


-
Products
-
SonicPlatform
SonicPlatform is the cybersecurity platform purpose-built for MSPs, making managing complex security environments among multiple tenants easy and streamlined.
Discover More
-
-
Solutions
-
Federal
Protect Federal Agencies and Networks with scalable, purpose-built cybersecurity solutions
Learn MoreFederalProtect Federal Agencies and Networks with scalable, purpose-built cybersecurity solutions
Learn More - Industries
- Use Cases
-
-
Partners
-
Partner Portal
Access to deal registration, MDF, sales and marketing tools, training and more
Learn MorePartner PortalAccess to deal registration, MDF, sales and marketing tools, training and more
Learn More - SonicWall Partners
- Partner Resources
-
-
Support
-
Support Portal
Find answers to your questions by searching across our knowledge base, community, technical documentation and video tutorials
Learn MoreSupport PortalFind answers to your questions by searching across our knowledge base, community, technical documentation and video tutorials
Learn More - Support
- Resources
- Capture Labs
-
- Company
- Contact Us
How can I configure IPSec Client based VPN for remote users?
 12/21/2023
  9,738 People found this article helpful
 598,485 Views

Description
This article will walk you through configuring, installing, and using the Global VPN Client (GVC) Software for Remote IPSec VPN connections.
 CAUTION: Please make sure to read this article to completion and follow the included steps closely. Even one missed step will result in a failed configuration.
Resolution
Resolution for SonicOS 7.X
This release includes significant user interface changes and many new features that are different from the SonicOS 6.5 and earlier firmware. The below resolution is for customers using SonicOS 7.X firmware.
Configure WAN Group VPN on the SonicWall
- Login to the SonicWall management GUI.
- Click Network in the top navigation menu.
- Navigate to IPSec VPN | Rules and Settings.
- Ensure that the Toggle switches for Enable VPN and the WAN GroupVPN are enabled.

- Click configure icon for the WAN GroupVPN entry. The VPN Policy window is displayed.
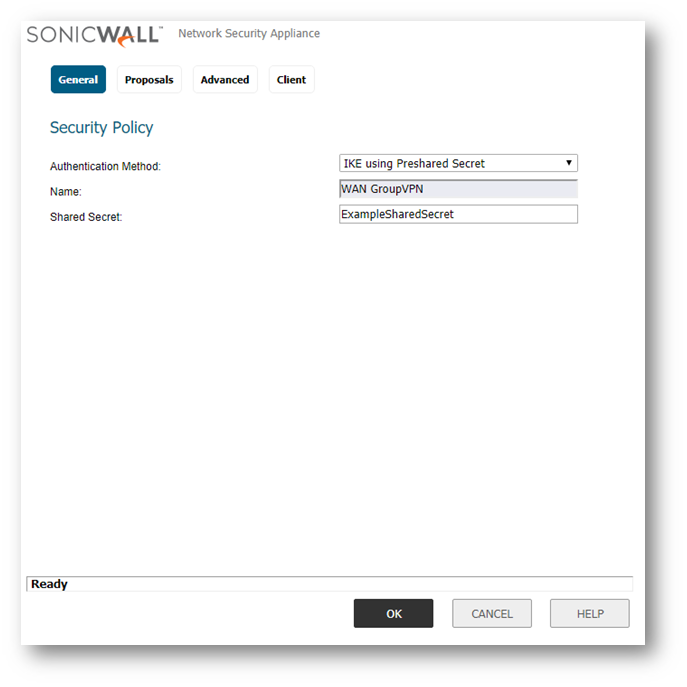
- In the General tab, IKE using Preshared Secret is the default setting for Authentication Method. Enter a Shared Secret in the Shared Secret field. A default auto-generated Shared Secret should auto-populate and can be used if you prefer.

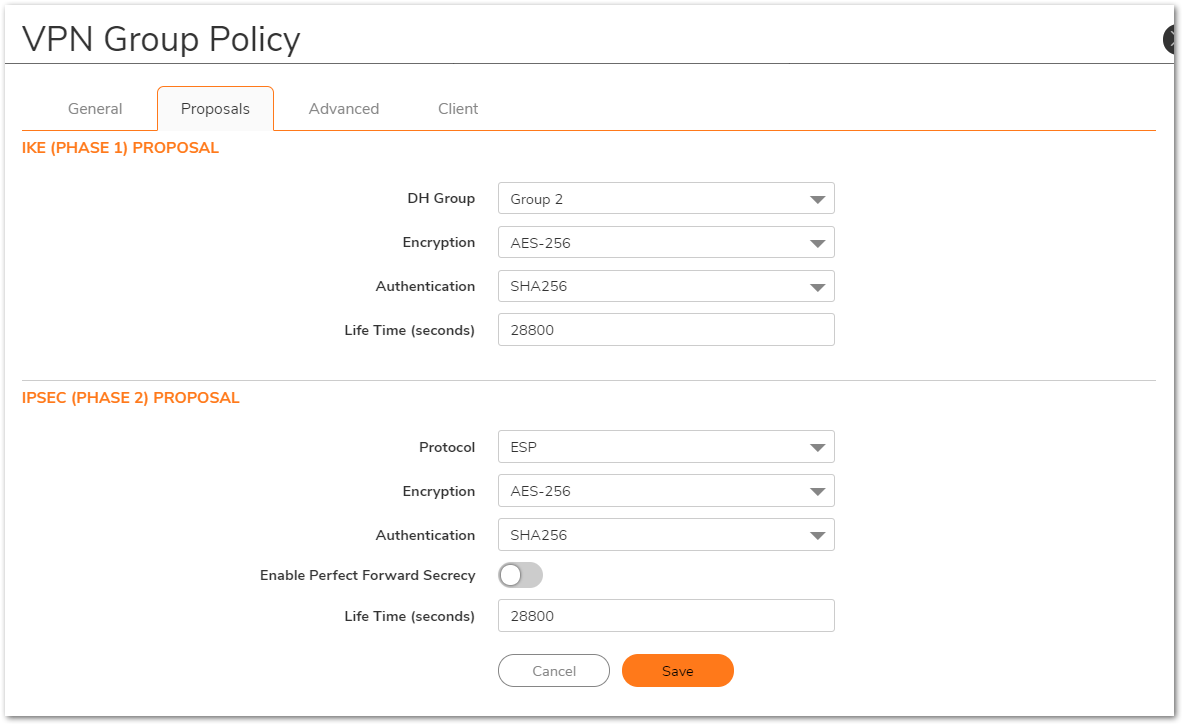
- Click Proposals tab, use the default settings or choose the desired Encryption and Authentication options for Phase 1 and Phase 2 proposals.
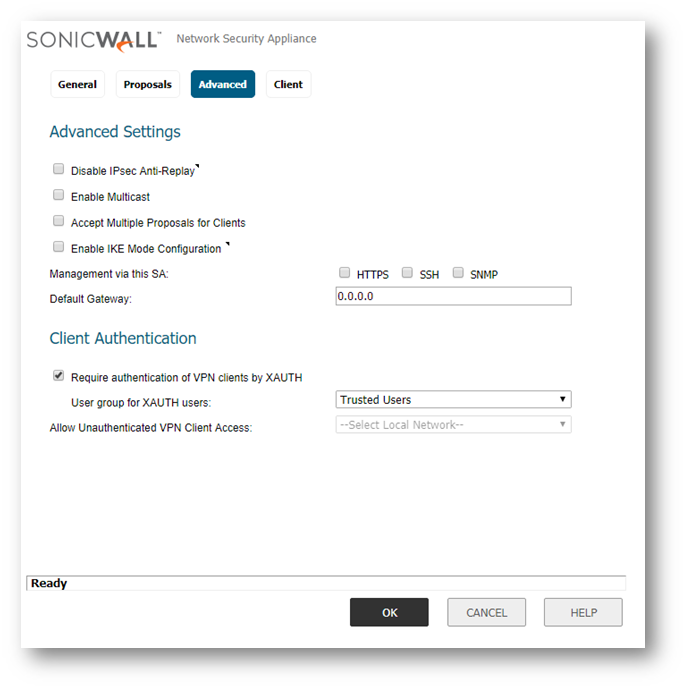
- Click Advanced tab an notice the options detailed in the image below.

Require Authentication of VPN Clients via XAUTH -
So that all the users connecting to he corporate network
are authenticated. Unauthenticated traffic will not be allowed
on to connect. The Trusted users group is selected by default.Management via this SA: - Optionally, if you want the Remote users to manage the SonicWall security appliance,
select the management method, either HTTP or HTTPS. NOTE: Want to use LDAP instead of Local Users? You can change Trusted Users to a Group you've imported from LDAP. Even if you don't all LDAP Groups will inherit both Trusted Users and Everyone, so you can have both Local and LDAP Users connect at once.
 - Click Client tab, select the following settings in the image below.

Cache XAUTH User Name and Password on Client: Single session
Virtual Adapter Settings: DHCP Lease
Allow Connections to: Split Tunnels
Set Default Route as this Gateway: Disable
Use Default Key for Simple Client Provisioning: Disable - Click Save to save these settings and close the window.
Configure DHCP over VPN
- Navigate to IPSec VPN | DHCP over VPN and select Central Gateway from the menu.
- Click Configure. The DHCP over VPN Configuration window is displayed.
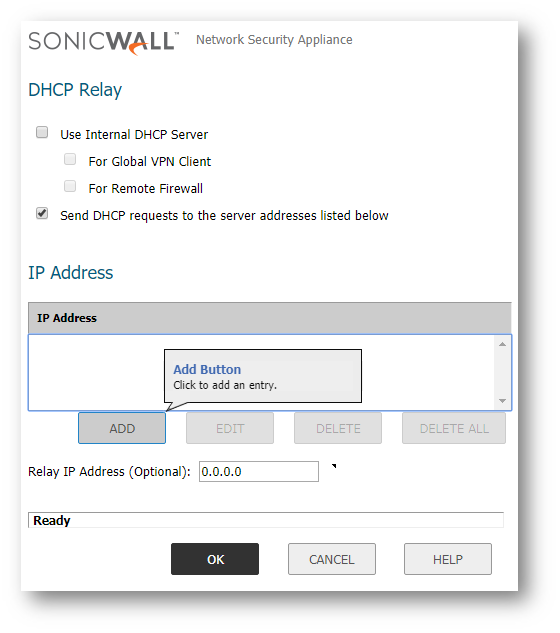
- Select the appropriate options for your configuration. Refer to the information below for more details.
Use Internal DHCP Server-
Enables the SonicWall to be the DHCP server for either the Global VPN Client connections to this SonicWall or for Remote firewall connections via VPN. For this example we would only be concerned with Global VPN Client (GVC).
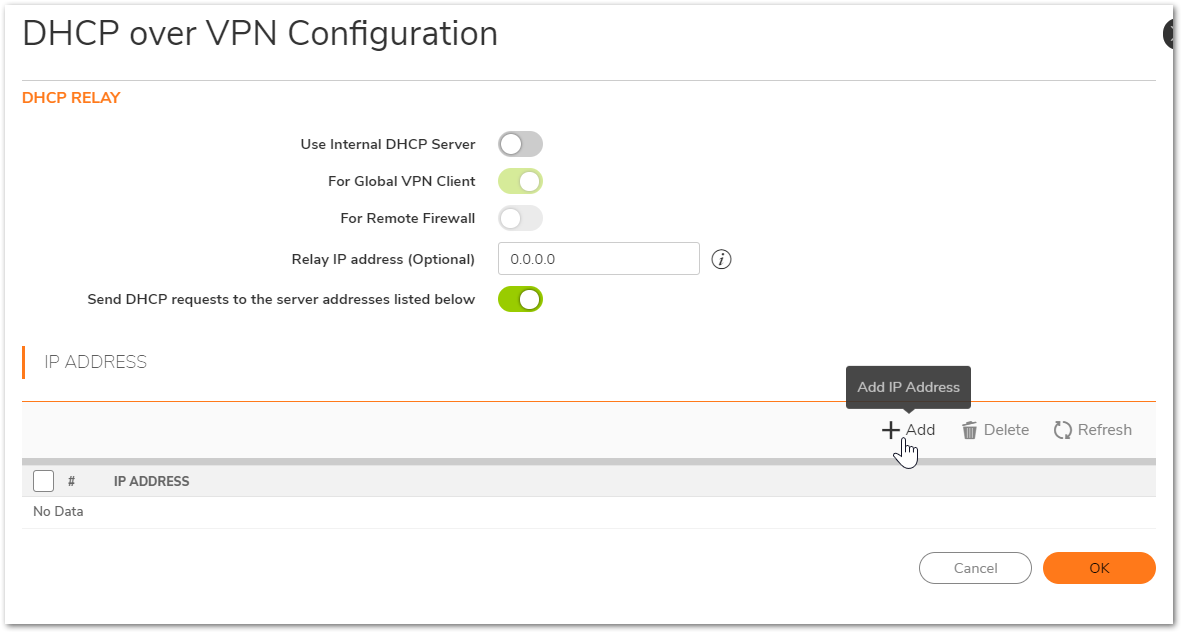
Send DHCP requests to the server addresses listed below-
Enables the SonicWall to forward DHCP requests to the server indicated below in the IP Address Field.
NOTE: You will need to separately add the DHCP server using the ADD buttonRelay IP Address (Optional)- If set, this is used as the DHCP Relay Agent IP address (giaddr) in place of this SonicWall's LAN IP address. This address is only used when no Relay IP Address has been set on the Remote Gateway, and must be reserved in the DHCP scope on the DHCP server.
- Click OK.
Configure User Accounts
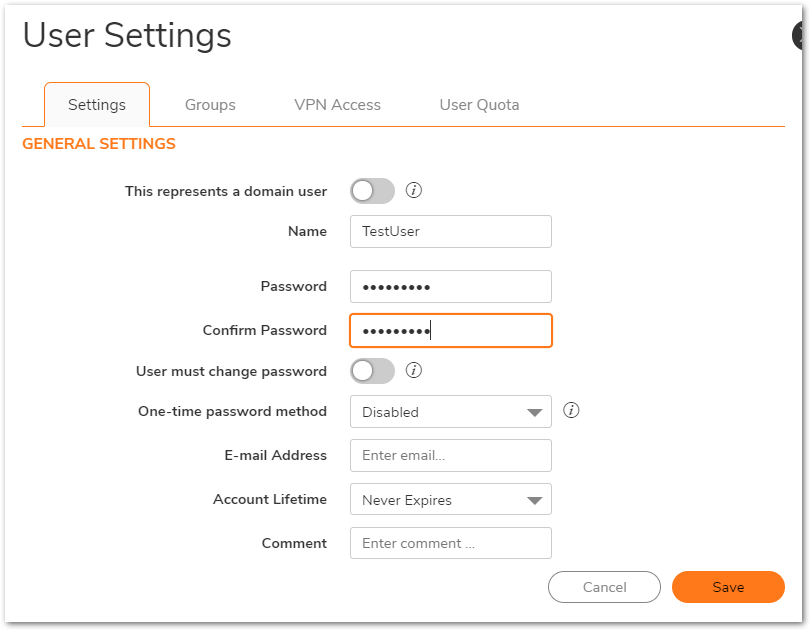
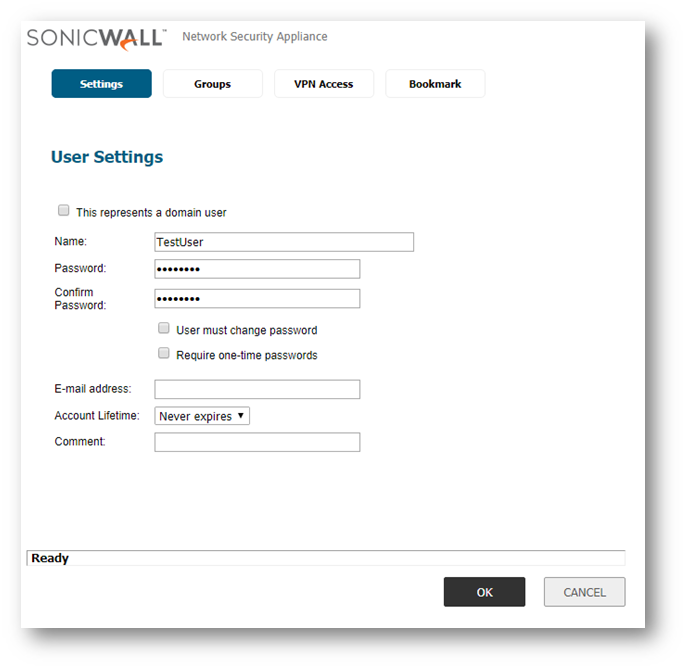
- Navigate to Device | Users | Local Users & Groups. Click Add User.
- Under the Ssettings tab enter the desired Name and Ppassword.
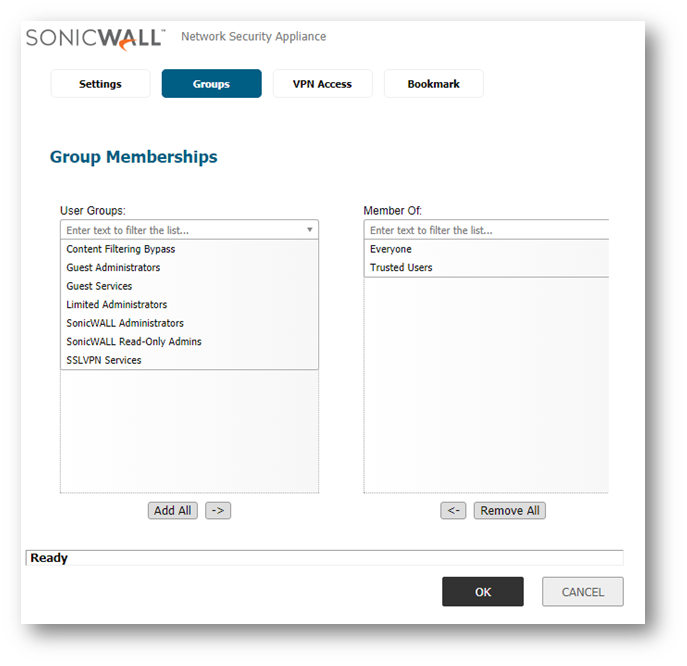
- On the Groups Tab ensure the user is a member of Trusted Users.

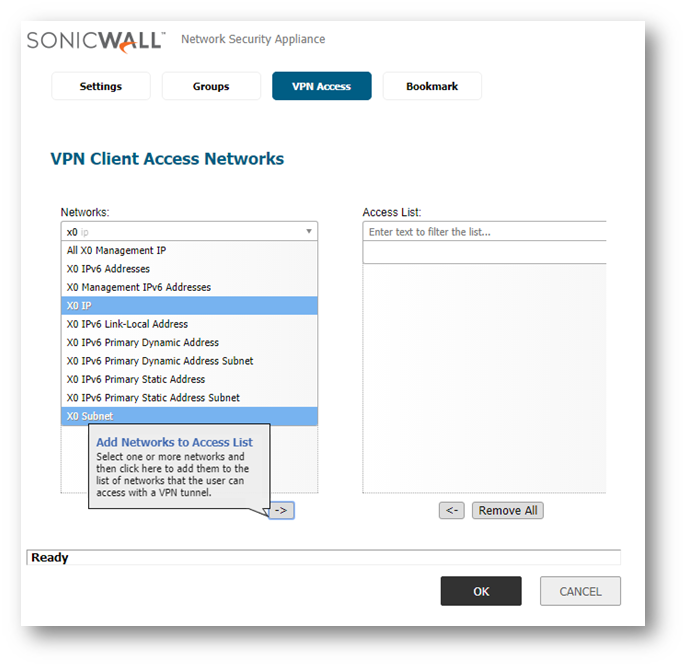
- On to VPN Access tab , select the Address ObjectsorAddress Groups that the user needs access to and add to the user's access list.

- Click Save.
Resolution for SonicOS 6.5
This release includes significant user interface changes and many new features that are different from the SonicOS 6.2 and earlier firmware. The below resolution is for customers using SonicOS 6.5 firmware.
Configure WAN Group VPN on the SonicWall
- Login to the SonicWall management GUI.
- Click Manage in the top navigation menu.
- Navigate to VPN | Base Settings.
- Ensure that the Enable VPN and the WAN GroupVPN Enable check boxes are checked.

- Click configure icon for the WAN GroupVPN entry. The VPN Policy window is displayed.
- In the General tab, IKE using Preshared Secret is the default setting for Authentication Method. Enter a Shared Secret in the Shared Secret field. A default auto-generated Shared Secret should auto-populate and can be used if you prefer.
- Click Proposals tab, use the default settings or choose the desired Encryption and Authentication options for Phase 1 and Phase 2 proposals.

- Click Advanced tab an notice the options detailed in the image below.
Require Authentication of VPN Clients via XAUTH -
So that all the users connecting to he corporate network
are authenticated. Unauthenticated traffic will not be allowed
on to connect. The Trusted users group is selected by default.Management via this SA: - Optionally, if you want the Remote
users to manage the SonicWall security appliance,
select the management method, either HTTP or HTTPS. NOTE: Want to use LDAP instead of Local Users? You can change Trusted Users to a Group you've imported from LDAP. Even if you don't all LDAP Groups will inherit both Trusted Users and Everyone, so you can have both Local and LDAP Users connect at once. - Click Client tab, select the following settings in the image below.

Cache XAUTH User Name and Password on Client : Single session
Virtual Adapter Settings : DHCP Lease
Allow Connections to : Split Tunnels
Set Default Route as this Gateway : Disable
Use Default Key for Simple Client Provisioning : Disable - Click OK to save these settings and close the window.
Configure DHCP over VPN
- Navigate to VPN | DHCP over VPN and select Central Gateway from the menu.
- Click Configure. The DHCP over VPN Configuration window is displayed.
- Select the appropriate options for your configuration. Refer to the information below for more details.
Use Internal DHCP Server-
Enables the SonicWall to be the DHCP server for either the Global VPN Client connections to this SonicWall or for Remote firewall connections via VPN. For this example we would only be concerned with Global VPN Client (GVC).
Send DHCP requests to the server addresses listed below-
Enables the SonicWall to forward DHCP requests to the server indicated below in the IP Address Field.
Relay IP Address (Optional):- If set, this is used as the DHCP Relay Agent IP address (giaddr) in place of this SonicWall's LAN IP address. This address is only used when no Relay IP Address has been set on the Remote Gateway, and must be reserved in the DHCP scope on the DHCP server. NOTE: You will need to separately add the DHCP server using the ADD button - Click OK.
Configure User Accounts
- Navigate to Users | Local Users & Groups. Click Add.
- Under the Ssettings tab enter the desired Name and Ppassword.
- On the Groups Tab ensure the user is a member of Trusted Users.
- On to VPN Access tab , select the Address Objects or Address Groups that the user needs access to and add to the user's access list.
- Click OK.
How to Test: Using the Global VPN Client (GVC) Software
- Install the latest GVC software version on the User's PC. NOTE: The latest GVC software version can be downloaded from the SonicWall VPN Clients page.
- Launch GVC, click File | New Connection.
- Input the WAN IP Address or Domain Name of the SonicWall that the User it VPN connecting to.
- Click on the new connection that is created and click Enable.
- When prompted, enter the Preshared Secret for the connection, as well as the Username and Password.
- After entering the Username and Password the adapter will try to acquire an IP Address and then change to Connected status.

See also:
Related Articles
- How to Block Google QUIC Protocol on SonicOSX 7.0?
- How to block certain Keywords on SonicOSX 7.0?
- How internal Interfaces can obtain Global IPv6 Addresses using DHCPv6 Prefix Delegation
Categories
- Firewalls > TZ Series > GVC/L2TP
- Firewalls > NSa Series > GVC/L2TP
- Firewalls > NSv Series > GVC/L2TP
 YES
YES NO
NO