-
Products
-
SonicPlatform
SonicPlatform is the cybersecurity platform purpose-built for MSPs, making managing complex security environments among multiple tenants easy and streamlined.
Discover More
-
-
Solutions
-
Federal
Protect Federal Agencies and Networks with scalable, purpose-built cybersecurity solutions
Learn MoreFederalProtect Federal Agencies and Networks with scalable, purpose-built cybersecurity solutions
Learn More - Industries
- Use Cases
-
-
Partners
-
Partner Portal
Access to deal registration, MDF, sales and marketing tools, training and more
Learn MorePartner PortalAccess to deal registration, MDF, sales and marketing tools, training and more
Learn More - SonicWall Partners
- Partner Resources
-
-
Support
-
Support Portal
Find answers to your questions by searching across our knowledge base, community, technical documentation and video tutorials
Learn MoreSupport PortalFind answers to your questions by searching across our knowledge base, community, technical documentation and video tutorials
Learn More - Support
- Resources
- Capture Labs
-
- Company
- Contact Us
How to provision UTM firewalls (Gen7 - TZ, NSA) using Monthly Billing (MSSP Monthly)


Description
This article explains the steps to provision UTM firewalls (Gen7 - TZ, NSA) using Monthly Billing.
The products listed below :
- TZ Firewalls : TZ (TZ670, TZ 570, TZ 470, TZ370, TZ270, TZ 570W, TZ 470W, TZ370W, TZ270W, TZ 570P)
- NSA Firewalls : (NSa 6700, NSa 5700, NSa 4700, NSa 3700, NSa 2700)
Resolution
Follow the below steps to provision a UTM product:
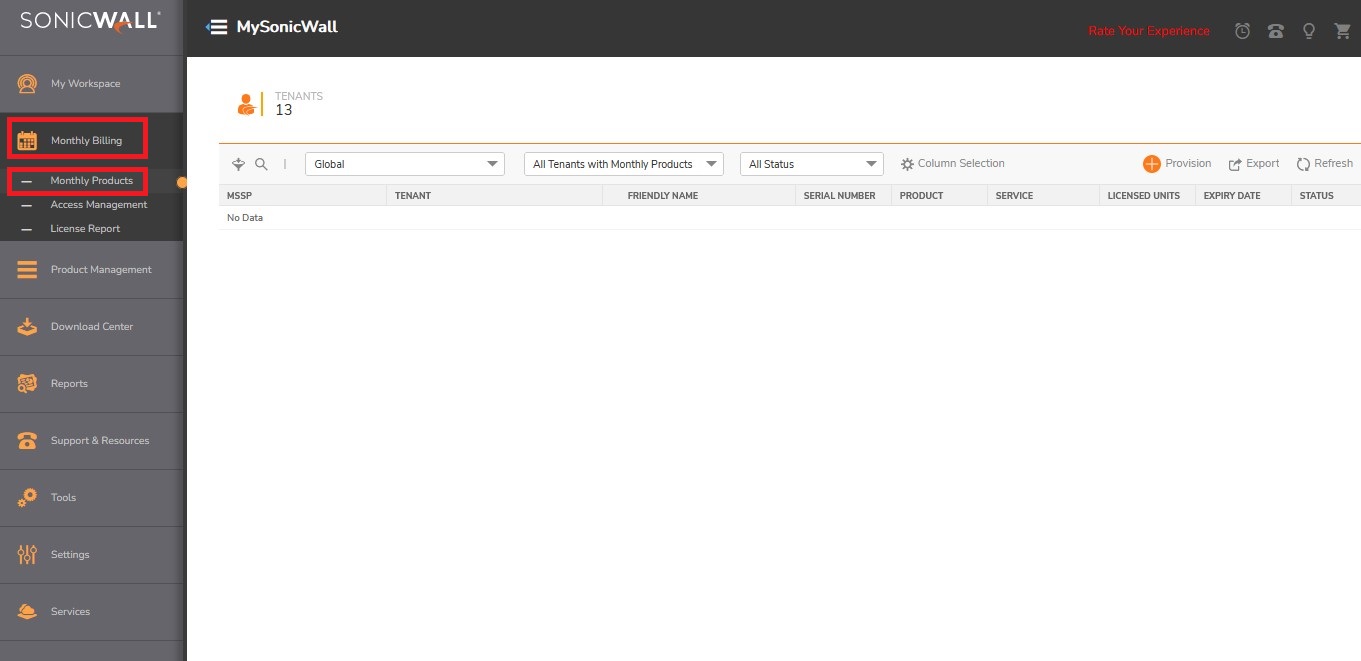
1. Navigate to Monthly Billing | Monthly Products
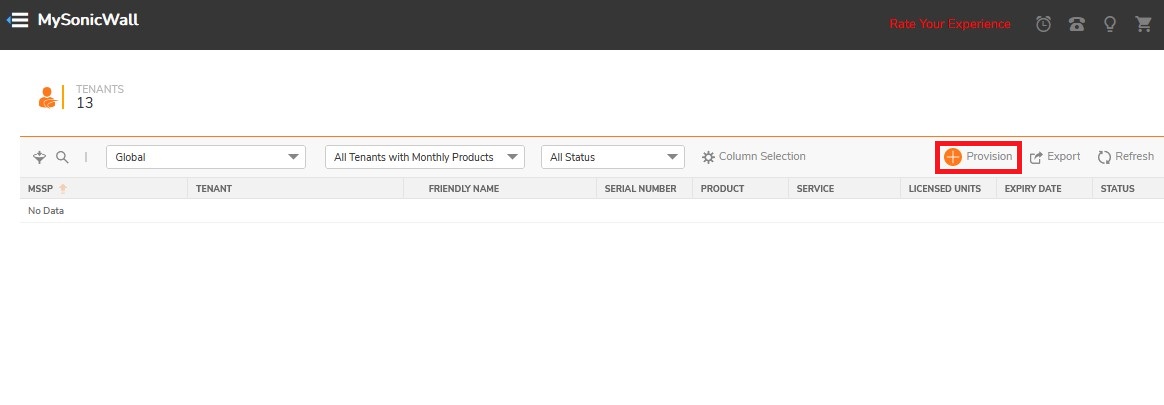
2. Click Provision > Product.
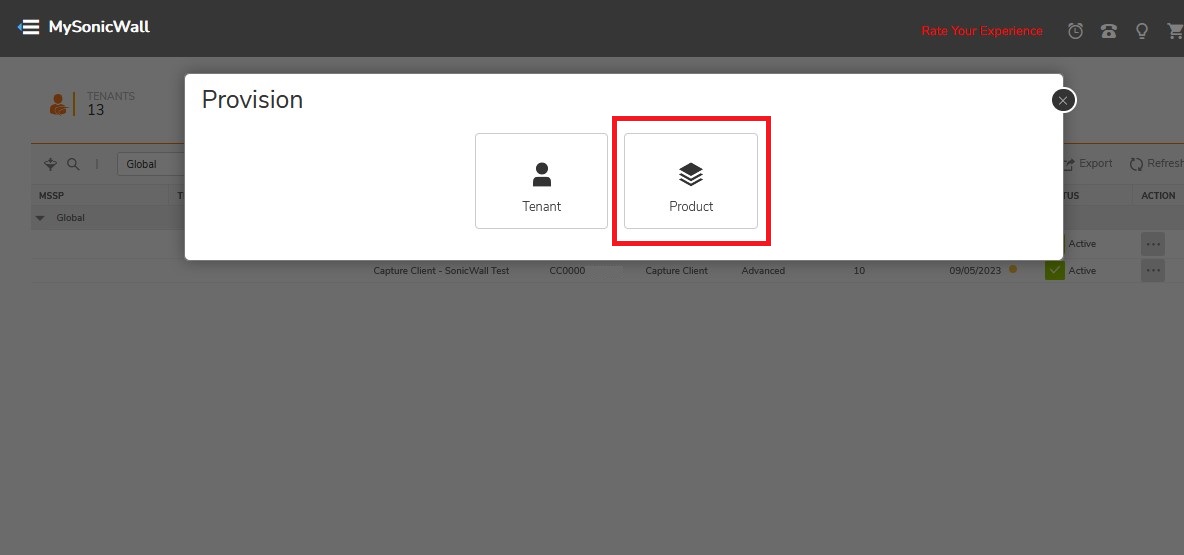
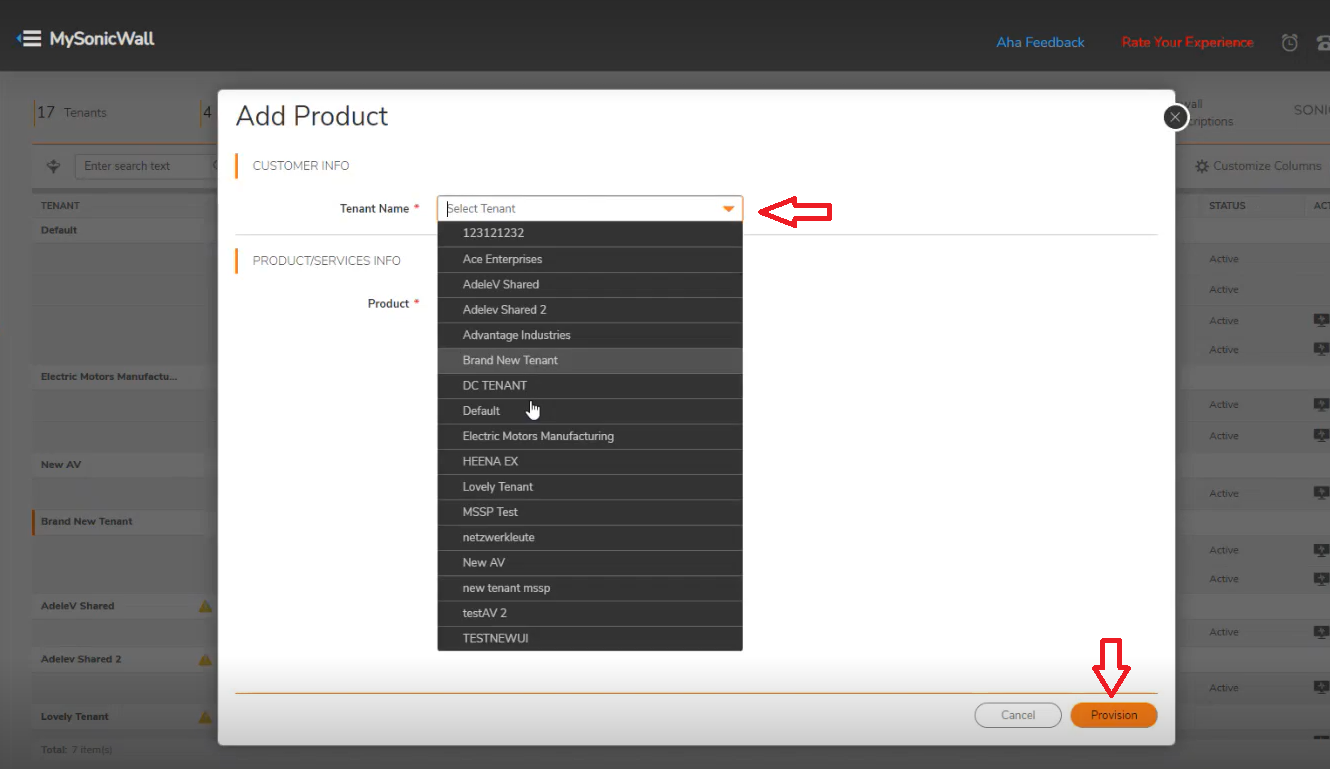
3. Select the MSSP Name and Tenant Name under which you want to add the Product.  NOTE: MSSP Name (if applicable)” – only tenant name is mandatory.
4. Select Gen7 TZ & NSa from Product list.
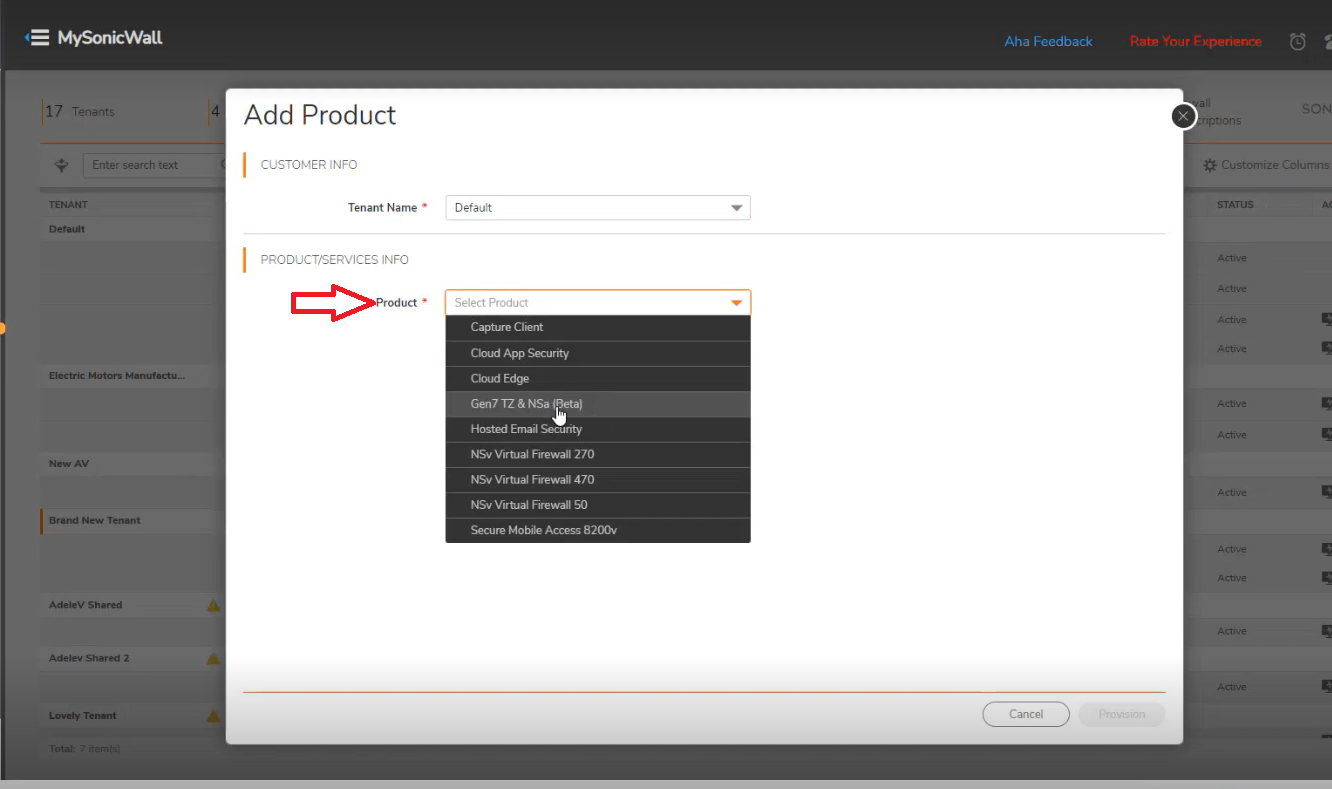
5. Select Firewall from the list.
You can either Register a New Firewall or select the already registered firewall from the list.
When you select:
- Register a New Firewall, a new tab opens to register a new firewall.
- An existing firewall from the list, displays Active Annual & Perpetual Licensing statuses, Security Services Bundle and NSM Saas (Cloud).
 CAUTION: When enabling a product for billing via MSSP Monthly, any existing validity for that product is terminated immediately with no adjustment for credits. However, the system prompts the user to set a new expiration date.
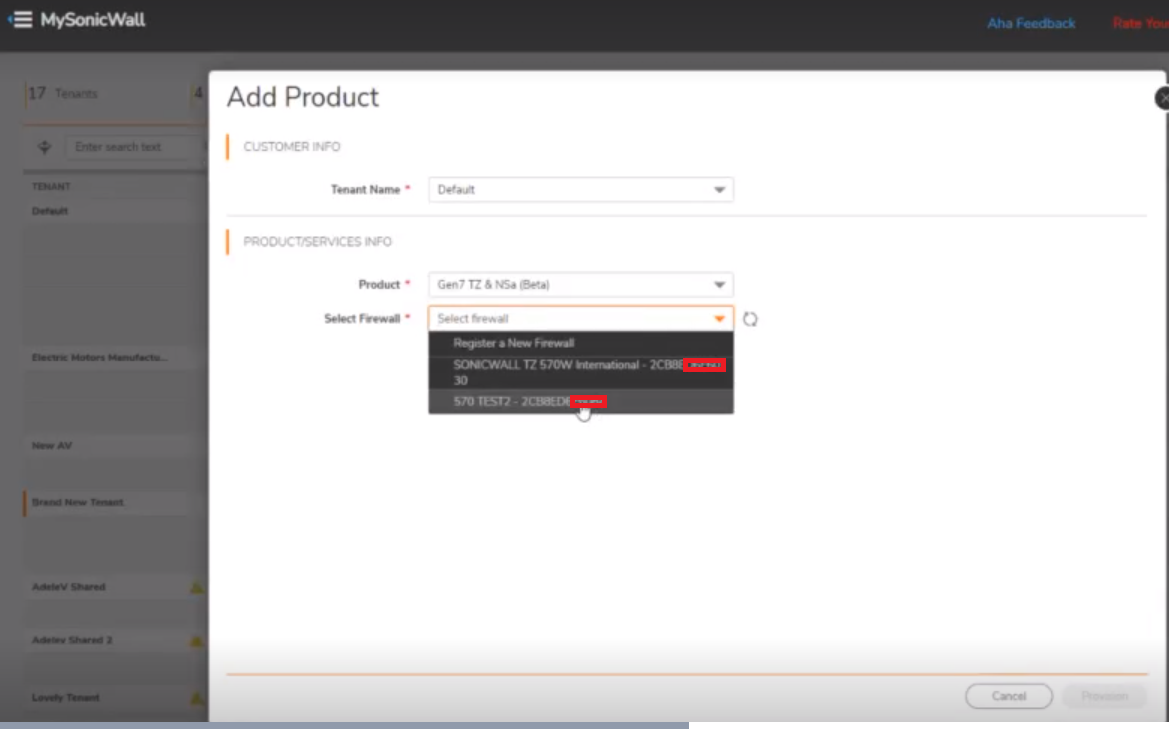
6. Click the Refresh icon next to Select Firewall field if you register a new firewall.
7. Select the Security Service Bundle and the respective NSM Saas (Cloud).
Security Service Bundle | NSM Saas (Cloud) | |
Threat Protection | Network Security Manager | Network Security Manager Advanced |
Essentials Protection Service Suite | Not applicable | Network Security Manager Advanced |
Advanced Protection | Network Security Manager Essentials | |
 NOTE: Network Security Manager Essentials comes with Advanced Protection Service Suite. No action is required here. By the default, NSM Essentials is selected and you cannot make any changes to it.
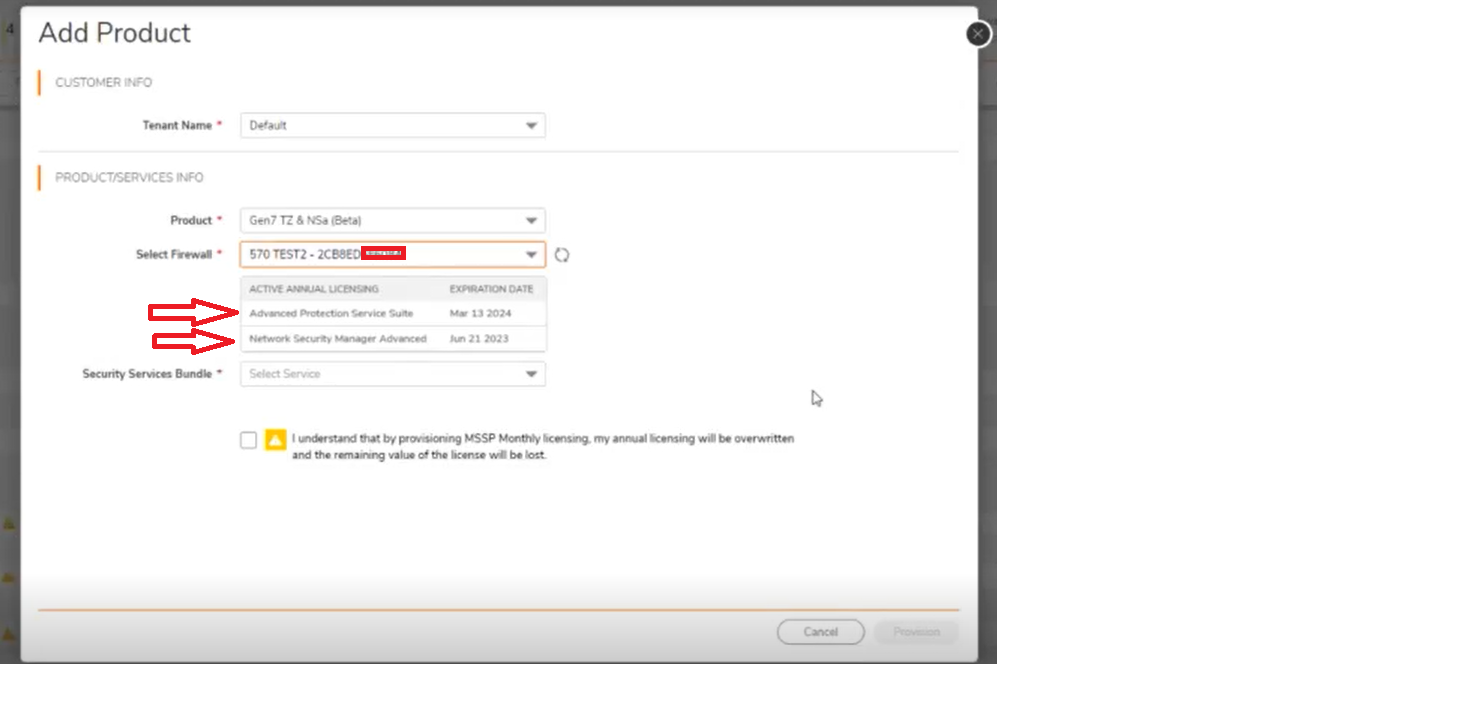
8. Set the Expiry Date for Security Service Bundle and NSM Saas (Cloud).
 NOTE: If Advanced Protection Service Suite is selected as Security Service Bundle, you need to set the Expiry Date only for Advanced Protection Service Suite.
9. Disable the Zero Touch if you want to turn off for the product. By the default, the Zero Touch option is enabled. The Zero Touch option is available only if Advanced Protection Service Suite or NSM licensing is selected. NOTE: ‘No Change’ will not modify annual licensing for the bundle type.
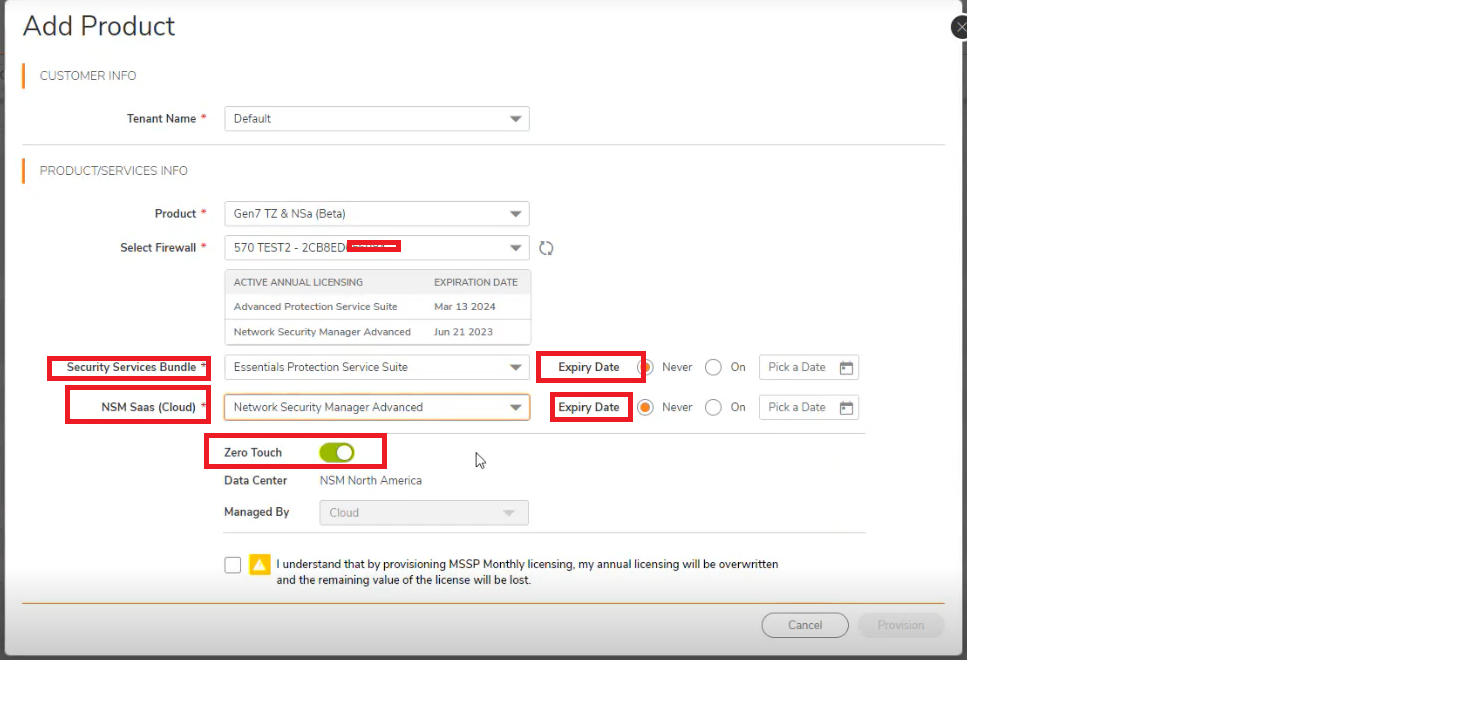
10. Check I understand that by provisioning MSSP Monthly licensing, my annual licensing will be overwritten and the remaining value of the license will be lost box to overwrite an existing license value. NOTE: This only applies if you are converting an existing annual license with future validity. The license bundle in question will only be overwritten if an option other than ‘No Change’ is selected. This does not affect perpetual licenses like SSLVPN/GVC or Stateful High Availability
11. Click Provision.
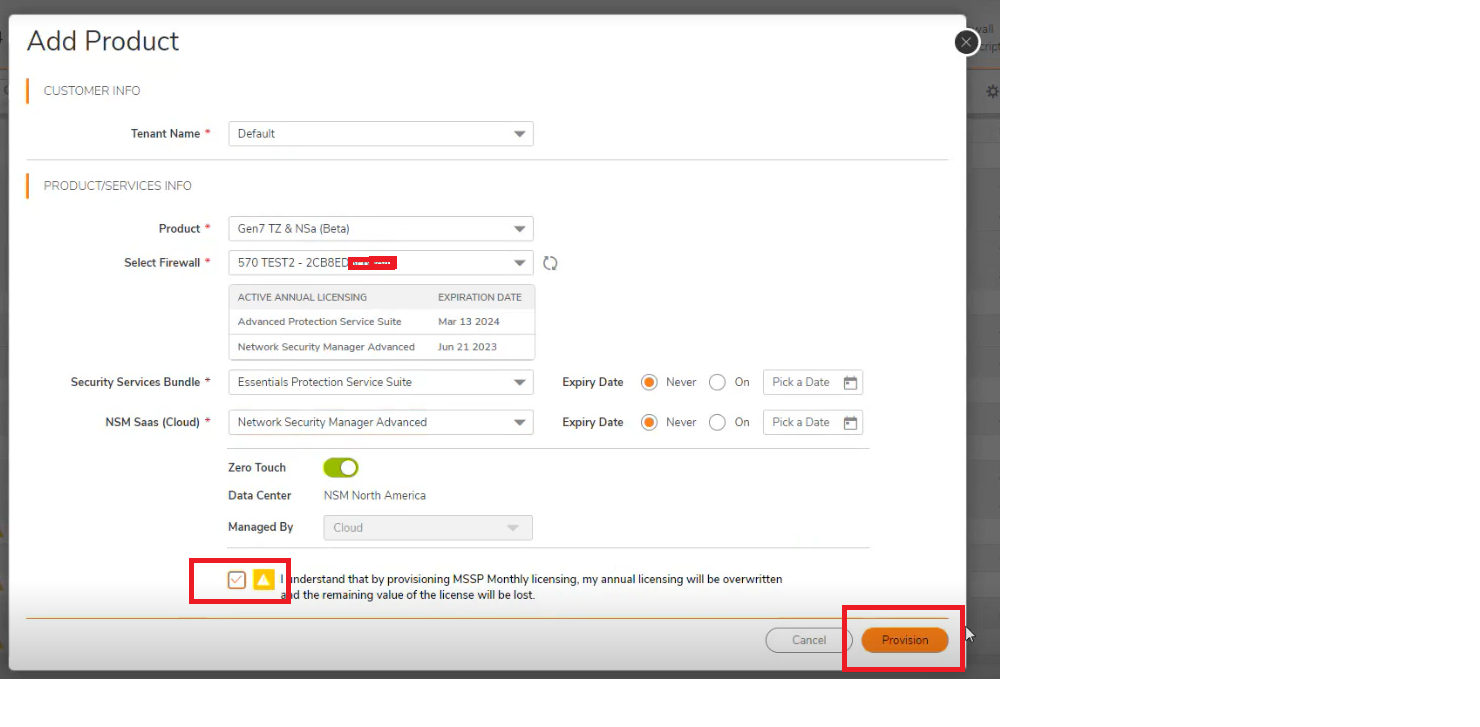
12. Check STATUS of the added Product in the MSSP Tenants table.

- Active: The Product is successfully provisioned, and ready to use.
- Provisioning in progress: The Product provisioning is in progress. Wait until the status is changed to Active to use the Product.
- Expired: The Product is expired and not available for use.
 NOTE: You can find the CSC Console icon for the Active Products except for NSv Products.
Related Articles
- Converting Cloud App Security licenses from annual to monthly
- Get Fast, Real-Time Technical Support with SonicWall Webchat: Your Quick Guide
- SonicProtect Subscription FAQ


 YES
YES NO
NO