-
Products
- Network Security
- Threat Protection
- Secure Access Service Edge (SASE)
- Managed XDR
- Endpoint Security
- Email Security
- Secure Access
-
Gen 7 Firewalls
SonicWall's Gen 7 platform-ready firewalls offer performance with stability and superior threat protection — all at an industry-leading TCO.
Read More
-
Solutions
- Industries
- Use Cases
-
Widgets
-
Content WidgetFederal
Protect Federal Agencies and Networks with scalable, purpose-built cybersecurity solutions
-
Image Widget

-
-
Partners
- SonicWall Partners
- Partner Resources
-
Widgets
-
Content WidgetPartner Portal
Access to deal registration, MDF, sales and marketing tools, training and more
-
Image Widget

-
-
Support
- Support
- Resources
- Capture Labs
-
Widgets
-
Content WidgetSupport Portal
Find answers to your questions by searching across our knowledge base, community, technical documentation and video tutorials
-
Image Widget

-
- Company
- Contact Us
How to deploy NSv with SonicOS version 7.1.1 on Hyper-V?


Description
With the release of SonicOs 7.1.1, users will have to redeploy their NSv firewalls as an upgrade from 7.0.X is not possible. For more information, refer to the following KB: NSv upgrade from 7.0.1 to 7.1.1
Resolution
To deploy an NSv on Hyper-V the prerequisite is that you already have a Virtual Switch created. For assistance with creating a Virtual switch refer to Creating Virtual Switches in Hyper-V
To Install NSV on Hyper-V:
- Download the NSv firewall vhdx file to a local folder in the Windows Server system.
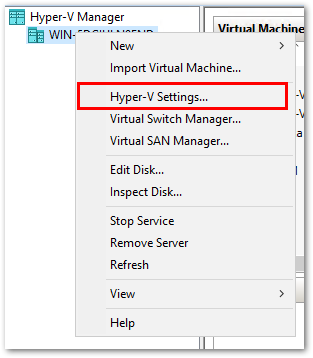
- In the Hyper-V Manager window, click Action and select Hyper-V Settings.
- Disable the Allow virtual machines to span physical NUMA nodes option.
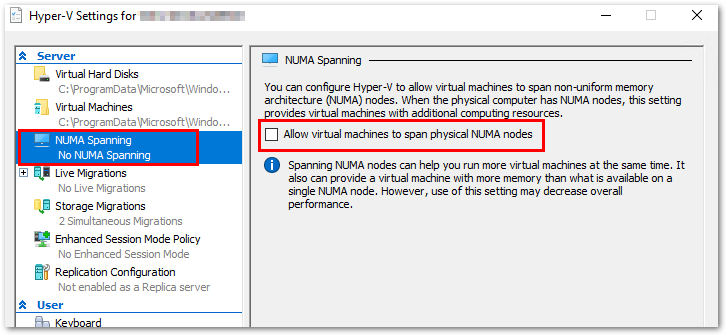
 NOTE: After disabling the Allow virtual machines to span physical NUMA nodes option, the Hyper-V Virtual Machine Management service must be restarted to apply the change. To restart the service, select Action > Stop Service, then select Action > Start Service in the Hyper-V Manager.
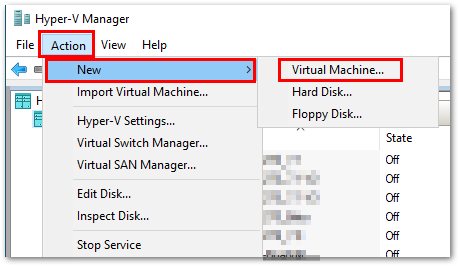
 - Create a virtual machine by clicking Action > New > Virtual Machine.
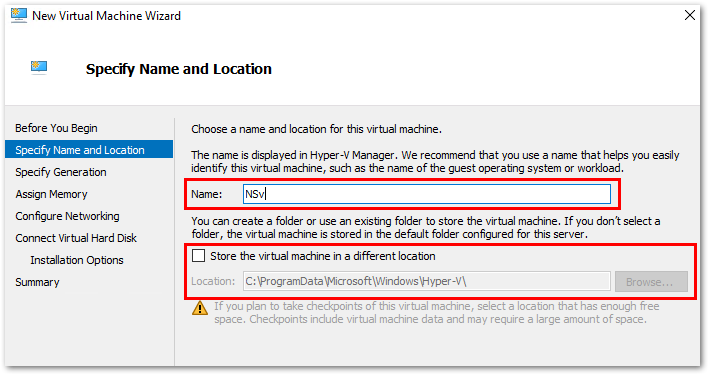
- Type a descriptive name for the NSv VM into the Name field.
- If you don’t want to use the default location to store VM files, select the Store the virtual machine in a different location check box and enter a different location into the Location field.
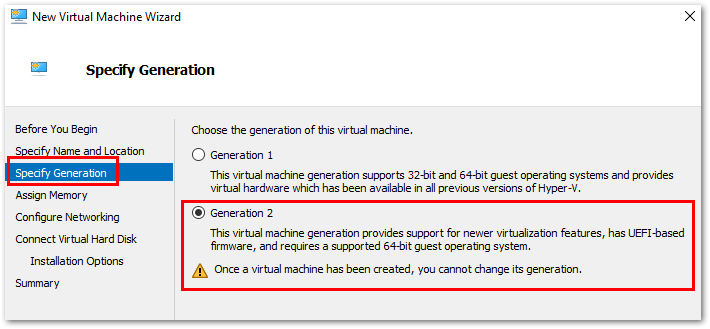
- In the Specify Generation screen, select Generation 2.
- In the Assign Memory screen, assign the memory based on the NSv system requirements of your NSv Series Microsoft Hyper-V model. In general, 4096 MB is the minimum required. Different models and configurations require different memory allocations. Please consult the Product Matrix and Requirements section of SonicOS/X 7 NSv Getting Started Guide for Hyper-V for the actual amount of memory needed.
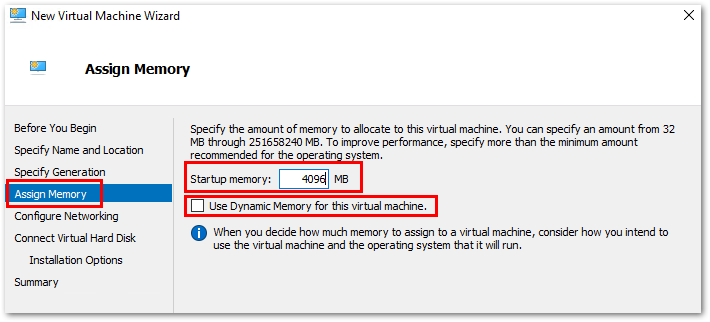
 NOTE: Do not select the Use Dynamic Memory for this virtual machine option; this function is not supported by the NSv Series Microsoft Hyper-V.
 - In the Configure Networking screen, since this is the first network interface to be mapped to X0 in the NSv, do one of the following:
- Select your Private vSwitch if your LAN (X0) side network devices are virtual machines located in the same Hyper-V host.
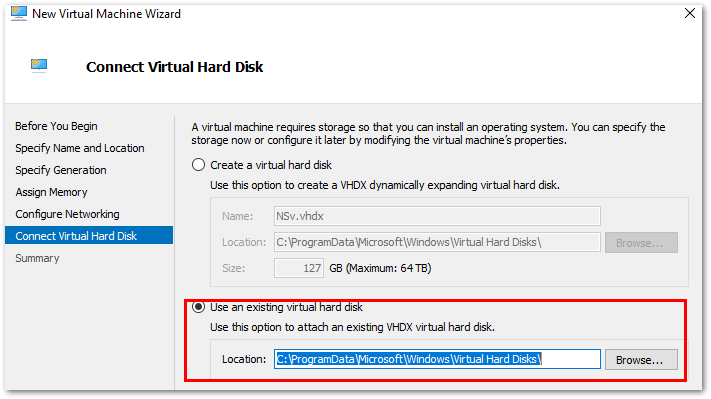
- Select your External vSwitch if your LAN (X0) side network devices are located external to the Hyper-V host - In the Connect Virtual Hard Disk screen, select the Use an existing virtual hard disk option and set the Location field to the folder where you downloaded the NSv vhdx file in Step 1.
- Review the summary and click Finish.
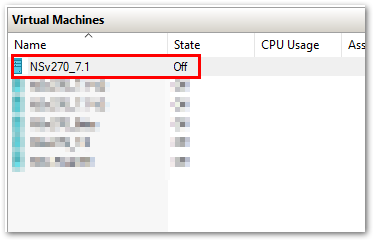
- Check the created NSv VM in the Hyper-V Manager tool. The VM is Off by default.
- Right-click the NSv VM and select Settings to open the Edit Settings page.
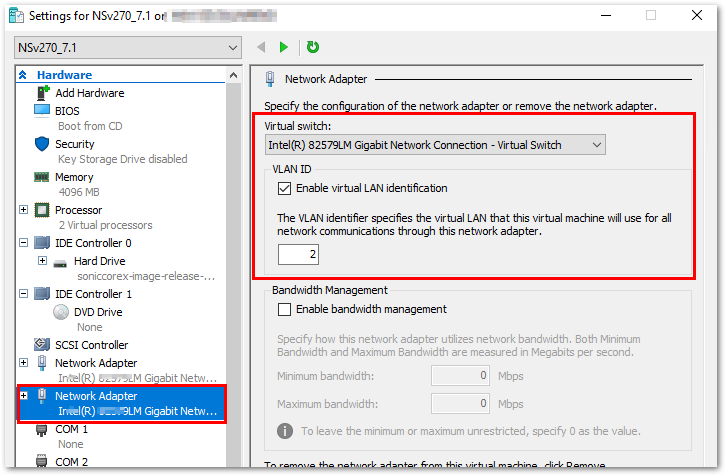
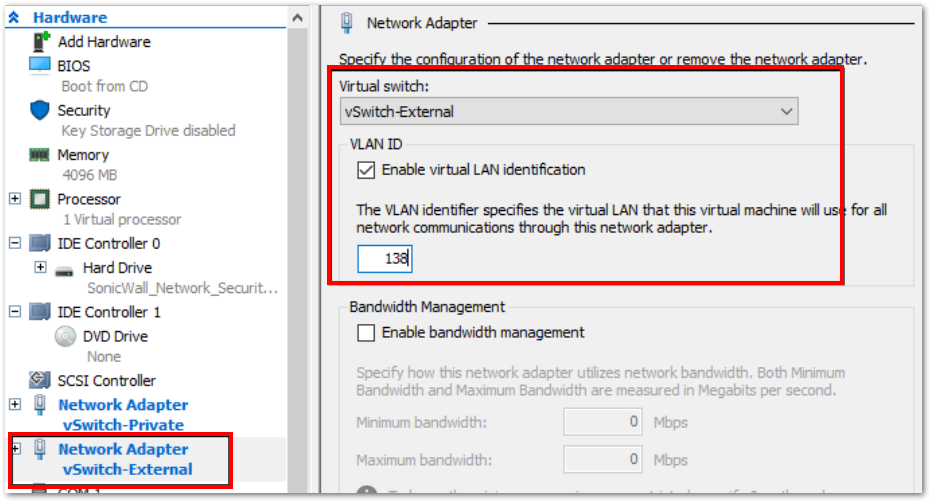
- Configure the network adapter. The first network adapter is mapped to X0 in the NSv. Configure the vSwitch and VLAN ID which match the network settings in your LAN (X0) side network devices.
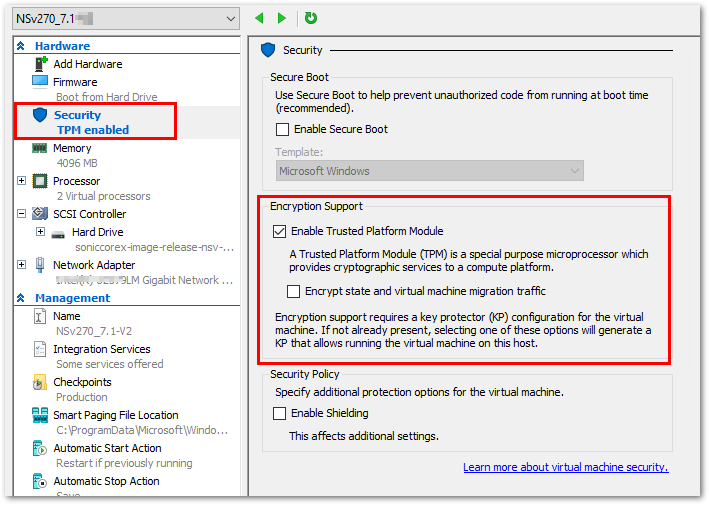
- Configure Security. Check Enable Trusted Platform Module and leave other options unchecked.
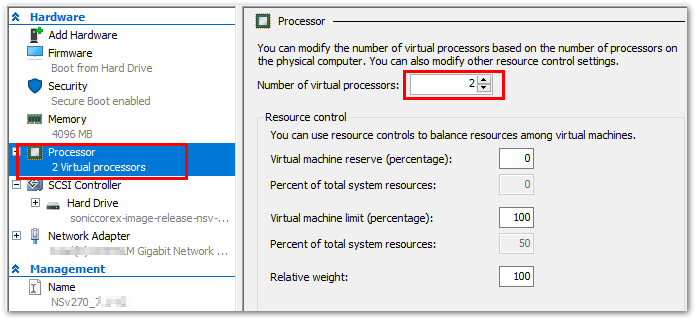
- Configure the Number of virtual processors field based on the NSv system requirements of your NSv Series Microsoft Hyper-V model. This is the CPU core number. In general, 2 cores are the minimum required. Different models require different virtual processor allocations. Please consult the Product Matrix and Requirements section of SonicOS/X 7 NSv Getting Started Guide for Hyper-V for the actual amount of processors needed.
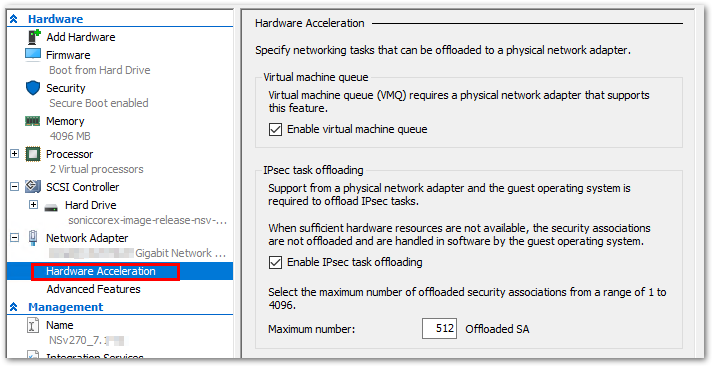
- Configure Hardware Acceleration. The options are enabled by default. Please check to make sure they are enabled for all network adapters.
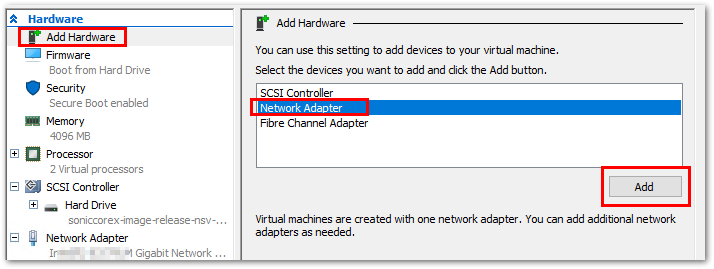
- To add more network adapters for the NSv, click Add Hardware, select Network Adapter, then click Add.
- Map your second network adapter to X1 (default WAN), which should use an External vSwitch. For the VLAN ID, select Enable virtual LAN identification and enter the VLAN ID of the VLAN that connects to the internet via the external switch.
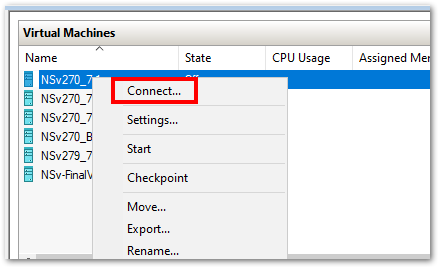
- In the Hyper-V Manager tool, right-click your NSv and select Connect to open the NSv console window.
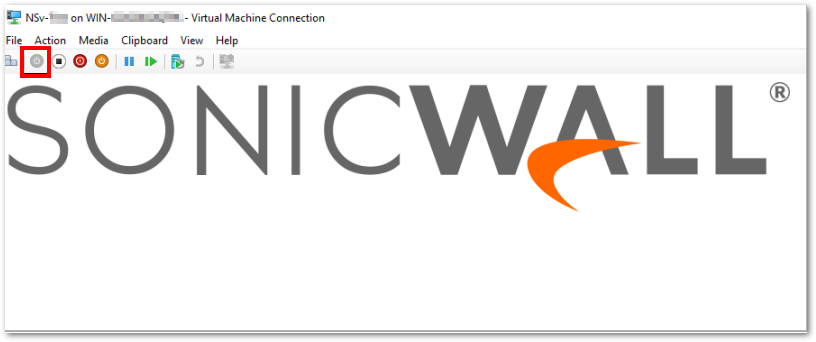
- Click the Power On button to boot up SonicCore and SonicOSX. You are now ready to register your NSv and proceed with SonicOSX management.
Related Articles
- Supported SonicWall and 3rd party SFP and SFP+ modules that can be used with SonicWall TZ series
- Certificate Signing Request (CSR) Error: Please enter a valid certificate name for SonicOS 7.1.1
- SNMP OID values that are not supported on Gen7 firewalls


 YES
YES NO
NO