


How to deploy the SonicWall ES Virtual Appliance
 06/30/2021
  40 People found this article helpful
 456,446 Views

Description
This article contains the installation procedures and configuration guidelines for deploying the SonicWall Email Security Virtual Appliance on a server on your network.
The SonicWall Email Security Virtual Appliance includes a software appliance, which has been pre-installed and pre-configured for VMware environments, and allows for the secure and easy development of SonicWall Email Security solutions within a virtual environment.
Supported Platforms
The elements of basic VMware structure must be implemented prior to deploying the SonicWall ES Virtual Appliance. The following VMware platforms are supported:
- ESXi 6.x
- ESXi 6.0
- ESXi 5.5
- ESXi 5.1
You can use the following client applications to import the image and configure the virtual settings:
- VMware vSphere provides infrastructure and application services in a graphical user interface for ESX/ESXi, included with ESX/ESXi. Provides Thick Provisioning when deploying a SonicWall SRA Virtual Appliance.
Requirements
The following are the minimum requirements for the SonicWall ES Virtual Appliance. Please refer to the release notes of respective ES Virtual Appliance version that you're deploying for the minimum requirement as these varies from version to version. You can download release notes from your Mysonicwall Account.
- 8 GB RAM - This is the minimum amount of RAM needed by the SonicWall Email Security Virtual Appliance operating system to meet the product performance and capacity specifications. Can be expanded to 64GB.
- 1 CPU - This is the default number of CPUs provisioned in the SonicWall SRA Virtual Appliance. The minimum required number of CPUs is 1, can be expanded to 8 CPUs.
- 160 GB thick provisioned hard disk space
- Internet access (for communication with SonicWall Licensing Manager)
Resolution
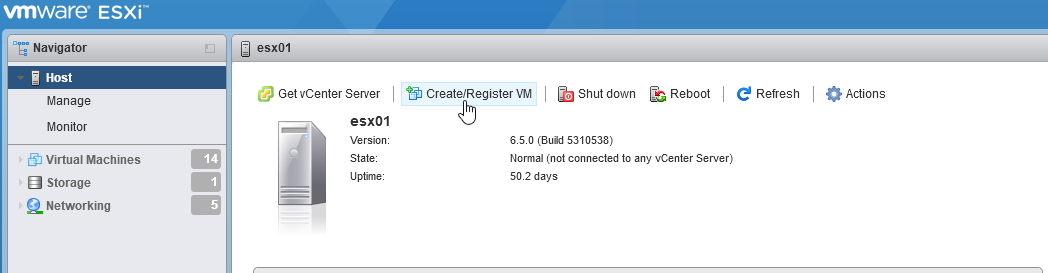
After the appropriate .ova file has been downloaded (32bit or 64bit), log into vmware.
1. Click Create/Register VM.
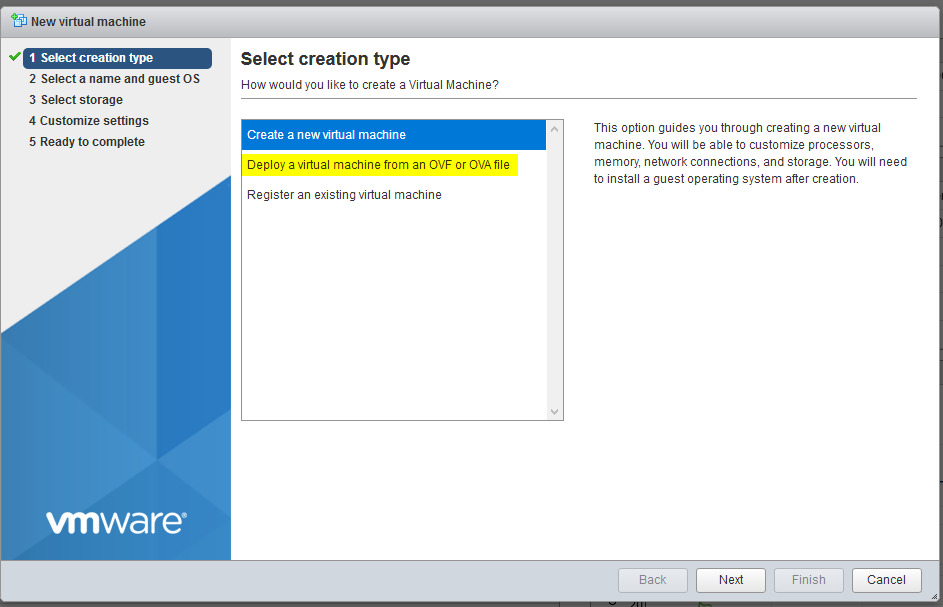
2. Select Deploy a virtual machine from an OVF or OVA file and click Next.
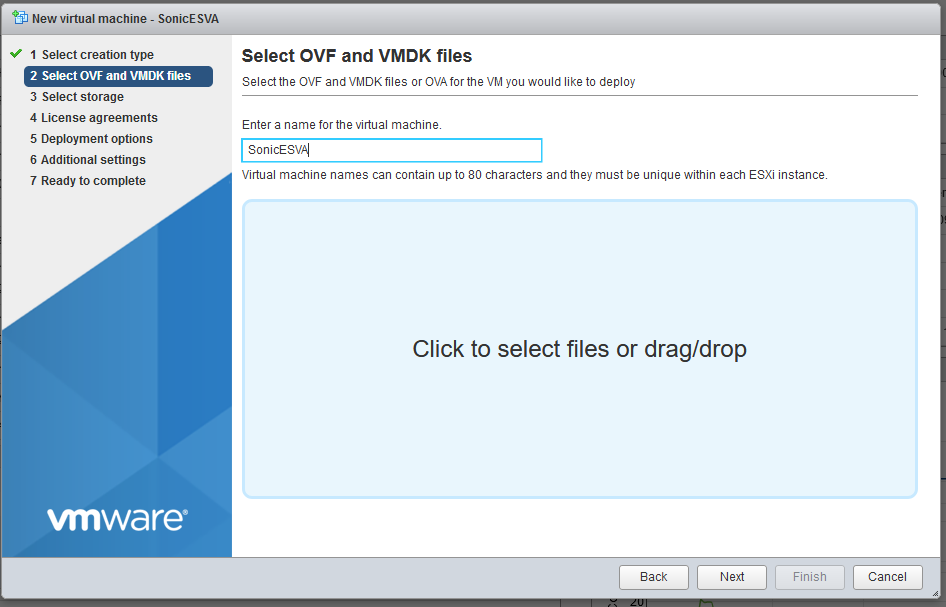
3. Name the virtual appliance and either click or drag the OVA to the blue box.
 NOTE: Clicking has the effect of opening the File Explorer for the local machine.
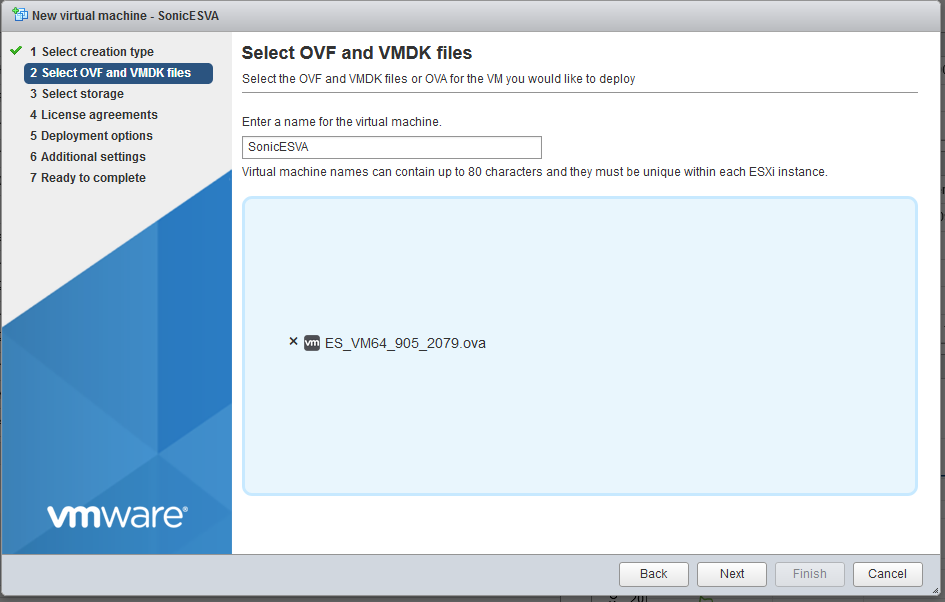
4. The file will be displayed once selected, click Next.
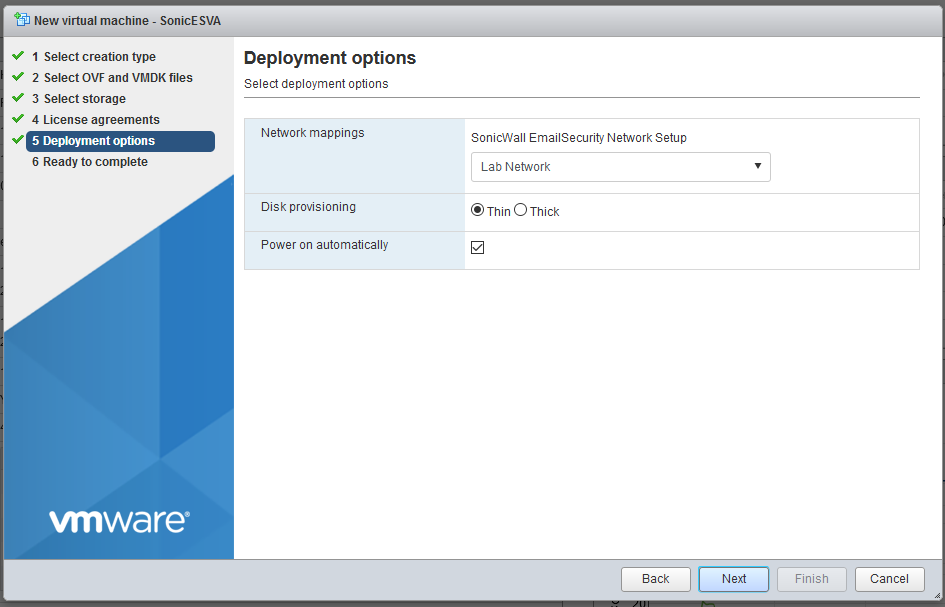
5. Select storage & accept the License Agreement. Deployment options are dependent on the environment, make the appropriate selections and click Next.
NOTE: Thick provisioning is recommended
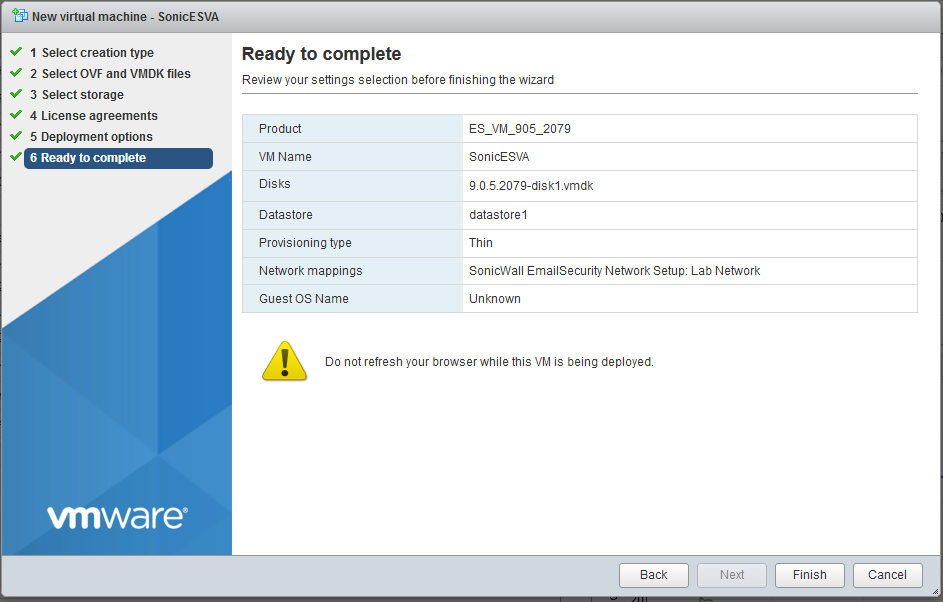
6. Review the settings selections and click Next.
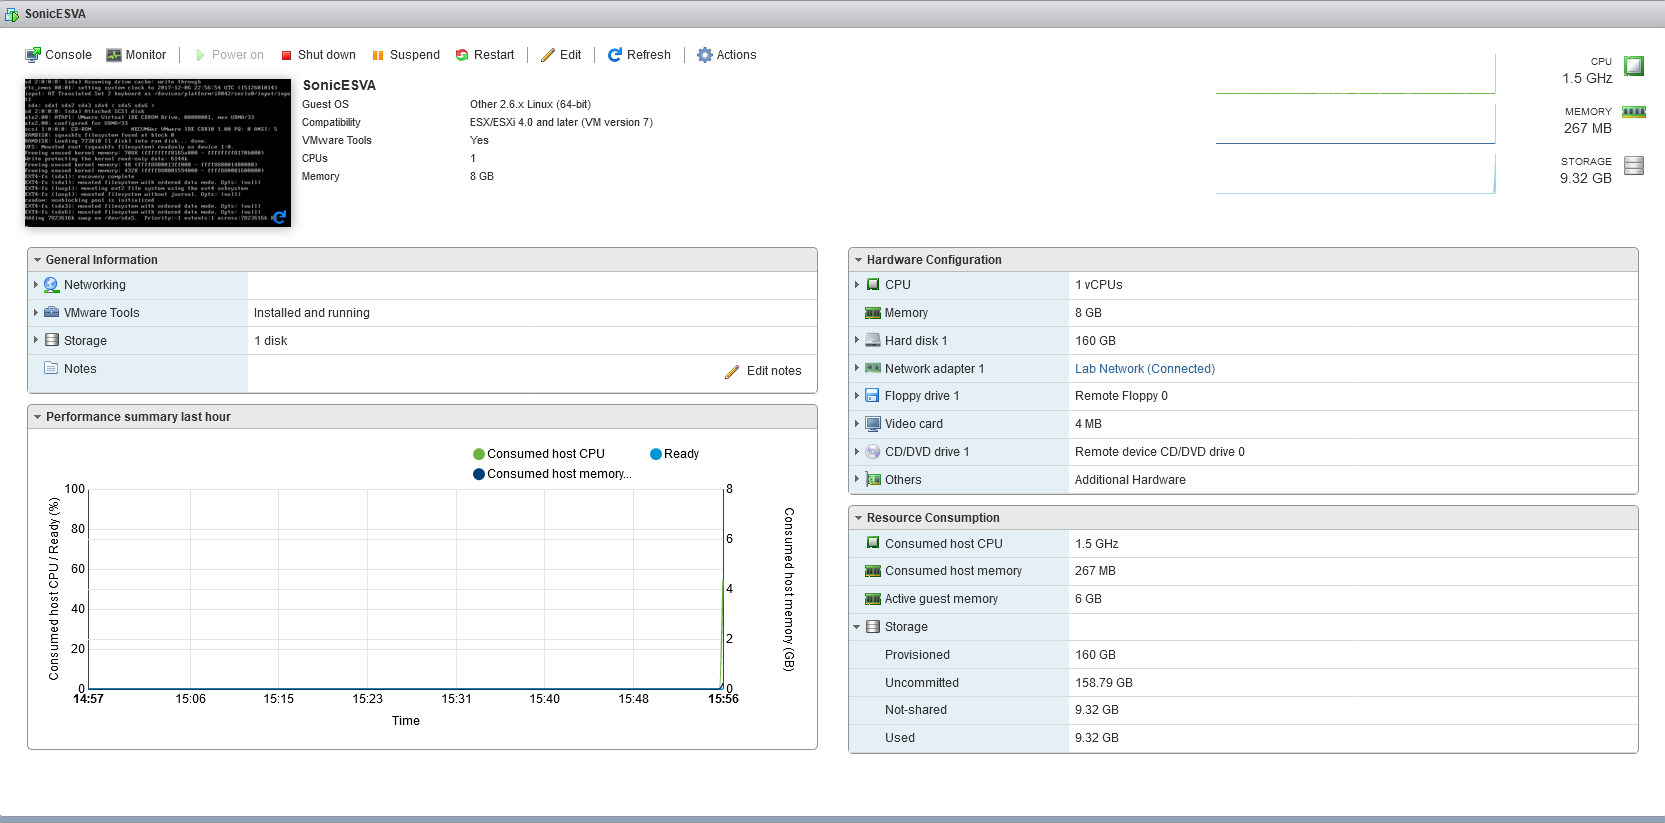
7. Progress will be displayed in the Recent Tasks section.

8. When the build is complete, the VA will power on. Watch progress in the console.
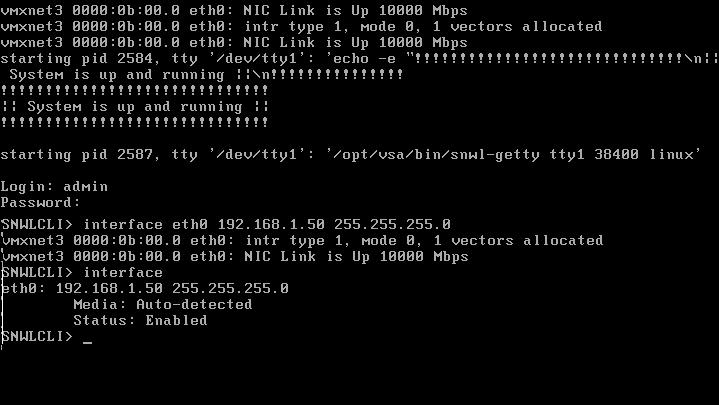
9. When Linux completes loading, log in first as SNWLCLI, then use admin/password (in console ) and set the IP address and subnet mask using the interface command as shown in the screen shot below.
NOTE: After the IP address and subnet mask have been set, type interface again to confirm the configuration was successful.
10. After the IP address and subnet mask have been assigned, log into the new appliance using the IP configured in the last step.
Related Articles
- How do I collect SonicWall product diagnostic information?
- How to Setup O365 Connector to use with SonicWall Hosted Email Security
- How to Activate Email Security Free Trial License in MySonicWall
 YES
YES NO
NO