


How to Block Microsoft Office 365 on SonicWall
 11/22/2022
  66 People found this article helpful
 453,640 Views

Description
This article covers step by step configuration for blocking Microsoft office 365.
Resolution
Resolution for SonicOS 7.X
This release includes significant user interface changes and many new features that are different from the SonicOS 6.5 and earlier firmware. The below resolution is for customers using SonicOS 7.X firmware.
Login to SonicWall UTM appliance.
1) Navigate to Policy | Security Services | App Control.
2) Under Global Settings enable the checkbox for Enable App Control.

3) Navigate to the Signatures tab.
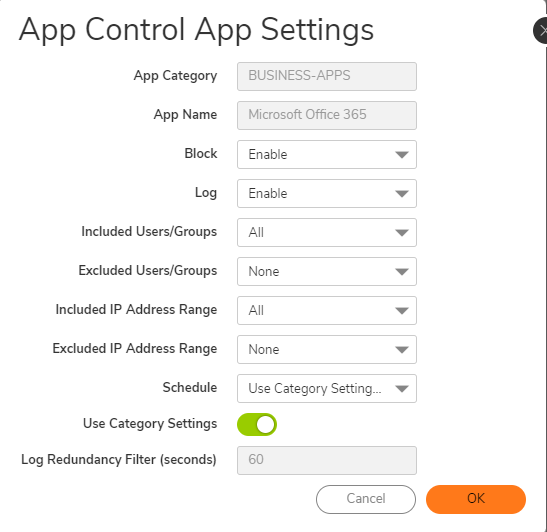
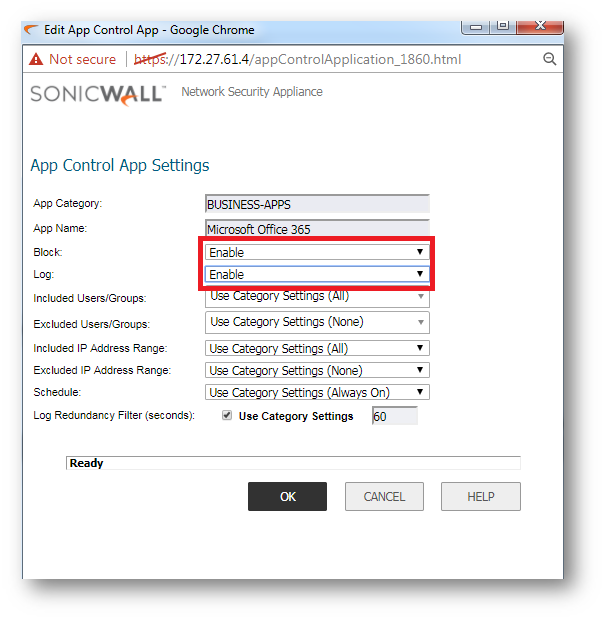
4) Select as Category Business Apps, Application as Microsoft Office 365, and View Style as Application.

5) Hover your mouse over the Application then edit it by clicking on the configure button.
6) Make sure to enable Block and Log under App Control App Settings.
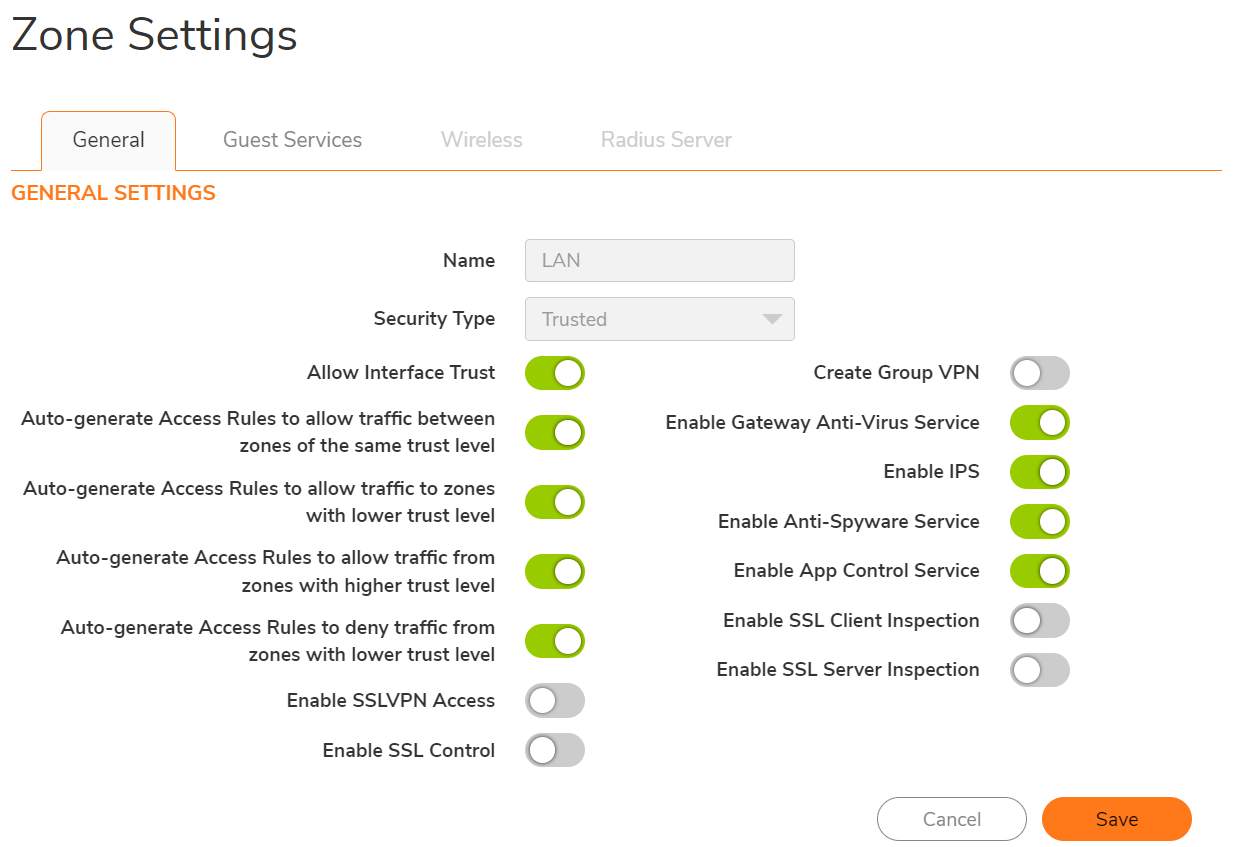
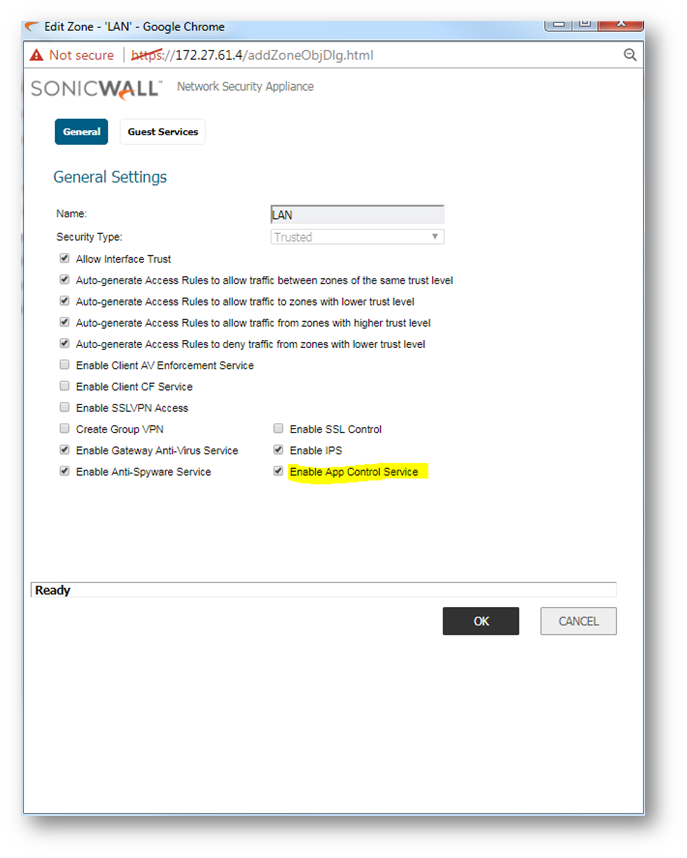
7) Navigate to Object | Match Objects | Zone.
8) Edit the LAN Zone and enable the checkbox for Enable App Control Service.
Resolution for SonicOS 6.5
This release includes significant user interface changes and many new features that are different from the SonicOS 6.2 and earlier firmware. The below resolution is for customers using SonicOS 6.5 firmware.
Login to SonicWall UTM appliance
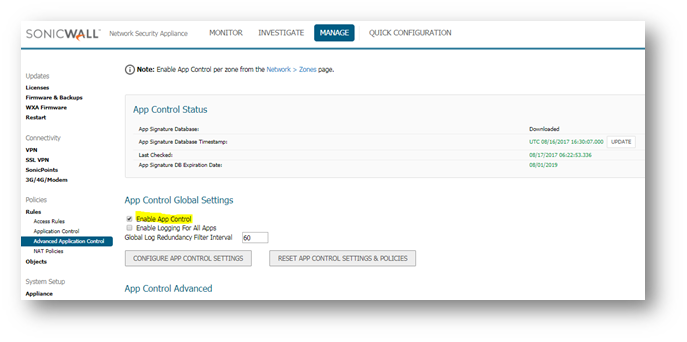
1) Click on MANAGE, and navigate to Rules | Advanced Application Control.
2) Make sure under App Control Global Settings, Enable App Control is Checked
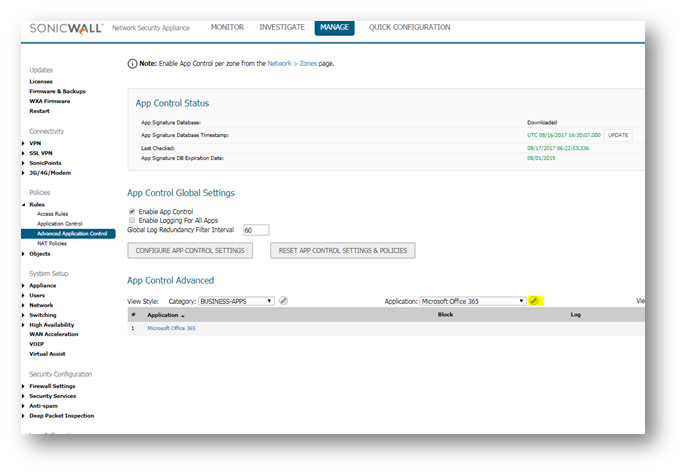
3) Under App Control Advanced, View Style: Category Select Business Apps and Application Select Microsoft Office 365
4) Click on the Edit button for Microsoft Office 365
5) Select Enable for Block and Log options.
6) Click on OK and then click Accept at the bottom.
7)Make sure that App Control Service is enabled on LAN Zone (If you are using it for LAN Zone).
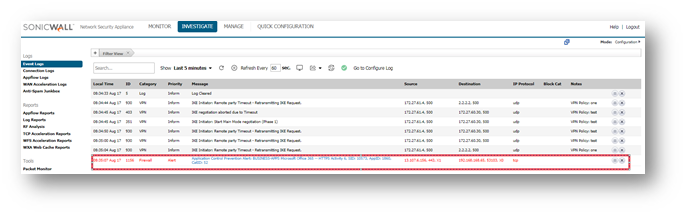
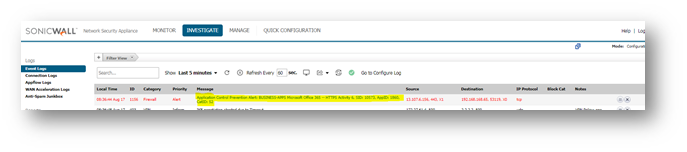
8) Now if any device in that zone tries to get to Microsoft 365, the connection will be drooped and we can see the same in Logs.
9) For Logs, click on INVESTIGATE button on the top bar and select EVENT LOGS.
Related Articles
- How to enable DNS Doctoring?
- Understanding TCP Handshake violation
- How can I Install SonicWall NSv on AWS ?
Categories
- Firewalls > SonicWall NSA Series
- Firewalls > TZ Series
- Firewalls > SonicWall SuperMassive 9000 Series
- Firewalls > SonicWall SuperMassive E10000 Series
 YES
YES NO
NO