-
Products
-
SonicPlatform
SonicPlatform is the cybersecurity platform purpose-built for MSPs, making managing complex security environments among multiple tenants easy and streamlined.
Discover More
-
-
Solutions
-
Federal
Protect Federal Agencies and Networks with scalable, purpose-built cybersecurity solutions
Learn MoreFederalProtect Federal Agencies and Networks with scalable, purpose-built cybersecurity solutions
Learn More - Industries
- Use Cases
-
-
Partners
-
Partner Portal
Access to deal registration, MDF, sales and marketing tools, training and more
Learn MorePartner PortalAccess to deal registration, MDF, sales and marketing tools, training and more
Learn More - SonicWall Partners
- Partner Resources
-
-
Support
-
Support Portal
Find answers to your questions by searching across our knowledge base, community, technical documentation and video tutorials
Learn MoreSupport PortalFind answers to your questions by searching across our knowledge base, community, technical documentation and video tutorials
Learn More - Support
- Resources
- Capture Labs
-
- Company
- Contact Us
SonicWall Capture Client and Datto RMM


Description
RMM Overview:
Remote monitoring and management (RMM) software application enables Managed IT service providers (MSPs/MSSPs) to monitor their customers’ networks and computers remotely and proactively. RMM tool helps businesses gain insight into the performance, health, and status of their various IT assets.This tool gives the administrator control over the network and endpoints which involves installing software and managing all activities:
- Monitor IT assets including endpoints, computers, and applications.
- Monitor network performance, security, and availability.
- Discover and track IT-related issues.
- Allow remote administrators to access endpoints.
This article describes how SonicWall Capture Client integrates with Datto Remote Monitoring & Management (RMM) tool. This integration helps: Install Capture Client on the endpoint using the Datto platform and displays that Capture Client is installed on the device details in device list page.
About Datto RMM :
Datto RMM is an IT automation solution that helps companies track and manage IT assets from a single location. This document describes the steps that need to be performed to be able to configure the integration successfully. Datto RMM helps Managed Service Providers (MSPs/MSSPs) to secure, monitor, and manage endpoints remotely to reduce costs and improve service delivery.
 CAUTION: Before starting the integration, make sure that the Datto RMM agent is installed on the endpoints and is being reported in the Datto RMM console.Also, download the Capture Client Agent MSI package from the CC Console.
Resolution
Configuring Datto RMM
- Download the cc-install-component (cc-install-component.bat) from the SonicWall Github page
- Login to Datto RMM tool and create a new component by choosing category as Applications
- Choose the sites where you want to install Capture Client
- Choose the Batch command and copy the contents downloaded from file in step1
Sample Datto RMM PowerShell script component inside the batch file:
“msiexec /i "SonicWall Capture Client.3.7.7.msi" /qn /promptrestart TOKENID=$ENV:CaptureClientTenantID /L*V "C:\CapCliInstall.log" echo Product Installed Succesfully exit” - Download the MSI from Capture Client management console under Management | Client Installers, rename the downloaded msi to SonicWall Capture Client.msi and add to the file in the component (make sure to remove the Tenant details from the downloaded Agent name)
- Create 2 input variables required for the script The component can be used to create jobs and in turn install Capture Client on devices
- When choosing to use the above created component in a job the tenantId and version needs to be filled based on the sites. For example while creating a job for auto install of Capture Client on a given site the tenantId and version is filled for a site
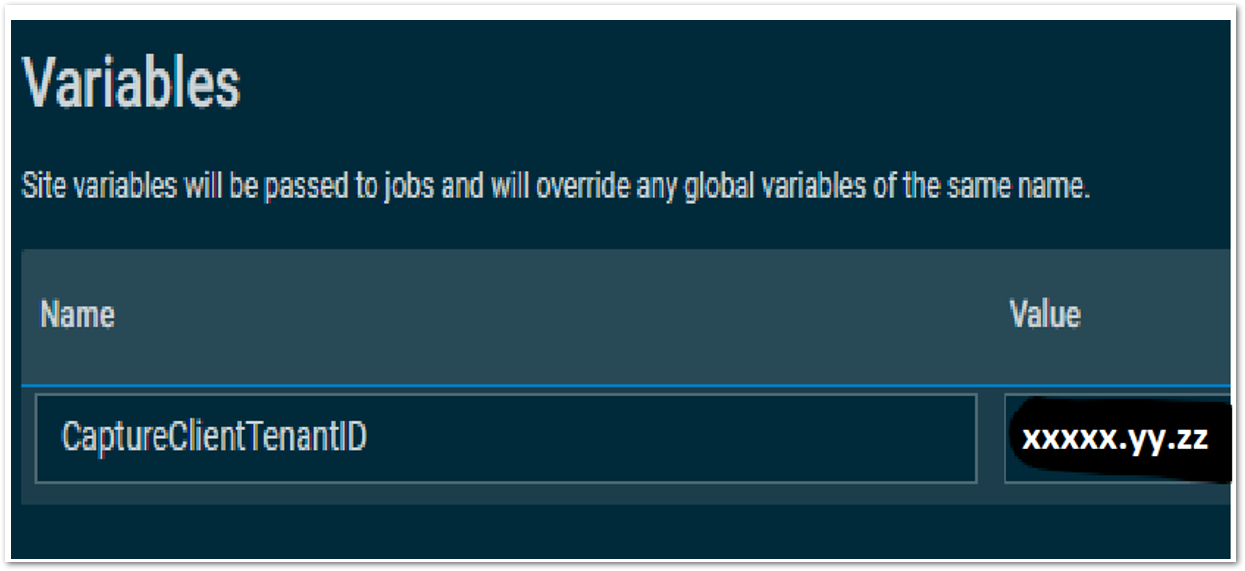
- Attach the MSI package as a file to the component (after removing the tenant details/checking the version matches). Then add the CaptureClientTenantID into the Site Setting of the customer as per the below:

The values for these variables can be found in the Capture Client console under the respective tenant.The TenantId can be found in the Capture Client console under Management | Tenant Settings
The version can be found under Management|Client Installers based on the clients chosen.
 NOTE: Please make sure you use the right TenantId or the client will be installed under different (wrong) Tenant.
 TIP: To know more more about Capture Client Installation via Command Line Interface or PowerShell, refer to this KB article.
Troubleshooting
Please post your queries to SonicWall community for any help.
Related Articles
- SentinelOne agent command line tool
- Capture Client Agent Return Codes - Phase 1
- Configure Email and Notification(Alerts) in Capture Client for Tenants


 YES
YES NO
NO