-
Products
-
SonicPlatform
SonicPlatform is the cybersecurity platform purpose-built for MSPs, making managing complex security environments among multiple tenants easy and streamlined.
Discover More
-
-
Solutions
-
Federal
Protect Federal Agencies and Networks with scalable, purpose-built cybersecurity solutions
Learn MoreFederalProtect Federal Agencies and Networks with scalable, purpose-built cybersecurity solutions
Learn More - Industries
- Use Cases
-
-
Partners
-
Partner Portal
Access to deal registration, MDF, sales and marketing tools, training and more
Learn MorePartner PortalAccess to deal registration, MDF, sales and marketing tools, training and more
Learn More - SonicWall Partners
- Partner Resources
-
-
Support
-
Support Portal
Find answers to your questions by searching across our knowledge base, community, technical documentation and video tutorials
Learn MoreSupport PortalFind answers to your questions by searching across our knowledge base, community, technical documentation and video tutorials
Learn More - Support
- Resources
- Capture Labs
-
- Company
- Contact Us
How to Perform a factory reset on CSa 1000 from the CLI ?


Description
If the CSa 1000 appliance cannot be factory reset using the physical button then the administrator has the option of performing a factory reset via CLI. The administrator will require the SonicWall Console cable as well as the maintenance Key ( available from MySonicWall.com ) .
Resolution
Pre Requisites:
Preparing the Console Session.
- Use a genuine SonicWall console cable. The cable is shipped along with the appliance.
- The Following configuration for the serial communications port needs to be setup on the putty session.

- For more details on connecting via console , please access the following article : HOW CAN I LOGIN TO THE APPLIANCE USING THE COMMAND LINE INTERFACE (CLI)?
- You may use an adapter DB9 Make to USB if you don't have a PC with a serial communications port.
- On the CSa Appliance , please find the console port as indicated in the image below:

Obtaining the Maintenance Key
To obtain the maintenance Key, Please access the MySonicWall.com account under which the appliance is registered. Navigate to the Product details section and then selection on the view button next to the Maintenance Key as highlighted in the image below: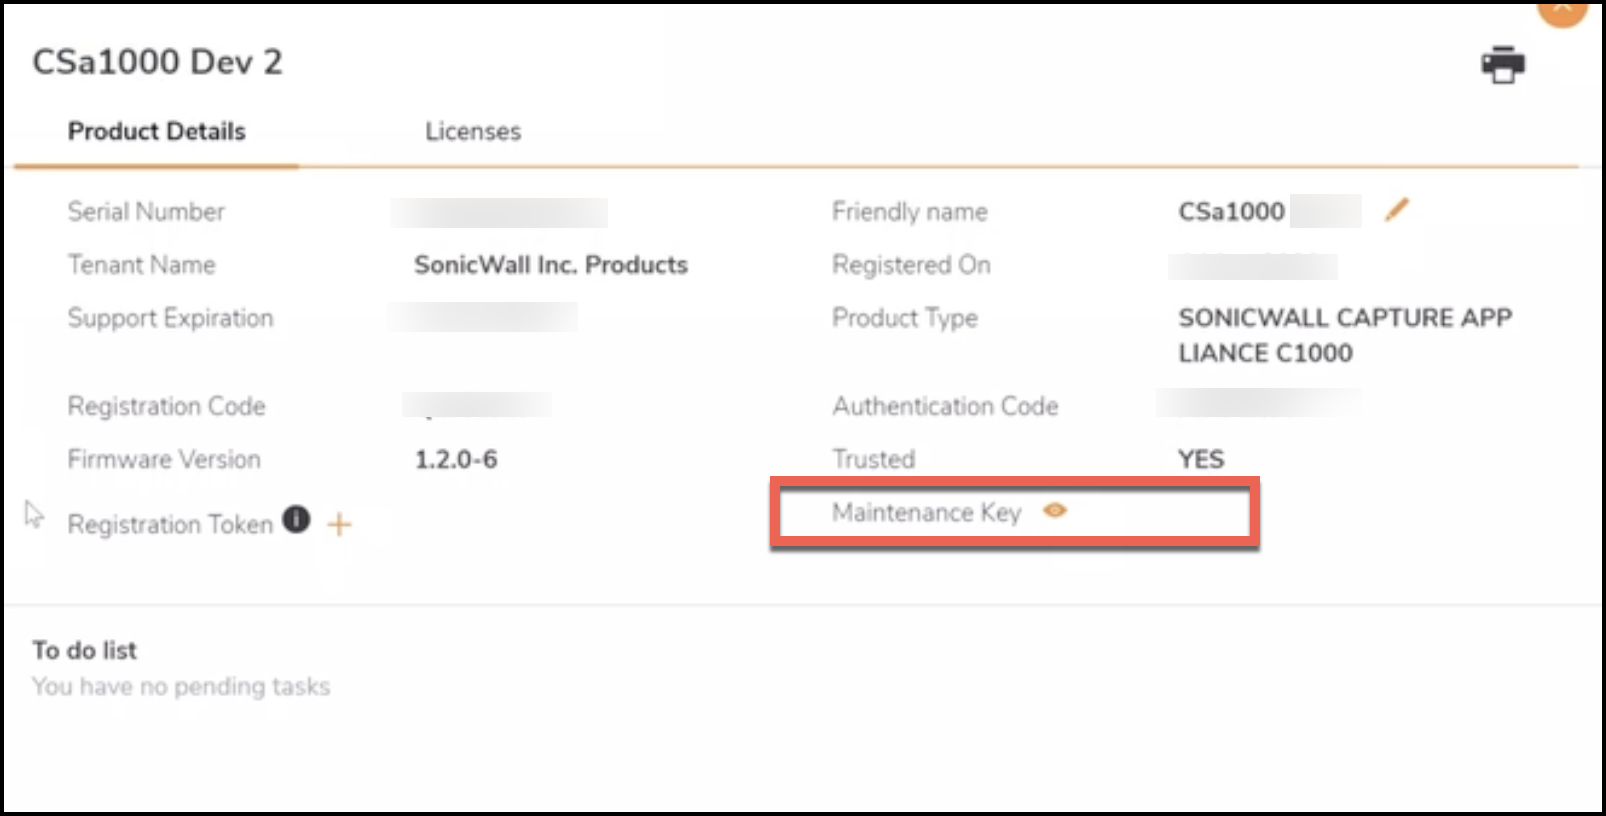
This completes the pre requisites.
Accessing the CLI Session
The process of navigating and selecting the options for the Console session are indicated below. The sreenshots indicate the flow and the output expected on the session upon after logging in to the appliance.
- The following screen shows the status after immediately logging in
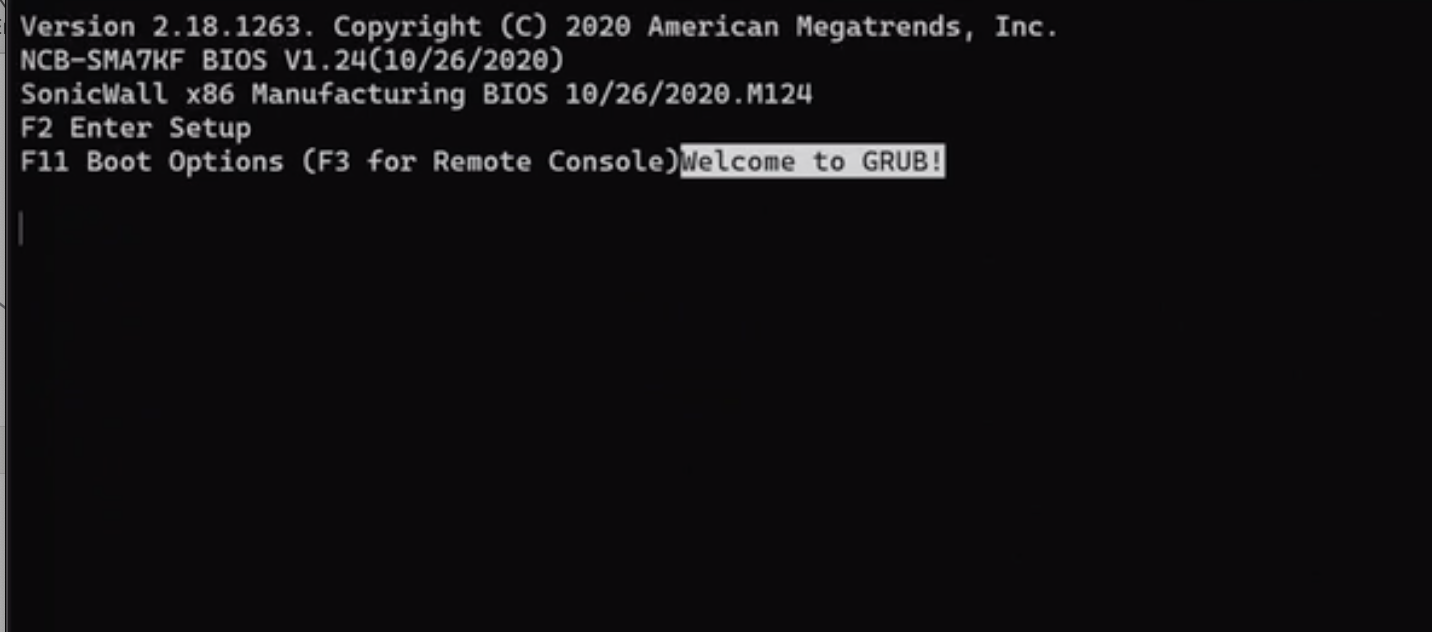
- Menu shows up the following however please do not select any option and let it default to highlighted entry " SonicCore X". You will notice that there is a countdown time to automatically select that the highlighted entry.
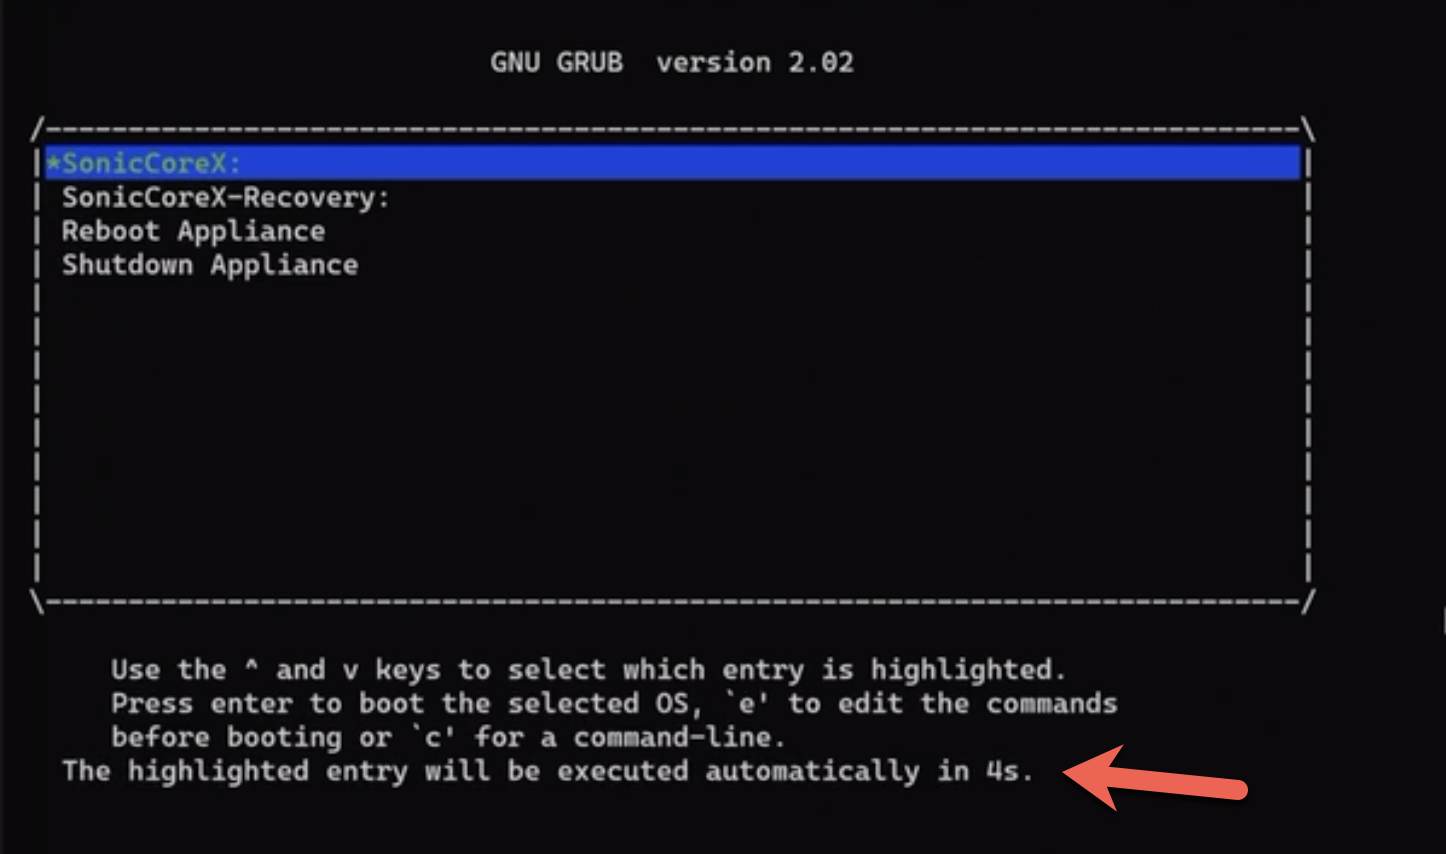
- You will be presented with the following screen and asked to select the mode. Choose the " recovery mode " by selecting r
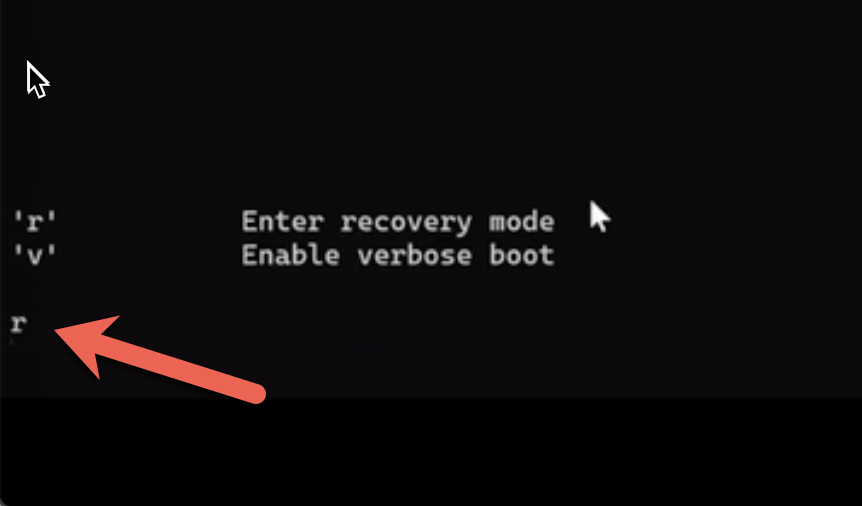
- The following screen will show that the appliance is initializing and entering the safe mode. The recovery menu now presents two options . Enter or Select 0 to enable the maintenance mode. Post selection, the screen will prompt for a maintenance Key to be entered. The Maintenance Key was one of the pre requisites . Please see the top part of the article on how to obtain the key. If the key is available then paste it and select enter.
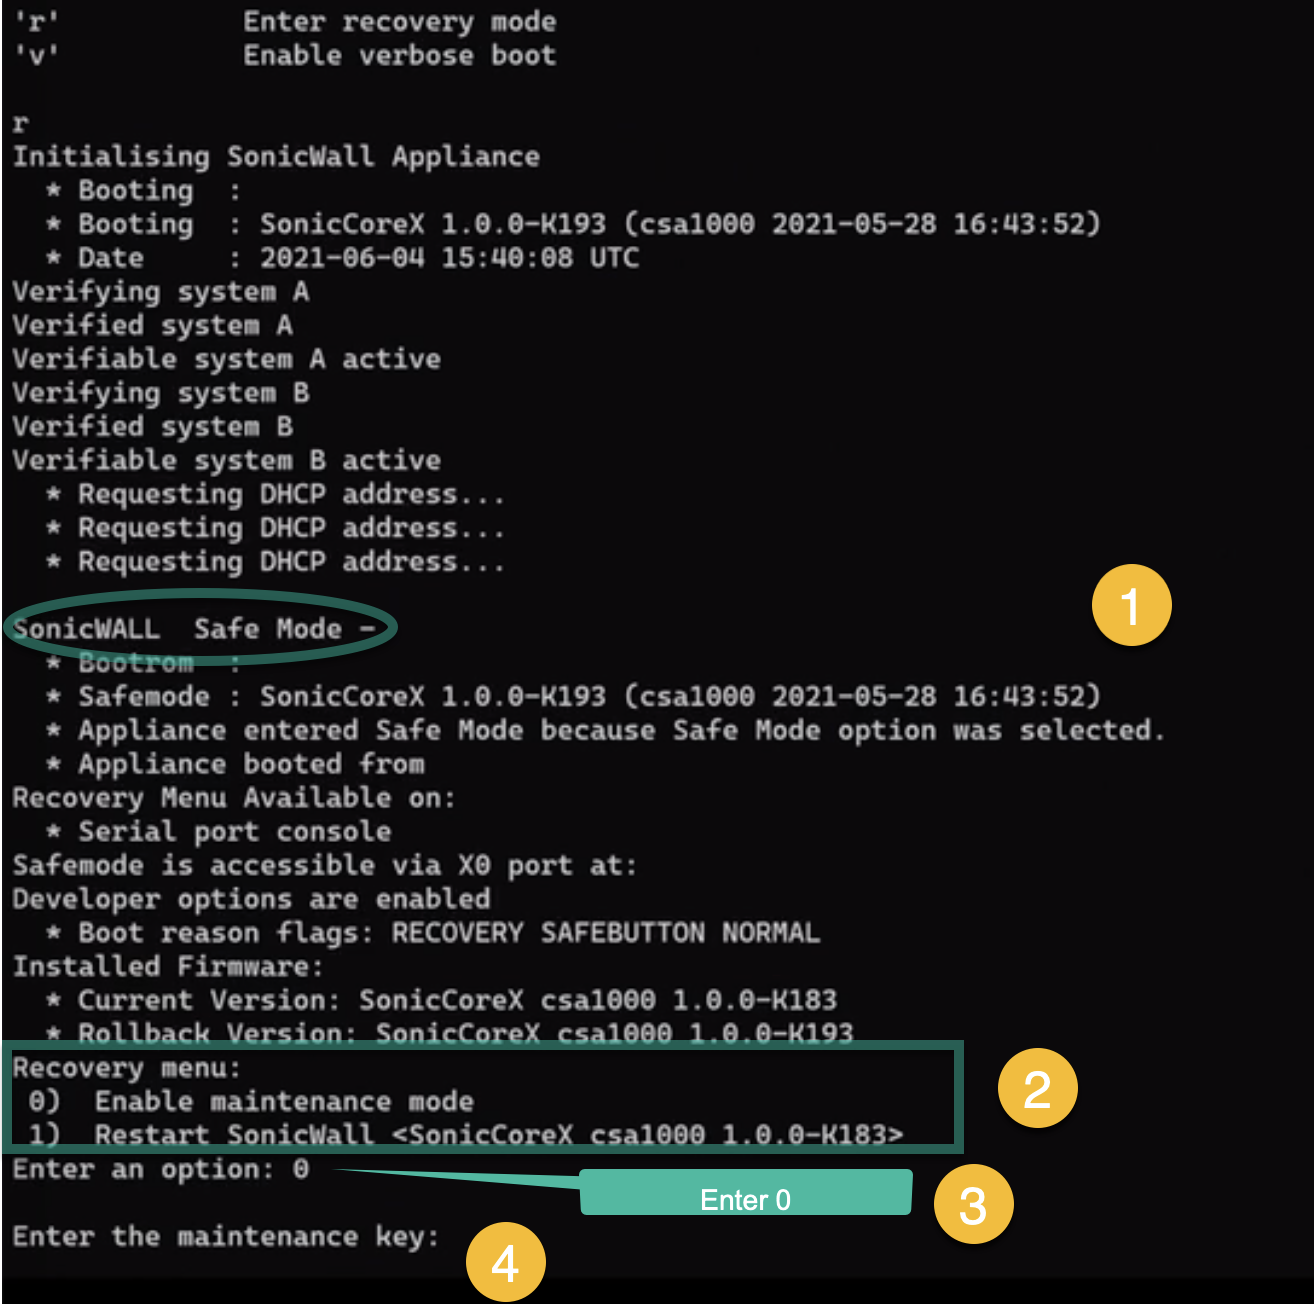
- After entering the maintenance Key , You will be presented with options under the recovery Menu again. Please select option 5 " Boot current firmware with default settings."
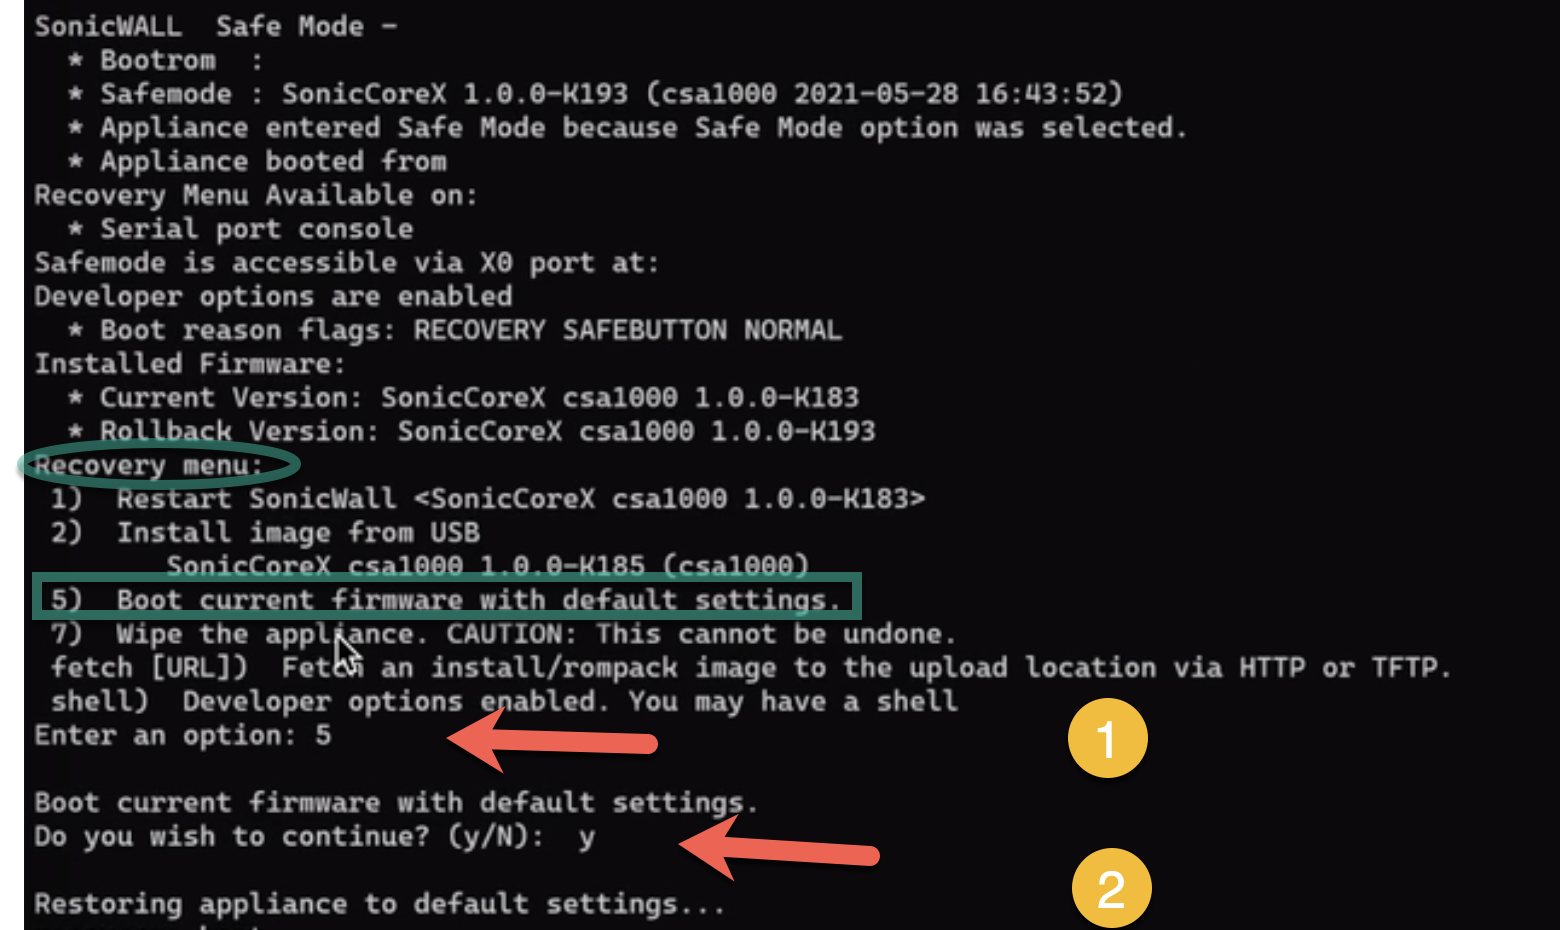
- The following are the screenshots of the CLI session to indicate the output on the screen as the appliance proceeds to boot to the current firmware with default settings:

The Highlighted entry of SonicCoreX is automatically executed as shown with the timer.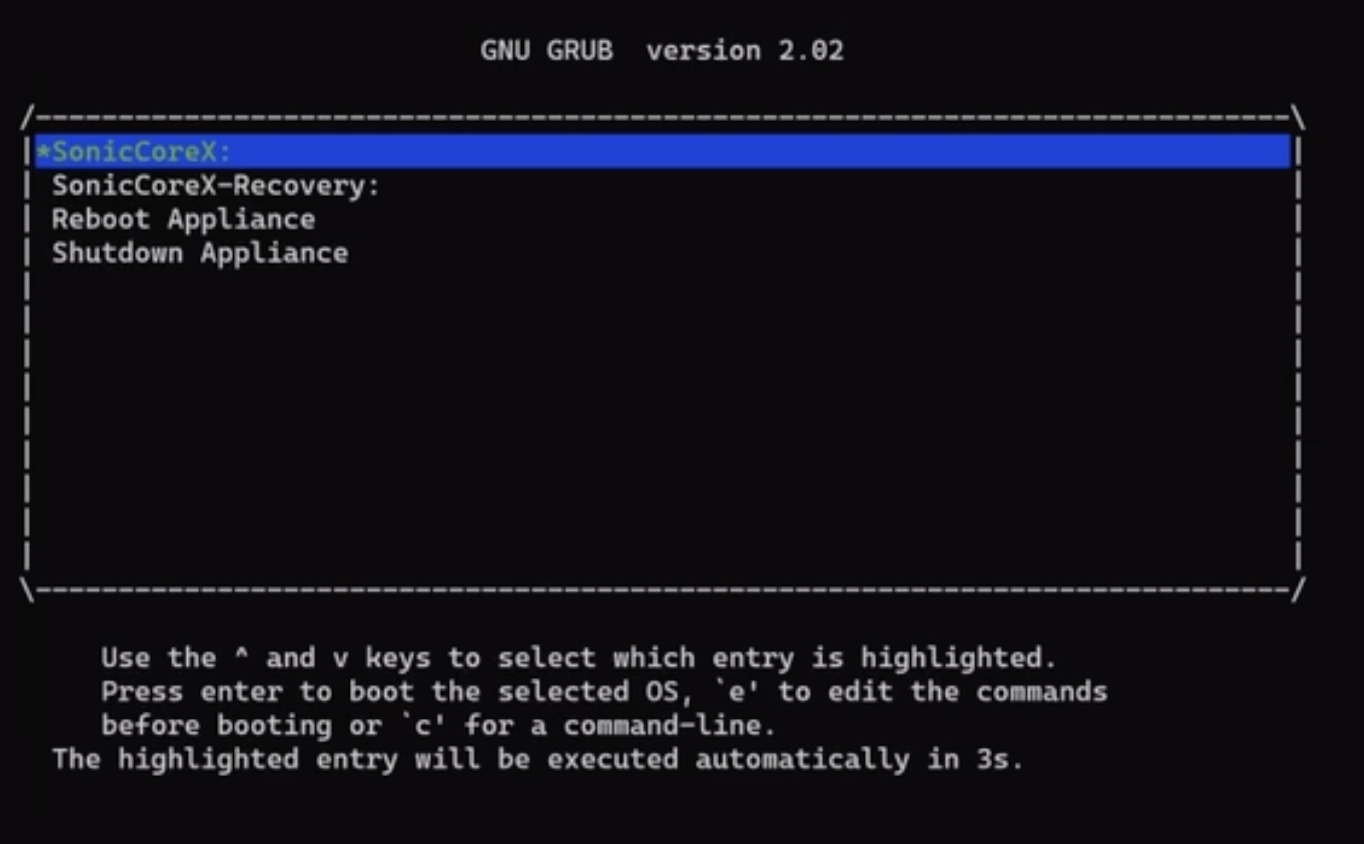
There is no need to manually select the mode and there will be no prompt as the appliance is continuing to boot to factory default settings.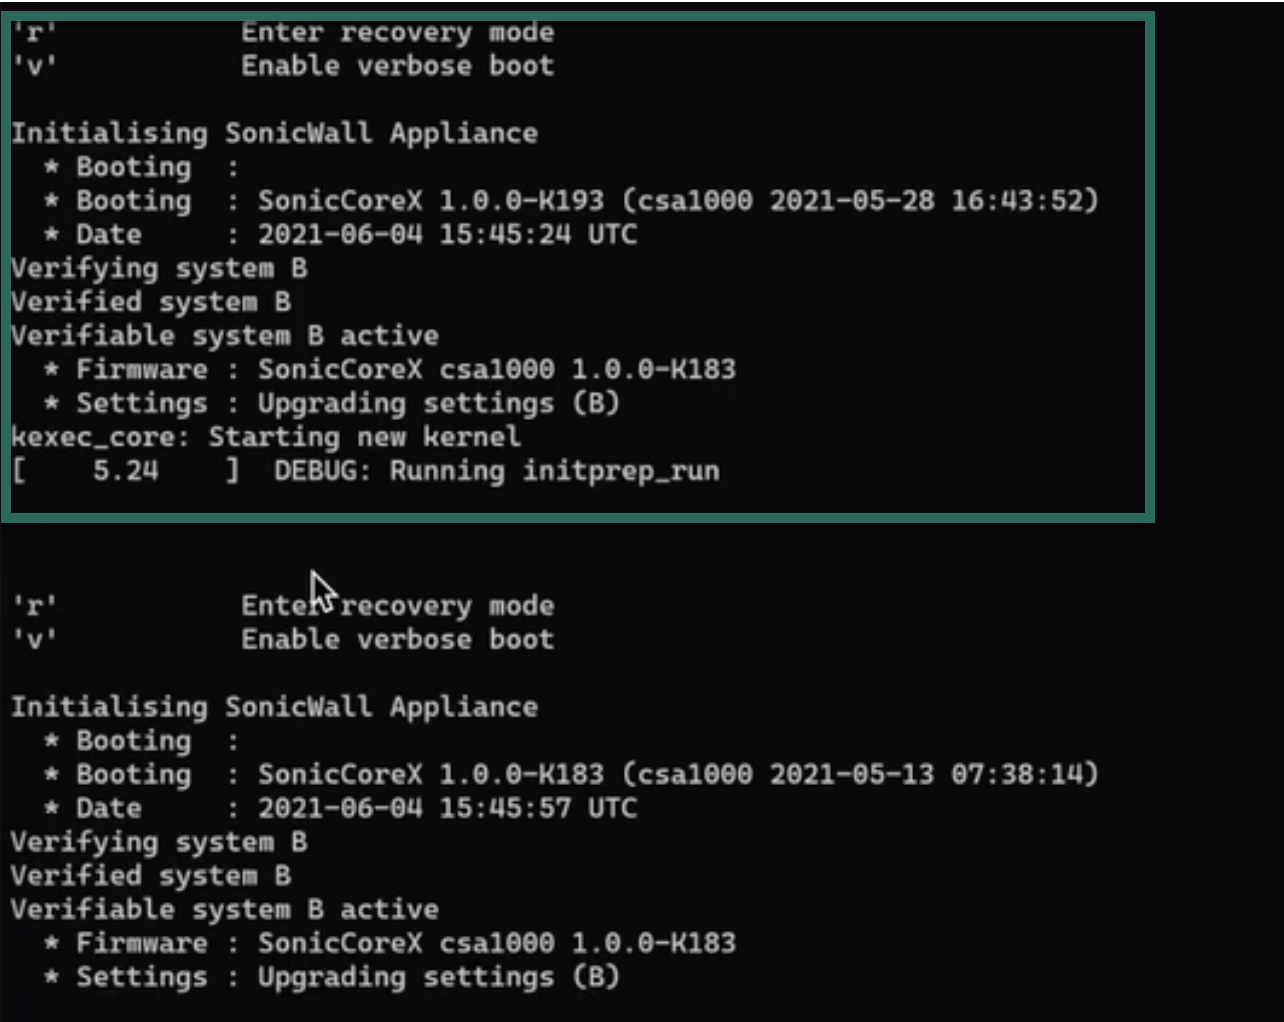
Initialization checks are performed and appliance starting messages are produced.
As part of the reset and settings revert, you can notice that the the IP addresses change to default. In the example of the screenshot below, the WAN interface IP address reverts from the earlier IP address ( blurred out ) is reverted to a dynamically received IP address of 192.168.168.76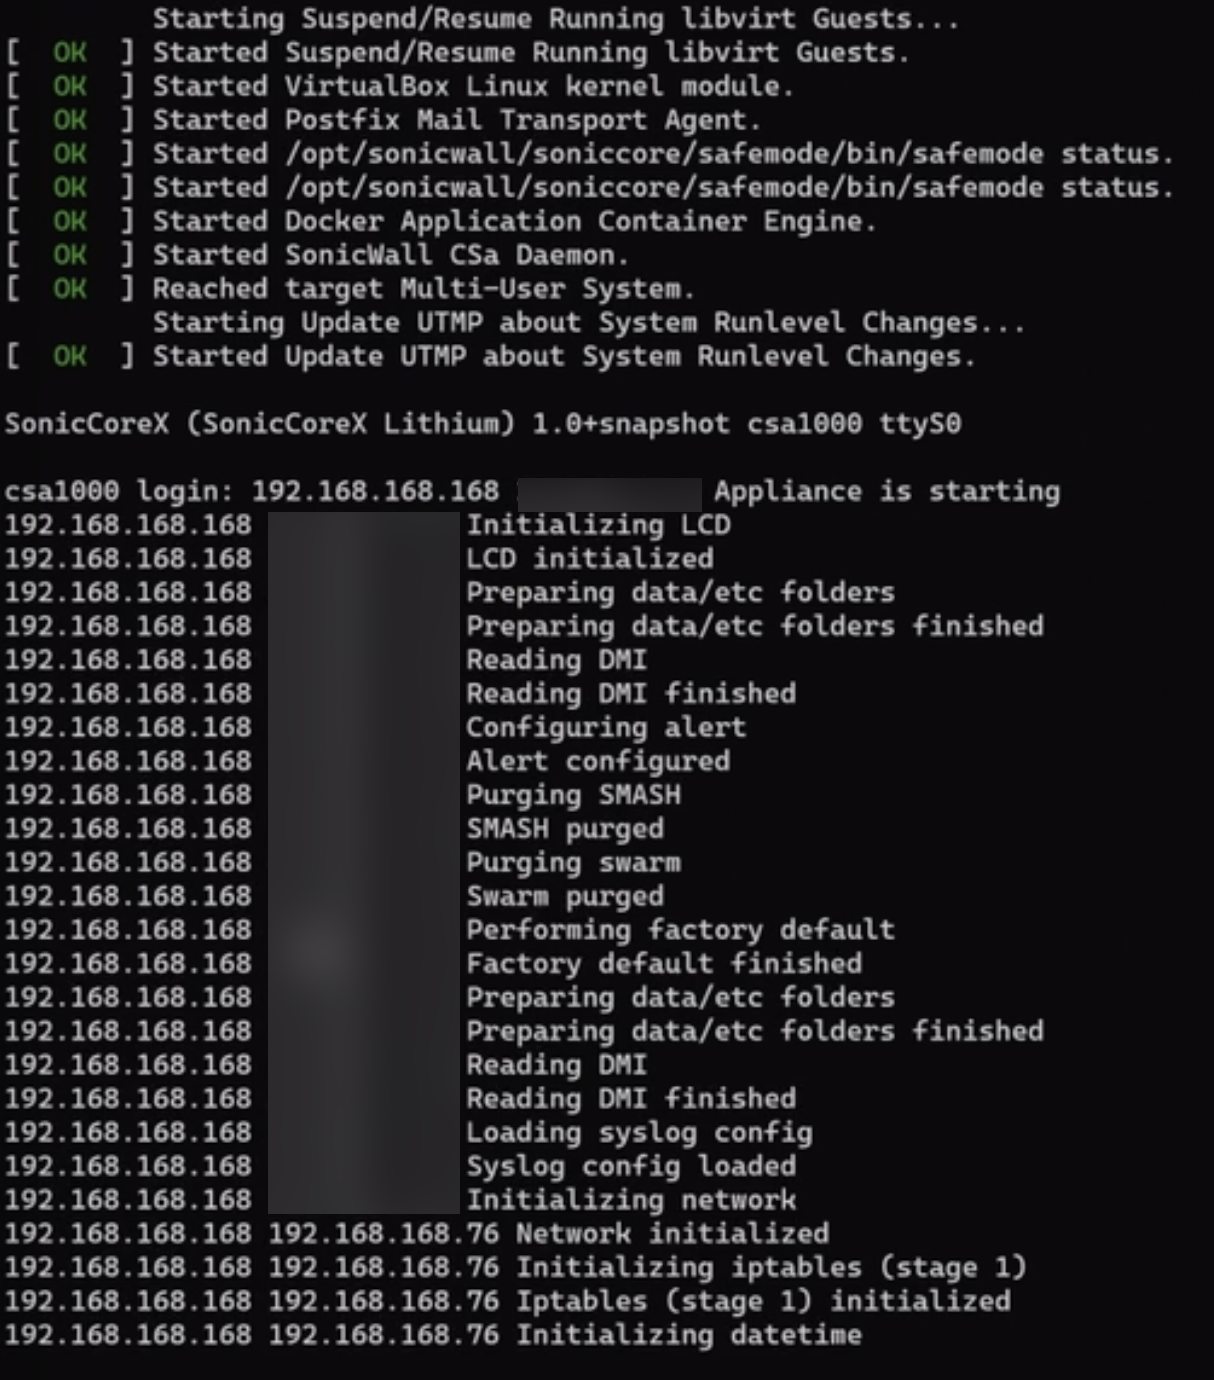
This completes the factory reset process via the CLI.
Related Articles
- Error:"Invalid API Argument" when modifying the access rules
- Cysurance Partner FAQ
- Configure probe monitoring for WAN Failover and Loadbalancing - SonicWall UTM


 YES
YES NO
NO