-
Products
-
SonicPlatform
SonicPlatform is the cybersecurity platform purpose-built for MSPs, making managing complex security environments among multiple tenants easy and streamlined.
Discover More
-
-
Solutions
-
Federal
Protect Federal Agencies and Networks with scalable, purpose-built cybersecurity solutions
Learn MoreFederalProtect Federal Agencies and Networks with scalable, purpose-built cybersecurity solutions
Learn More - Industries
- Use Cases
-
-
Partners
-
Partner Portal
Access to deal registration, MDF, sales and marketing tools, training and more
Learn MorePartner PortalAccess to deal registration, MDF, sales and marketing tools, training and more
Learn More - SonicWall Partners
- Partner Resources
-
-
Support
-
Support Portal
Find answers to your questions by searching across our knowledge base, community, technical documentation and video tutorials
Learn MoreSupport PortalFind answers to your questions by searching across our knowledge base, community, technical documentation and video tutorials
Learn More - Support
- Resources
- Capture Labs
-
- Company
- Contact Us
How to configure Voice VLAN and QoS on SonicWall Switch?


Description
The voice VLAN is an ingenious feature that enables access ports to carry voice traffic from an IP phone. Quality of Service (QoS) can be used to protect and prioritize time-critical traffic like voice and video. Voice packets must be delivered in the most timely manner possible, with minimum jitter, loss, and delay.
Resolution
Two steps to adding a voice VLAN:
- Adding a VLAN
- Configuring a Voice VLAN
Adding a VLAN
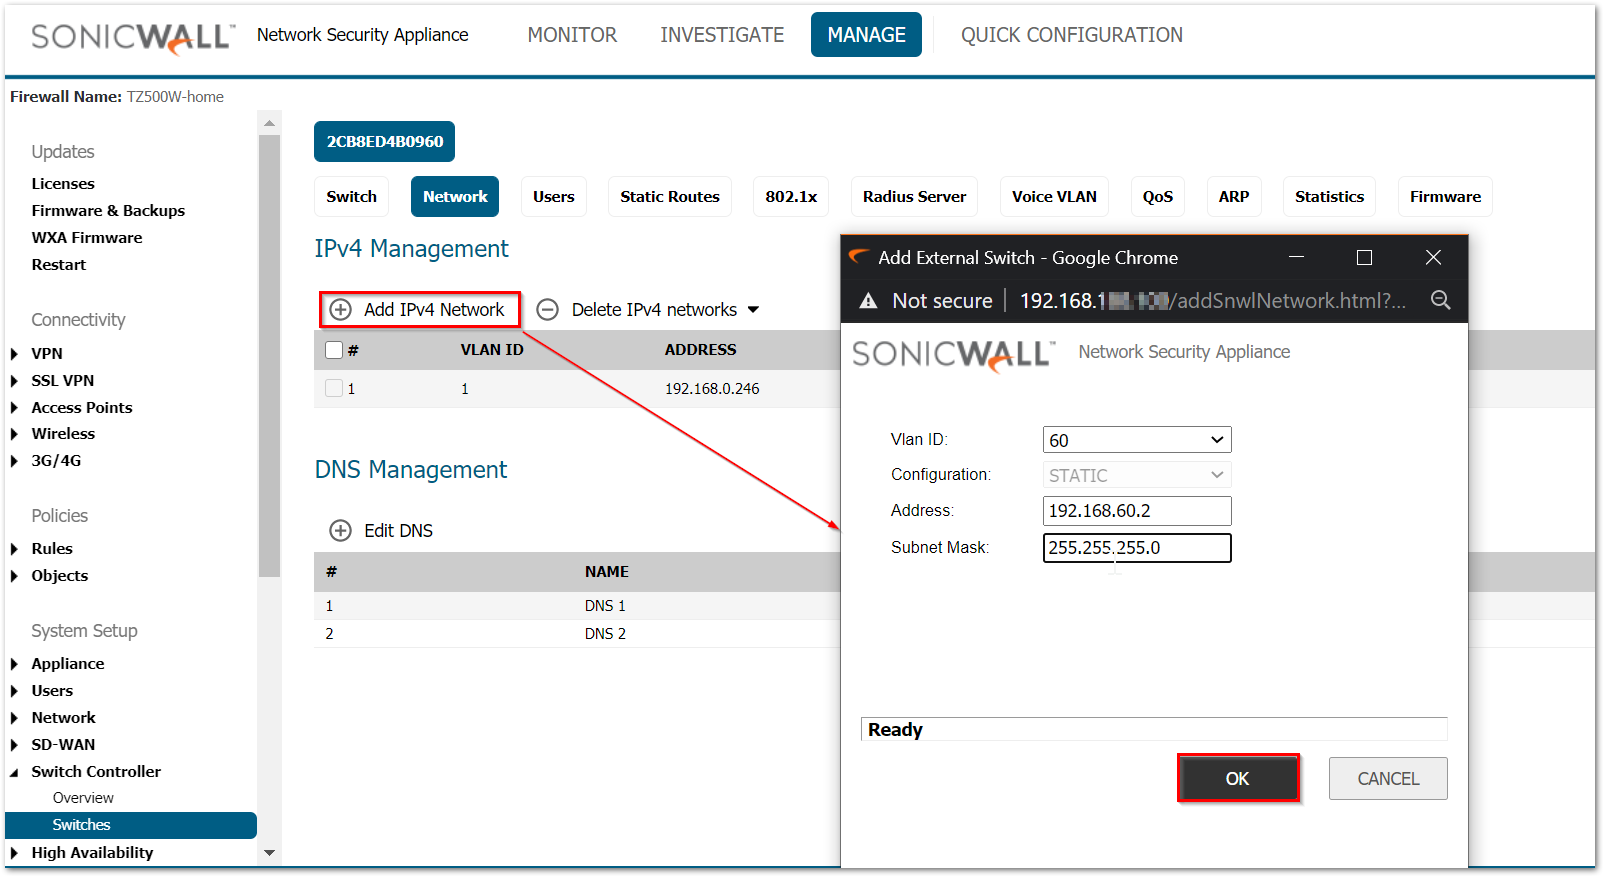
The SonicWall switch gets the VLAN information from the firewall. You would need to add the VLAN sub-interfaces on the firewall first. Please refer to How Can I Configure Sub-Interfaces?. Once the VLAN sub-interfaces are added, the VLAN can be added on the switch as below.
- Navigate to MANAGE | Switch Controller | Switches tab and then click on Network tab.
- Click Add IPv4 Network.
- Define Vlan ID, Address, Subnet Mask and choose address assignment method: Static or DHCP.
 NOTE: DHCP can only be used for Native VLAN 1 but for all other VLAN IDs, a static entry is needed.
 - Click OK.
Configuring Voice VLAN
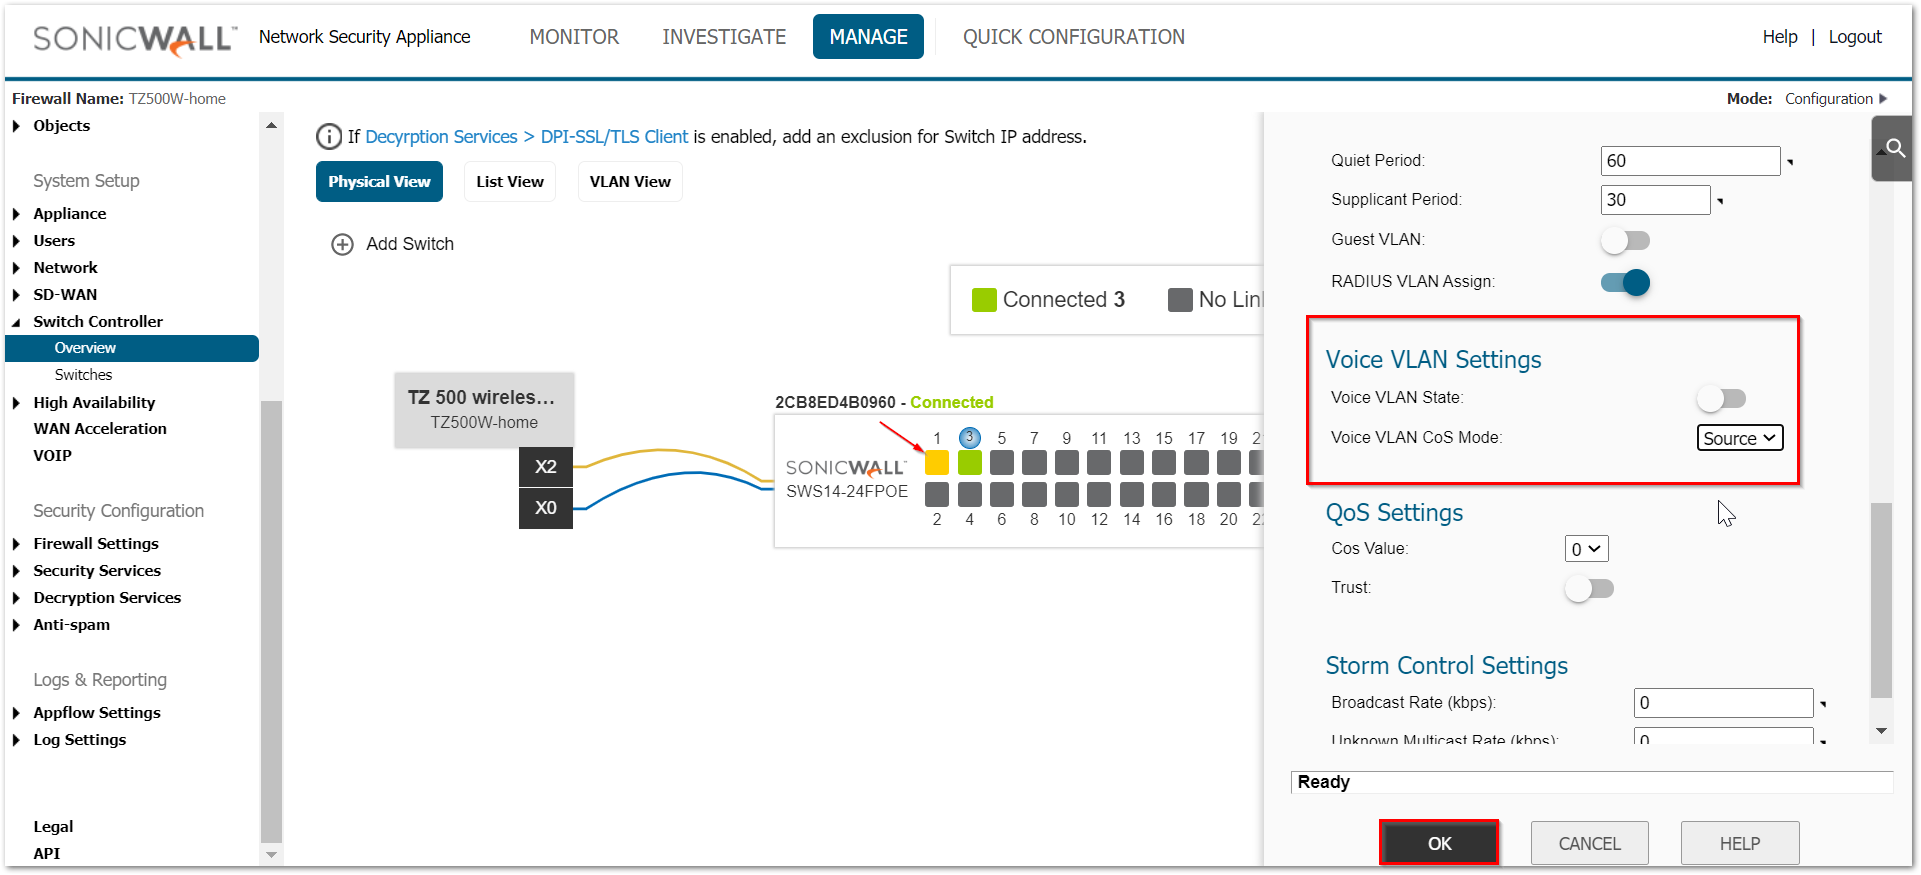
 NOTE: Voice VLANs can be enabled/disabled per port in the MANAGE | Switch Controller | Overview | Physical View display.
- To configure a voice VLANs navigate to MANAGE | Switch Controller | Switches and then click on Voice VLAN.
- Set up a voice VLAN by moving the state from Disabled to Auto and set the other parameters before clicking on Accept as it appears at the bottom of the display.
- Voice Vlan ID — Identifies LAN.
- Voice Priority Tag — determines priority among active voice streams.
- Differentiated Service Code Point — defines QoS.
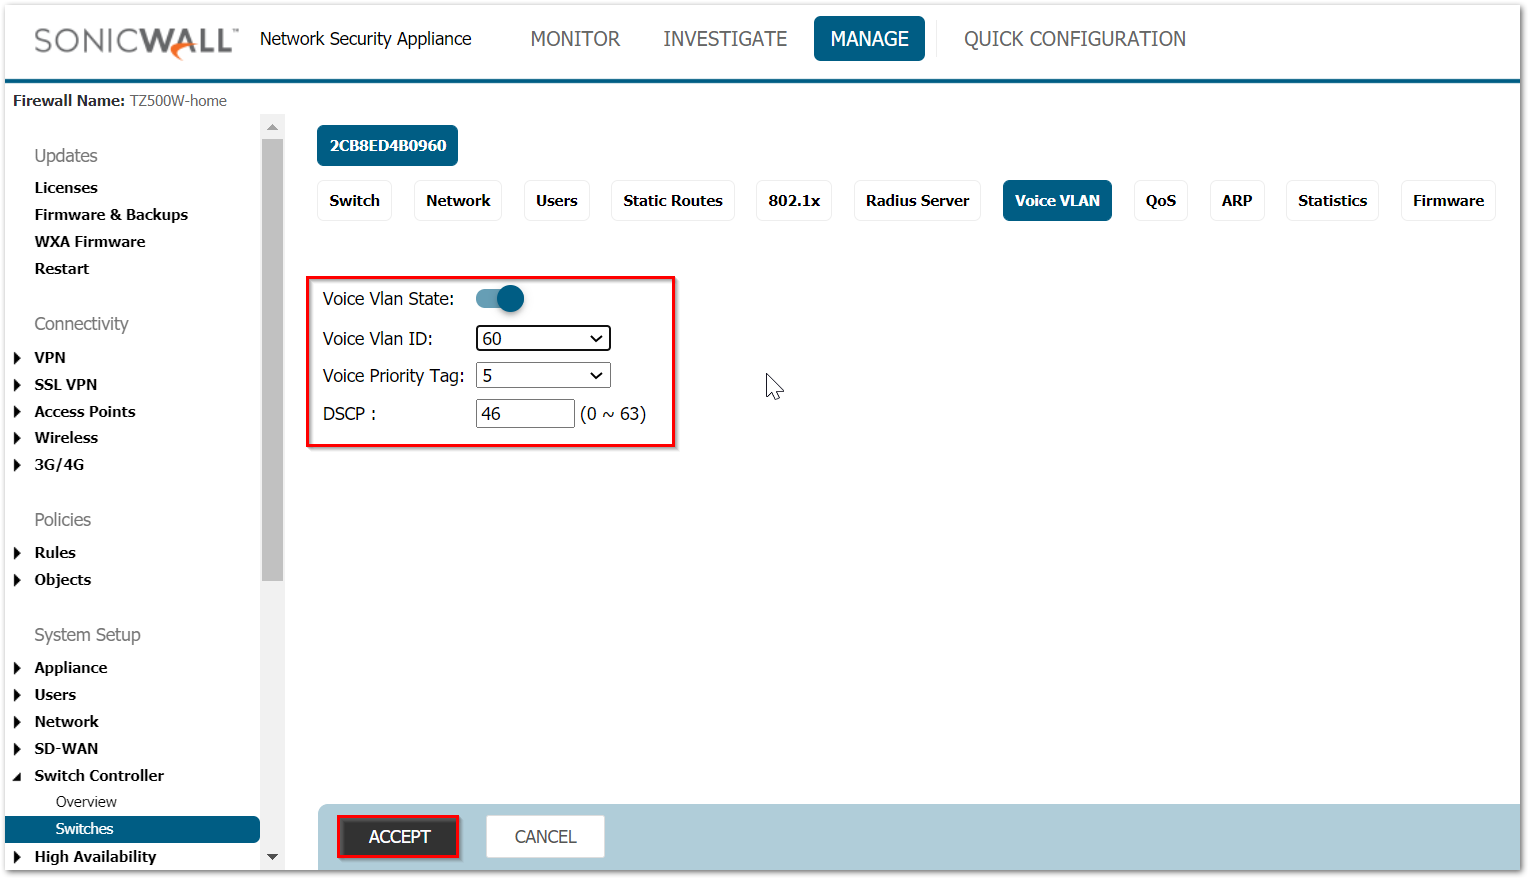
- Use the Voice VLAN Settings to enable Voice traffic management and determine if Class of Service (CoS) queues will be defined for all ports or only those sourcing voice traffic.
To Enable/Disable Voice VLAN for a port
- Navigate to MANAGE | Switch Controller | Overview and click on the port. When the sideband display appears scroll to Voice VLAN state as shown below.
Setting Up QoS:
Quality of Service (QoS) provides the ability to implement priority queuing within a network. QoS enables traffic to be prioritized, while excessive broadcast and multicast is minimized. Traffic such as voice and video streaming which requires a minimal delay can be assigned to a high priority queue, while other traffic can be assigned to a lower priority queue resulting in uninterrupted actions.
QoS setup for the switch:
- Navigate to MANAGE | Switch Controller | Switches and click on QoS.
- Set Egress Policy.
The first screen details Egress Policy which applies for all approaches to packet and traffic classification. In the preceding UI screen, the State slider determines whether QoS is enabled (to the right) or disabled (to the left). Scheduling method can be set as Strict Priority based on Queue number or as Weighted Round Robin (WRR). The classification of packets can be set as 802.1p or DSCP (Differentiated Services Code Point), or as both.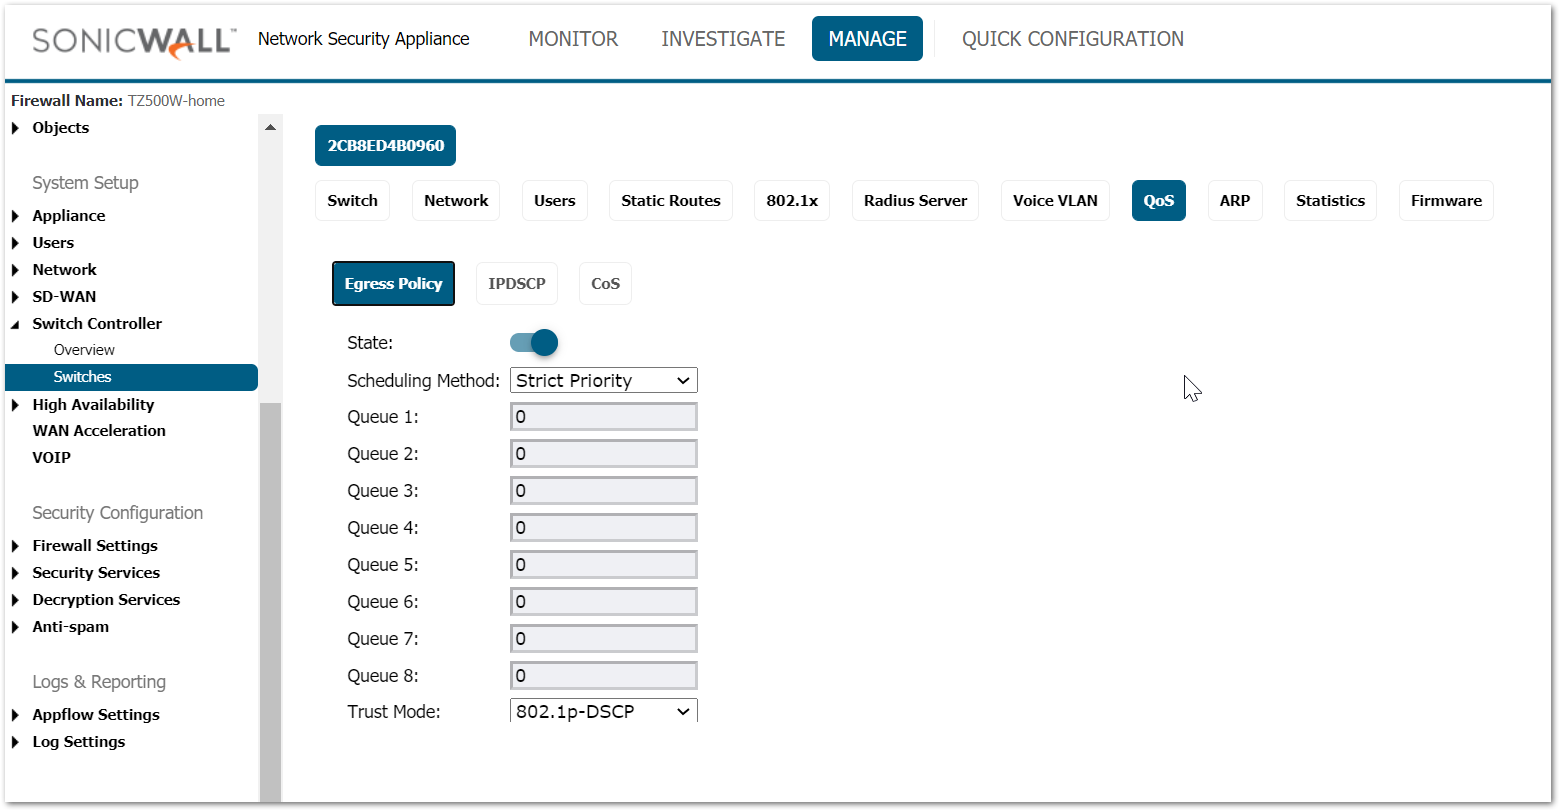
Select the IPDSCP screen to set DSCP codes to specific Queues.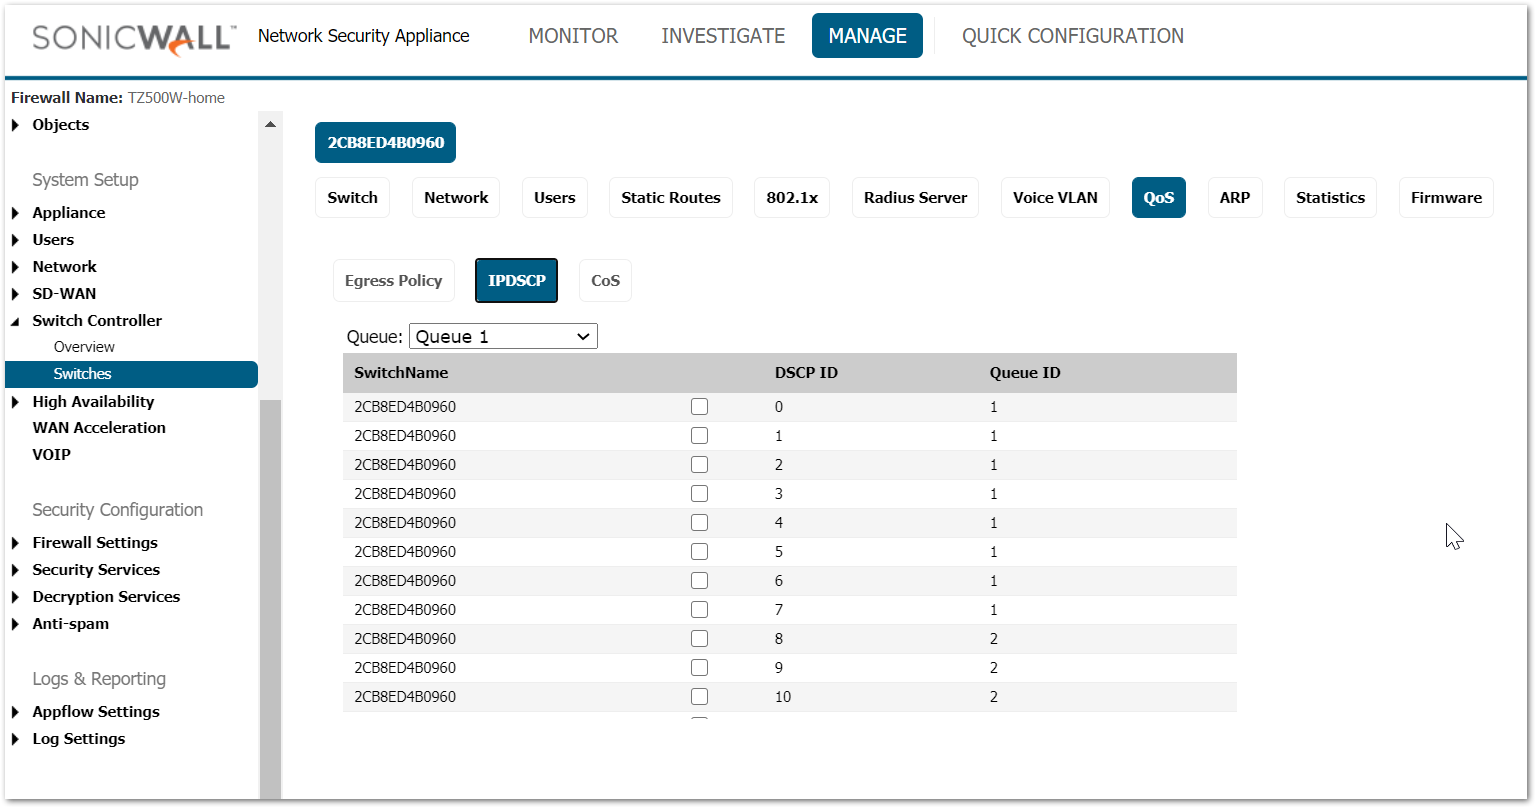
To set class of service, click on CoS.
In the CoS (Class of Service) screen, the CoS priority tag values, where 0 is the lowest and 7 is the highest are related to eight traffic priority queues from 1 to 8, where one is the lowest priority and eight is the highest priority.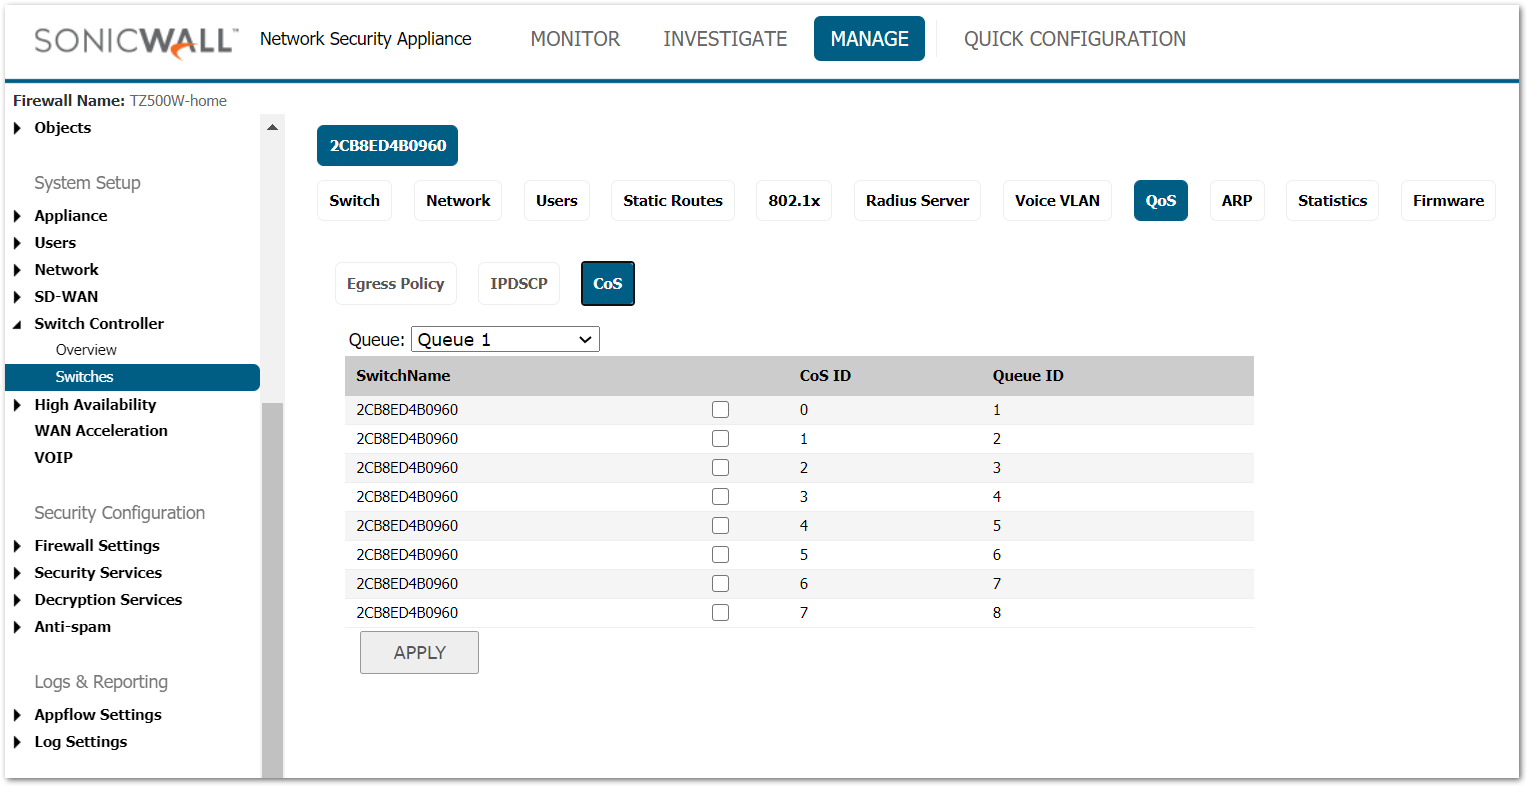
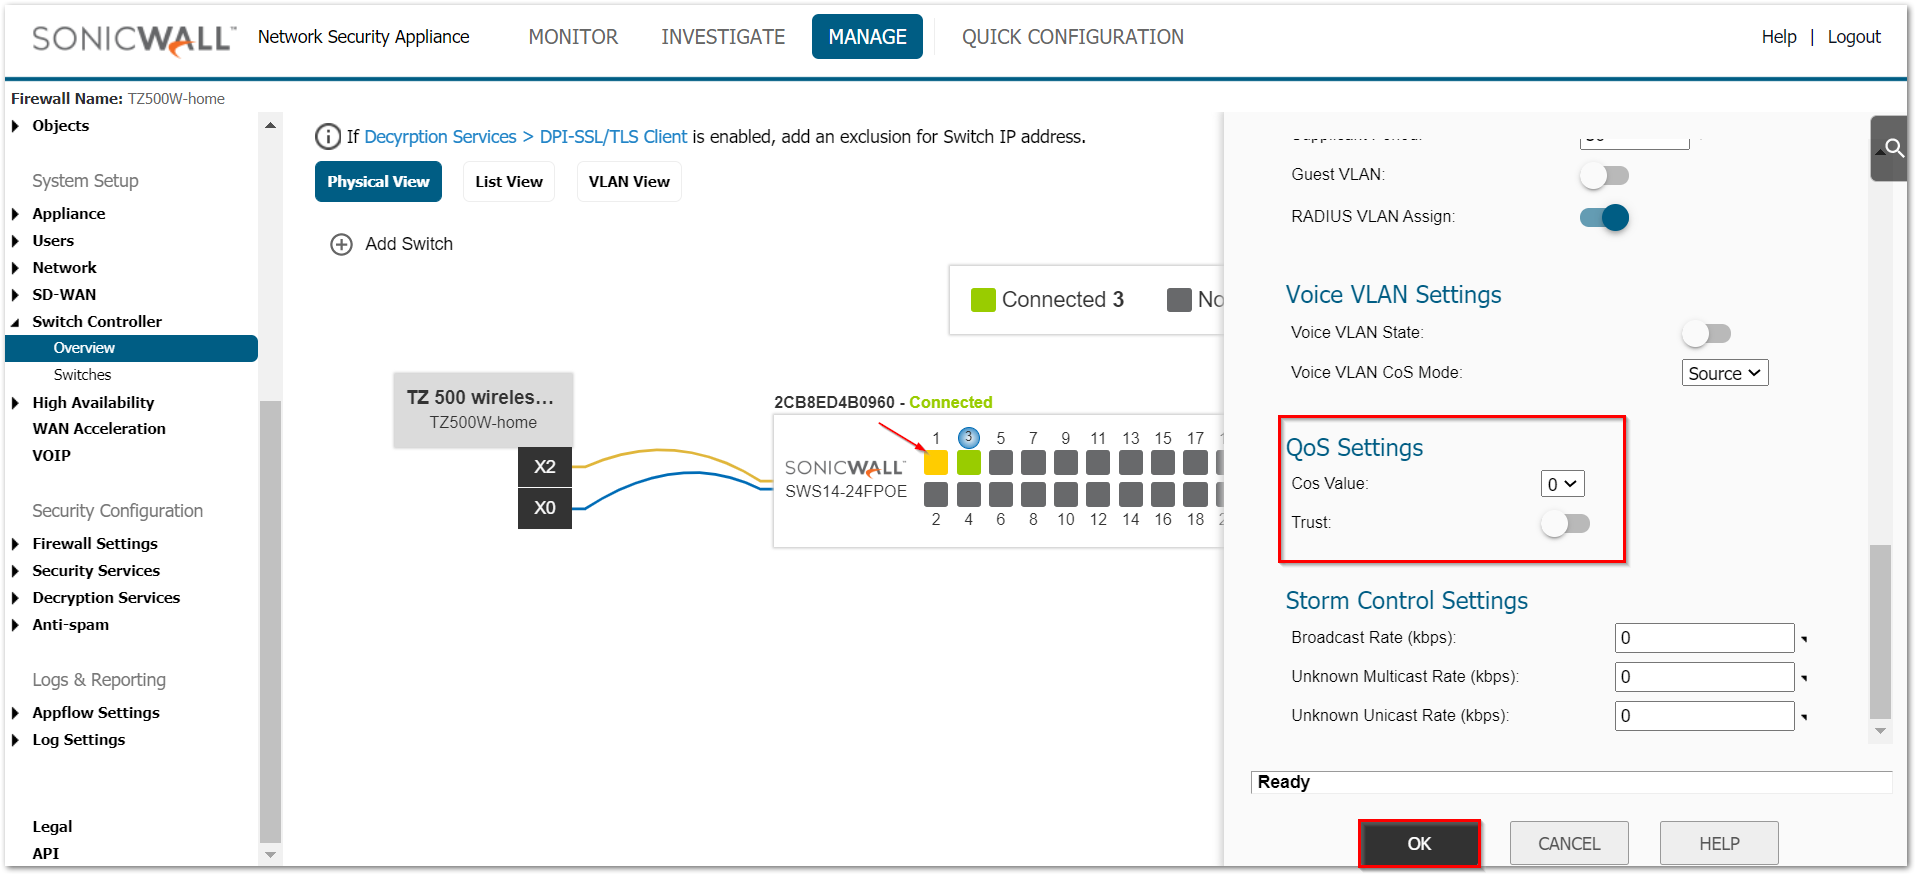
Enable/Disable QoS for a port
- Navigate to MANAGE | Switch Controller | Overview and click on the port. When the sideband display appears scroll to QoS as shown below.
Related Articles
- Supported SonicWall and 3rd party SFP and SFP+ Modules that can be used with SonicWall Switches
- How to enable Port Mirror on Sonicwall Switch.
- Create a new VLAN on Sonicwall Switch managed by WCM.


 YES
YES NO
NO