


How to design a solid wireless network using WiFi Planner
 05/05/2020
  21 People found this article helpful
 445,732 Views

Description
WiFi Planner lets you customize your settings per your surroundings and requirements to obtain maximum coverage with the fewest number of access points. You can prevent interference in your deployment on a best-effort basis through auto-channel assignment.
Resolution
- Navigate to cloud.sonicwall.com and log in.
- Click the Wireless tile and then click Launch WiFi Planner.
- Click New Project and provide a name. After selecting a country, click Create.
- Open the new project. In the lower-left corner, click Add floor plan.

- Click Choose file from computer, import file from local folder, click Apply and set scale.
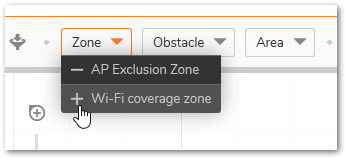
- Next, click Zone | Wi-Fi coverage zone. In this example, we've selected the whole floorplan.
- We'll add obstacles next. Click Obstacle.
- For each wall or divider, select the proper material which divides any two sections. For example, click Concrete Wall (12 dB) to set the wall type.
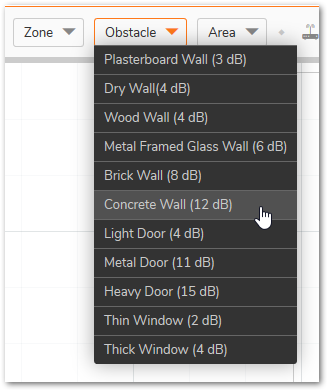
- Click Highlight.
- After choosing obstacles click Plan Advisor to select details.
- Select Access Point Model to place on the floor plan.
- Select the radio frequency. In our example we chose 5Ghz.
- We'll choose the default transmit power of half by clicking Minimum Signal Strength and then click -60dBm.
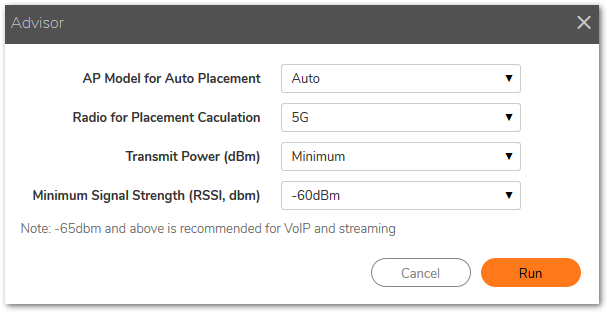
- Click Run for the system to place the access points.
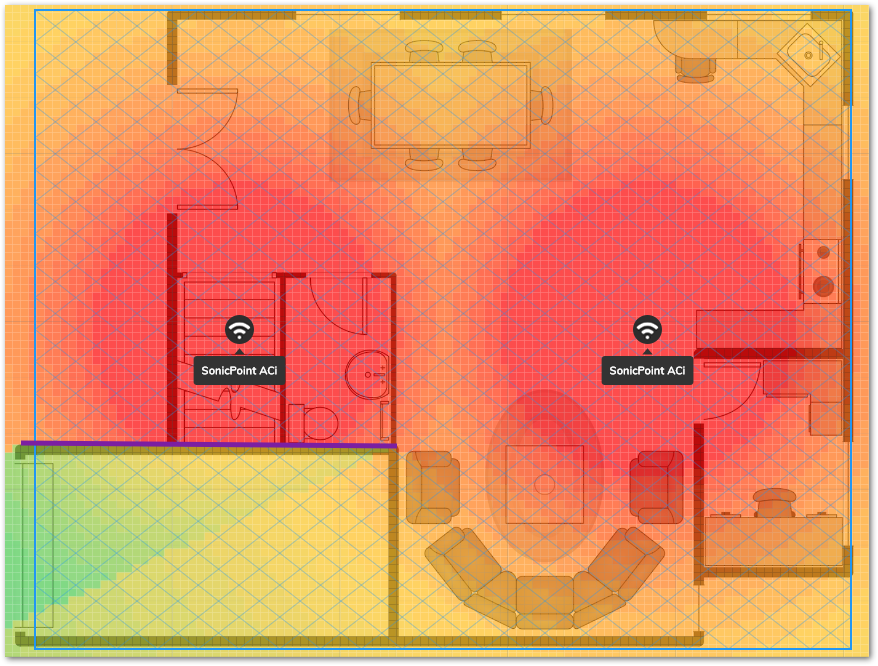
Once the system runs it will place the access points in optimal positions. Click Save as Image to save the updated floor print for your records.
Related Articles
- How to configure Trunk and Access ports on SonicWall Switches using WNM
- How to change Access Point location on WNM
- SAML Azure integration with WNM for Guest users
 YES
YES NO
NO