-
Products
-
SonicPlatform
SonicPlatform is the cybersecurity platform purpose-built for MSPs, making managing complex security environments among multiple tenants easy and streamlined.
Discover More
-
-
Solutions
-
Federal
Protect Federal Agencies and Networks with scalable, purpose-built cybersecurity solutions
Learn MoreFederalProtect Federal Agencies and Networks with scalable, purpose-built cybersecurity solutions
Learn More - Industries
- Use Cases
-
-
Partners
-
Partner Portal
Access to deal registration, MDF, sales and marketing tools, training and more
Learn MorePartner PortalAccess to deal registration, MDF, sales and marketing tools, training and more
Learn More - SonicWall Partners
- Partner Resources
-
-
Support
-
Support Portal
Find answers to your questions by searching across our knowledge base, community, technical documentation and video tutorials
Learn MoreSupport PortalFind answers to your questions by searching across our knowledge base, community, technical documentation and video tutorials
Learn More - Support
- Resources
- Capture Labs
-
- Company
- Contact Us
SMA100: How to generate Certificate Signing Request and import a signed certificate?


Description
This article provides you information about how to generate Certificate Signing Request and how to import a signed certificate.
Resolution
Procedure:
 TIP: Please create a System setting export backup before modifying/editing any settings
 NOTE: If your SSL CA Certificate Provider has just renewed your certificate without you needing to do csr reissue. Please Locate your Original ( Latest CSR generated request from this same SMA ) server.key file . Then proceed to step below using that file in following steps. Rename the .crt file to server.crt and zip the directory.
To generate a CSR:
- Navigate to the System | Certificates page and click on the Generate CSR button.
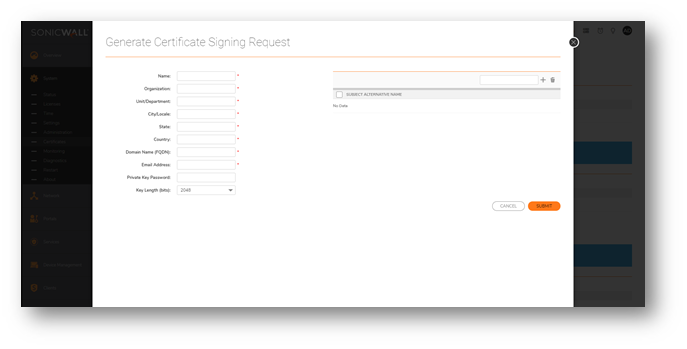
- Enter all the information marked with asterisk (*) in the Generate Certificate Signing Request window.
- Private key password is not required. But if you are entering a private key password, please document it, as it is required during the certificate import.
- Save the csr.zip file from the SMA console to your local workstation.
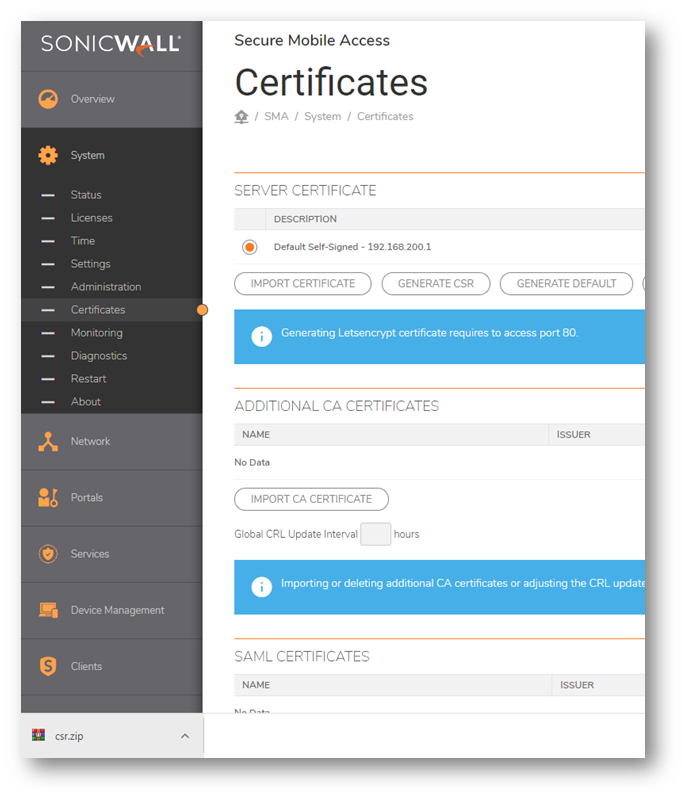
- Unzip the csr.zip and extract the server.key file for later use after you receive your signed certificate from the CA.

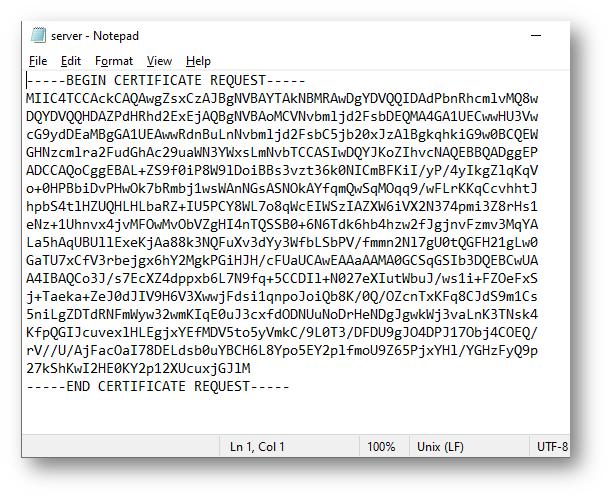
- Open the server.csr file in Notepad and copy the contents into the CA web interface while making your certificate request.
- When pulling the CA signed certificate the format of this certificate should be for an Apache Server
- The CA will typically provide two certificate files. One will contain the word 'bundle' in the name. This file contains the CA intermediate and root certificates. That certificate bundle is imported by clicking on the 'Import Ca Certificate' button under System > Certificates.
- After the .crt file is received from the CA, copy the .crt file and the .key file that was created during your CSR request to a common directory.
- Rename the .crt file to server.crt and zip the directory.

- Select the server.key file and server.crt file together and right click, choose the option -Send to Compressed (zipped) folder.
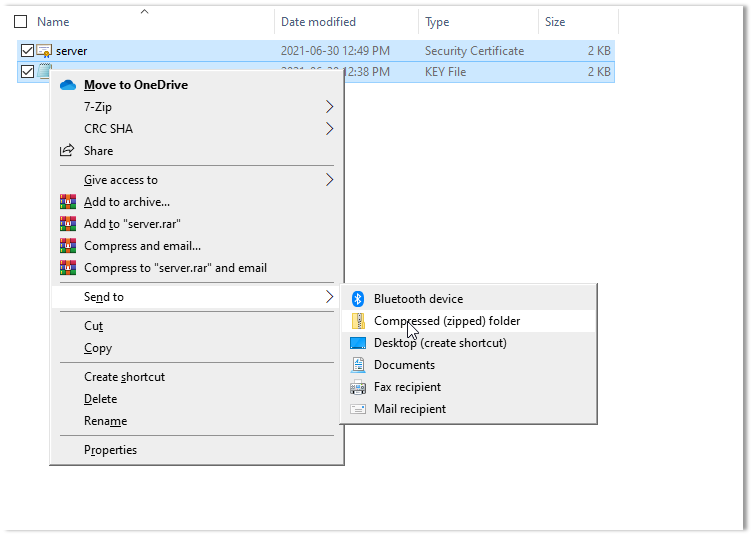
- The folder will be named server.zip.
Importing Certificate into SMA:
- Login to the SRA/SMA appliance.
- Navigate to System | Certificates page.
- Click on the Import certificate button.
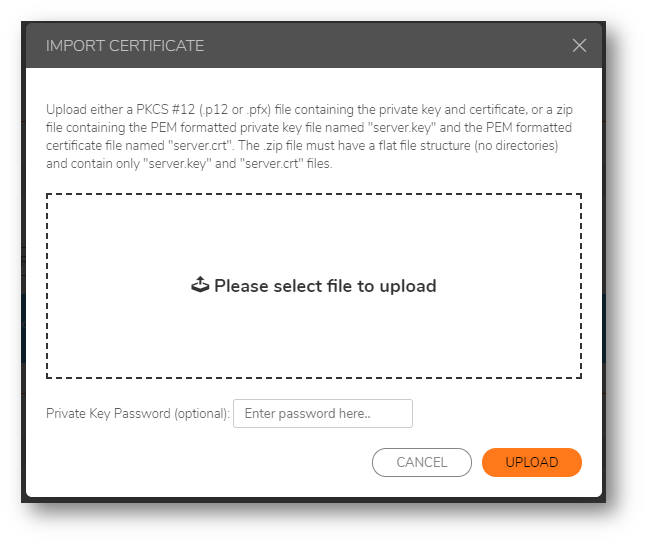
- In the pop-up that appears, select the server.zip file you just created.
- Enter the Private key password if you entered one when creating the CSR.
- Click on Upload.
- The certificate will be activated only when the radio button is moved to the imported certificate.
- Move the radio button next to the new certificate and click on the Accept button.
 CAUTION: Activating the certificate would reboot the SMA. After the reboot, the certificate will be active.
Related Articles
- How to download Client Installation package and the access agents from the appliance using WinSCP
- SMA 1000: How to update Advanced EPC Signatures to the Latest Version
- If OTP is enabled, NX disconnects after SMA100 Connect Agent installation


 YES
YES NO
NO