


-
Products
-
SonicPlatform
SonicPlatform is the cybersecurity platform purpose-built for MSPs, making managing complex security environments among multiple tenants easy and streamlined.
Discover More
-
-
Solutions
-
Federal
Protect Federal Agencies and Networks with scalable, purpose-built cybersecurity solutions
Learn MoreFederalProtect Federal Agencies and Networks with scalable, purpose-built cybersecurity solutions
Learn More - Industries
- Use Cases
-
-
Partners
-
Partner Portal
Access to deal registration, MDF, sales and marketing tools, training and more
Learn MorePartner PortalAccess to deal registration, MDF, sales and marketing tools, training and more
Learn More - SonicWall Partners
- Partner Resources
-
-
Support
-
Support Portal
Find answers to your questions by searching across our knowledge base, community, technical documentation and video tutorials
Learn MoreSupport PortalFind answers to your questions by searching across our knowledge base, community, technical documentation and video tutorials
Learn More - Support
- Resources
- Capture Labs
-
- Company
- Contact Us
Service Configuration - How to configure NTP and SNMP services?
 11/10/2023
  16 People found this article helpful
 493,776 Views

Description
A service configuration includes configuring both the Network Time Protocol (NTP) and the Simple Network
Management Protocol (SNMP) service settings.
NTP(Network Time Protocol) is a protocol used to synchronize computer clock times within a network of computers. NTP uses Coordinated Universal Time (UTC) to synchronize computer clock times to a millisecond, and sometimes, to a fraction of a millisecond.
SNMP (Simple Network Management Protocol) is a network protocol used over User Datagram Protocol (UDP)
that allows you to monitor the status of the SonicWALL security appliance and receive notification of
critical events as they occur on the network. SonicWALL security appliance supports SNMP v1/v2c/v3
and all relevant Management Information Base II (MIBII) groups except egp and at.
This article describes how to configure NTP and SNMP services on the SonicWALL firewall.
Resolution
Resolution for SonicOS 7.X
This release includes significant user interface changes and many new features that are different from the SonicOS 6.5 and earlier firmware. The below resolution is for customers using SonicOS 7.X firmware.
To add an NTP server to the SonicWall firewall follow the steps below :
- Navigate to DEVICE | Settings | Time.
- Under ‘Time Zone’, select the appropriate time zone.
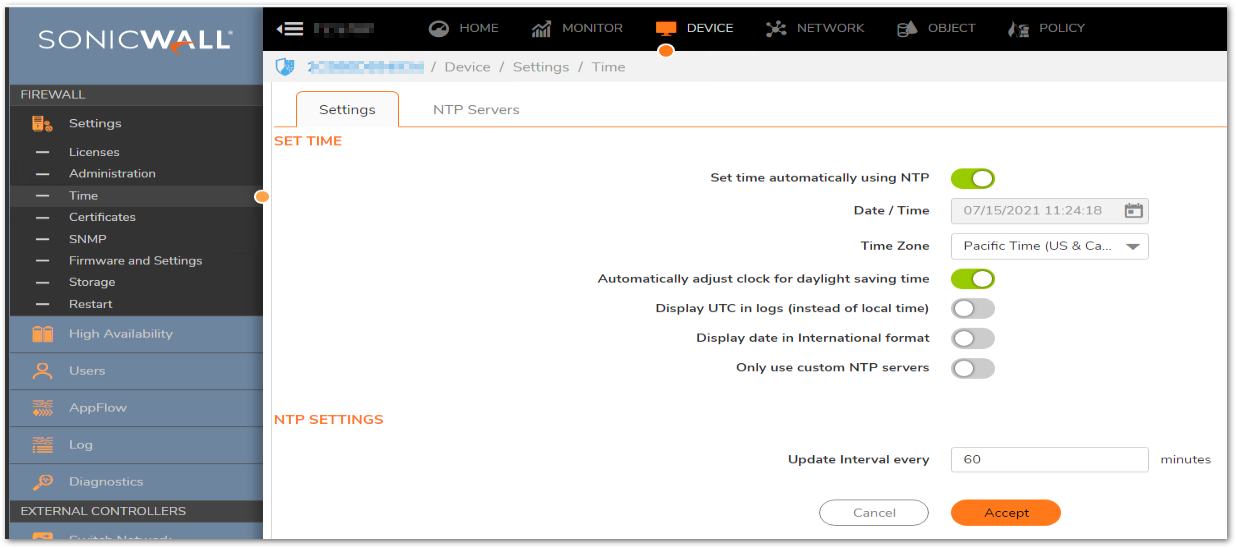
 NOTE: Some installations may require GMT instead of local time.
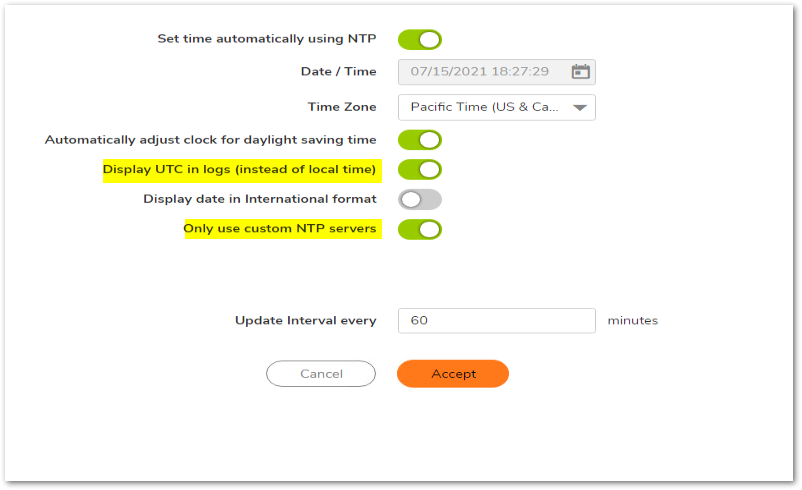
 - Enable ‘Display UTC in logs (instead of local time).
- Enable ‘Only use custom NTP servers’.
- Click Accept.
- Click on NTP Server.
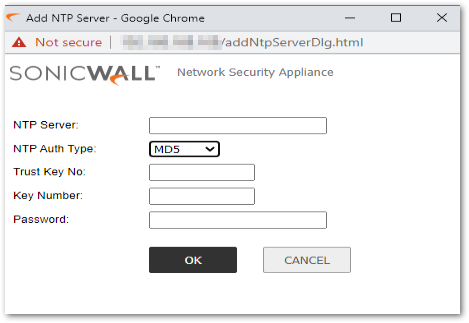
- Click on Add. The Add NTP Server window is displayed.
- Type the IP address of an NTP server in the NTP Server field.
- Enter a Trust Key No.
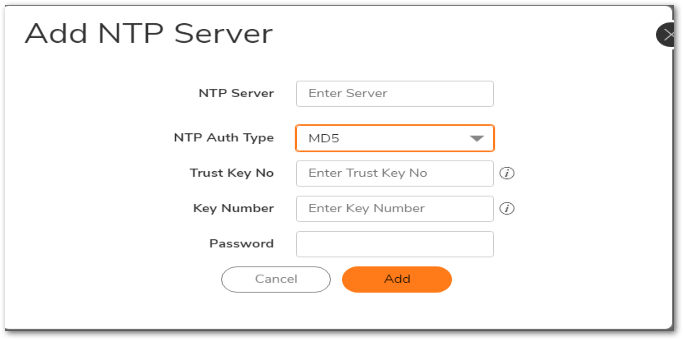 NOTE: The Trust Key can only be five numeric characters in length.
 - Click Add.
To add an SNMP server to the SonicWall firewall follow the steps below :
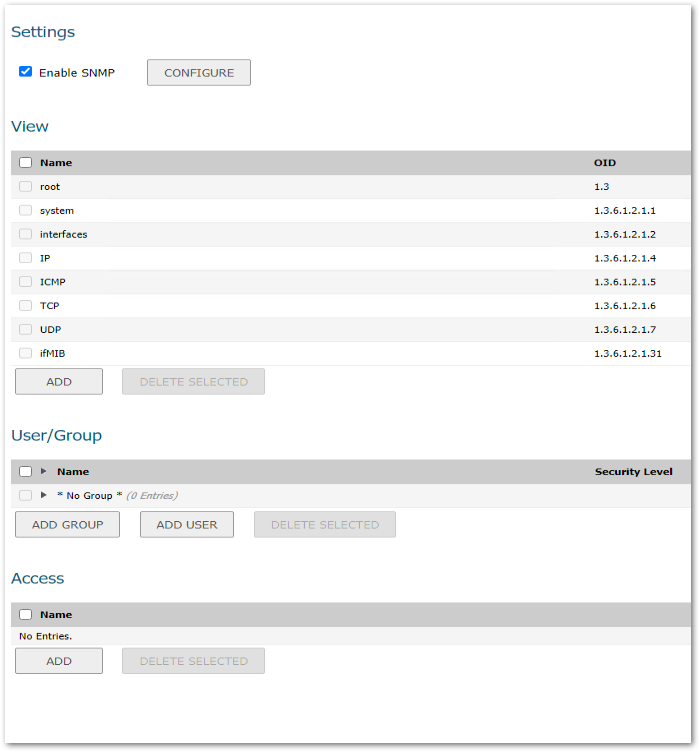
- Navigate to DEVICE | Settings |SNMP.
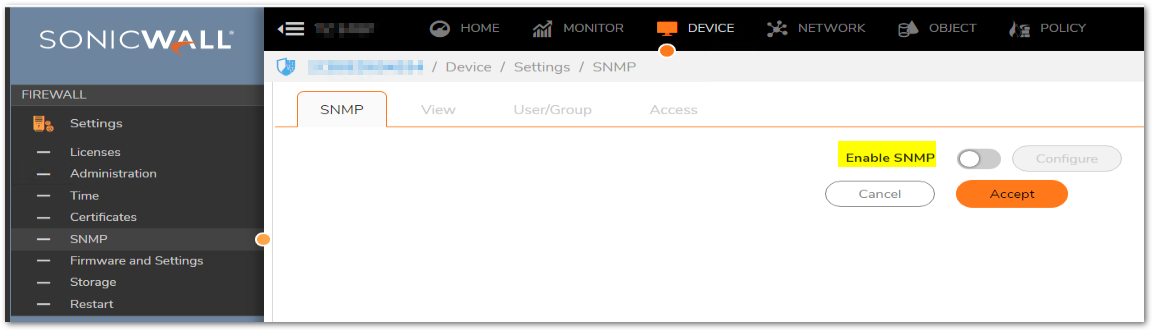
- Select Enable SNMP, and then click Accept. The Configure button becomes active and the display expands.
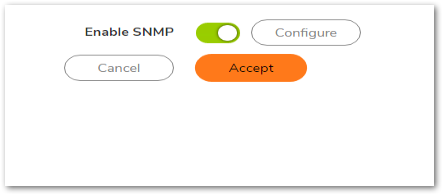
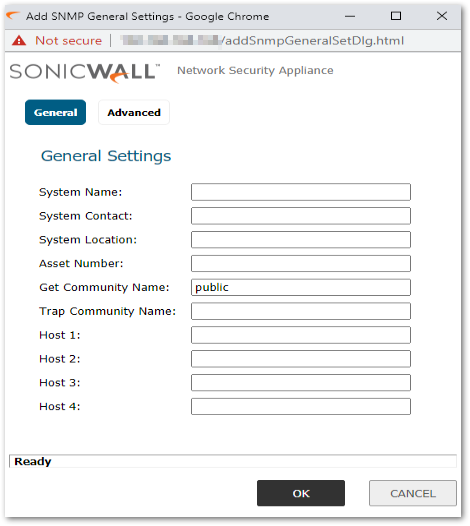
- To configure the SNMP interface, click Configure. The Configure SNMP dialog displays with two tabs: General and Advanced.
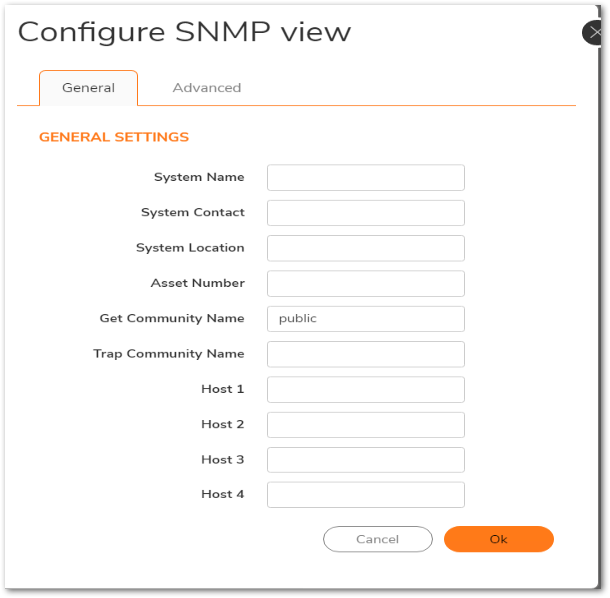
- Type the host name of the SonicWall appliance in the System Name field.
- Type the network administrator’s name in the System Contact field.
- Type an e-mail address, telephone number, or pager number in the System Location field.
- When SNMPv3 configuration is used, an Asset Number field displays on the menu. Enter the Asset Number of the appliance.
- Type a name for a group or community of administrators who can view SNMP data in the Get Community Name field (Default is public).
- Type a name for a group or community of administrators who can view SNMP traps in the Trap Community Name field.
- Type the IP address or host name of the SNMP management system receiving SNMP traps in the Host 1 through Host 4 fields. NOTE: You must configure at least one IP address or host name, but up to four addresses or host names can be used.
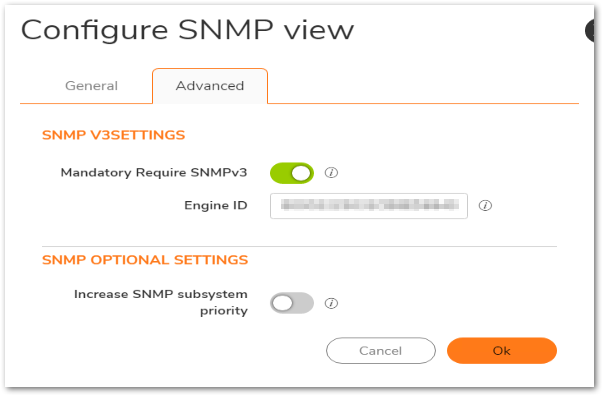
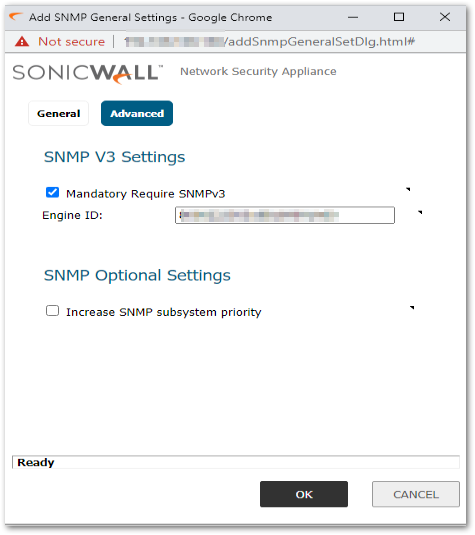
- Click the Advanced tab.
- Enable “Mandatory Require SNMPv3”. The default Engine-ID is generally acceptable.
- Click OK.
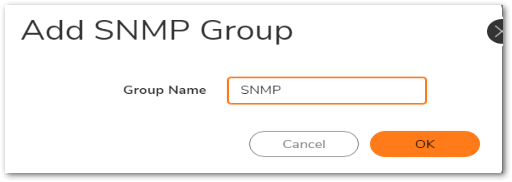
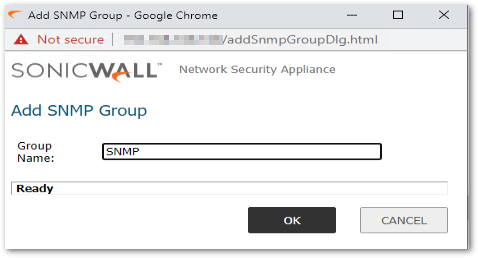
Adding SNMPv3 User and Group Access: - Click on User/Group Section, select “Add Group”.
- Enter the SNMPv3 Group name.
- Select OK.
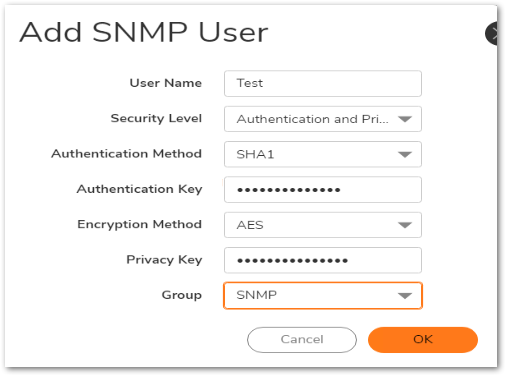
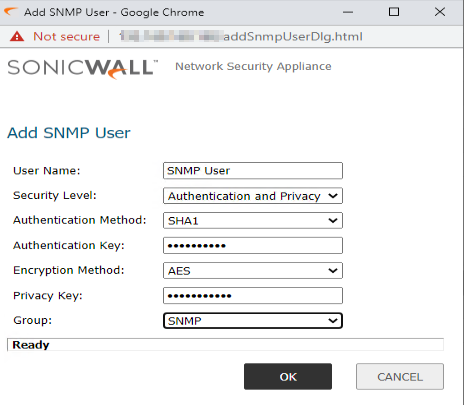
- Under the User/Group Section, select "Add User”.
- Enter the Username.
- From the Security Level drop-down box, select “Authentication and Privacy”.
- From the Authentication Method drop-down box, select “SHA1”.
- Enter the Authentication Key.
- From the Encryption Method drop-box select “AES”.
- Enter the Privacy Key.
- From the Group drop-down box select the SNMPv3 Group name created in step 14.
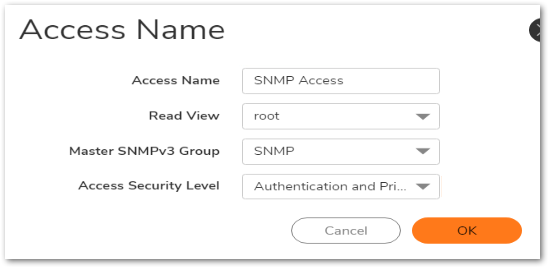
- Under the Access Section, select “Add”.
- Enter the name of the access policy under “Access Name”.
- From the Read View drop-down box, select root.
- From the Master SNMPv3 Group, select the Group name created in step 14.
- From the Access Security Level drop-down box, select “Authentication and Privacy”.
- Click OK.
Resolution for SonicOS 6.5
This release includes significant user interface changes and many new features that are different from the SonicOS 6.2 and earlier firmware. The below resolution is for customers using SonicOS 6.5 firmware.
To add an NTP server to the SonicWall firewall follow the steps below :
- Navigate to MANAGE | Appliance >System Time.
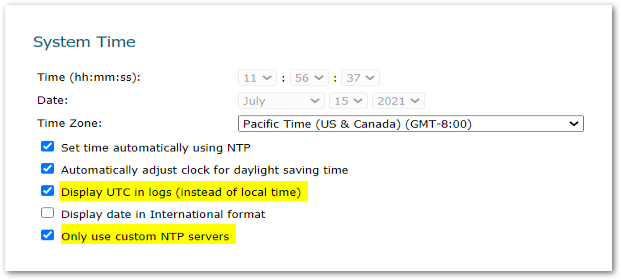
- Under ‘Time Zone’, select the appropriate time zone.
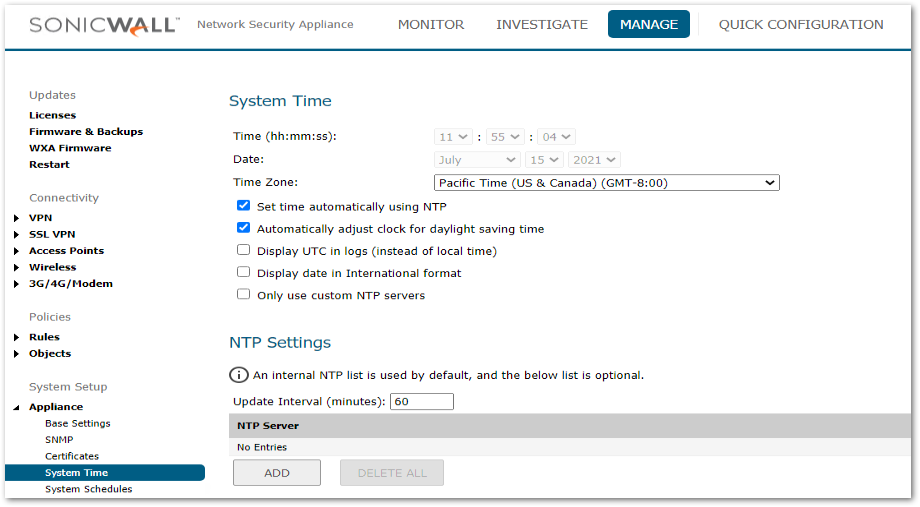 NOTE: Some installations may require GMT instead of local time.
 - Enable "Display UTC in logs (instead of local time)".
- Enable "Only use custom NTP servers".
- Click "Accept".
- Under NTP settings, Click Add. The Add NTP Server window is displayed.
- Type the IP address of an NTP server in the NTP Server field.
- Enter a Trust Key No. NOTE: The Trust Key can only be five numeric characters in length.
- Click OK.
- Click Accept on the System Time page to update the settings.
To add an SNMP server to the SonicWall firewall follow the steps below :
- Navigate to MANAGE | Appliance >SNMP.

- Select Enable SNMP, and then click Accept. The Configure button becomes active and the display expands.
- To configure the SNMP interface, click Configure. The Configure SNMP dialog displays with two tabs: General and Advanced.
- Type the host name of the SonicWall appliance in the System Name field.
- Type the network administrator’s name in the System Contact field.
- Type an e-mail address, telephone number, or pager number in the System Location field.
- When SNMPv3 configuration is used, an Asset Number field displays on the menu. Enter the Asset Number of the appliance.
- Type a name for a group or community of administrators who can view SNMP data in the Get Community Name field (Default is Public).
- Type a name for a group or community of administrators who can view SNMP traps in the Trap Community Name field.
- Type the IP address or host name of the SNMP management system receiving SNMP traps in the Host 1 through Host 4 fields. NOTE: You must configure at least one IP address or host name, but up to four addresses or host names can be used.
- Click the Advanced tab.
- Enable “Mandatory Require SNMPv3”. The default Engine-ID is generally acceptable.
- Click OK.
Adding SNMPv3 User and Group Access: - Under the User/Group Section, select “Add Group”.
- Enter the SNMPv3 Group name.
- Select OK.
- Under the User/Group Section, select “Add User”.
- Enter the Username.
- From the Security Level drop-down box, select “Authentication and Privacy".
- From the Authentication Method drop-down box, select “SHA1".
- Enter the Authentication Key.
- From the Encryption Method drop-box select “AES”.
- Enter the Privacy Key.
- From the Group drop-down box select the SNMPv3 Group name created in step 14.
- Under the Access Section, select “Add”.
- Enter the name of the access policy under “Access Name”.
- From the Read View drop-down box, select root.
- From the Master SNMPv3 Group, select the Group name created in step 14.
- From the Access Security Level drop-down box, select “Authentication and Privacy”.
- Click OK.

Related Articles
- Error:"Invalid API Argument" when modifying the access rules
- Cysurance Partner FAQ
- Configure probe monitoring for WAN Failover and Loadbalancing - SonicWall UTM
Categories
- Firewalls > TZ Series
- Firewalls > NSa Series
- Firewalls > SonicWall SuperMassive 9000 Series
- Firewalls > SonicWall NSA Series
 YES
YES NO
NO