-
Products
-
SonicPlatform
SonicPlatform is the cybersecurity platform purpose-built for MSPs, making managing complex security environments among multiple tenants easy and streamlined.
Discover More
-
-
Solutions
-
Federal
Protect Federal Agencies and Networks with scalable, purpose-built cybersecurity solutions
Learn MoreFederalProtect Federal Agencies and Networks with scalable, purpose-built cybersecurity solutions
Learn More - Industries
- Use Cases
-
-
Partners
-
Partner Portal
Access to deal registration, MDF, sales and marketing tools, training and more
Learn MorePartner PortalAccess to deal registration, MDF, sales and marketing tools, training and more
Learn More - SonicWall Partners
- Partner Resources
-
-
Support
-
Support Portal
Find answers to your questions by searching across our knowledge base, community, technical documentation and video tutorials
Learn MoreSupport PortalFind answers to your questions by searching across our knowledge base, community, technical documentation and video tutorials
Learn More - Support
- Resources
- Capture Labs
-
- Company
- Contact Us
Quick Guide to Adding a Resource, User/Group Definition, and Access Rule in AMC


Description
Quick Guide to Adding a Resource, User/Group Definition, and Access Rule in AMC
Resolution
Overview:
This KB offers a quick example of creating a host resource, a user/group definition, and an access control rule in AMC.
Assumptions:
The following steps assume the following:
- The backend authentication server is based on LDAP.
- The local subnet being created on the appliance is in the 192.168.0.0/255.255.0.0 range.
- A group of users will be allowed access to the subnet listed above.
- A realm has already been configured that points to your authentication server.
Adding a resource:
- Log in to AMC.
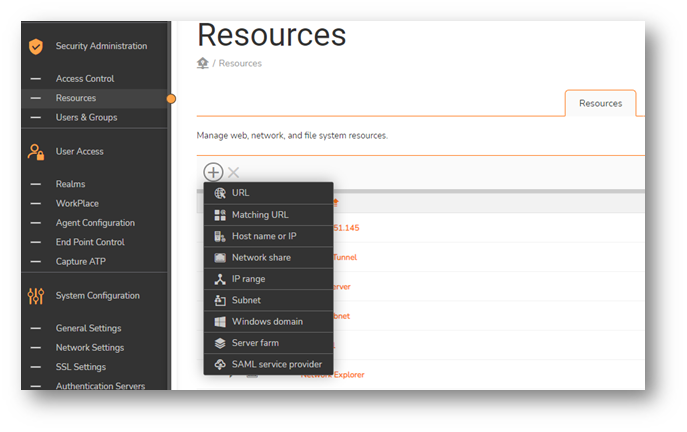
- On the left side of the page, click Resources under Security Administration.
- Click the + button and then choose Subnet.
- On the following page, enter a Name for the resource, enter the IP address, and then enter the Subnet mask:
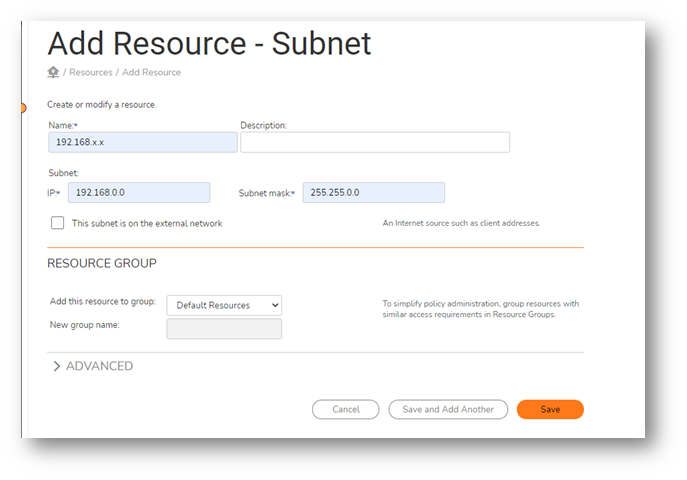
- After you've completed this, click the Save button.
Adding a user/group definition:
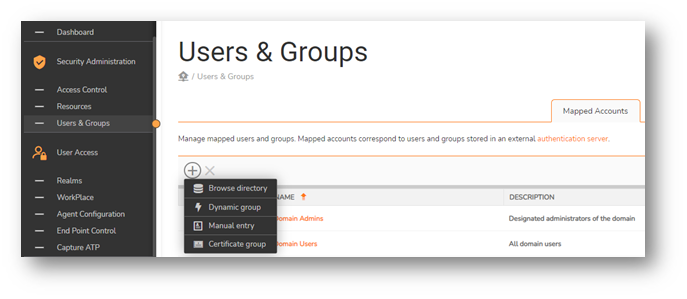
- On the left side in AMC, click Users & Groups under Security Administration.
- On the Groups page, click + and then choose Browse Directory.
- A new window will open. In this window, in the Search for text box, enter the name of the group you want to use in your access control rule, and then click Search:
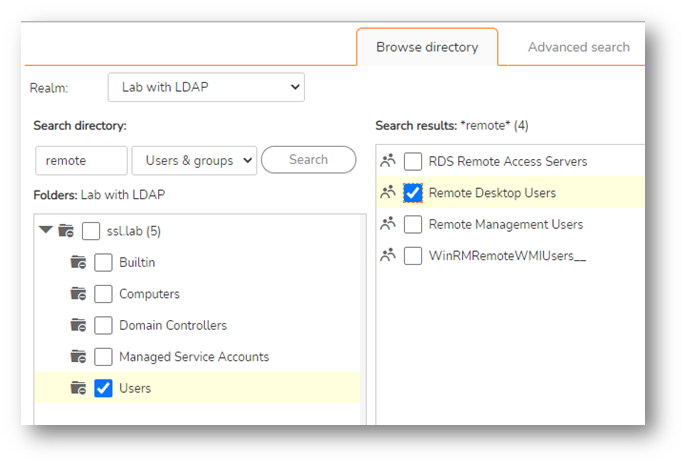
- Click the checkbox next to the group name and then at the bottom of the window, click Add Selected.
- In the list of groups, you'll now see the group you just added:

Adding an Access Control Rule:
- In AMC, click Access Control under Security Administration.
- Click the + button.
- Set the appropriate Number in the rule (rules are evaluated in order, from top to bottom).
- Set your Action to Permit or Deny access to the resource.
- This rule will allow access from the user group you created to the subnet resource you created:
- In the From text box, click the Edit button.
- In the separate window that opens, select the group you created, and then click Save:
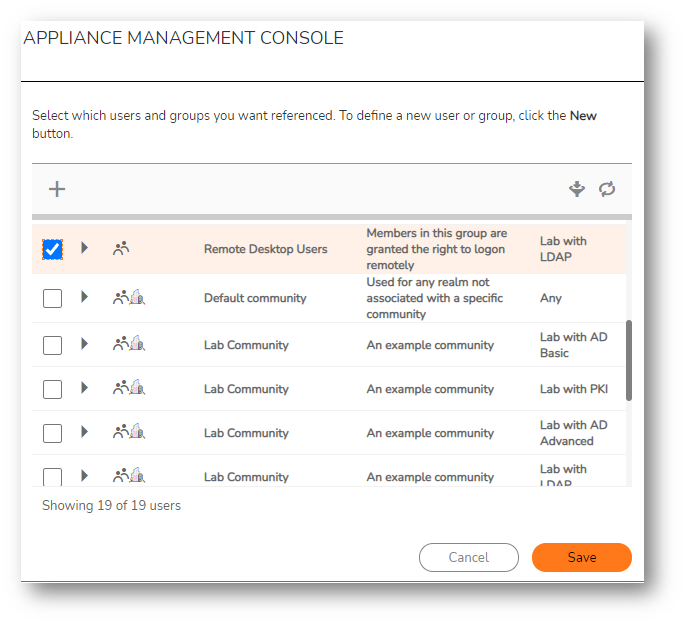
- In the To text box, click the Edit button.
- In the separate window that opens, select the subnet resource you created earlier, and then click Save:
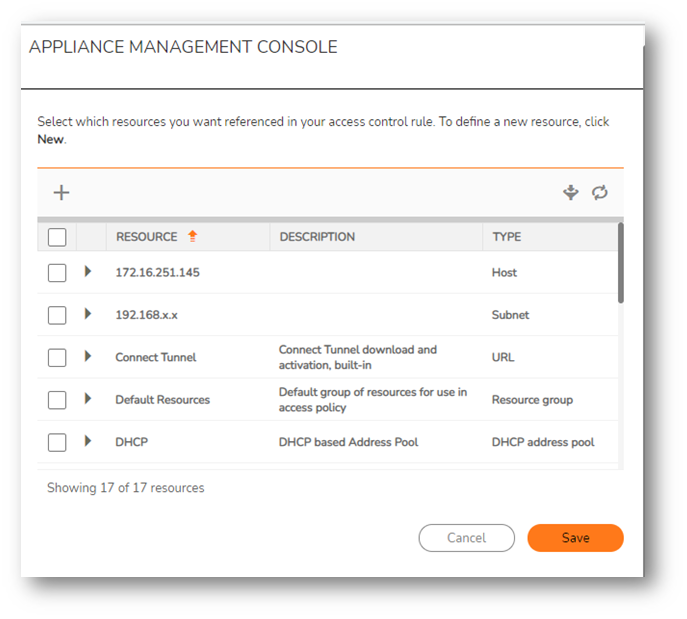
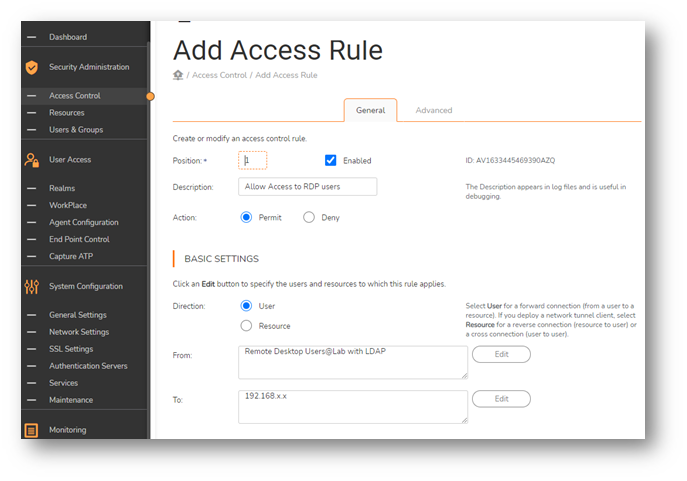
- Once access rule is added, you should see it listed as below:

- Click Pending changes to apply changes to the appliance so that the resource, group definition and access control rule will take effect for users.
 NOTE: For detailed instructions on how to add resources, user/group definitions, and access control rules, Please see the 12.4 Administration Guide
Related Articles
- How to download Client Installation package and the access agents from the appliance using WinSCP
- SMA 1000: How to update Advanced EPC Signatures to the Latest Version
- If OTP is enabled, NX disconnects after SMA100 Connect Agent installation


 YES
YES NO
NO