-
Products
-
SonicPlatform
SonicPlatform is the cybersecurity platform purpose-built for MSPs, making managing complex security environments among multiple tenants easy and streamlined.
Discover More
-
-
Solutions
-
Federal
Protect Federal Agencies and Networks with scalable, purpose-built cybersecurity solutions
Learn MoreFederalProtect Federal Agencies and Networks with scalable, purpose-built cybersecurity solutions
Learn More - Industries
- Use Cases
-
-
Partners
-
Partner Portal
Access to deal registration, MDF, sales and marketing tools, training and more
Learn MorePartner PortalAccess to deal registration, MDF, sales and marketing tools, training and more
Learn More - SonicWall Partners
- Partner Resources
-
-
Support
-
Support Portal
Find answers to your questions by searching across our knowledge base, community, technical documentation and video tutorials
Learn MoreSupport PortalFind answers to your questions by searching across our knowledge base, community, technical documentation and video tutorials
Learn More - Support
- Resources
- Capture Labs
-
- Company
- Contact Us
Modifying the SonicWall login banner Page Display


Description
This article explains how to modify the login banner page of the SonicWall to display custom content
Resolution
Resolution for SonicOS 7.X
This release includes significant user interface changes and many new features that are different from the SonicOS 6.5 and earlier firmware. The below resolution is for customers using SonicOS 7.X firmware.
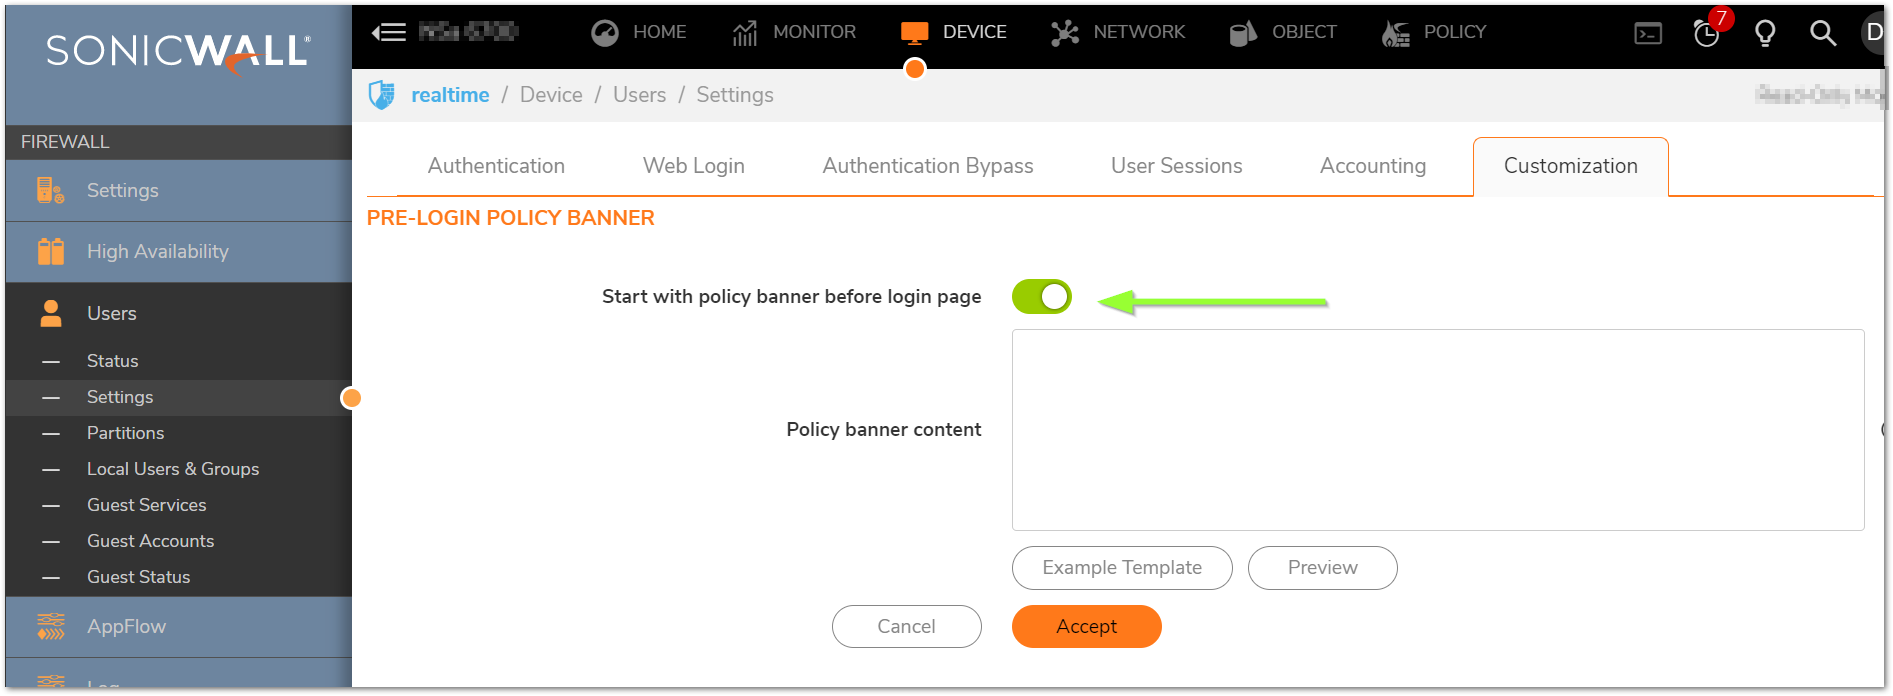
- Navigate to DEVICE |USERS | SETTINGS.
- Click Customization.
- In the Pre-Login Policy Banner section, select Start With Policy Banner Before Login Window. This option is not selected by default
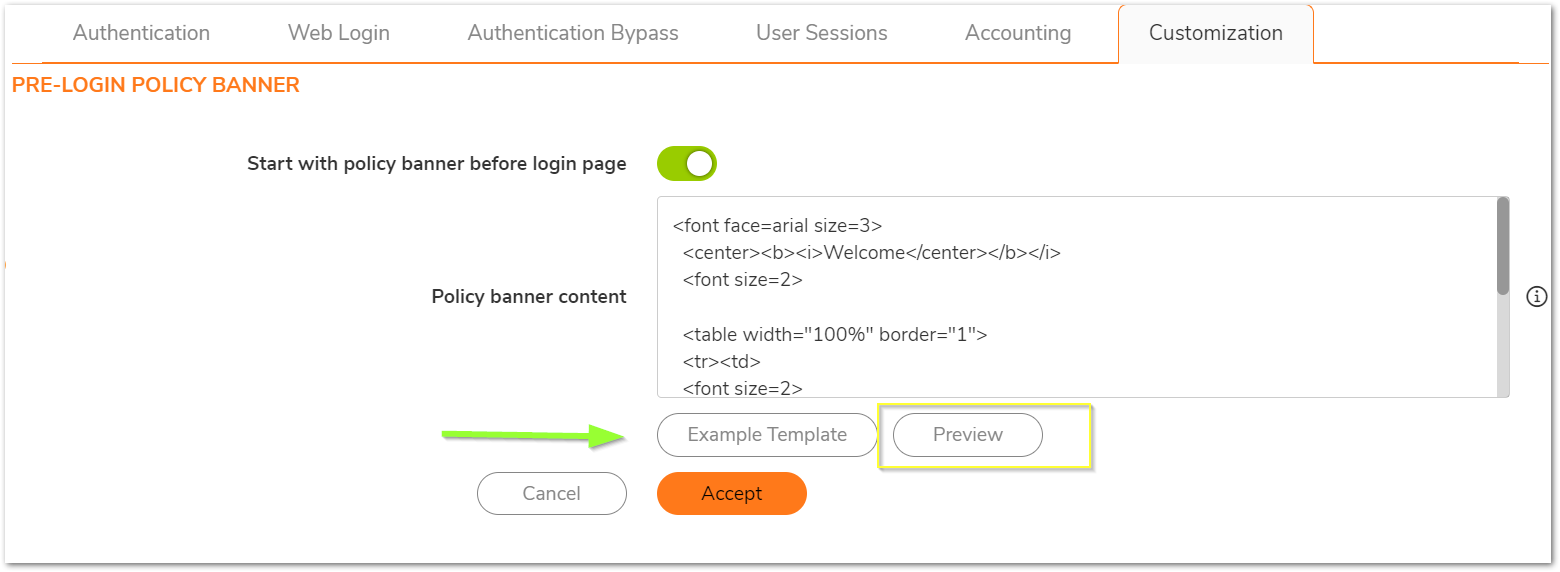
- To see a sample banner, click Example Template. The Policy banner content field is populated and we can also Preview the banner.
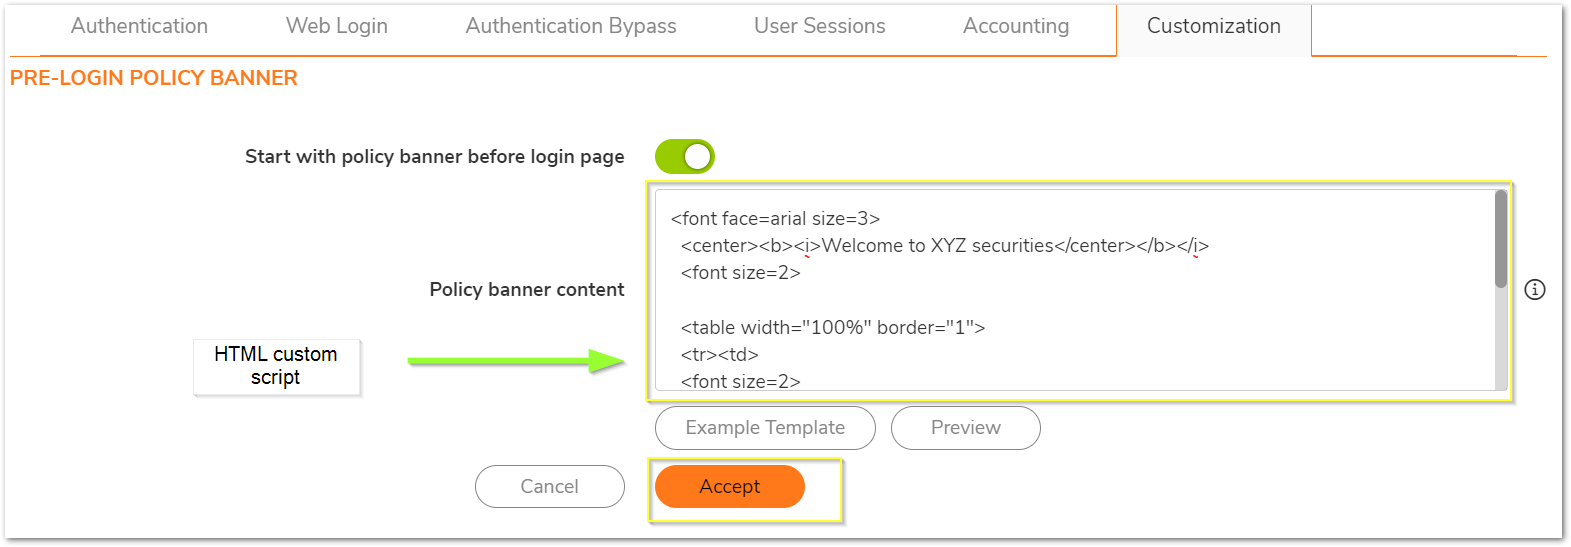
- Make changes to the sample banner or enter new html custom script.
- Click Accept
Resolution for SonicOS 6.5
This release includes significant user interface changes and many new features that are different from the SonicOS 6.2 and earlier firmware. The below resolution is for customers using SonicOS 6.5 firmware.
We have an option in SonicWall to modify the Default Login page of the device with own HTML coding.
The default Login Page of the SonicWall is as below.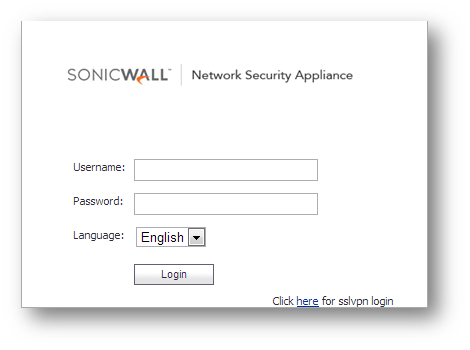
- Navigate to Manage at the top of the page.
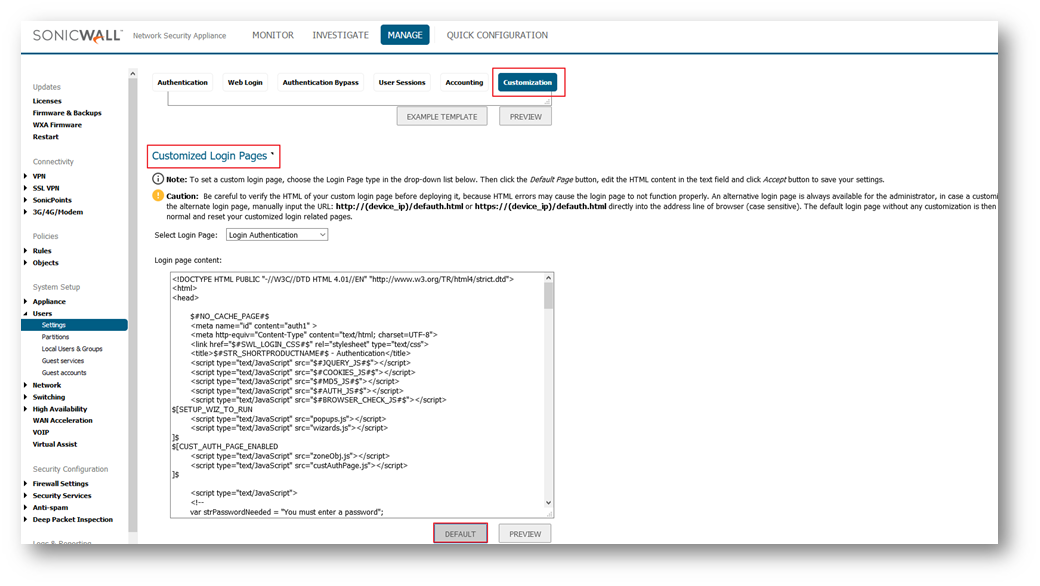
- Navigate to Users | Settings and select the Customization tab. Scroll down to the bottom will see Customize Login Pages as below select Login Authentication.
- Click on Default Button will see default HTML Script for Login page.
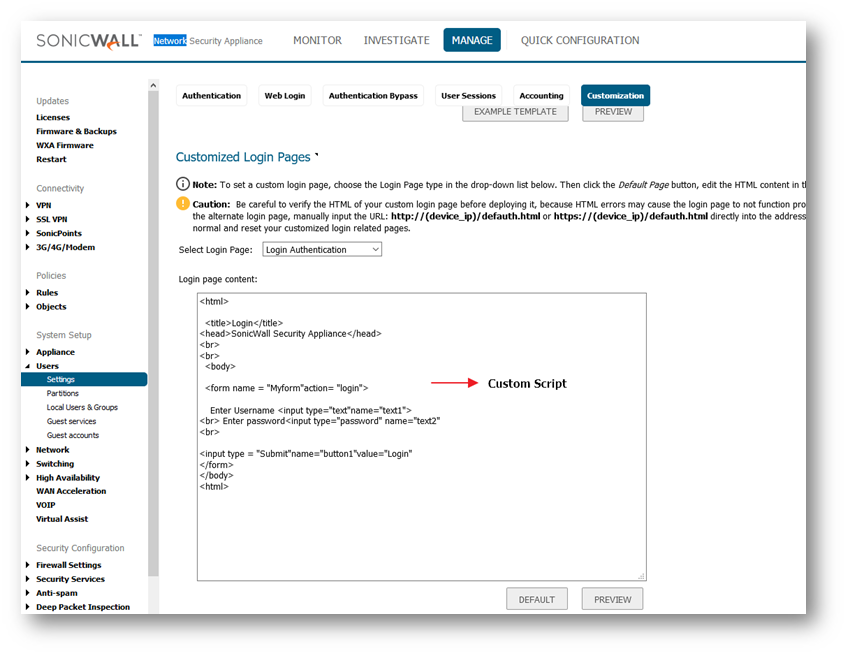
- Modify the default content with own HTML scripts as given below and click on Accept button to take effect.
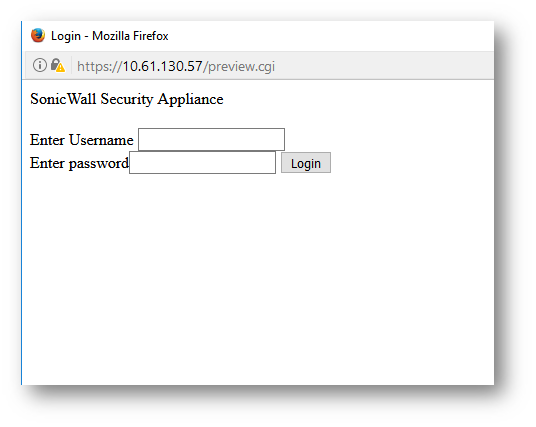
- After the change logout and Login back with SonicWall IP address, the Login page will be as below.
Resolution for SonicOS 6.2 and Below
The below resolution is for customers using SonicOS 6.2 and earlier firmware. For firewalls that are generation 6 and newer we suggest to upgrade to the latest general release of SonicOS 6.5 firmware.
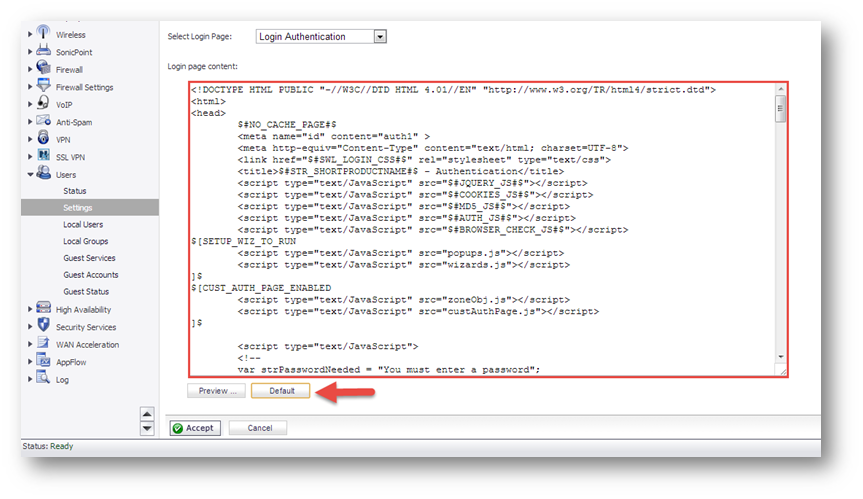
- Login to SonicWall and Navigate to User |Settings, scroll down to the bottom will see Customize Login Pages as below select Login Authentication.
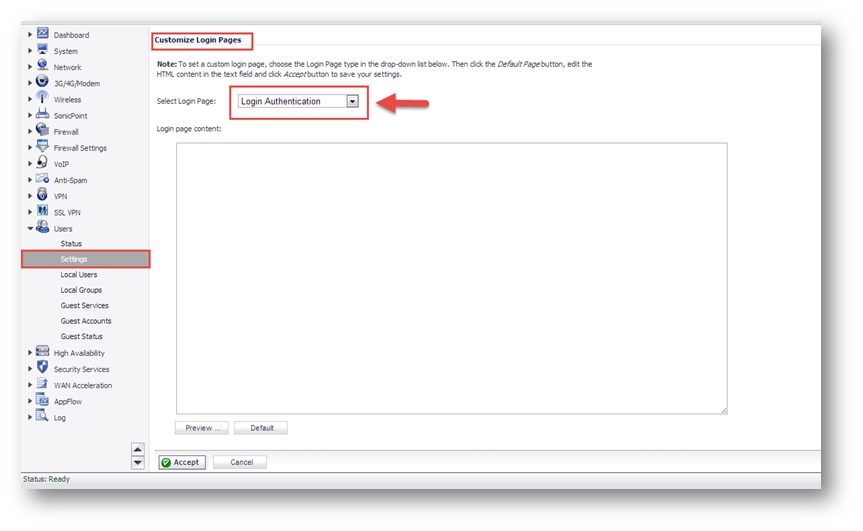
- Click Default Button will see default HTML Script for Login page.
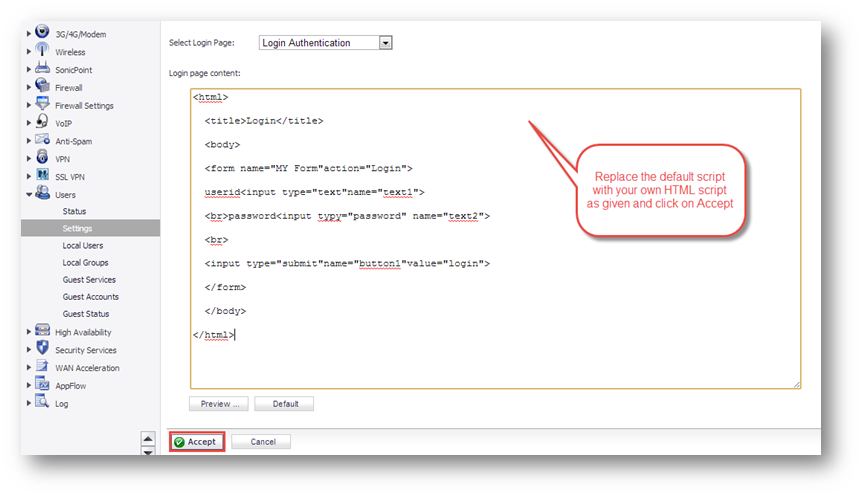
- Modify the default content with own HTML scripts as given below and click on Accept button to take effect.
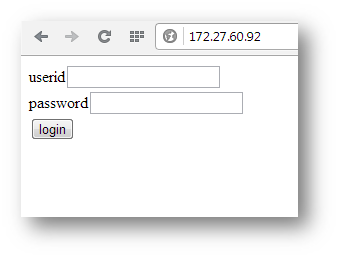
- After the change logout and Login back with SonicWall IP address, the Login page will be as below.
Related Articles
- Error:"Invalid API Argument" when modifying the access rules
- Cysurance Partner FAQ
- Configure probe monitoring for WAN Failover and Loadbalancing - SonicWall UTM
Categories
- Firewalls > SonicWall NSA Series > Firewall Management UI
- Firewalls > SonicWall SuperMassive 9000 Series > Firewall Management UI
- Firewalls > TZ Series > Firewall Management UI
- Firewalls > NSv Series > Firewall Management
- Firewalls > NSa Series > Firewall Management


 YES
YES NO
NO