-
Products
-
SonicPlatform
SonicPlatform is the cybersecurity platform purpose-built for MSPs, making managing complex security environments among multiple tenants easy and streamlined.
Discover More
-
-
Solutions
-
Federal
Protect Federal Agencies and Networks with scalable, purpose-built cybersecurity solutions
Learn MoreFederalProtect Federal Agencies and Networks with scalable, purpose-built cybersecurity solutions
Learn More - Industries
- Use Cases
-
-
Partners
-
Partner Portal
Access to deal registration, MDF, sales and marketing tools, training and more
Learn MorePartner PortalAccess to deal registration, MDF, sales and marketing tools, training and more
Learn More - SonicWall Partners
- Partner Resources
-
-
Support
-
Support Portal
Find answers to your questions by searching across our knowledge base, community, technical documentation and video tutorials
Learn MoreSupport PortalFind answers to your questions by searching across our knowledge base, community, technical documentation and video tutorials
Learn More - Support
- Resources
- Capture Labs
-
- Company
- Contact Us
How to set up a NSA 6700 out of box?


Description
This article explains setting up a NSA 6700 SonicWall for the first time. Setting up a new NSA 6700 SonicWall involves the following steps:
- Registering the Product on MySonicWall account
- Downloading the Latest Firmware
- Package Content
- Front Panel
- Rear Panel
- Connect and Power ON
- Upgrading the Firmware
- Run the Setup Wizard or Manual Setup
- Registering the Product on GUI
Resolution
Registering the Product on MySonicWall account:
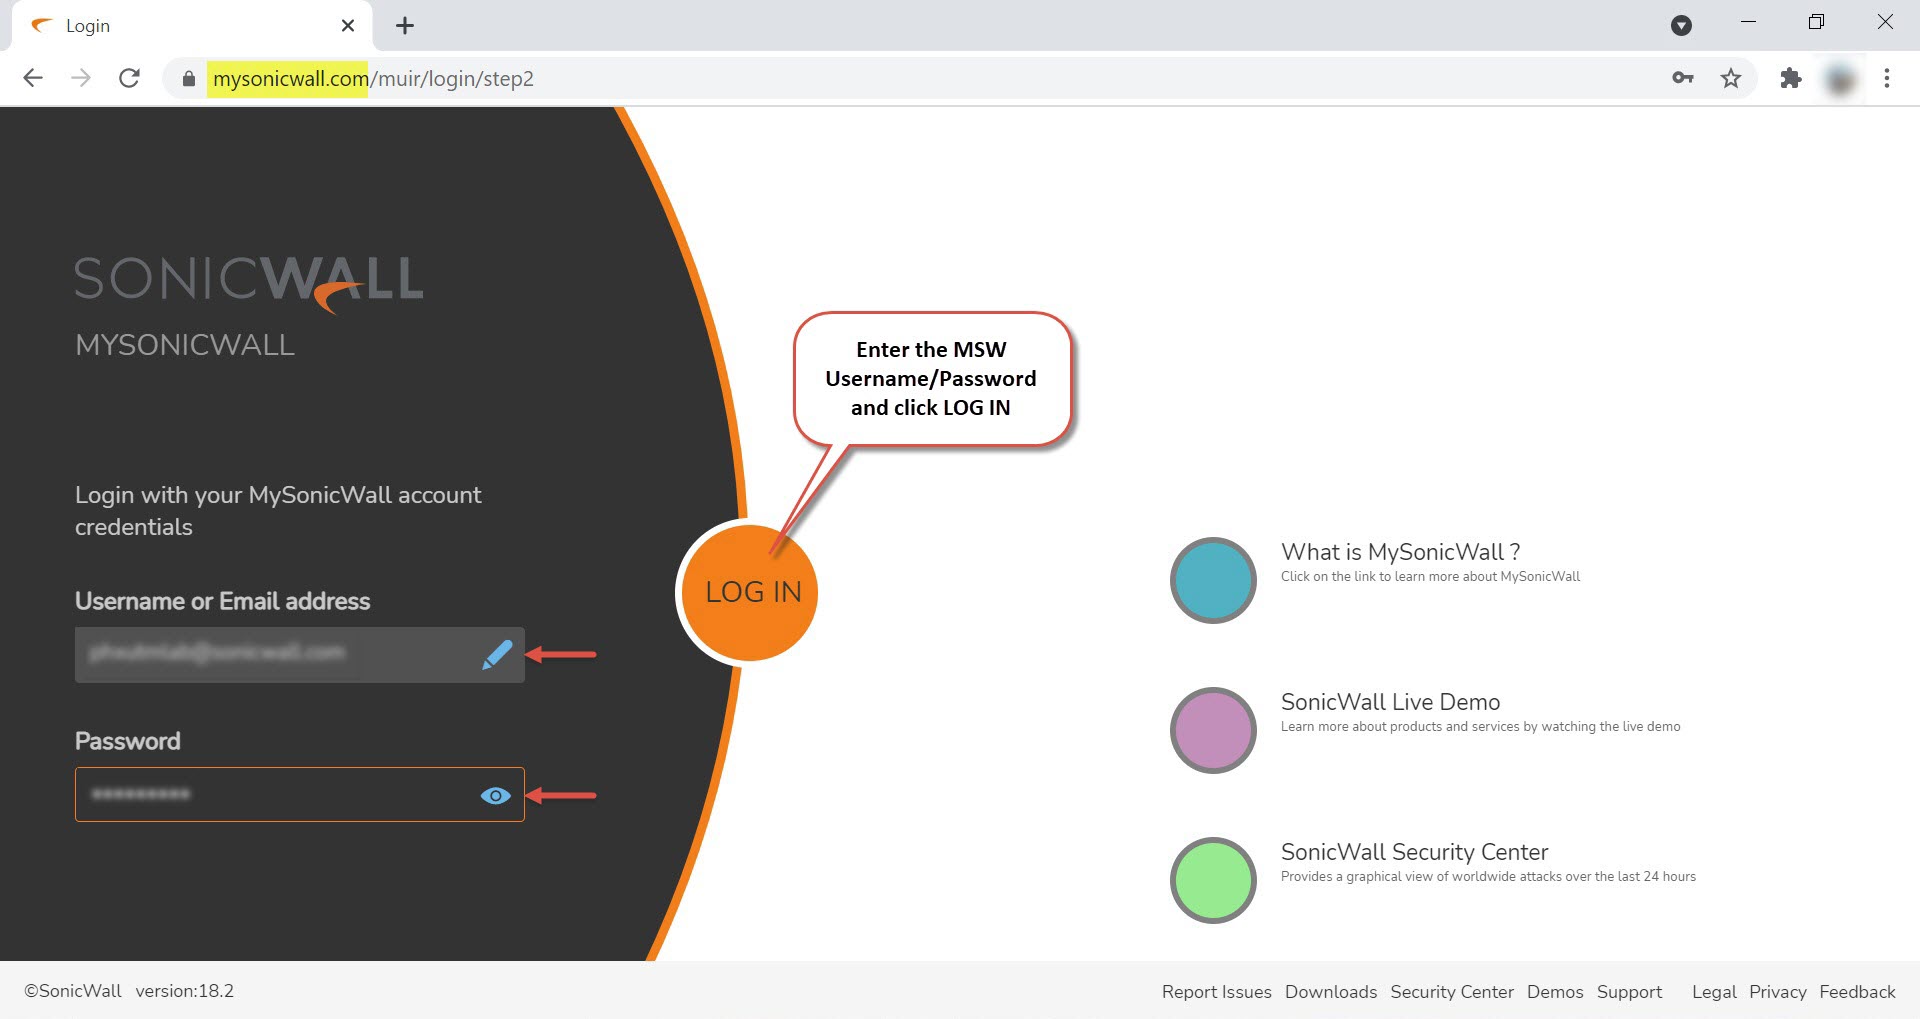
1. Visit MySonicWall account and enter the Username & Password and click LOG IN.
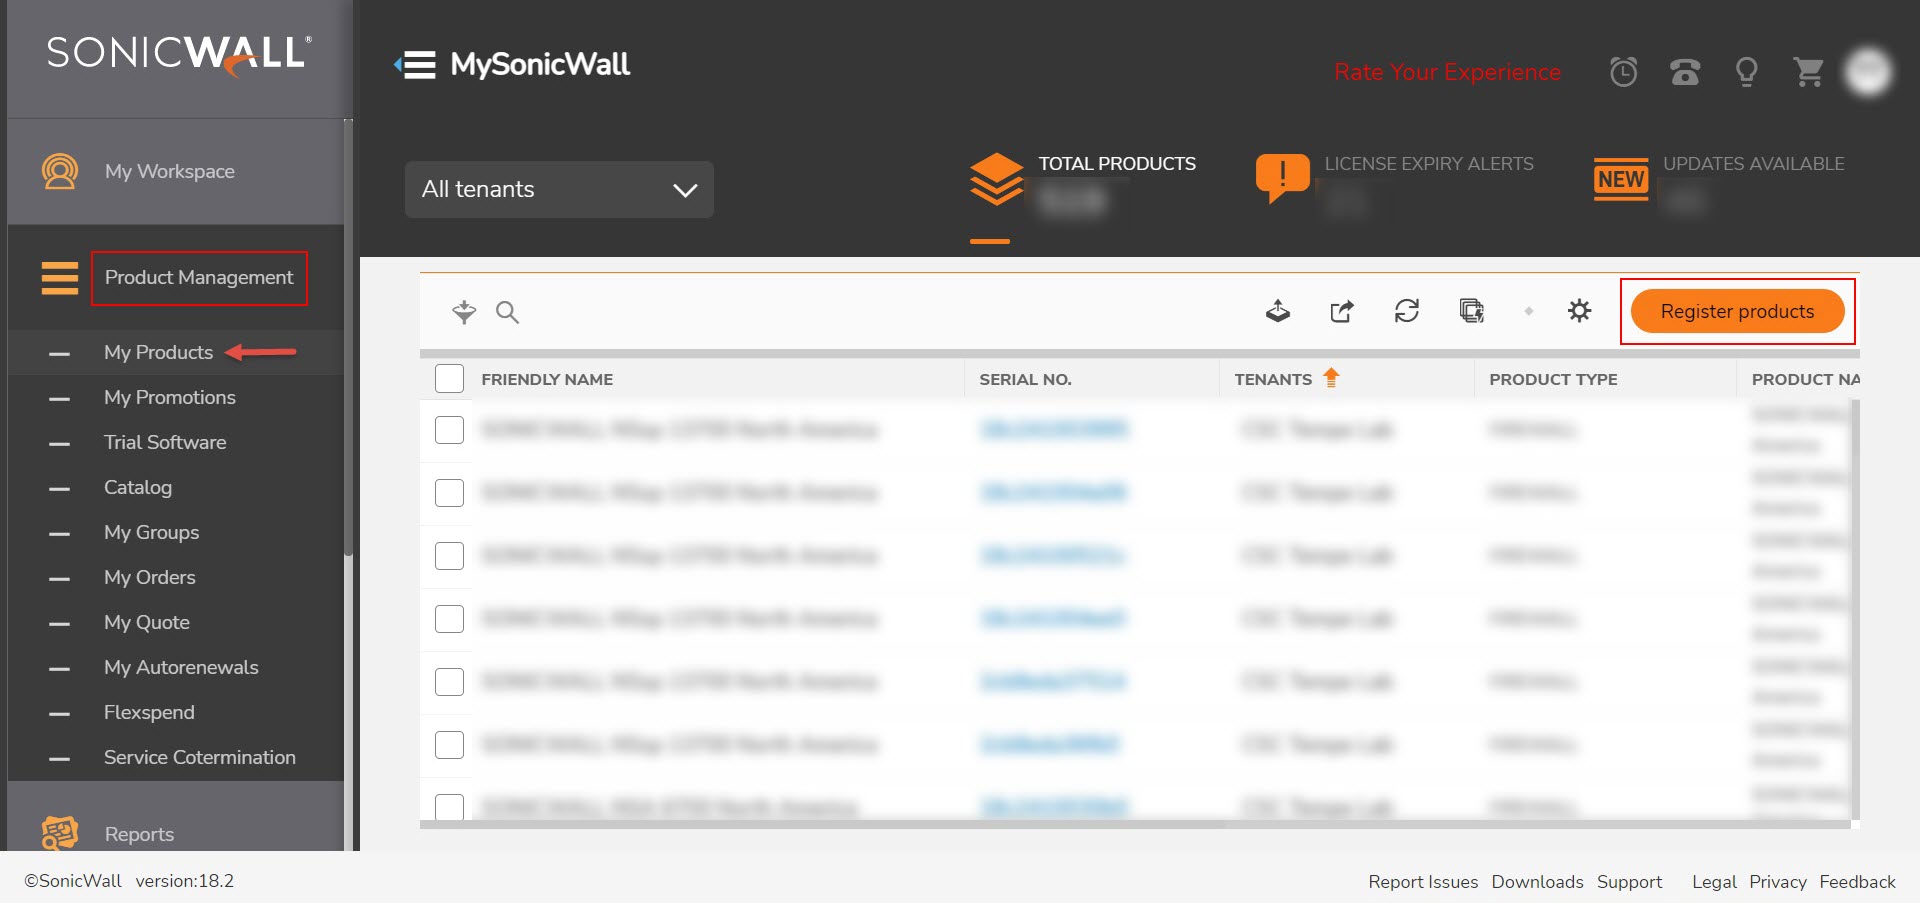
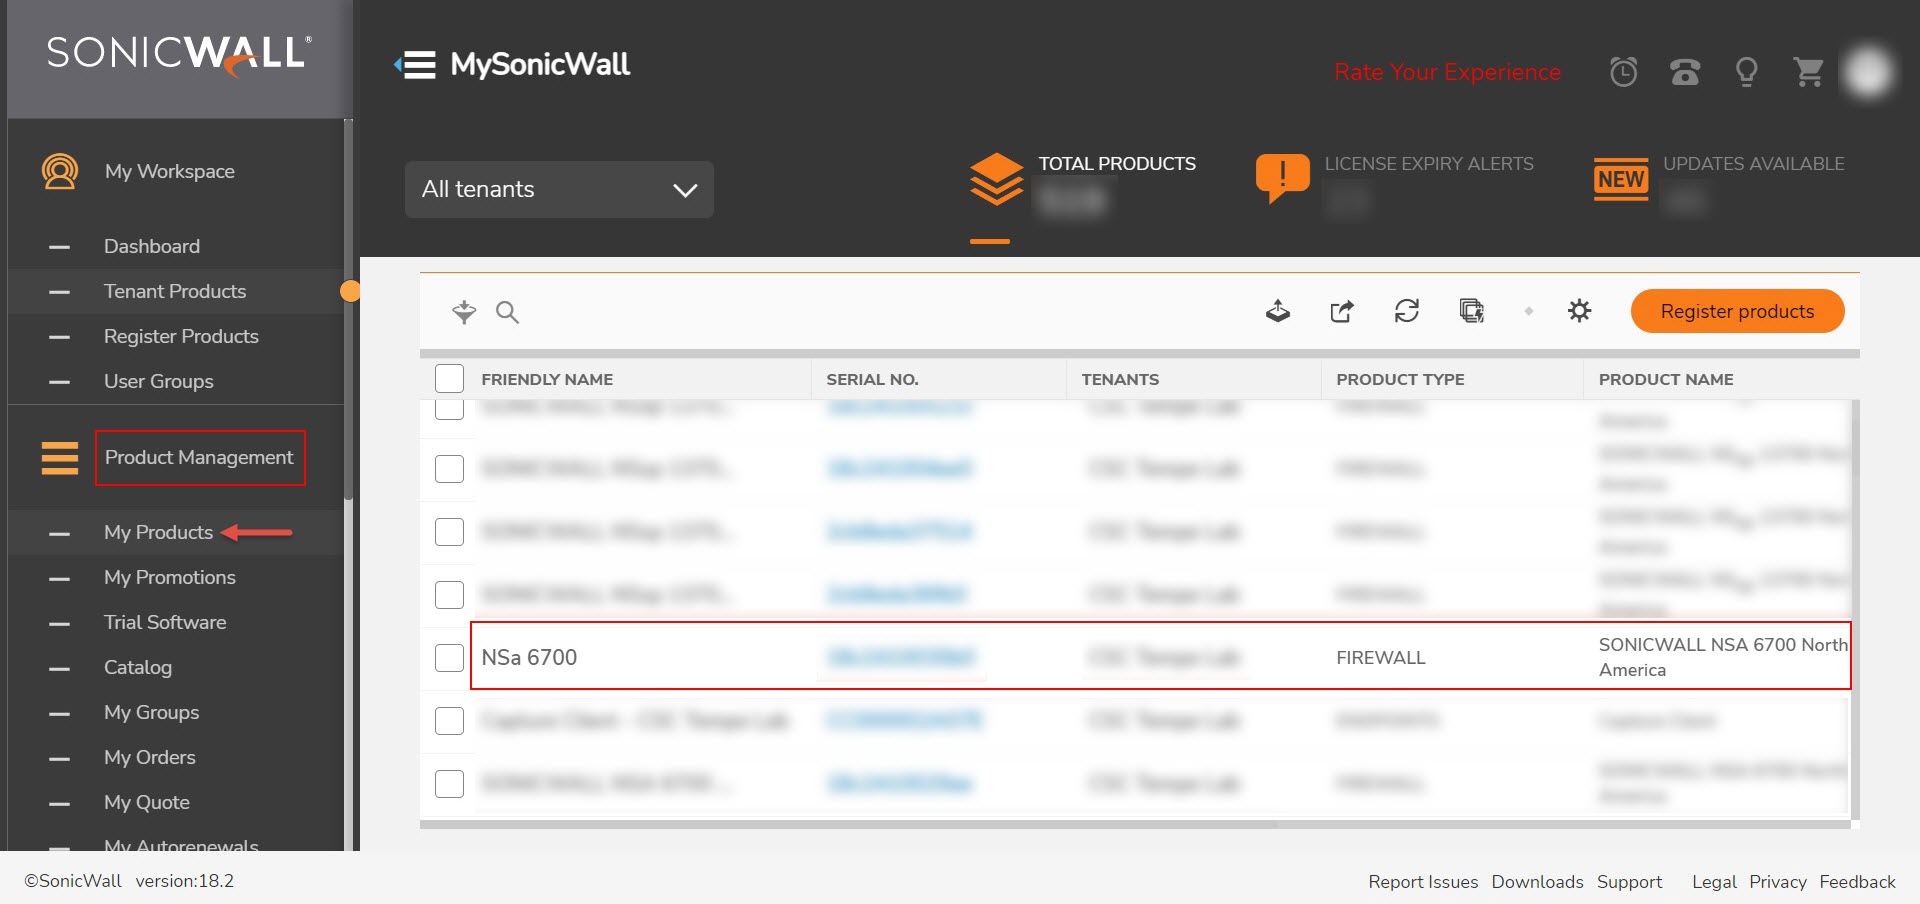
2. Navigate to Product Management | My Products page and click Register products.
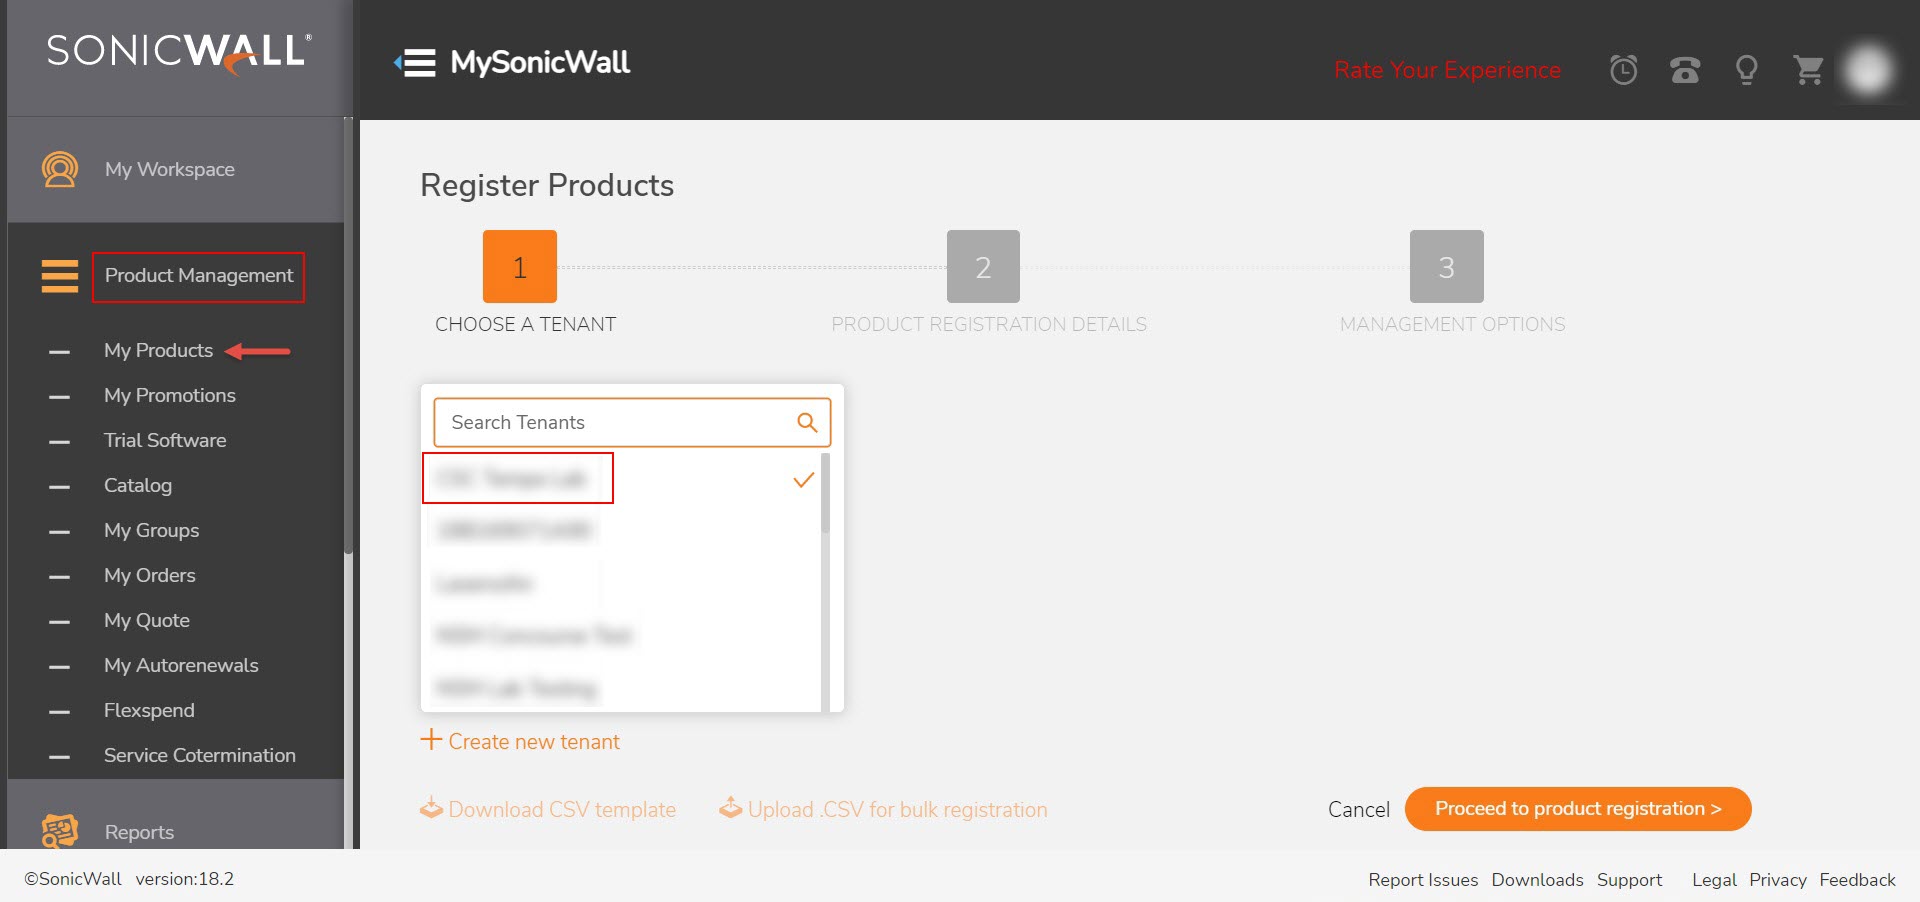
3. Choosing the Tenant is the first step in registering a product on MySonicWall. Click on the appropriate Tenant from the Search Tenants list.
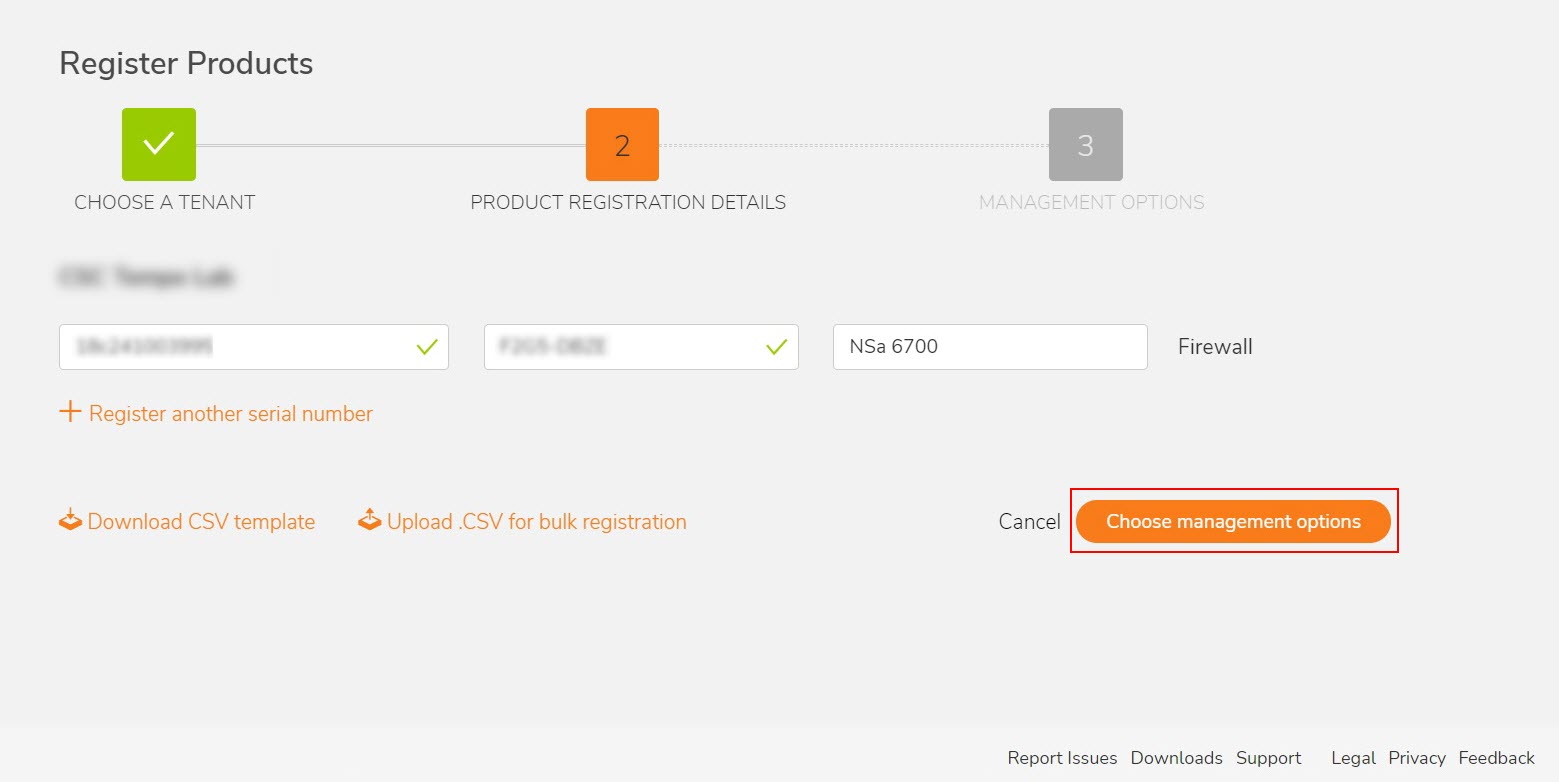
4. Enter the Serial number and Authentication code of the NSA 6700. Provide a Friendly name for the NSA 6700.
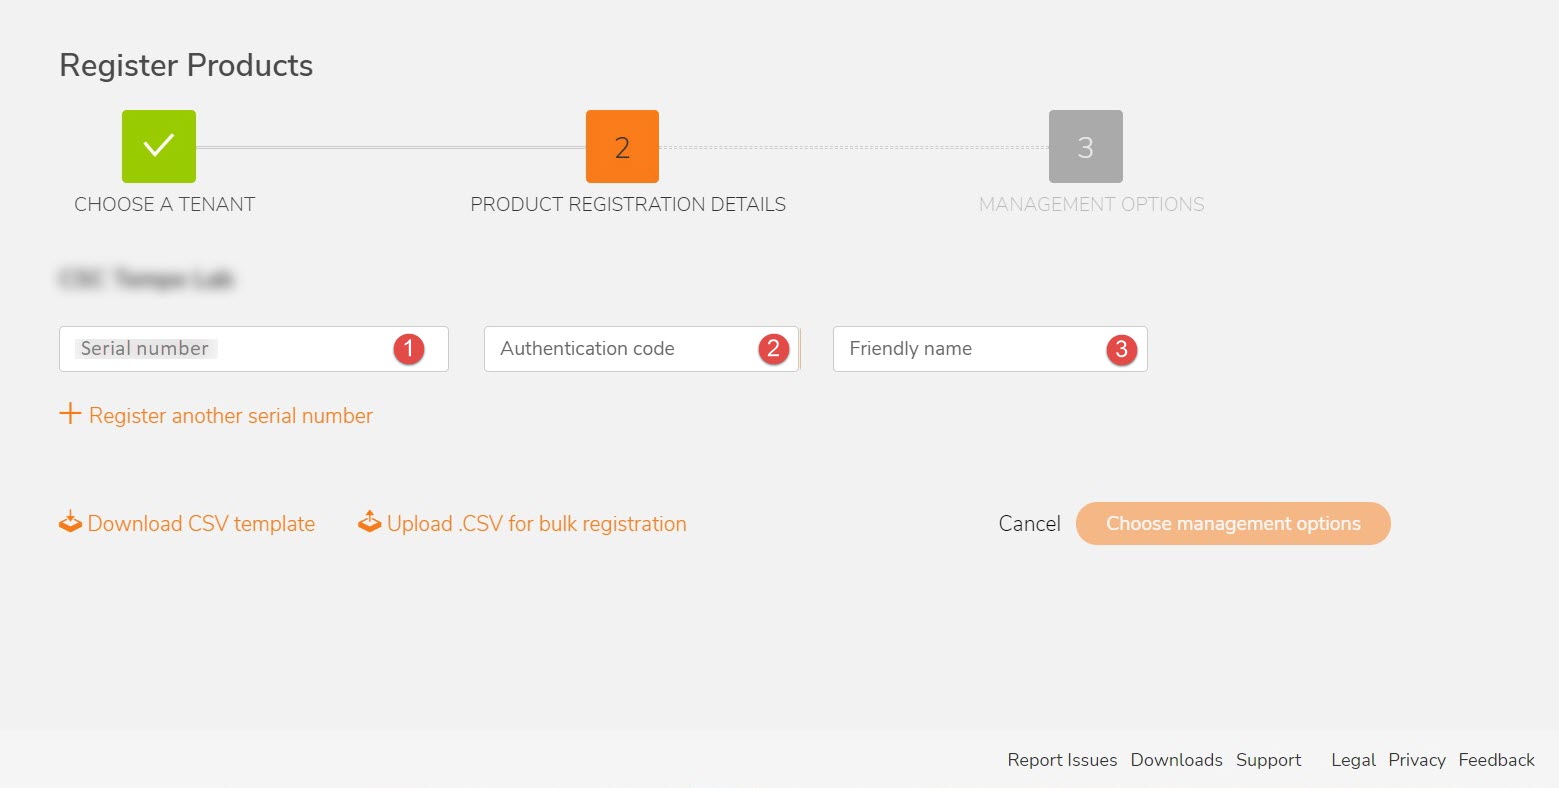
5. After filling in the serial number, authentication code and friendly name, click on Choose management options.
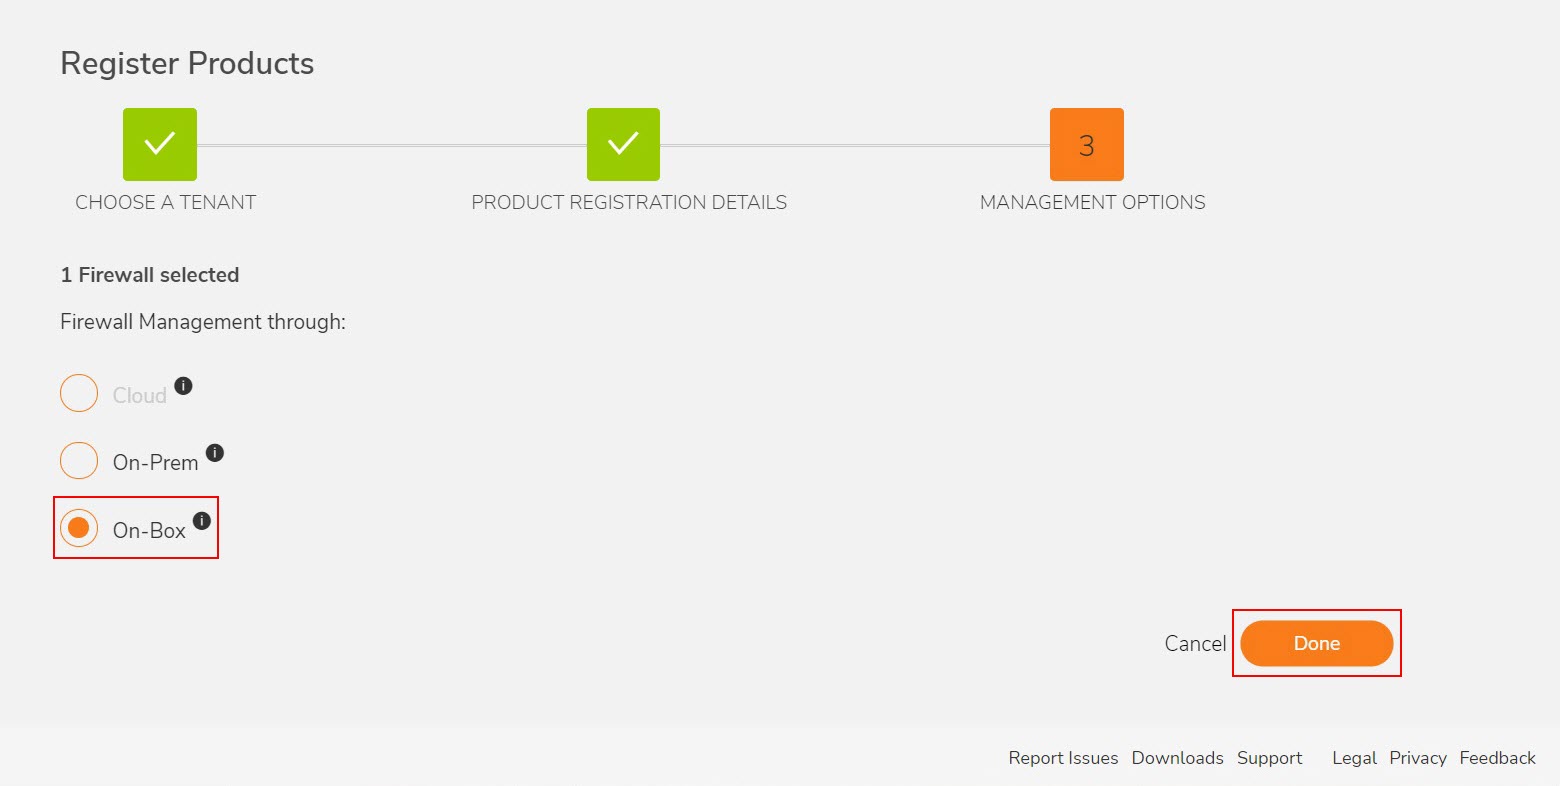
6. As the last step in Product registration is, to select the radio option On-Box and click Done.
7. The registered product is displayed in the Product Management | My Products page in MySonicWall.
Downloading the Latest Firmware:
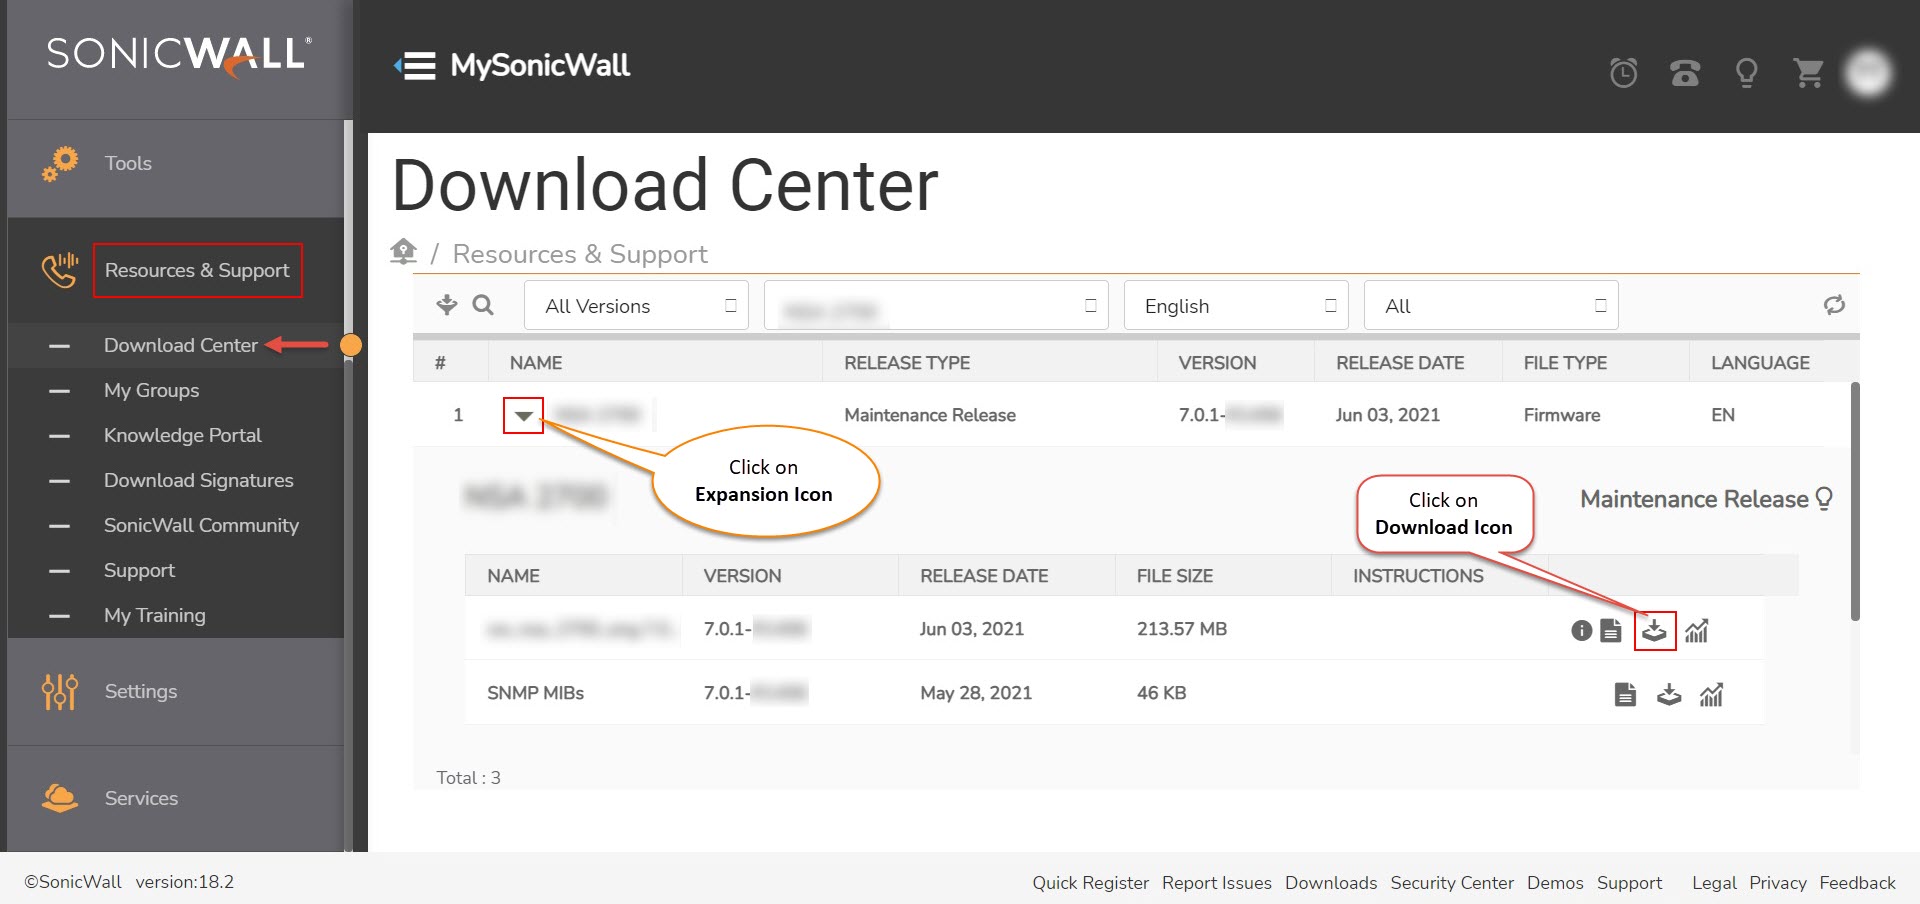
1. In the MySonicWall account, navigate to Resources & Support | Download Center page.
2. Choose NSA 6700 from the list as shown in the below screenshot.
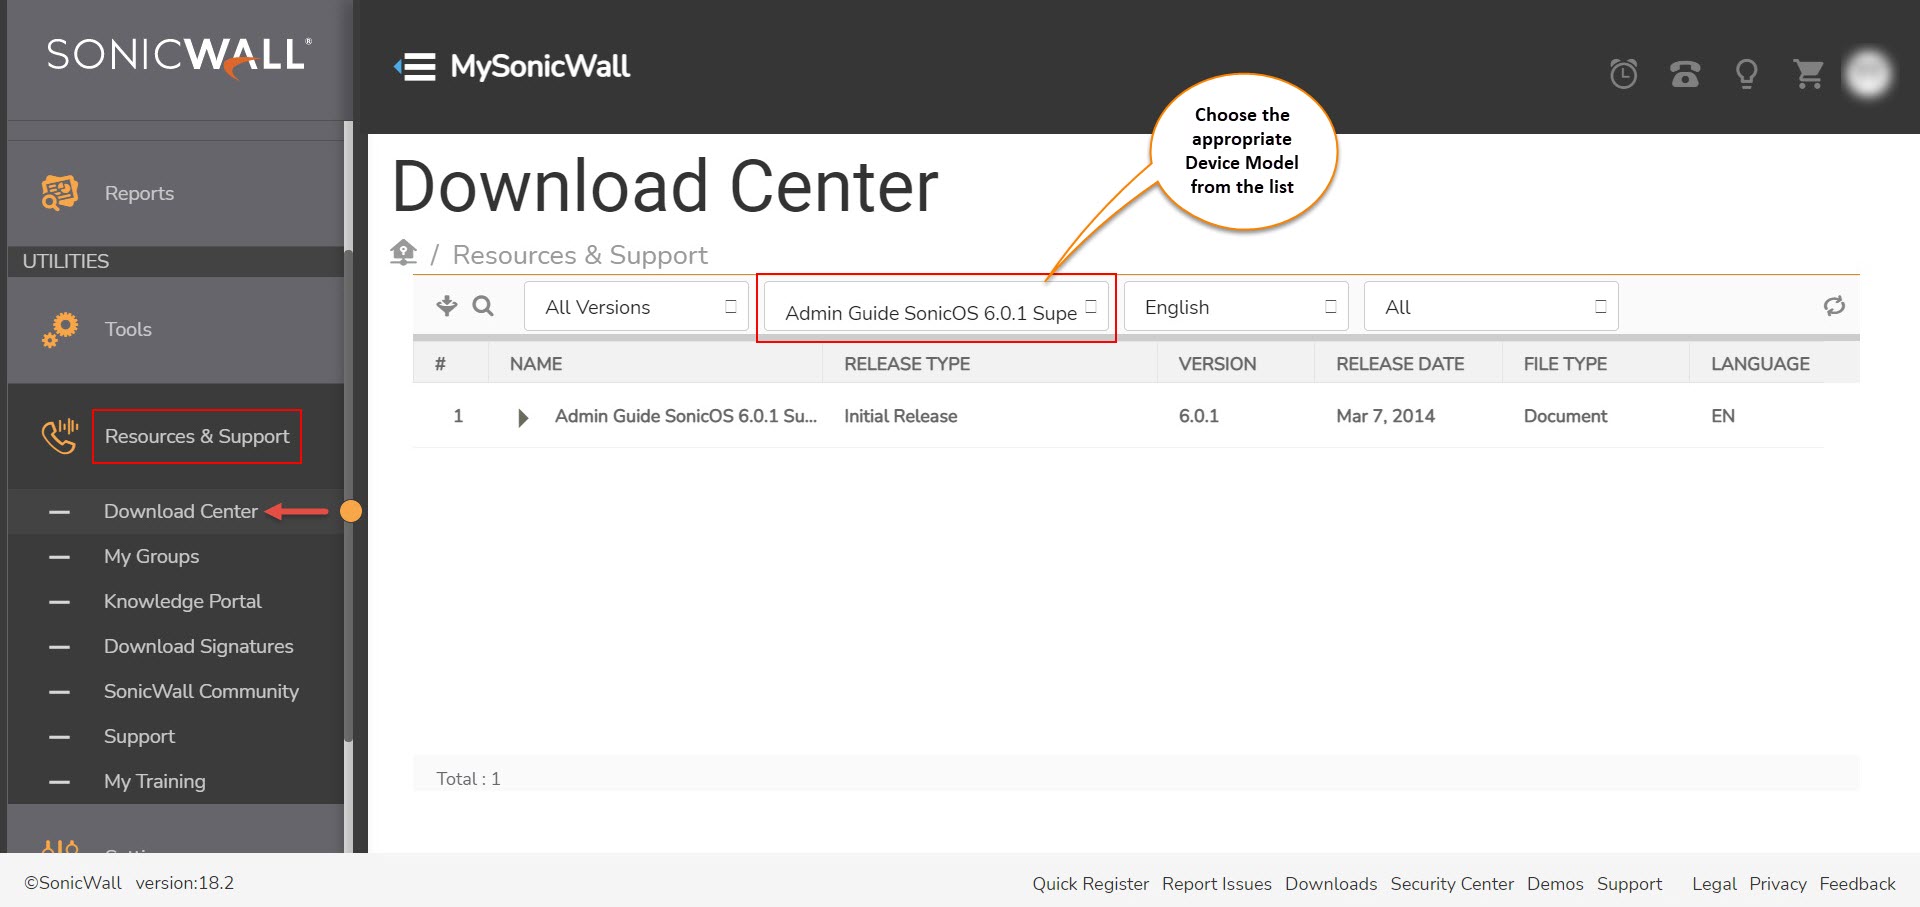
3. Once the firmware’s shows up, choose the firmware version; click on the Expansion icon to see the firmware download option and click on Download icon.
Package Content:
The NSA 6700 comes with a default package that includes,
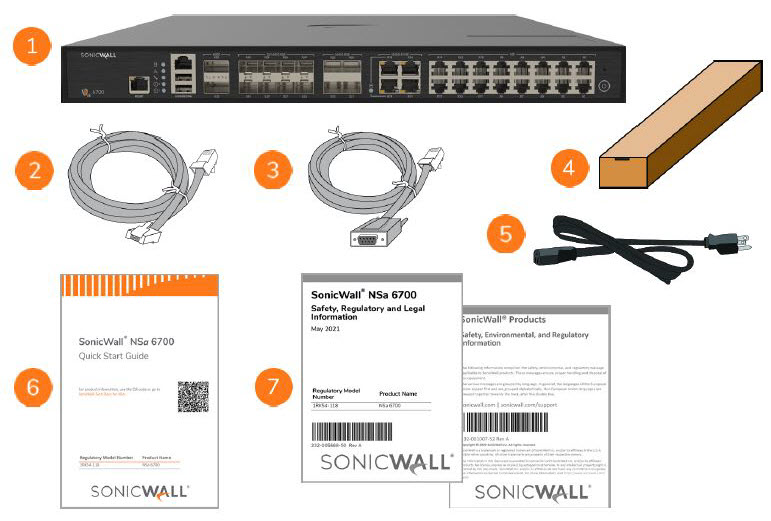
- NSA 6700 appliance
- Ethernet Cable
- Serial Console Cable (RJ45 to DB9)
- Rack Mount Kit
- Power Cord - 1 No
- NSA 6700 Quick Start Guide
- Safety, Environmental and Regulatory Information Documents
Front Panel:

1. MGMT Port - RJ45: The MGMT port is a dedicated 1GE interface MGMT for appliance management and SafeMode access.
2. Console Port - RJ45: Serial Console for CLI access
3. X32 - X33: 40GE QSFP+ Ports and LEDs
 NOTE: Breakout cables are not supported on these ports.
4. X24 - X31: 25/10/5/2.5GE SFP+ Ports and LEDs
5. X20 - X23: 10/5/2.5GE SFP+ Ports and LEDs
6. X16 - X19: 10/5/2.5/1GE Copper RJ45 Ports and LEDs
 NOTE:
NOTE:
- Force the link speed instead of using Auto-Negotiate on port X16 and above in case the links are not coming UP.
- When specific 40GE uses QSFP+, both QSFP+ and QSFP28 share the same connector format factor. But when use different fiber/DAC of product, it refers to different name.
7. X0 - X15: 1GE Copper RJ45 Ports and LEDs
8. SafeMode Button: A recessed button used to enter SafeMode
9. Power Button: Short press powers ON if button was used to power system off.
Short press powers OFF with Graceful Shutdown.
Long Press (5+ sec) = Forced Shutdown.
10. LAN Bypass LED: Disabled/Enabled
 NOTE: By default, LAN Bypass is disabled, and traffic is routed to the NSA to follow the forwarding policy for each ports/interfaces. If LAN Bypass is enabled, and NSA lost power, traffic is bypassed from the NSA causing no impact to the network even when the NSA is powered OFF.
11. USB SS 3.0 Ports: For Configuration, Recovery, Re-imaging the NSA, and USB WWAN device support.
12. Storage LED: Status on internal and external storage.
12. Alarm LED: Status on Minor/Major/Critical System Alarm.
12. Test LED: Status on System Boot - Operational/Progress/SafeMode/Shutdown.
12. Power LED: 1 = Primary, 2 = Redundant
Rear Panel:

1. M1 Slot for SSD: Extended storage drive
2. M0 Slot for M.2 Module: Boot drive
3. System Fans - 3 Nos
4. Redundant Power Input
5. Primary Power Input
Connect and Power ON:
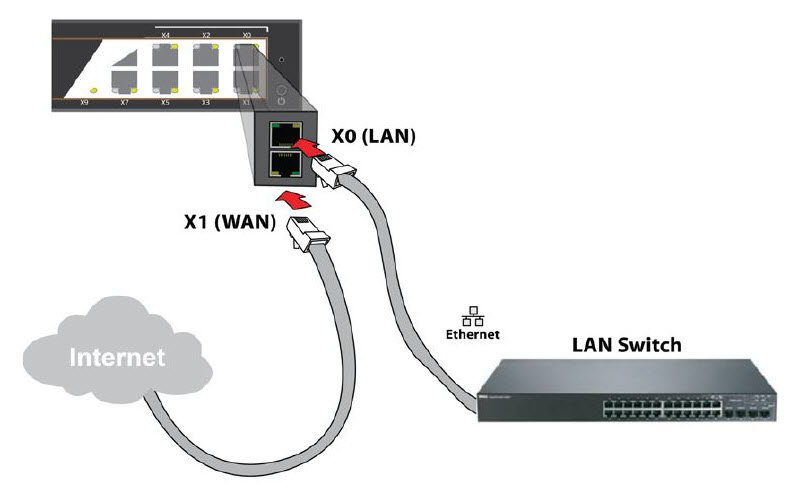
1. Connect the provided power cord to the appliance and to an electrical outlet (100-240 volts). The NSA powers on.
 NOTE: The startup sequence takes about 8 minutes.
2. Connect the NSA LAN interface (X0 by default) to the local or internal network.
3. Connect the NSA WAN interface (X1) to the Internet (ISP Modem or Router).
Upgrading the Firmware:
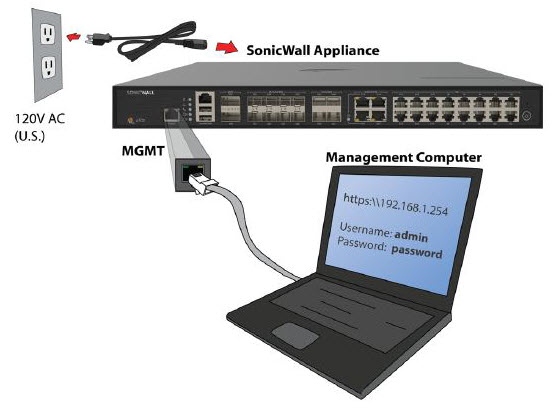
1. Connect the Laptop or PC (Management Computer) directly into MGMT (Management) port of the NSA 6700.
2. The MGMT port of the NSA is by default accessible using the IP address 192.168.1.254.
3. Configure the Management Computer with IP address on the subnet 192.168.1.x/24 and default gateway IP 192.168.1.254.
 CAUTION: SSH Management on the MGMT interface on the NSA 6700 should be enabled for SSH access via PuTTY.
4. Install PuTTY application on the Management Computer.
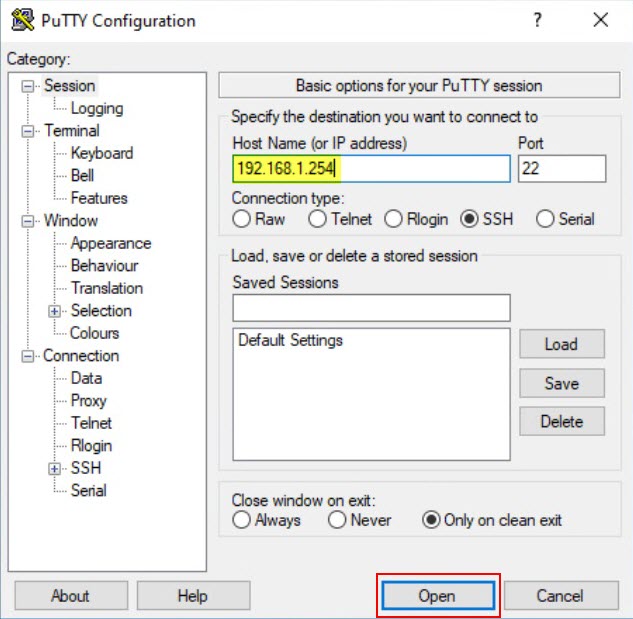
5. Open the PuTTY application and enter the below details,
- Hostname (or IP address): 192.168.1.254
- Connection type: SSH
6. Click Open.
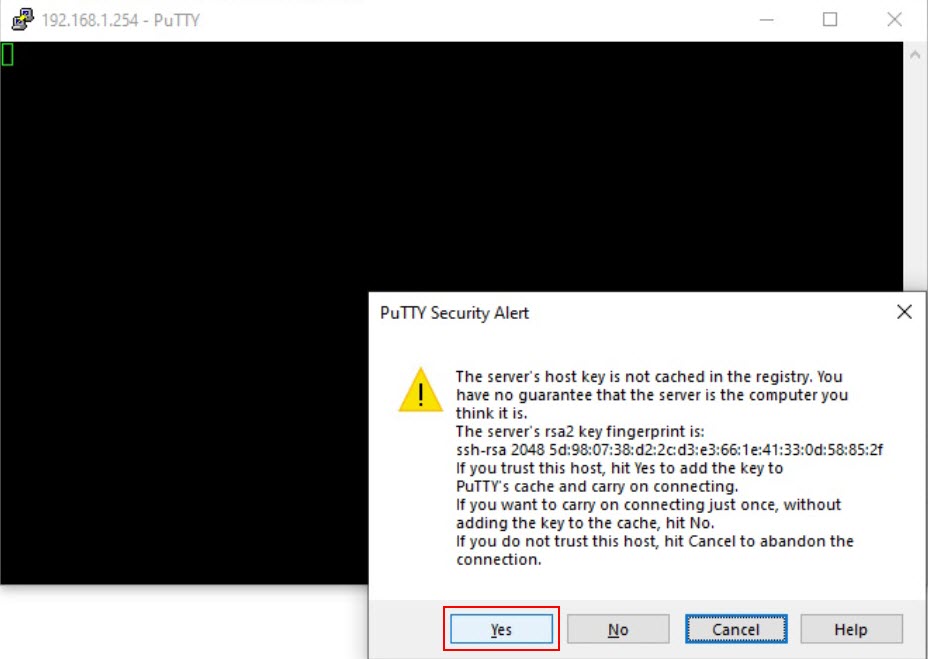
7. There is a PuTTY Security Alert and click Yes to proceed.
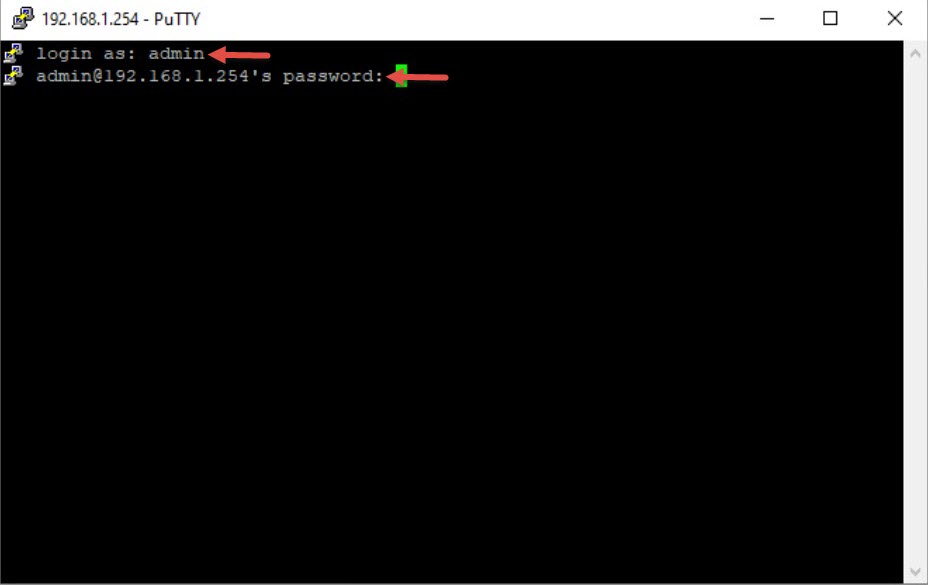
8. Provide the login as: admin and press Enter on the keyboard.
9. Type the password: password and press Enter on the keyboard.
 NOTE: The password is not visible on the PuTTY while typing.
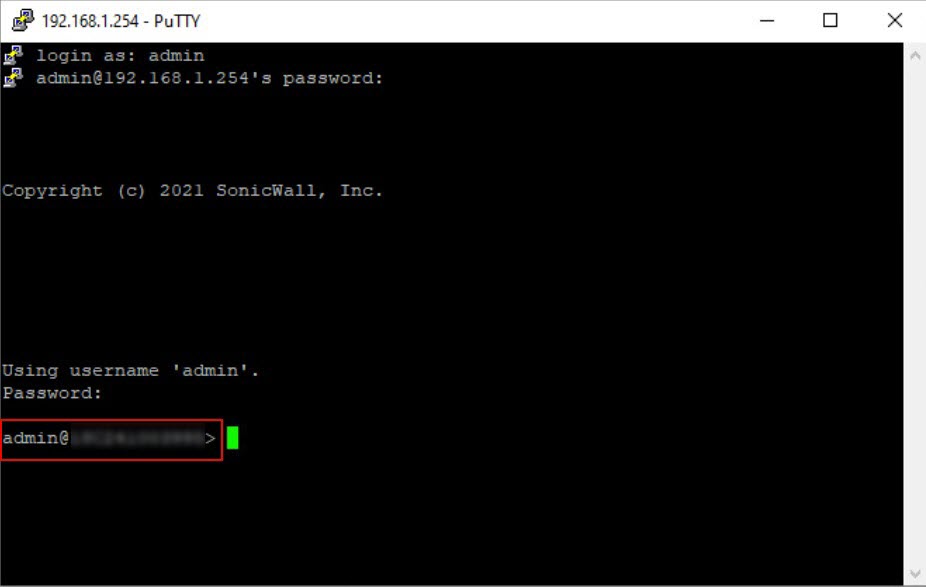
10. Once the credentials are validated, NSA 6700 goes to the User EXEC mode as shown in the screenshot below.
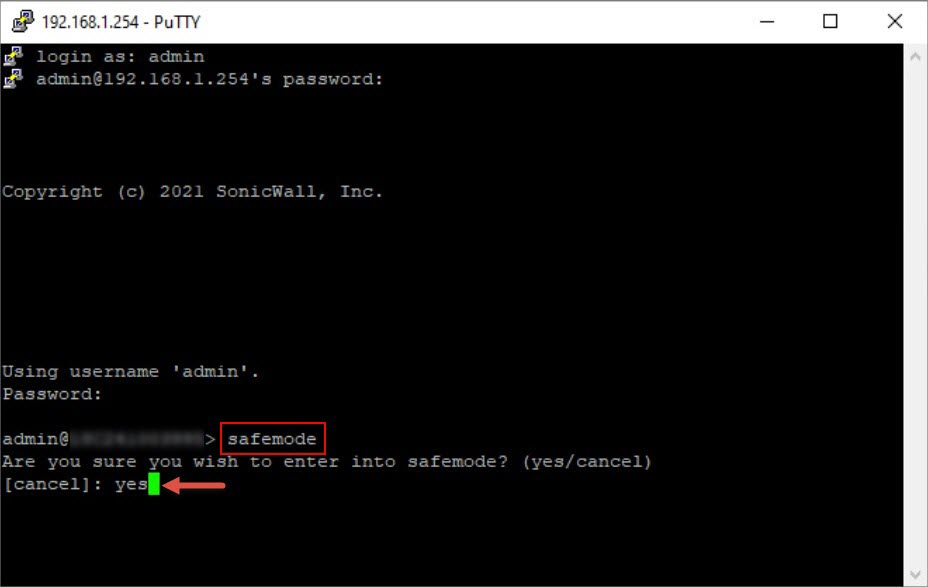
11. Type safemode and press Enter in the keyboard.
12. There is a prompt “Are you sure you wish to enter into safemode? (yes/cancel)”, type yes and press Enter in the keyboard.
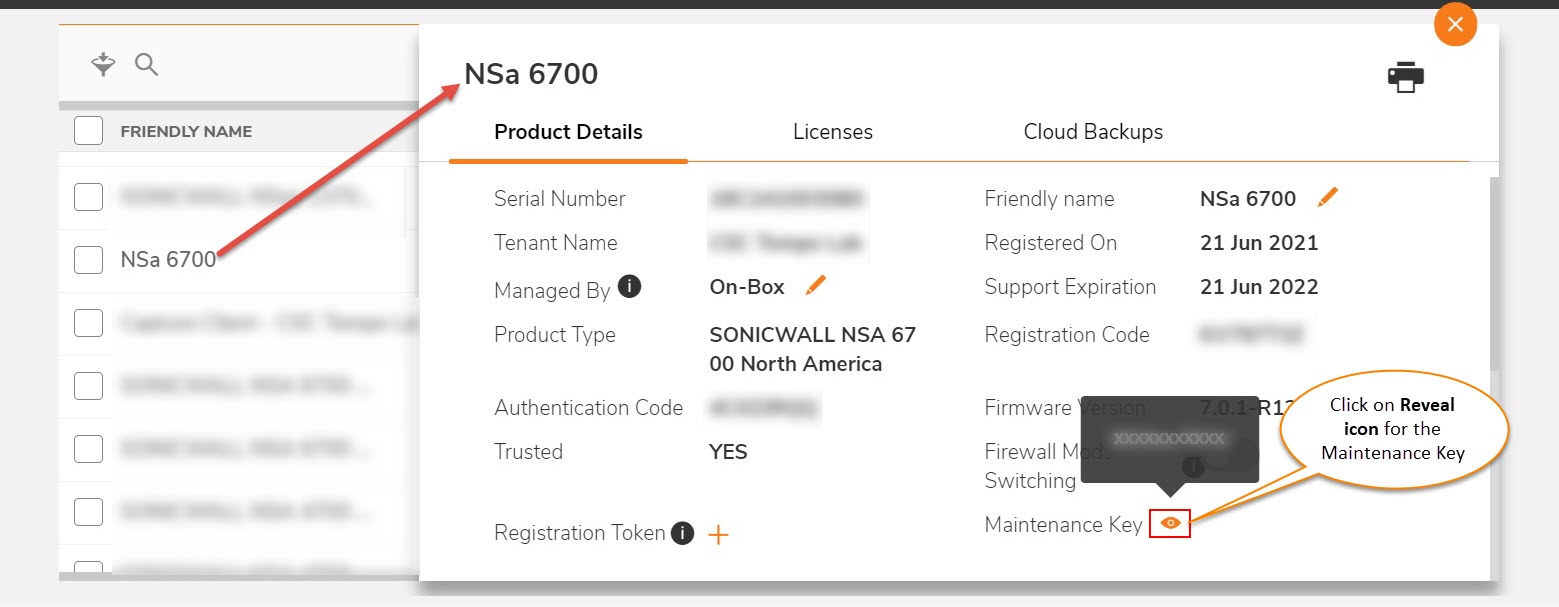
 NOTE: To access the safemode page, NSA 6700 requires a Maintenance Key and it needs to be fetched from the MySonicWall account inline to the registered NSA 6700. (Refer steps 14 & 15 in this section)
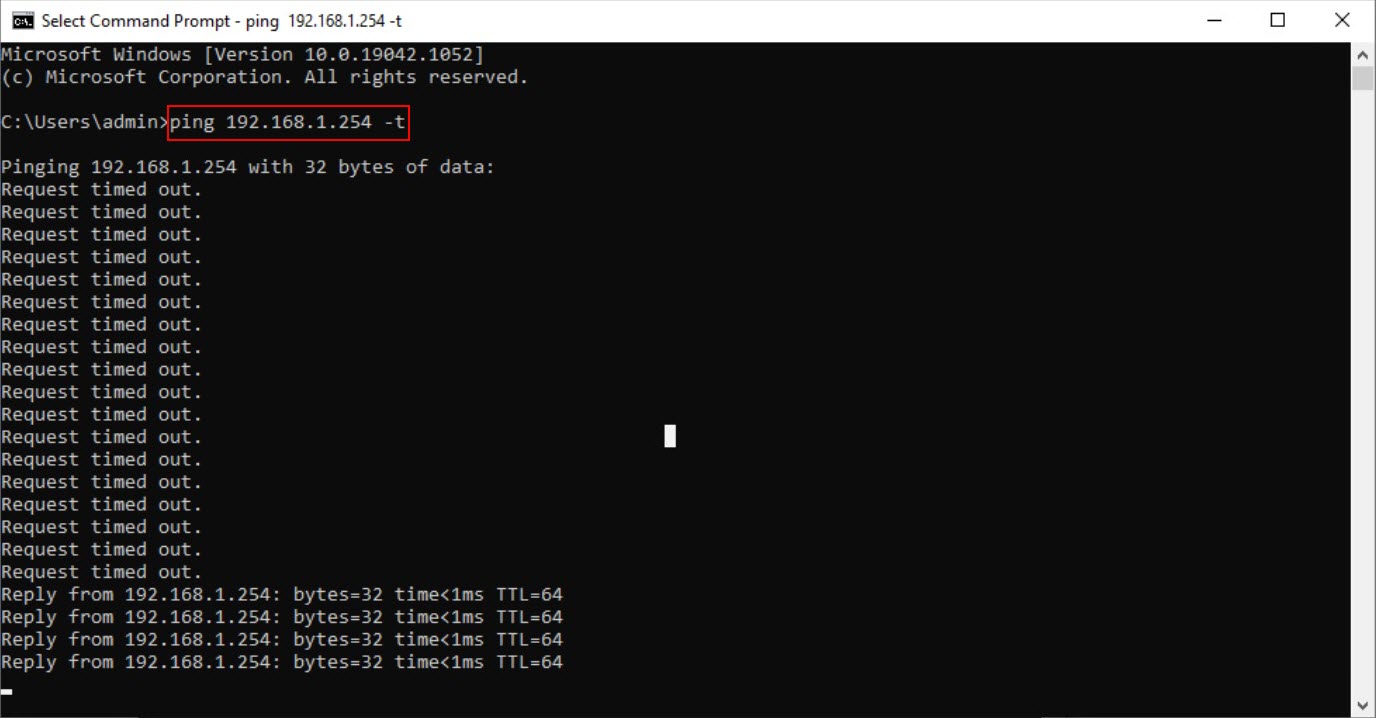
13. Open CMD prompt on the Management Computer and initiate a ping to the MGMT interface IP ping 192.168.1.254 -t to check the NSA 6700 is UP.
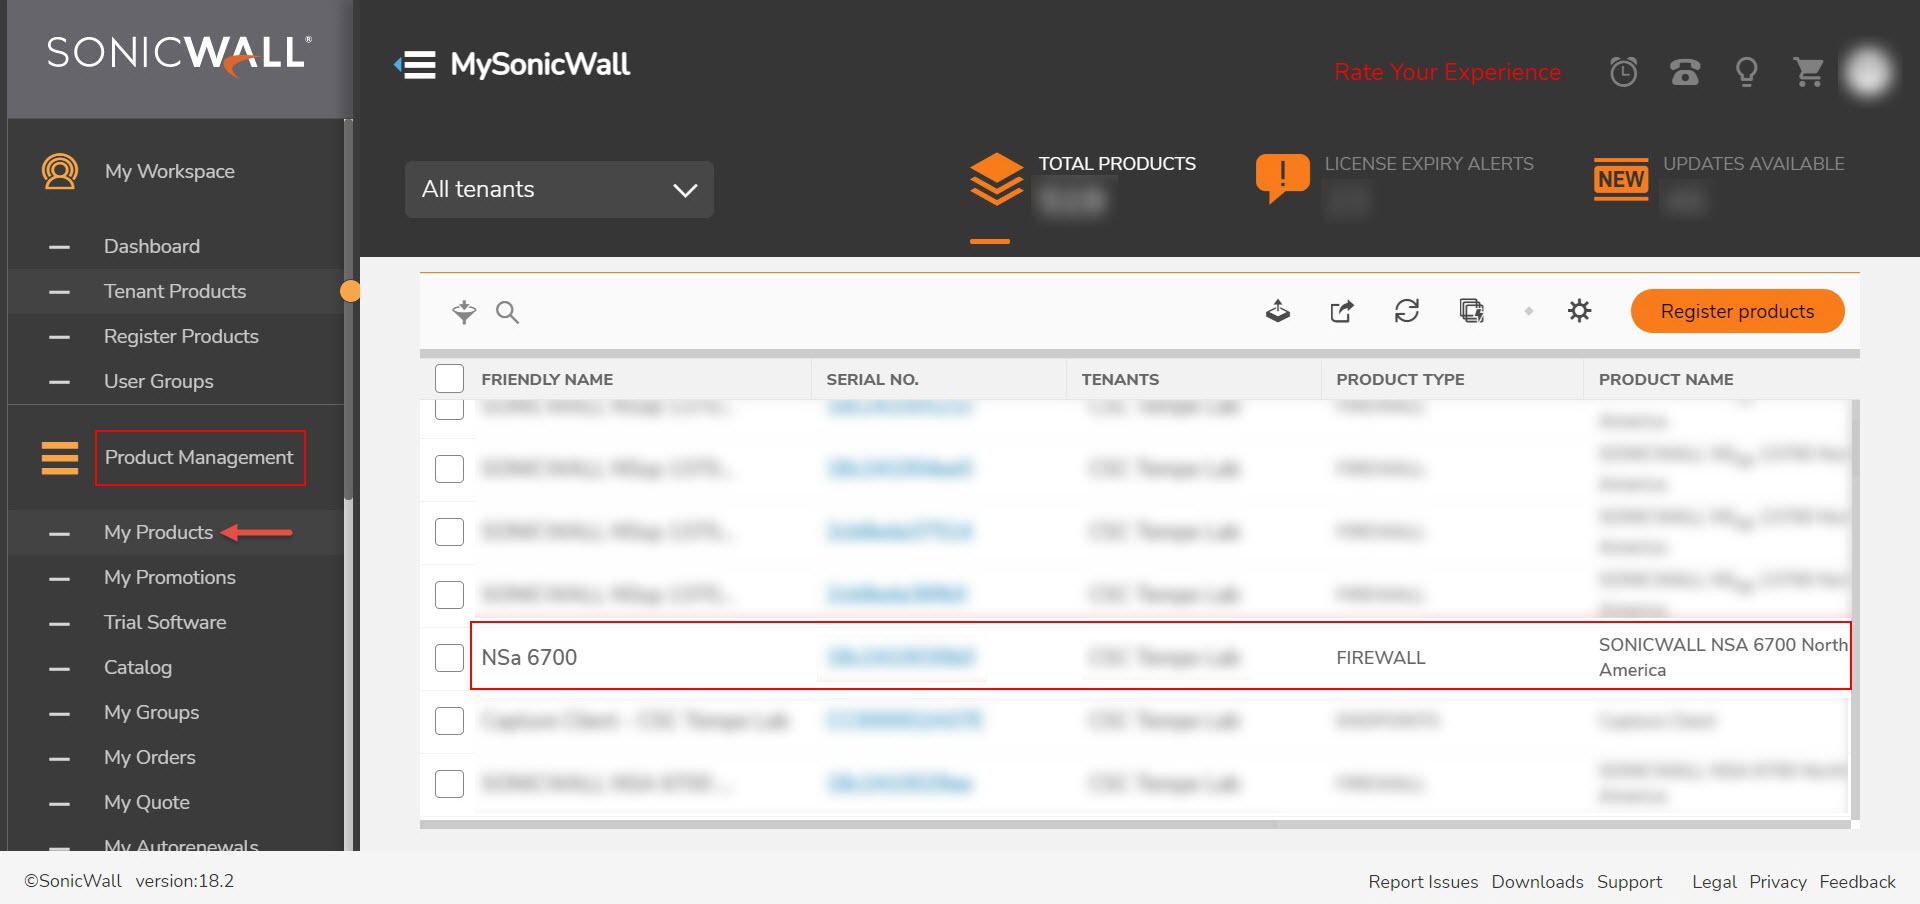
14. In the MySonicWall account, navigate to Product Management | My Products, click on the Serial Number of the registered NSA 6700.
15. Make a note of the Maintenance Key for the NSA 6700 as shown in the below screenshot.
16. Open a browser and type in the IP address https://192.168.1.254 in the address bar.
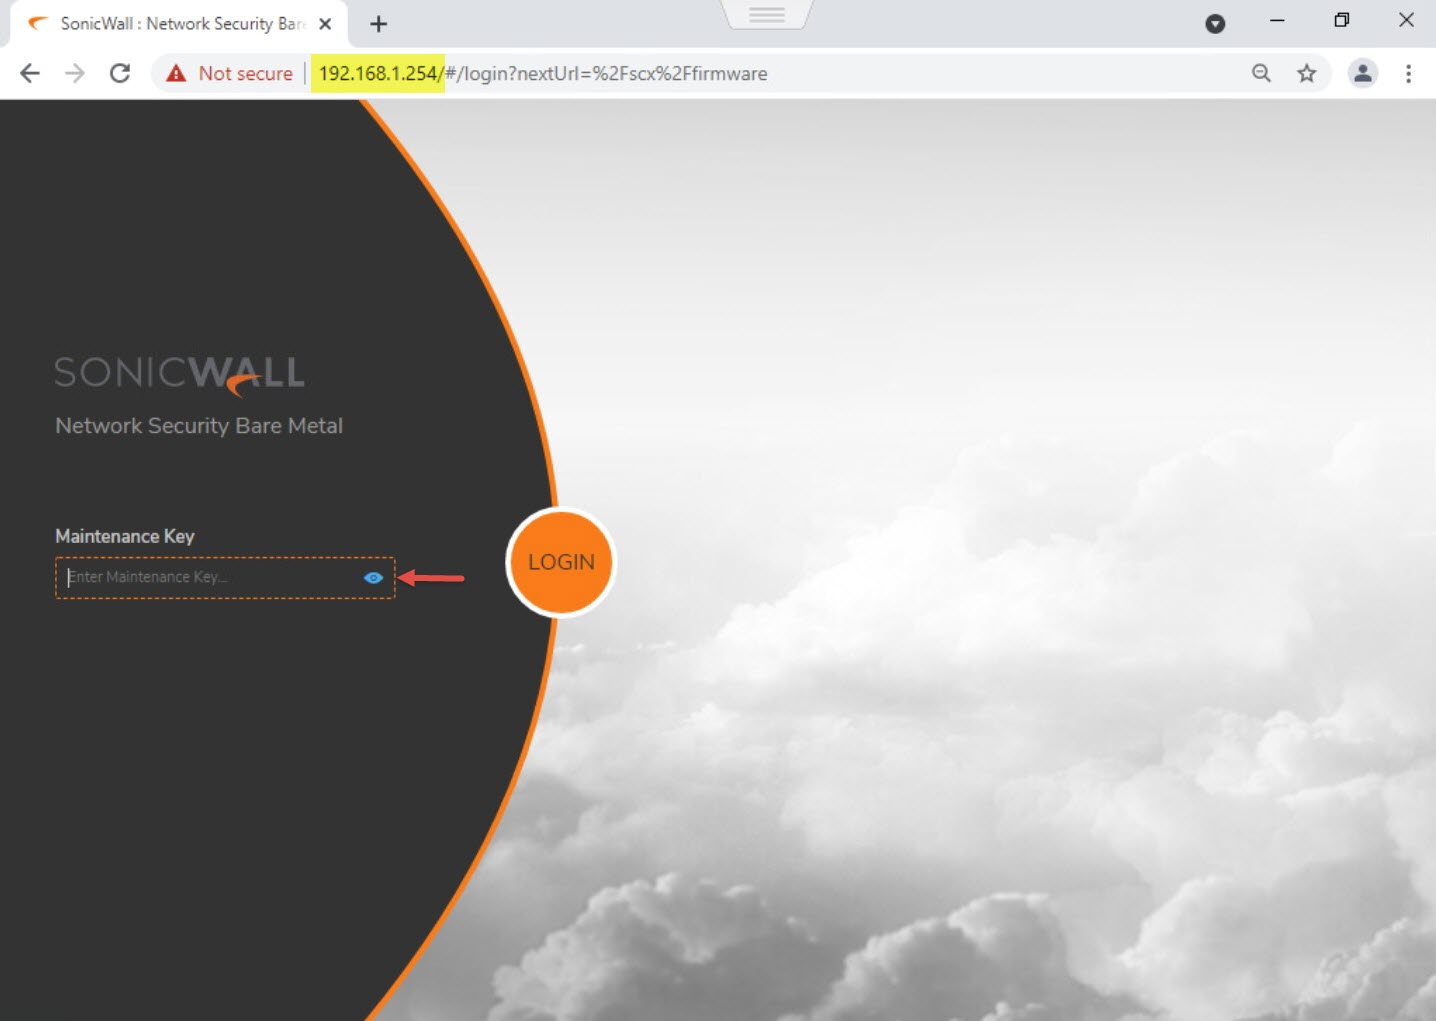
17. Type in the Maintenance Key and click LOGIN.
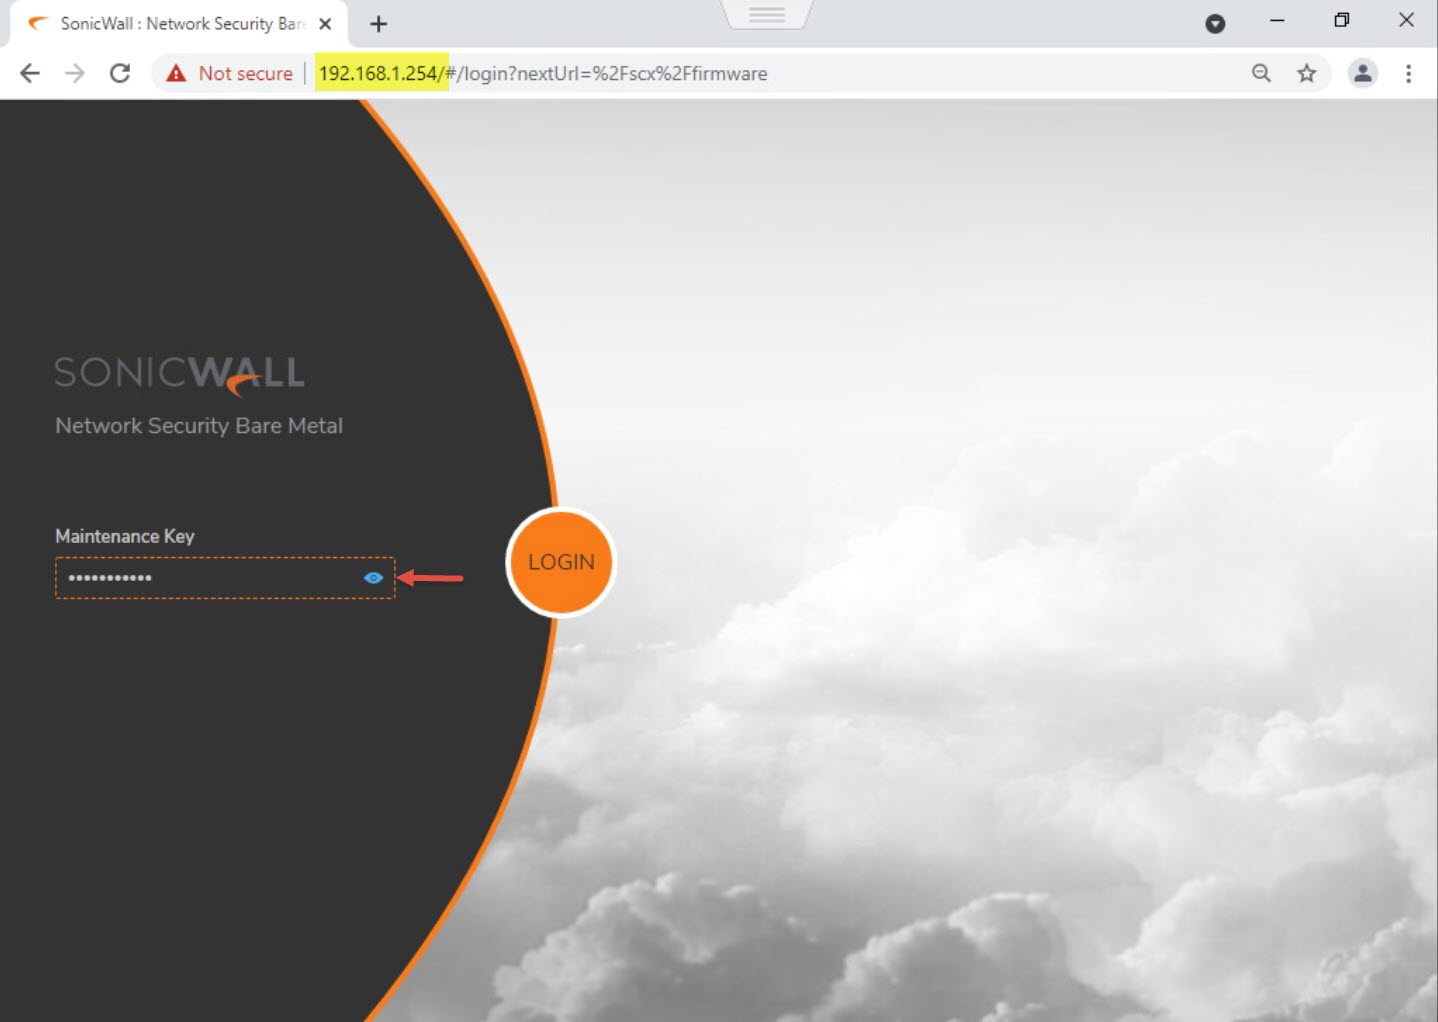
18. Safemode page by default lands on FIRMWARE tab. Click on Upload Firmware.
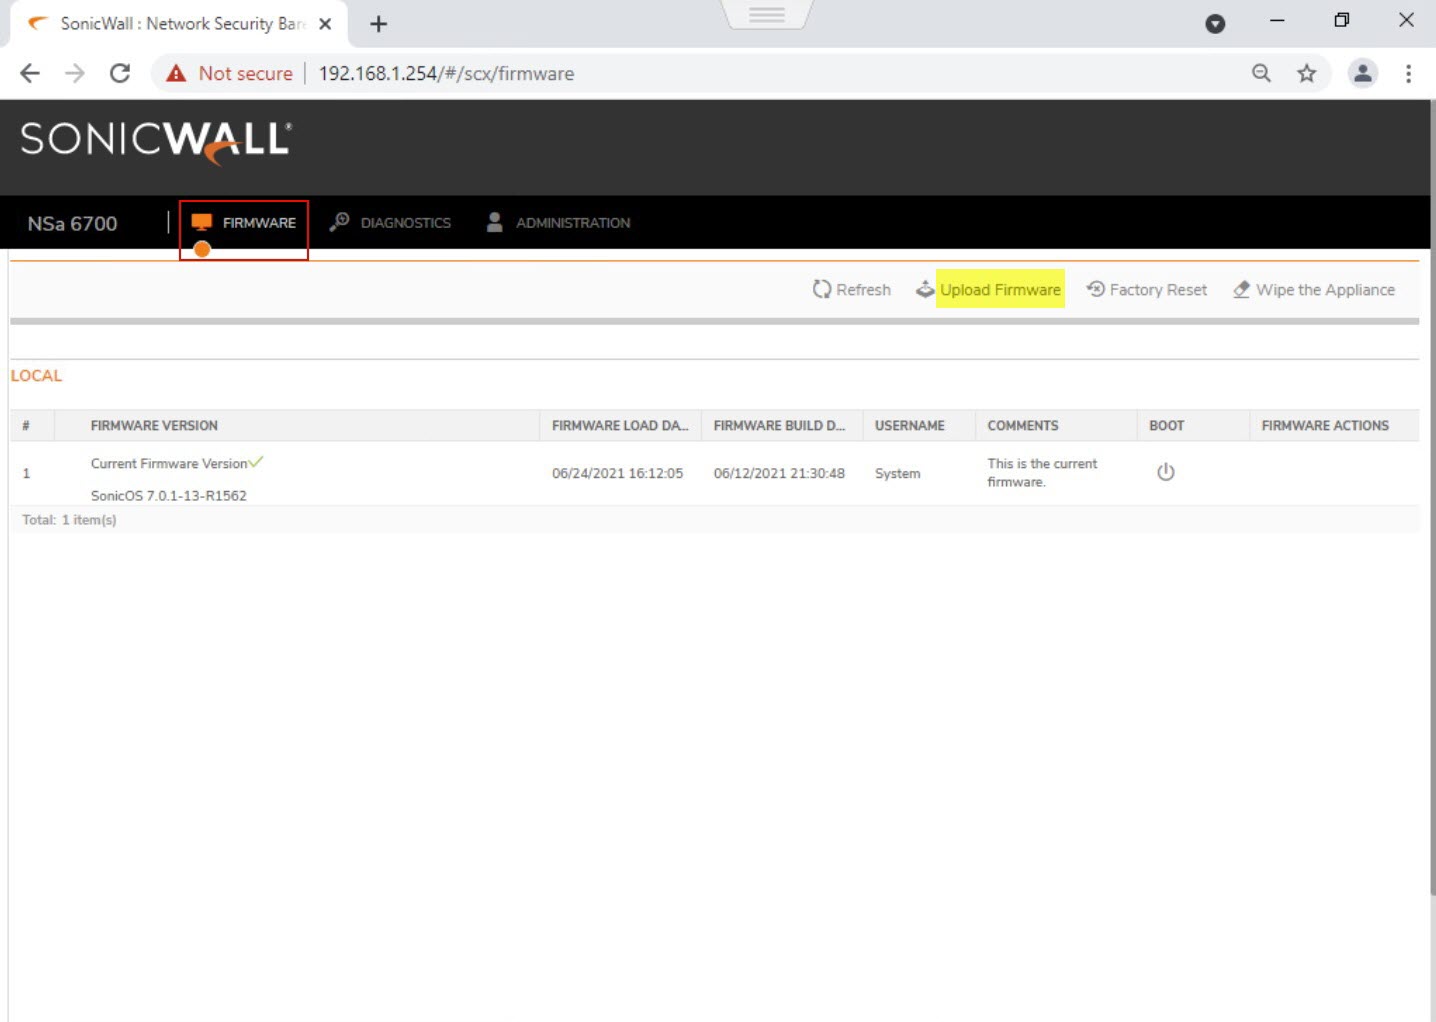
19. Browse for the NSA 6700 firmware and click Upload.
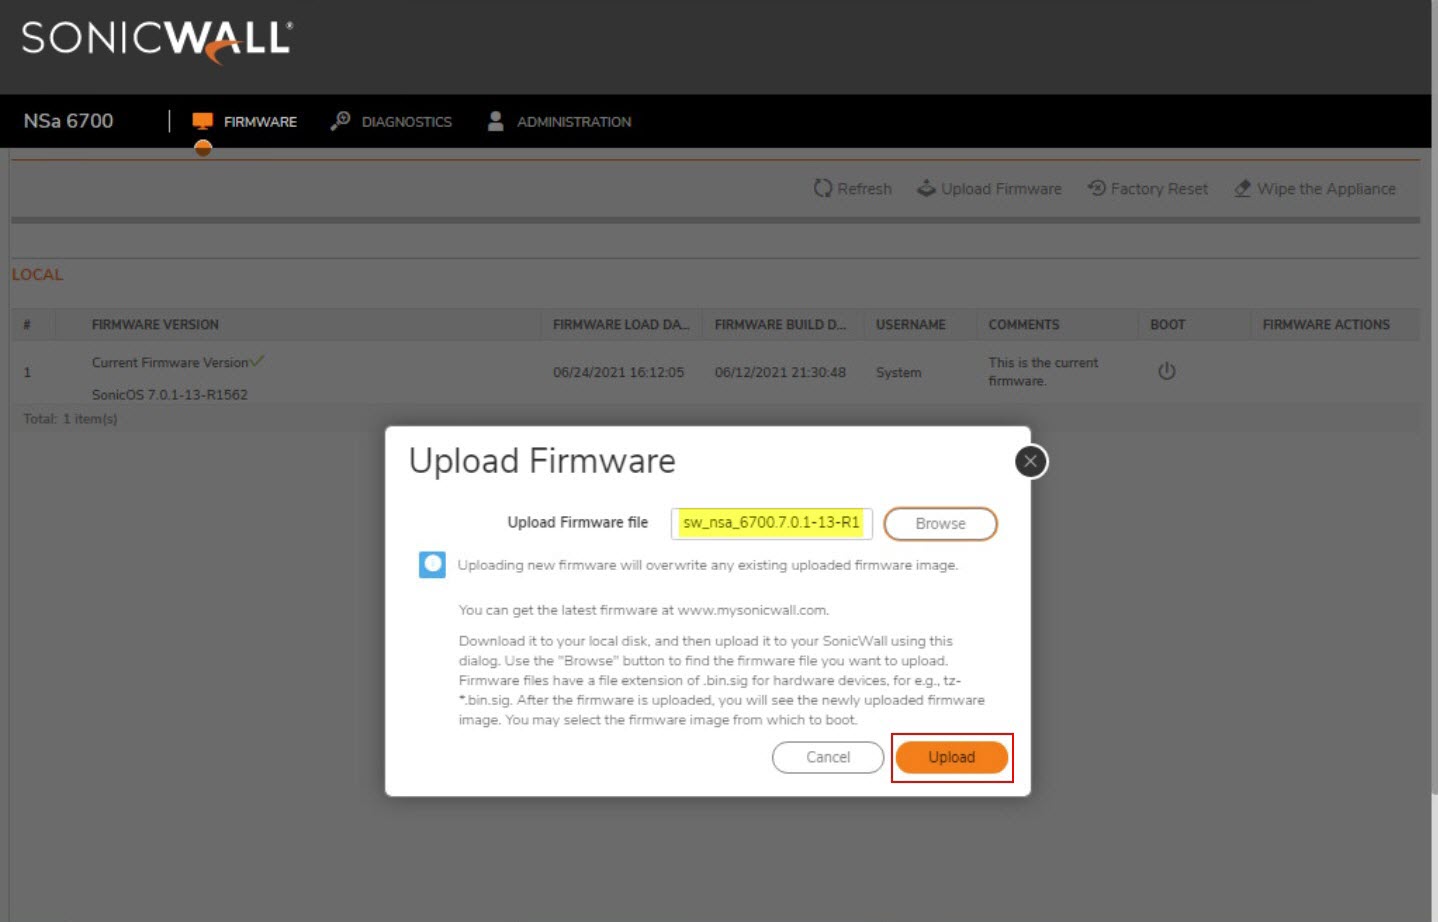
20. Once the upload is complete, the Uploaded Firmware appears.
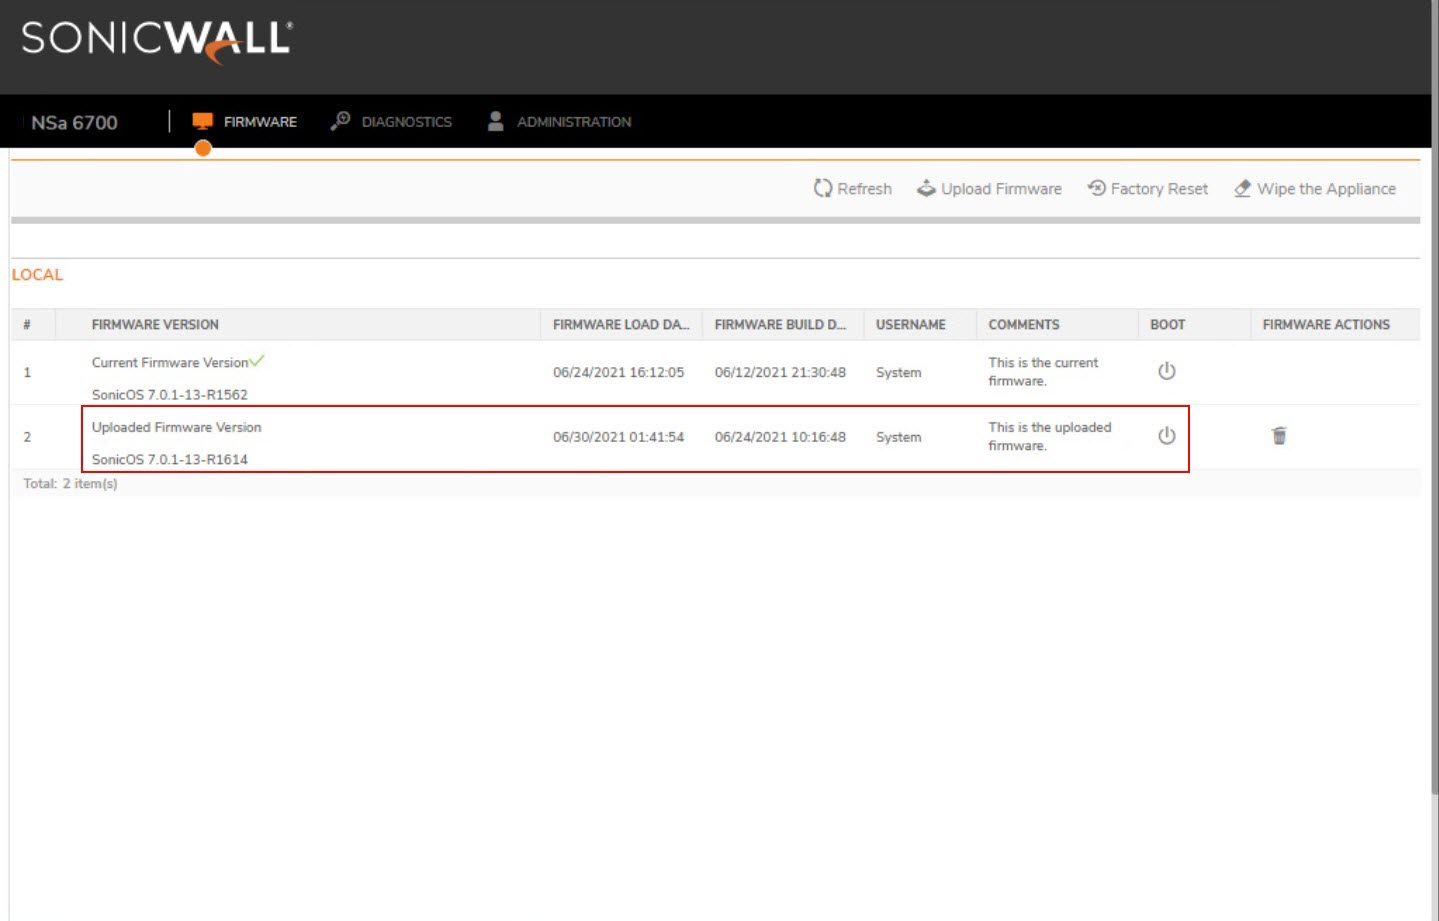
21. Click on the BOOT icon of the Uploaded Firmware Version and select Boot firmware option with Factory Default Configuration.
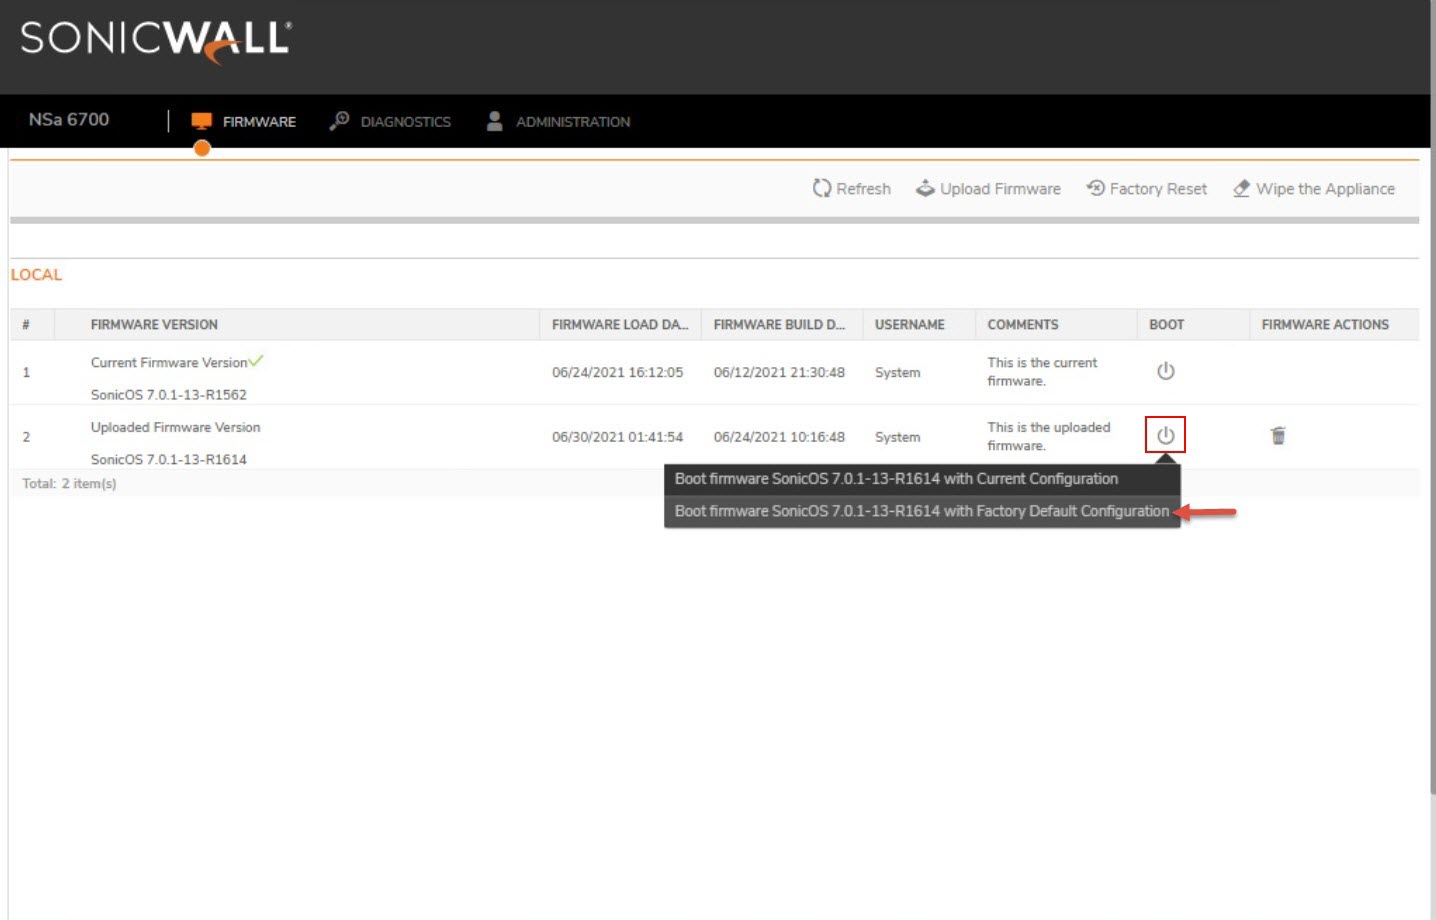
22. Warning prompt would appear, click OK to proceed.

23. The NSA 6700 restarts and comes UP automatically.
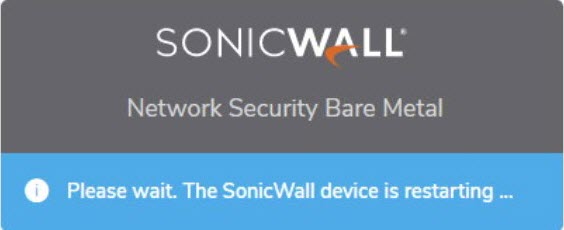
24. Open a browser and type in the IP address https://192.168.1.254 in the address bar.
25. Override the certificate error on the browser by clicking on Advanced option and then Proceed with the firewall IP address.
 NOTE: The screenshot below references to Google Chrome browser. Override of certificate error is feasible on all browsers like IE, Mozilla Firefox, Microsoft Edge, etc,.,
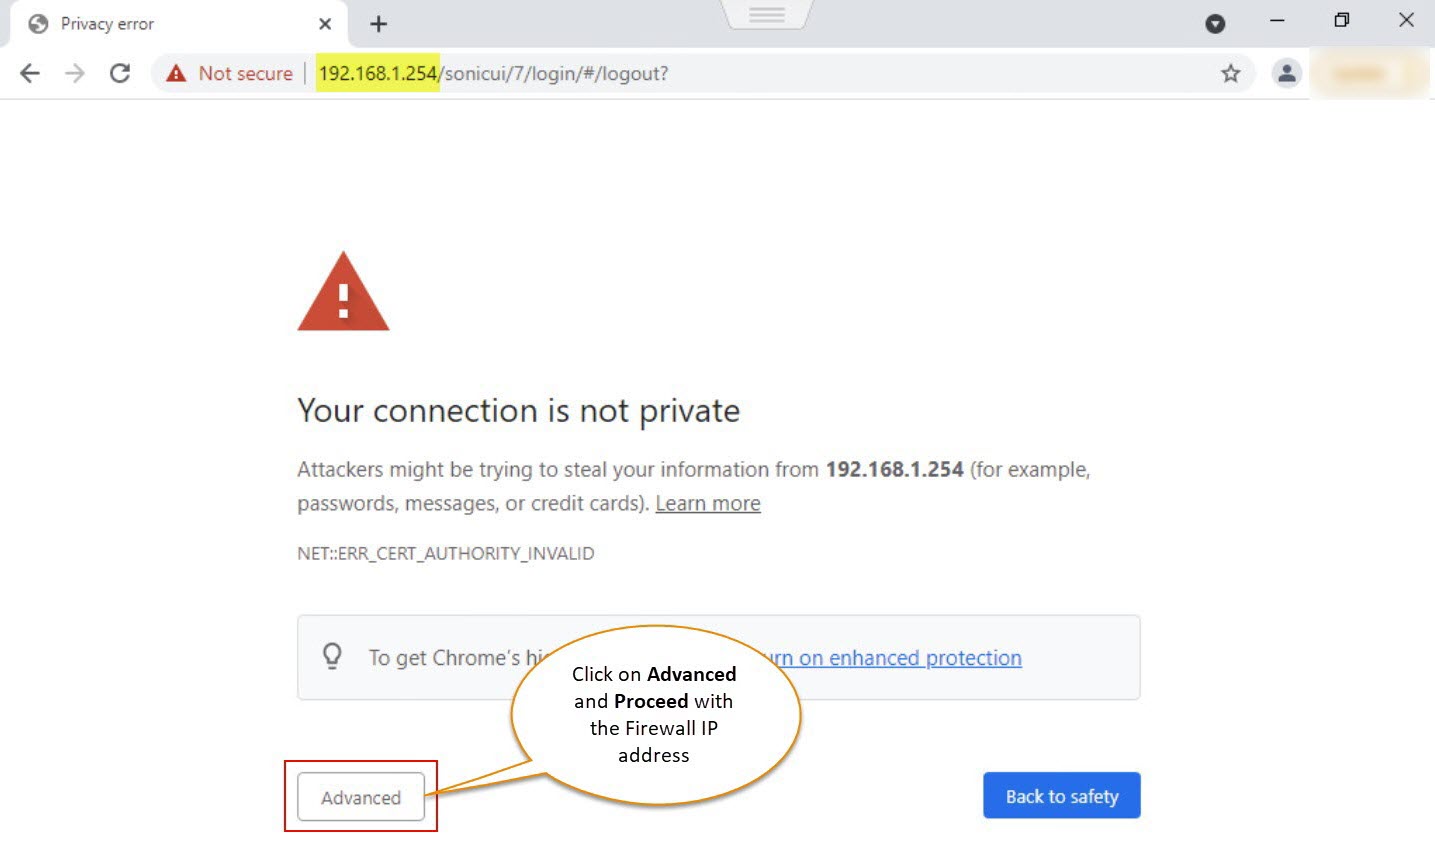
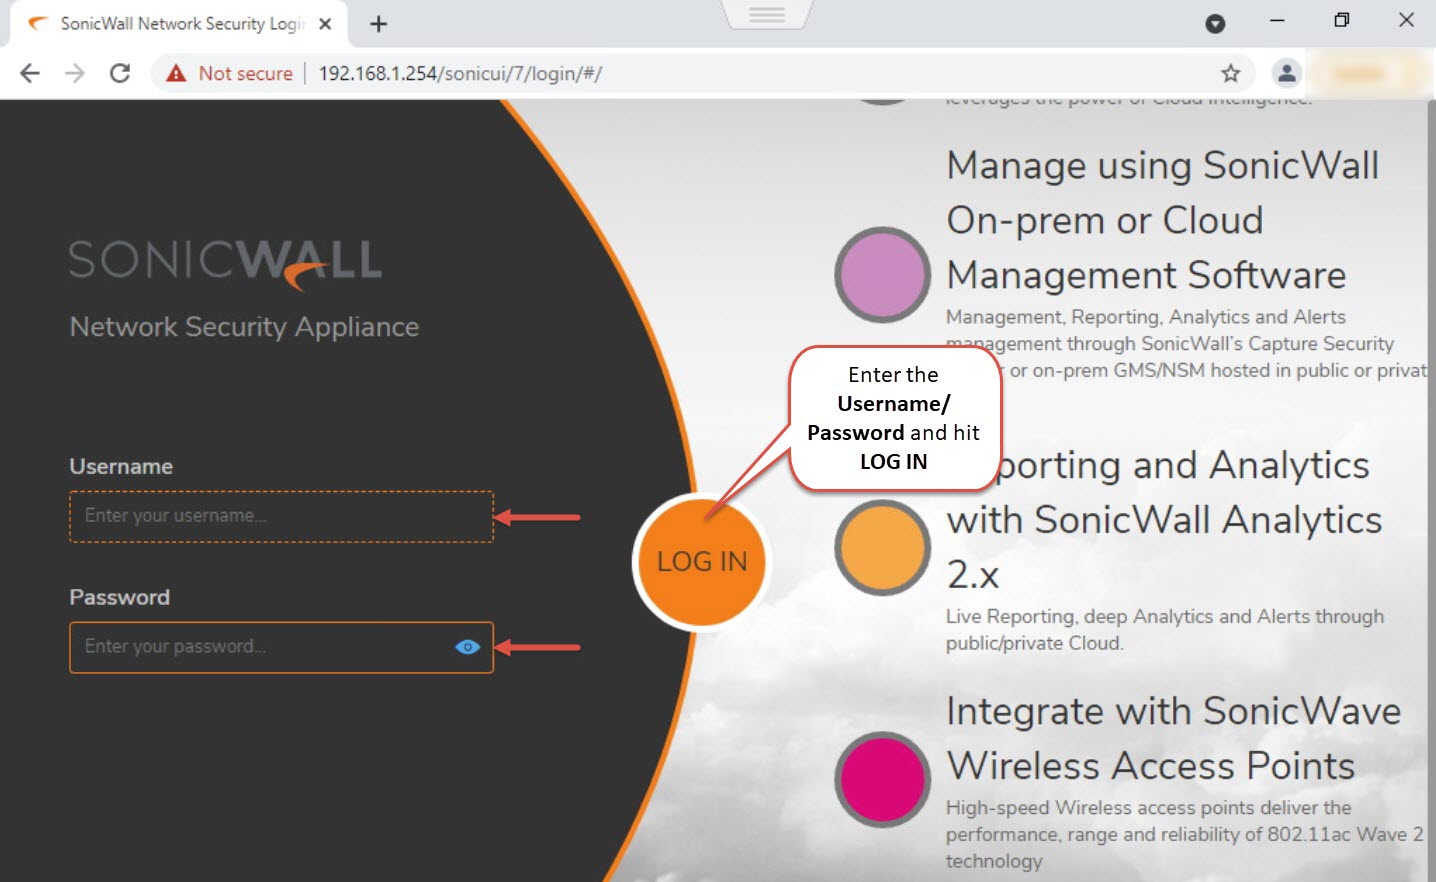
26. Login to the NSA with default login credentials and click LOG IN option.
Username: admin
Password: password
 NOTE: The username/password are case sensitive.
Run the Setup Wizard or Manual Setup:
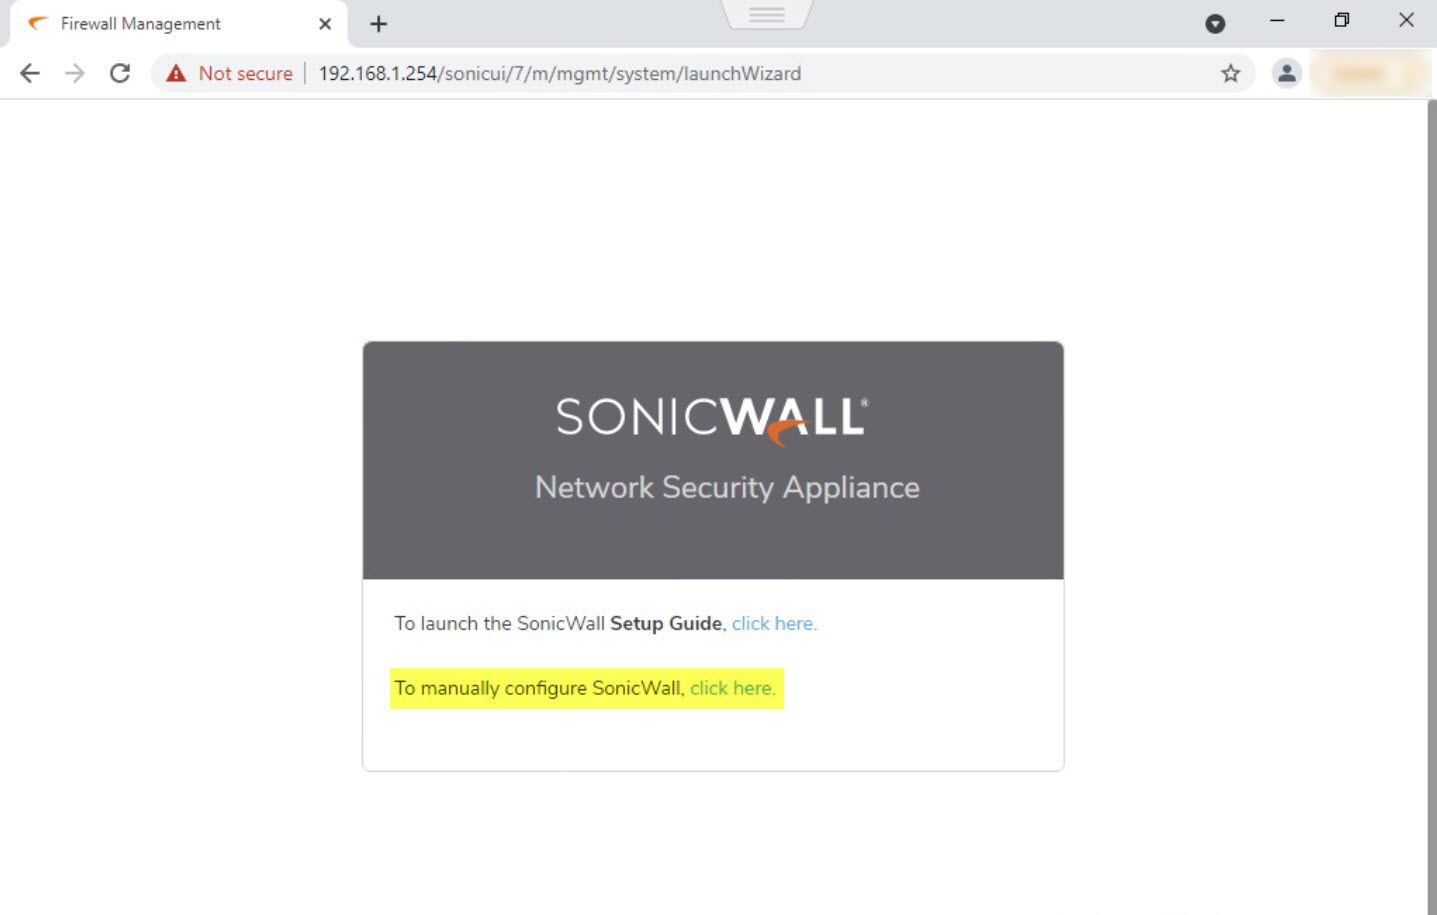
1. Launch the Setup Guide wizard or manually configure the NSA to configure the WAN interface, change the admin password, and select other settings.
2. Click on the option “To manually configure SonicWall, click here”.
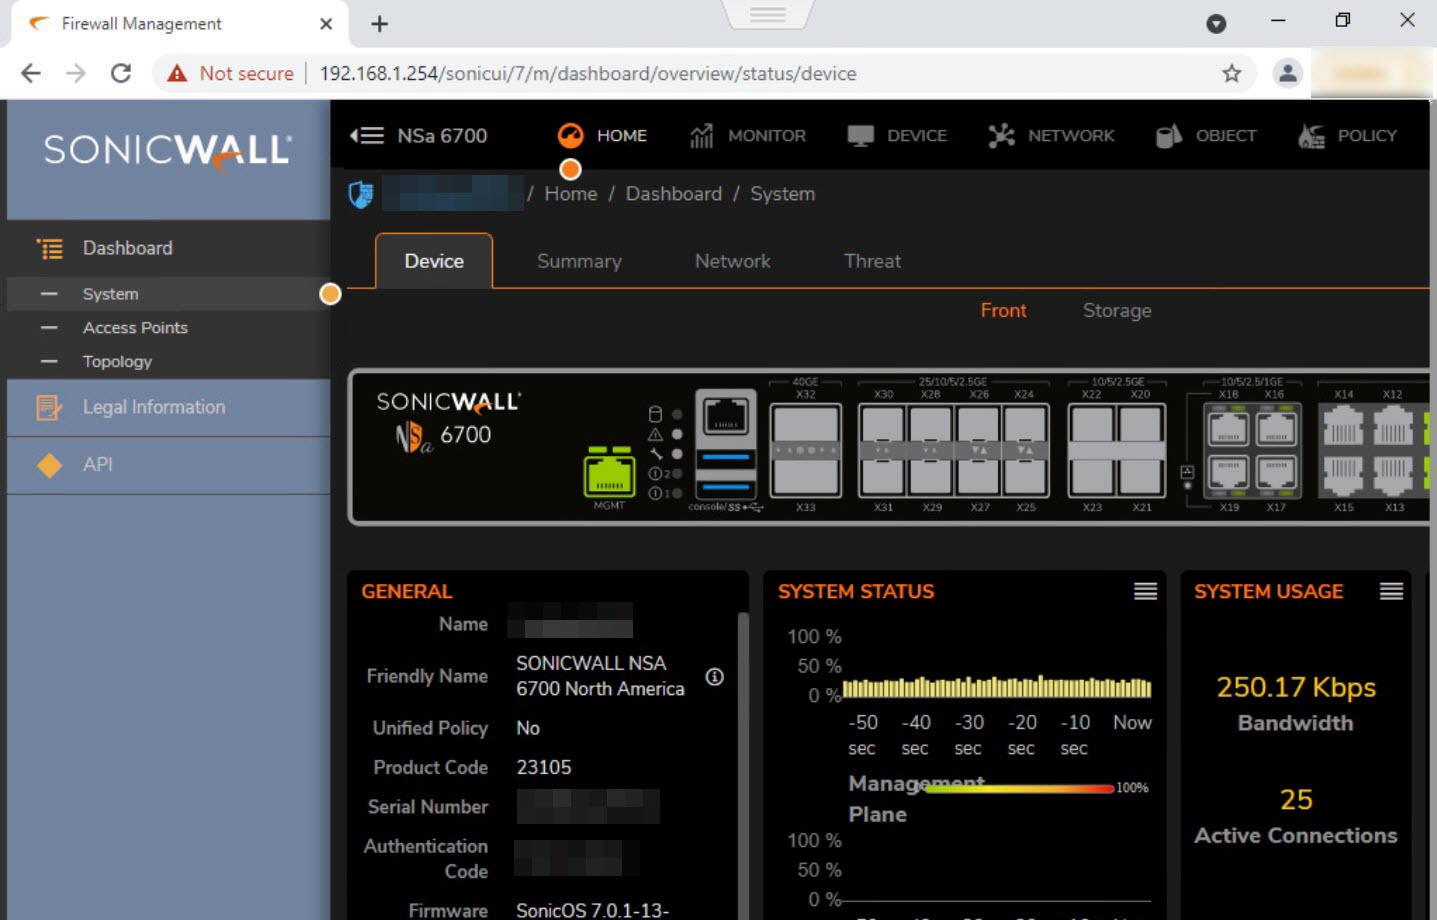
3. Upon launching the manual setup, NSA goes to the default page HOME | Dashboard | System | Device tab on the GUI.
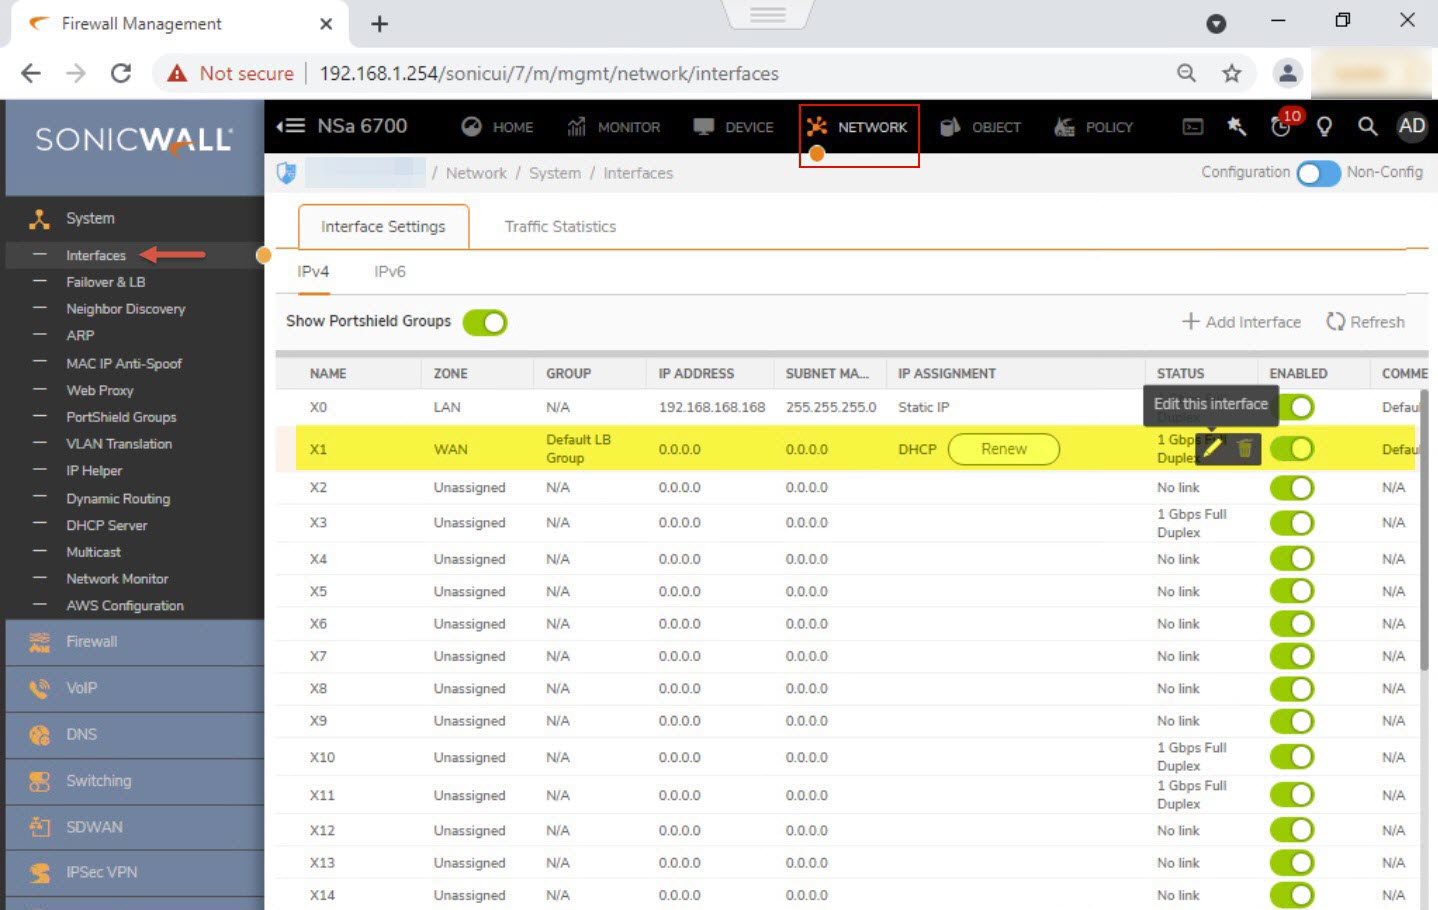
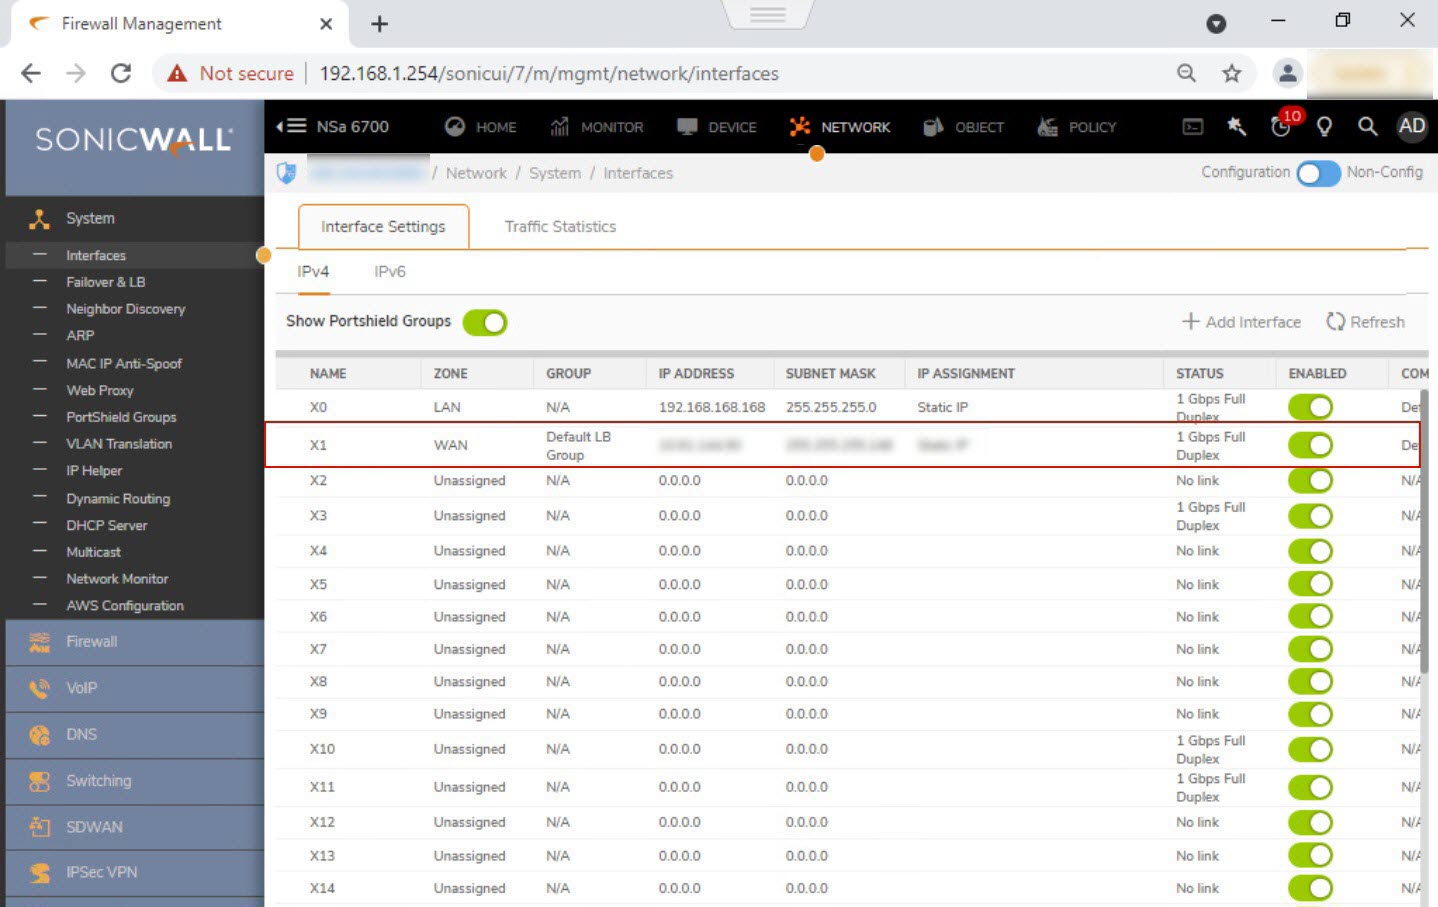
4. Navigate to NETWORK | System | Interfaces, click on the Configure/Edit option of the X1 (WAN) interface to setup Internet access.
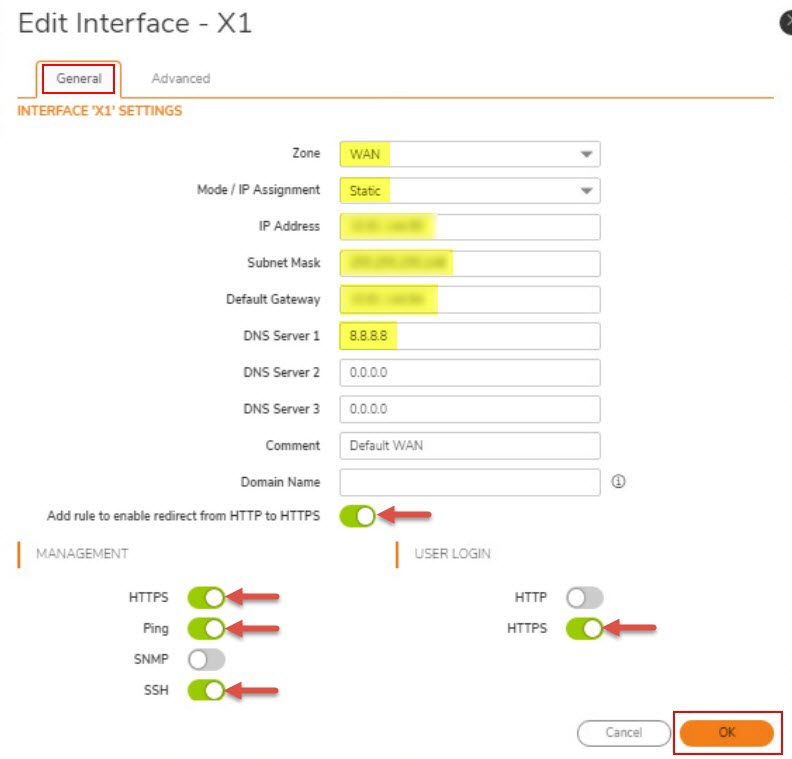
5. In the Edit Interface - X1, configure below parameters
- Zone: WAN
- Mode/IP Assignment: Static or DHCP (This is purely based on the ISP’s offering)
 NOTE:
NOTE:
- If ISP provides static IP address, specify the IP Address, Subnet Mask, Default Gateway and DNS Server 1, 2 and 3 respectively.
- If ISP offers a Dynamic IP address, the fields IP Address, Subnet Mask, Default Gateway and DNS Servers can be left blank as they would get populated automatically when the configuration is saved.
- Enable the MANAGEMENT and USER LOGIN options as required.
 NOTE: Enabling the Management and User Login options on X1 interface is not Mandatory and it is purely based on the requirement.
- Click OK.
6. The X1 WAN interface is configured, and IP address detail appears as shown in the below screenshot.
Registering the Product on GUI:
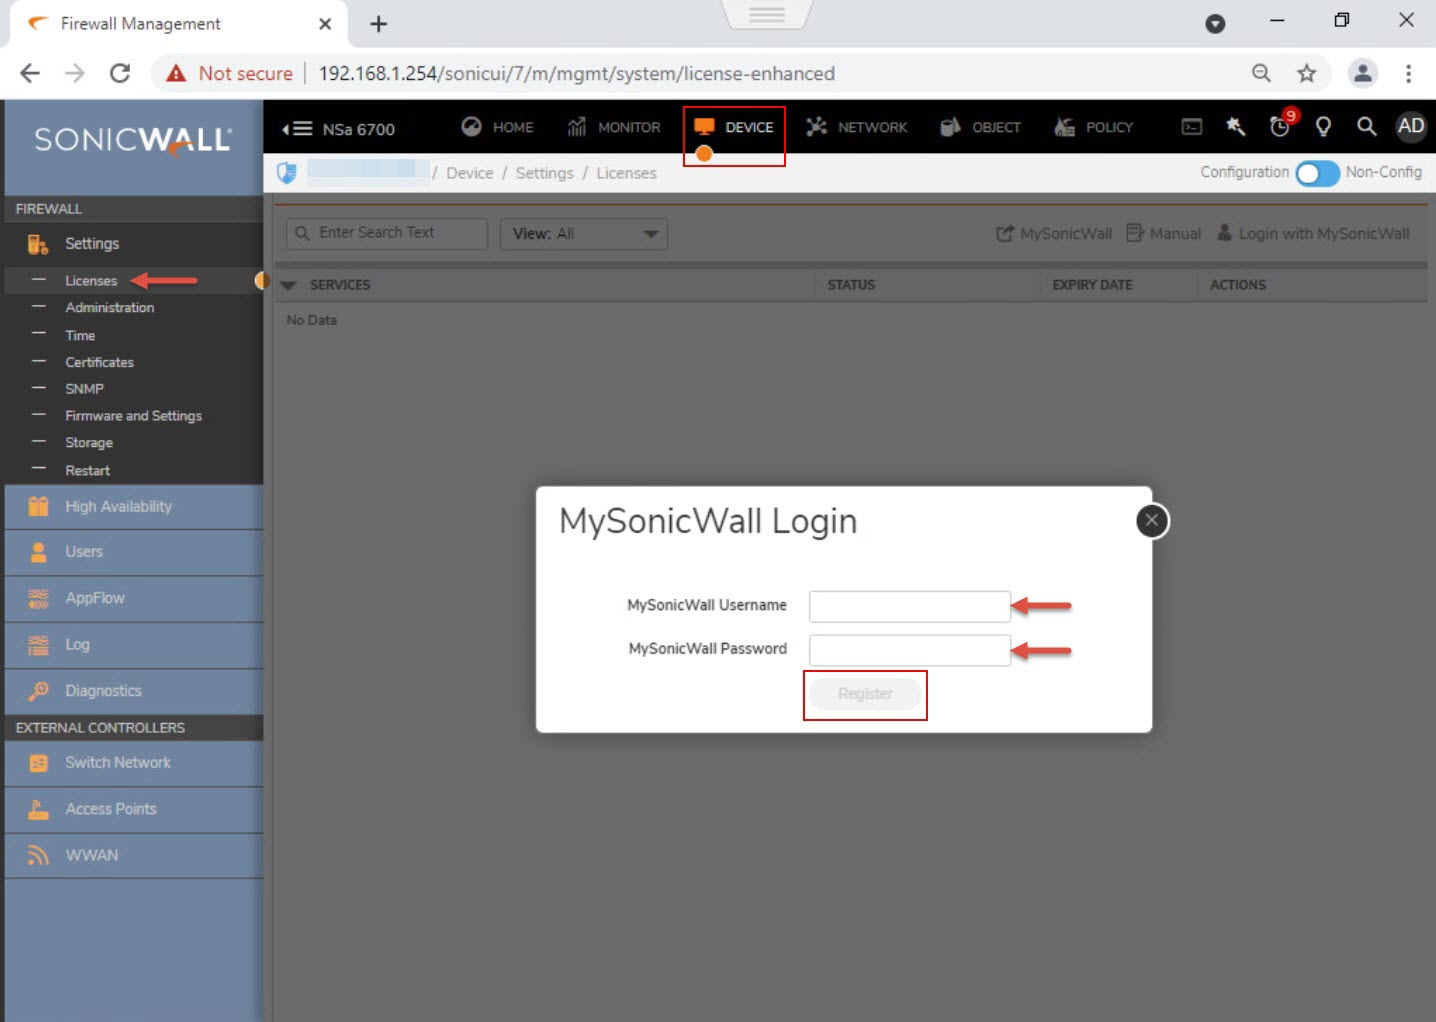
1. To complete the NSA 6700 registration on the GUI, navigate to DEVICE | Settings | Licenses page and enter the MySonicWall Login Username/Password and click Register.
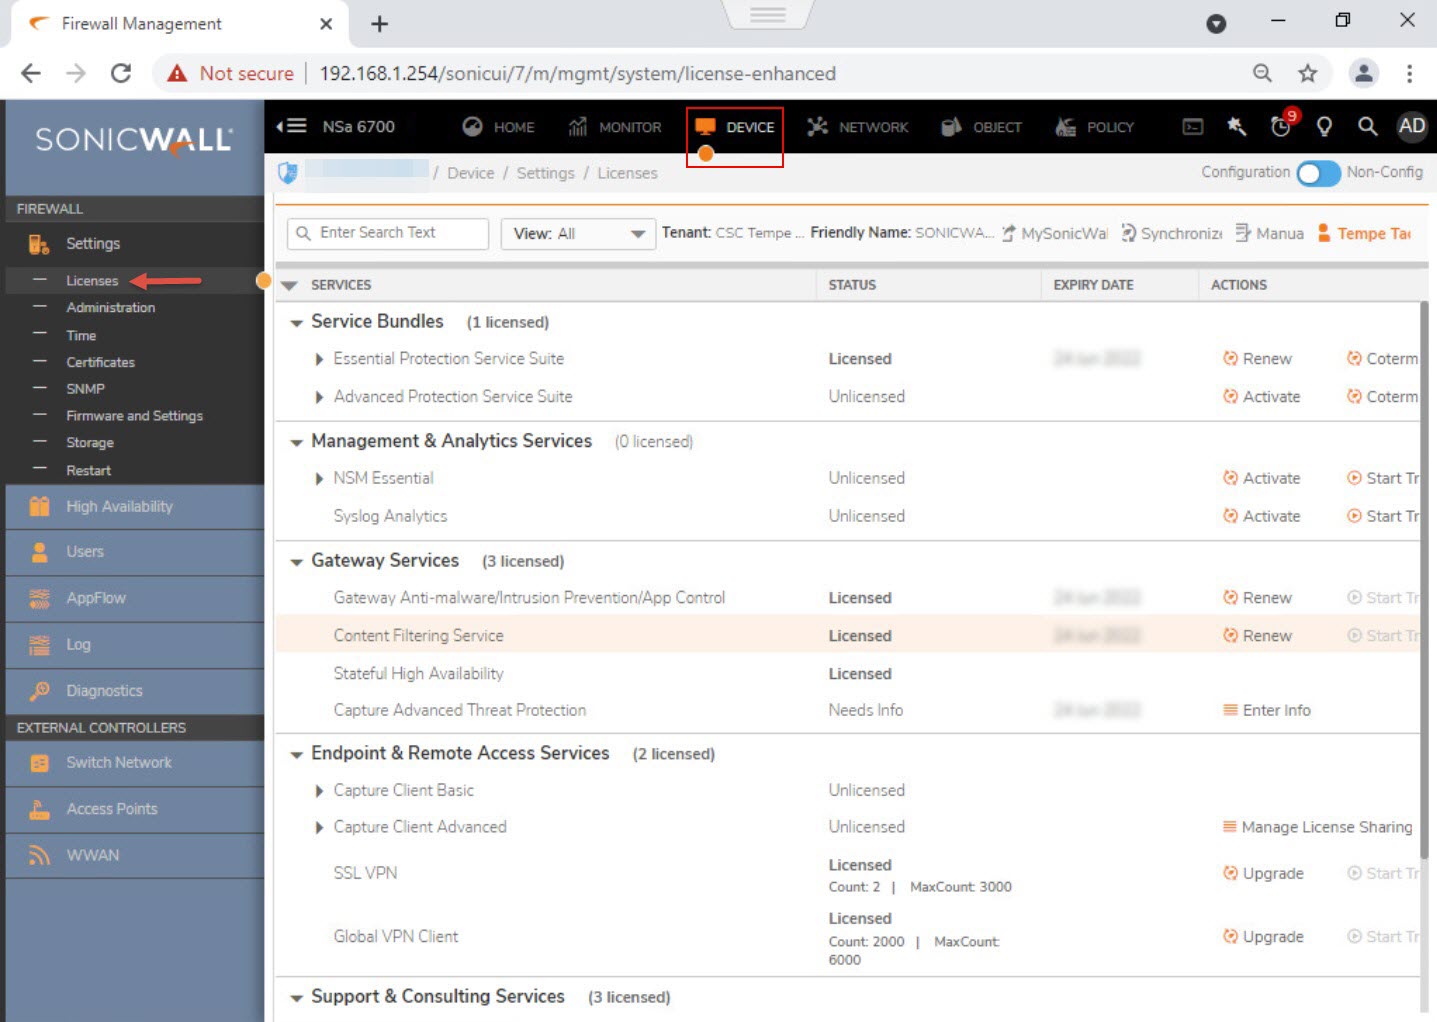
2. The NSA is registered and displays all the licensing details of SonicWall Services/Features in the DEVICE | Settings | Licenses page on the GUI.
Related Articles
- Error:"Invalid API Argument" when modifying the access rules
- Cysurance Partner FAQ
- Configure probe monitoring for WAN Failover and Loadbalancing - SonicWall UTM


 YES
YES NO
NO