


-
Products
-
SonicPlatform
SonicPlatform is the cybersecurity platform purpose-built for MSPs, making managing complex security environments among multiple tenants easy and streamlined.
Discover More
-
-
Solutions
-
Federal
Protect Federal Agencies and Networks with scalable, purpose-built cybersecurity solutions
Learn MoreFederalProtect Federal Agencies and Networks with scalable, purpose-built cybersecurity solutions
Learn More - Industries
- Use Cases
-
-
Partners
-
Partner Portal
Access to deal registration, MDF, sales and marketing tools, training and more
Learn MorePartner PortalAccess to deal registration, MDF, sales and marketing tools, training and more
Learn More - SonicWall Partners
- Partner Resources
-
-
Support
-
Support Portal
Find answers to your questions by searching across our knowledge base, community, technical documentation and video tutorials
Learn MoreSupport PortalFind answers to your questions by searching across our knowledge base, community, technical documentation and video tutorials
Learn More - Support
- Resources
- Capture Labs
-
- Company
- Contact Us
How to secure Virtual Office portal from all external access
 07/12/2024
  178 People found this article helpful
 457,360 Views

Description
 CAUTION: Before proceeding Please Export Settings Configuration
 NOTE: Due to some changes, may have you edit or add another physical interface or change your local network host
Please be onsite with settings before proceeding.
There are two ways of Securing the Virtual Office to be seen from the External Access
Option1:
- Simply edit the portal your using for Users (That's not Virtual Office) or add a new one for users.
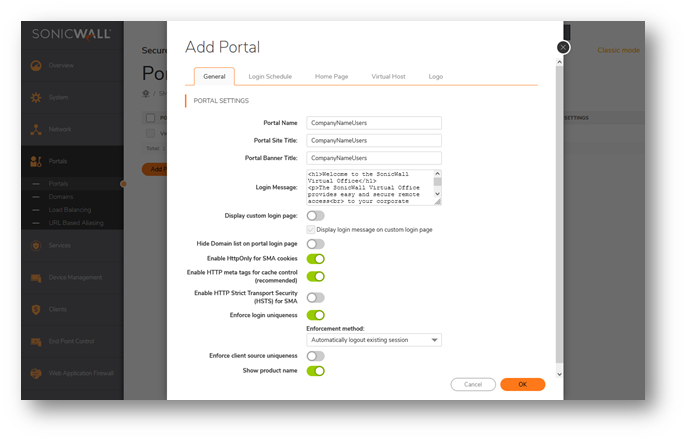
- Under Add Portals | portal | General
- Edit these fields: Portal Name, Portal Site Title, and Portal Banner Title
 EXAMPLE: CompanyNameUsers or Vendors or ....
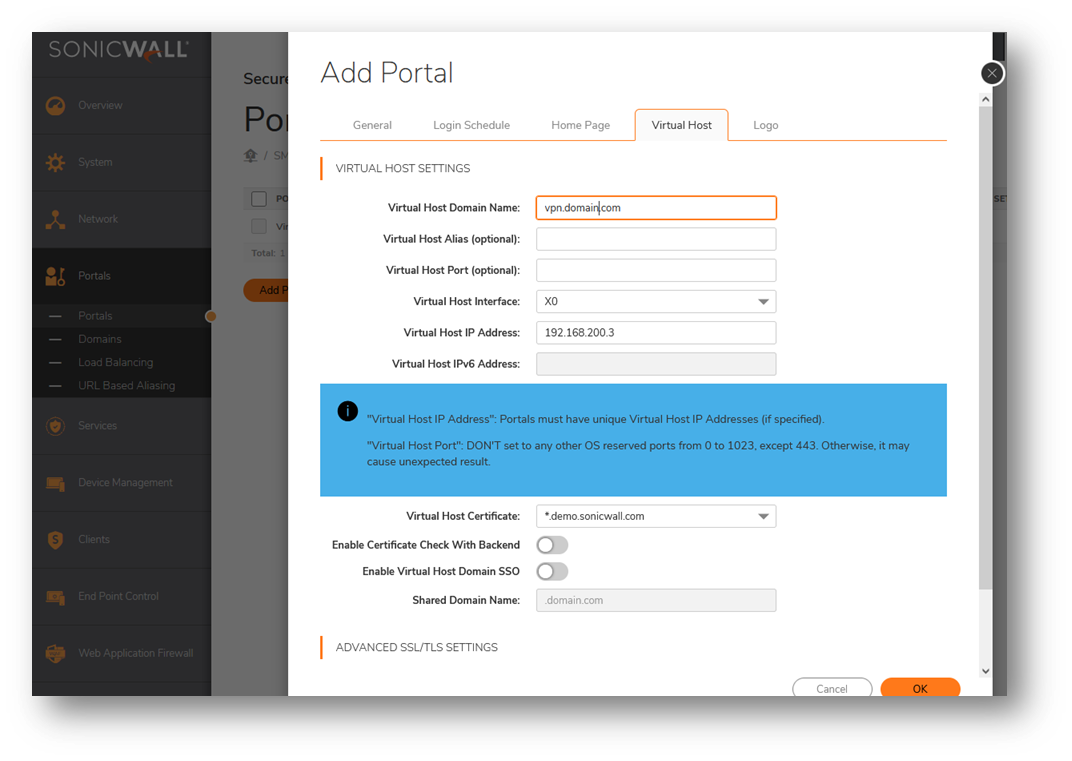
- Now under Virtual Host Tab, Give Hostname based on your domain, like example: vpn.domain.com
- Then change Virtual Host Interface from ALL Interfaces to X0 (or the interface you want to use)
- Edit Virtual Host IP Address to your new IP - normally IP address from the same subnet as your SMA Appliance IP.
EXAMPLE: SMA X0 is 192.168.200.1 and the Default Gateway is 192.168.200.2 So, the custom IP would be 192.168.200.3
Then change your firewall Nat policy to the new custom address IP you created.
Submit/Save Changes
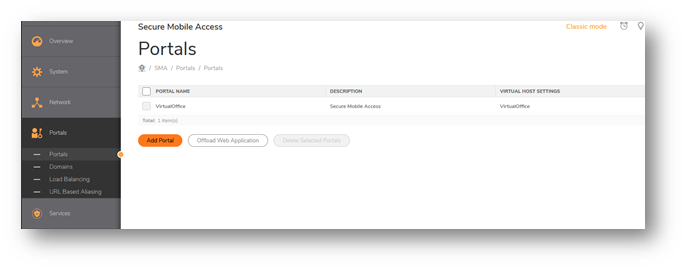
- Next, navigate to Portals | Domains | Edit Users Domain
- Then make sure the Portal name: [ Box has correct Portal ] Remove virtual Office from it.
Summation: this will keep IP of SMA not part of the inbound Nat policy, so the virtual office is not seen publicly NOTE: This has a Limitation only one portal with unique internal IP to one public IP
Option 2:
Secures the Virtual Office Portal from All External Access. However, for many Portal names, you want it attached to single public IP. You will need to do a Second way of Securing the Virtual Office from External Access
- Add new interface under Networks | Interfaces
- Edit X1 Interface to your new virtual office admin network you wish to use
NOTE: (if using x1 then use another interface that is Available)
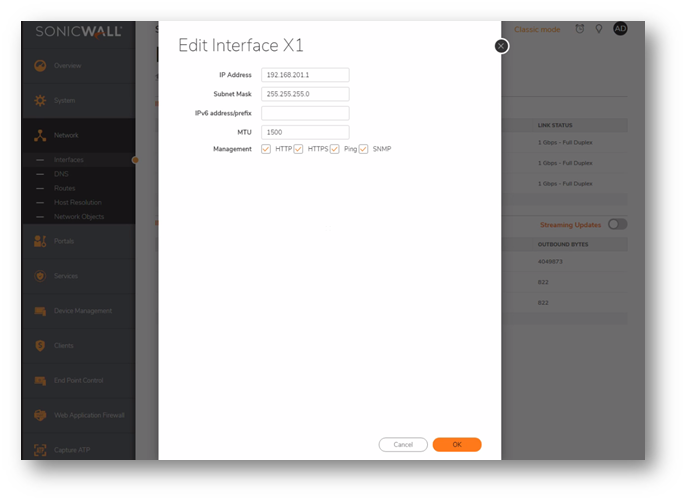
- Once added make sure that the cable is plugged into the network and make it visible on its own separate IP network range
 TIP: For physical SMA devices, create a new zone and network on another firewall interface for your new SMA interface
(if any issues in set up, please check with our firewall team or your 3rd party firewall support)
TIP: For the virtual SMA devices, create a new virtual switch tied to another separate physical interface of your virtual host server or create VLAN to separate that
(if any issues in set up, please check your 3rd party virtual server support)
- Add New Portal for Users If not already done
- Under Add Portals | portal | General
- Edit these fields: Portal Name, Portal Site Title, and Portal Banner Title
EXAMPLE: CompanyNameUsers or Vendors or ....
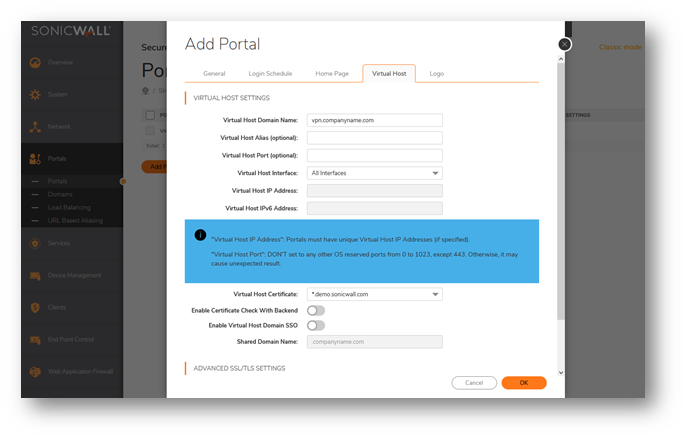
- Next Under Portals | portal | Edit existing portal or Add one | Virtual Host
- Edit Virtual Host Domain Name: example vpn.companyname.com
NOTE: This is the Hostname assigned to the public IP of your SMA by global DNS tied to your company.com name
- Now edit All Interfaces change to X0 or ( if that's the interface you use for your users / NAT policy IP )
- Add the IP address you want for that portal
CAUTION: Make Sure you have access to other SMA Interface IPs before proceeding
- Click OK. You will get a warning box as below, now hit OK
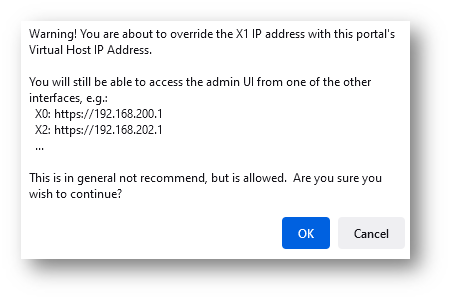
CAUTION: This change will disconnect active Users and Restart device is Suggested
- Next, you may receive 2nd Warning Message Portal IP change click OK
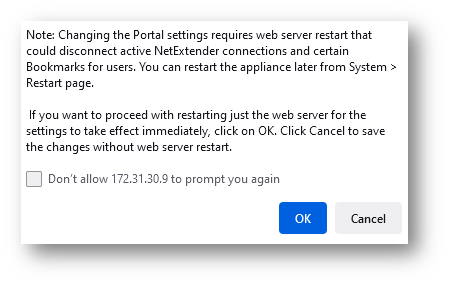
- Now you successfully secured your administration portal ( Virtual Office ) to only be seen on internal ip addresses
CAUTION: Be Onsite with SMA backup before proceeding
TIP: you may need to make further adjustments on virtual SMA's to see both networks internally thru the virtual host or cloud provider
If traffic does not flow check your firewall/router access rules and NAT policies for each SMA internal IP you have
if many user portals give each separate IP, then create a group object in the firewall and set all of them to the same public IP. This may have you create a few NAT policies for each object or group NAT policy.
**remember each user portal needs DNS Hostname created and posted publicly with your DNS service provider**
Related Articles
- How to download Client Installation package and the access agents from the appliance using WinSCP
- SMA 1000: How to update Advanced EPC Signatures to the Latest Version
- If OTP is enabled, NX disconnects after SMA100 Connect Agent installation
Categories
- Secure Mobile Access > SMA 100 Series
- Secure Mobile Access > SMA 100 Series > Configuration
- Secure Mobile Access > SMA 100 Series > Portals
 YES
YES NO
NO