


-
Products
-
SonicPlatform
SonicPlatform is the cybersecurity platform purpose-built for MSPs, making managing complex security environments among multiple tenants easy and streamlined.
Discover More
-
-
Solutions
-
Federal
Protect Federal Agencies and Networks with scalable, purpose-built cybersecurity solutions
Learn MoreFederalProtect Federal Agencies and Networks with scalable, purpose-built cybersecurity solutions
Learn More - Industries
- Use Cases
-
-
Partners
-
Partner Portal
Access to deal registration, MDF, sales and marketing tools, training and more
Learn MorePartner PortalAccess to deal registration, MDF, sales and marketing tools, training and more
Learn More - SonicWall Partners
- Partner Resources
-
-
Support
-
Support Portal
Find answers to your questions by searching across our knowledge base, community, technical documentation and video tutorials
Learn MoreSupport PortalFind answers to your questions by searching across our knowledge base, community, technical documentation and video tutorials
Learn More - Support
- Resources
- Capture Labs
-
- Company
- Contact Us
How to restrict SSLVPN access to the SonicWall firewall based on Source WAN IP's?
 07/17/2024
  23 People found this article helpful
 497,550 Views

Description
This KB article depicts instructions on how to restrict SSLVPN connection to the SonicWall firewall appliance so that the device allows only authorized users to connect via SSLVPN. The SSLVPN users are limited for connection based on source Public IP addresses.
Resolution
Resolution for SonicOS 7.X
This release includes significant user interface changes and many new features that are different from the SonicOS 6.5 and earlier firmware. The below resolution is for customers using SonicOS 7.X firmware.
Step 1 - Choose the appropiate SonicWall diag page setting option
Option 1 - "Enable the ability to remove and fully edit auto-added access rules".
 NOTE: This is a temporary solution and the default SSLVPN access rule will be recreated after reboot in addition to the one that has the source modified
Option 2 - "Automatic SSL VPN access rules generation"
NOTE: This will allow the changes to persist through reboots, however this affects all default SSLVPN access rules. You will have to add all SSLVPN access rules for any Zone / Objects that need to be allow for the SSLVPN clients manually.
Step 2 - Creating Address Objects and Address Group(s)
Step 3 - Updating the default SSLVPN access rule with the address objects created
Step 1
Option 1 - SonicWall diag page setting change for auto-added access rules edit
1. Login to the firewall and visit the IP/sonicui/7/m/mgmt/settings/diag to access the diag page of the firewall.
 EXAMPLE: 192.168.168.168/sonicui/7/m/mgmt/settings/diag
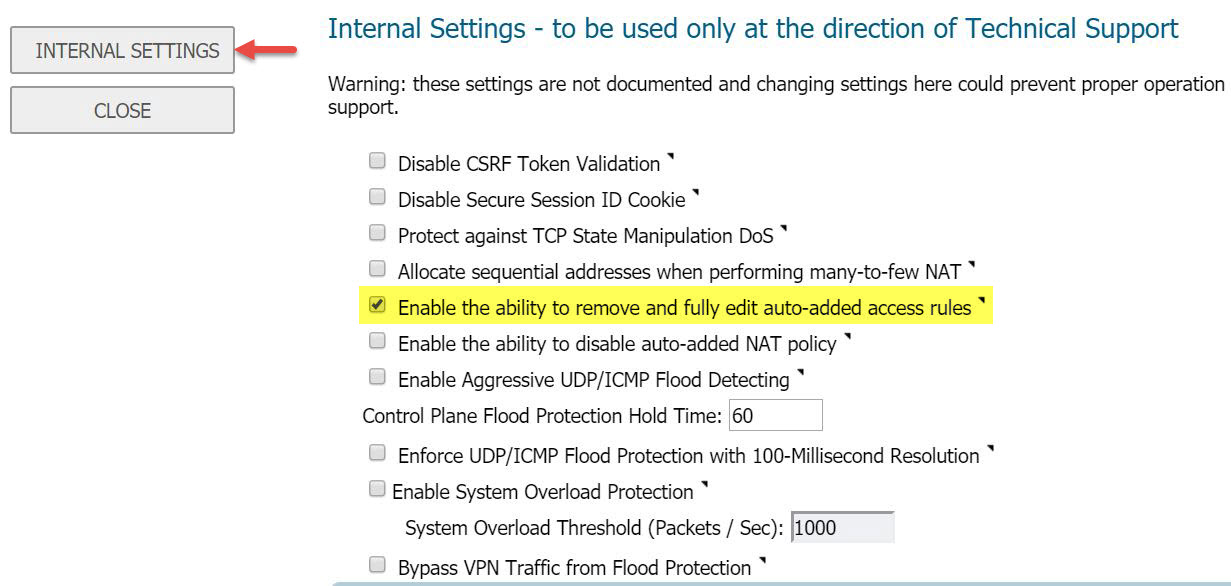
2. Click on Internal Settings and search for the section Firewall Settings.
3. Enable the checkbox Enable the ability to remove and fully edit auto-added access rules.
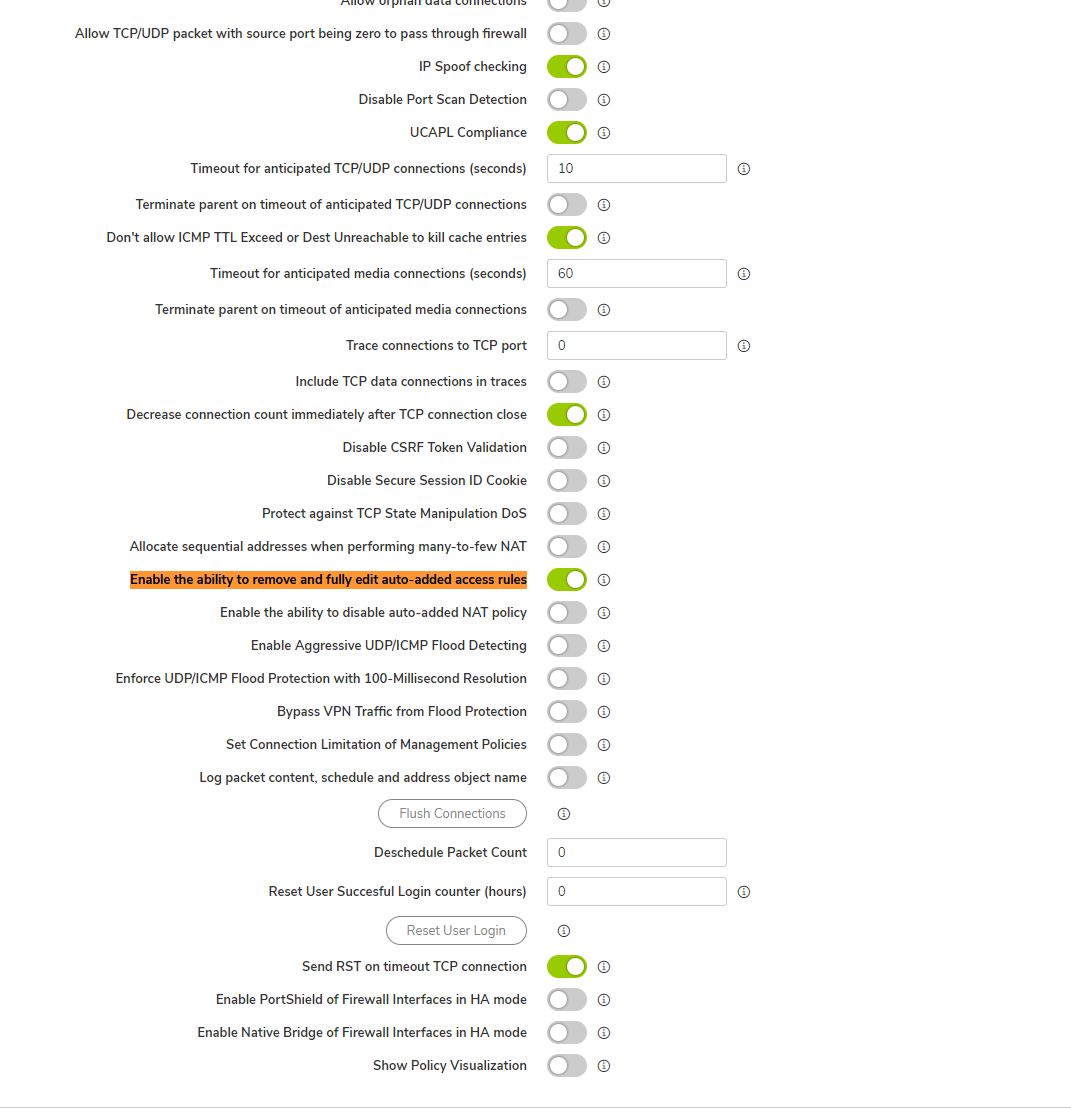
4. Click on Accept to save the configuration.
5. Click on CLOSE to visit SonicWall's conventional GUI.
Option 2 - SonicWall diag page "Automatic SSL VPN access rules generation"
1. Login to the firewall and visit the IP/sonicui/7/m/mgmt/settings/diag to access the diag page of the firewall.
EXAMPLE: 192.168.168.168/sonicui/7/m/mgmt/settings/diag
2. Click on Internal Settings and search for the section Firewall Settings.
3. Disable the option "Automatic SSL VPN access rules generation.
4. Click on Accept to save the configuration.
5. Click on CLOSE to visit SonicWall's conventional GUI.
NOTE: Unfortunately, Gen 5 and Gen 5.5 firewall models are not embedded with the diag page options to tweak the default rules/policies. Hence, Gen 5 and 5.5 firewall models do not follow this KB article. The embedded feature is available only from Gen 6 firewalls.
Step 2 - Creating Address Objects and Address Group(s)
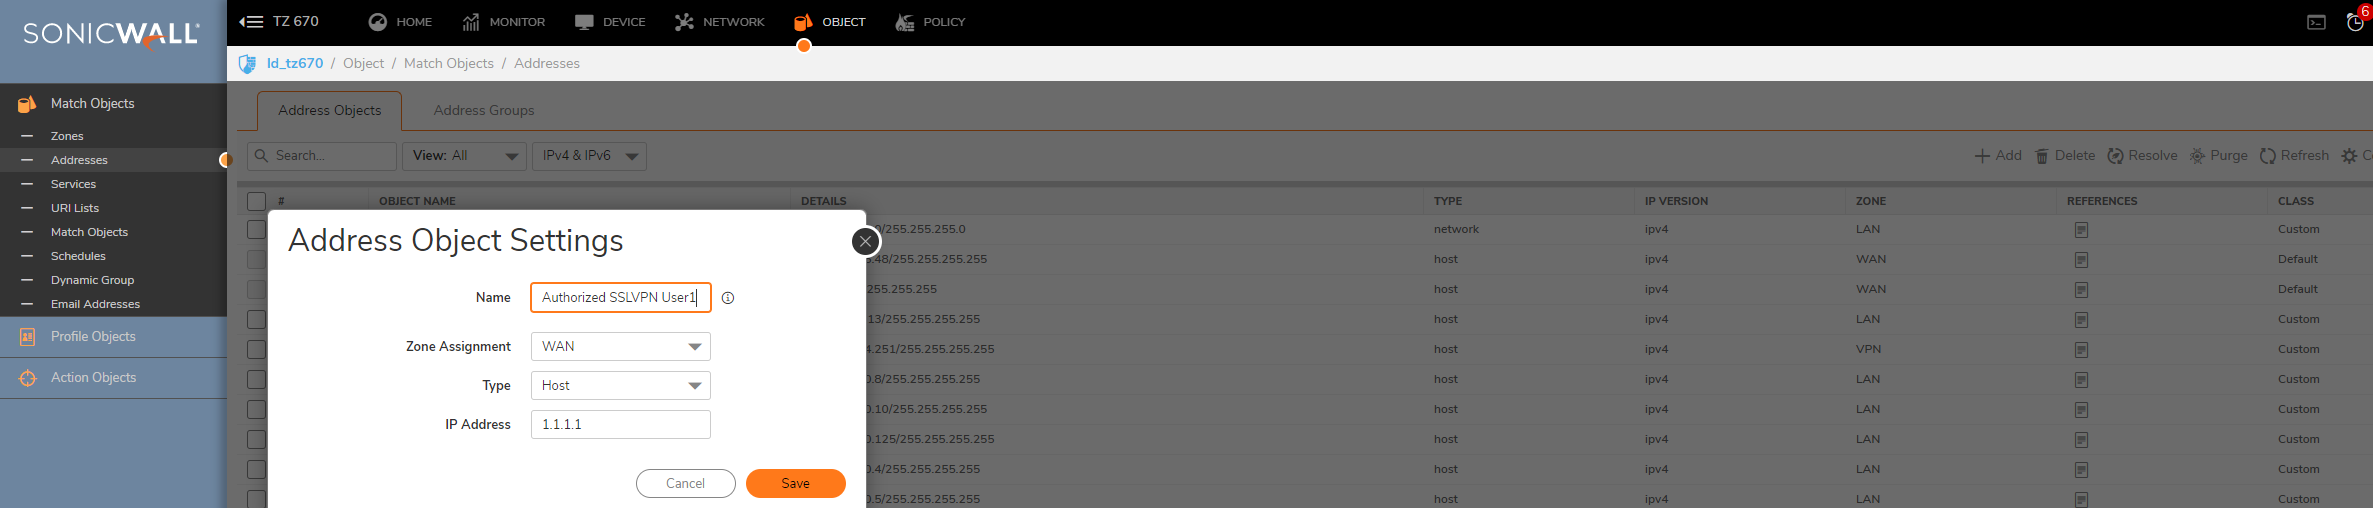
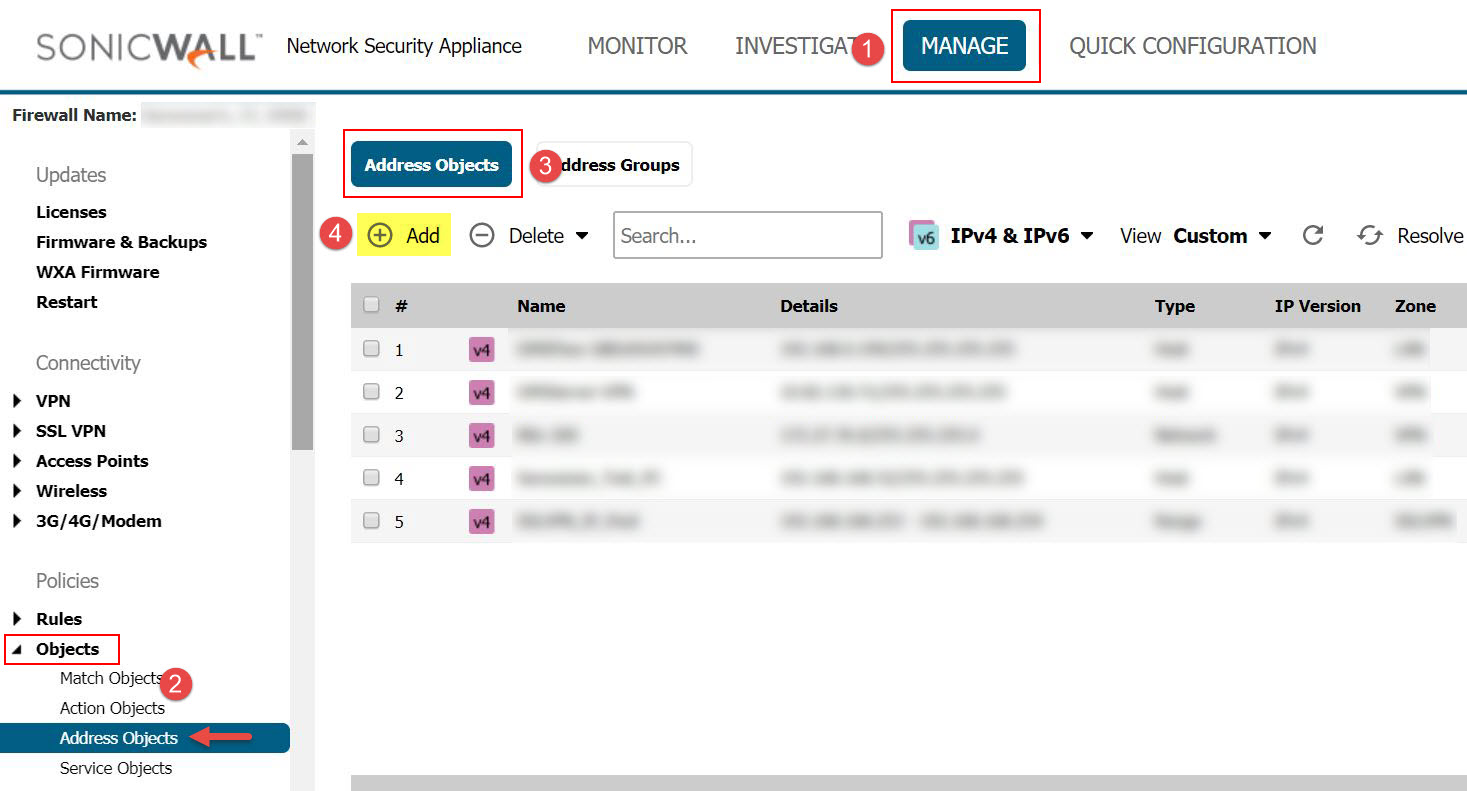
6. Navigate to Objects | Match Objects | Address Objects page in the GUI.
7. In the Address Objects tab, click Add.
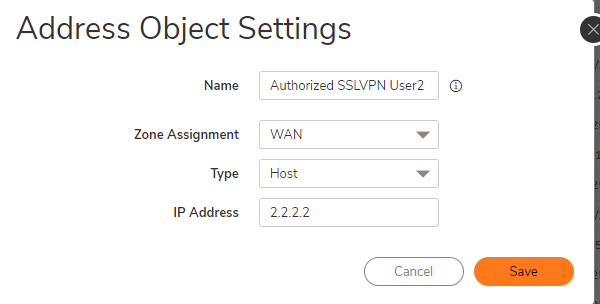
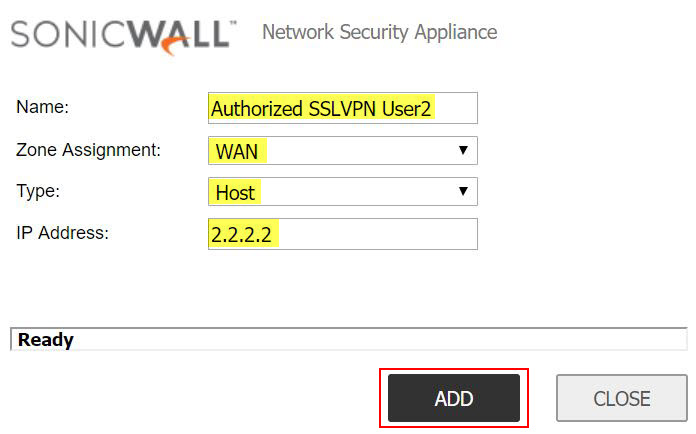
8. In the Address Object creation pop-up window, specify the Name, Zone Assignment, Type and IP Address details. (The address objects are created for the WAN IP addresses of the SSLVPN users)
9. Click ADD.
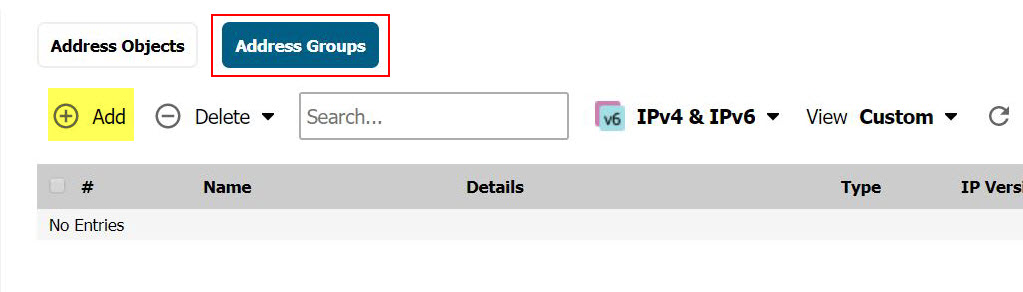
10. Put the address objects together in an Address Group by navigating to Address Groups tab and click on Add.
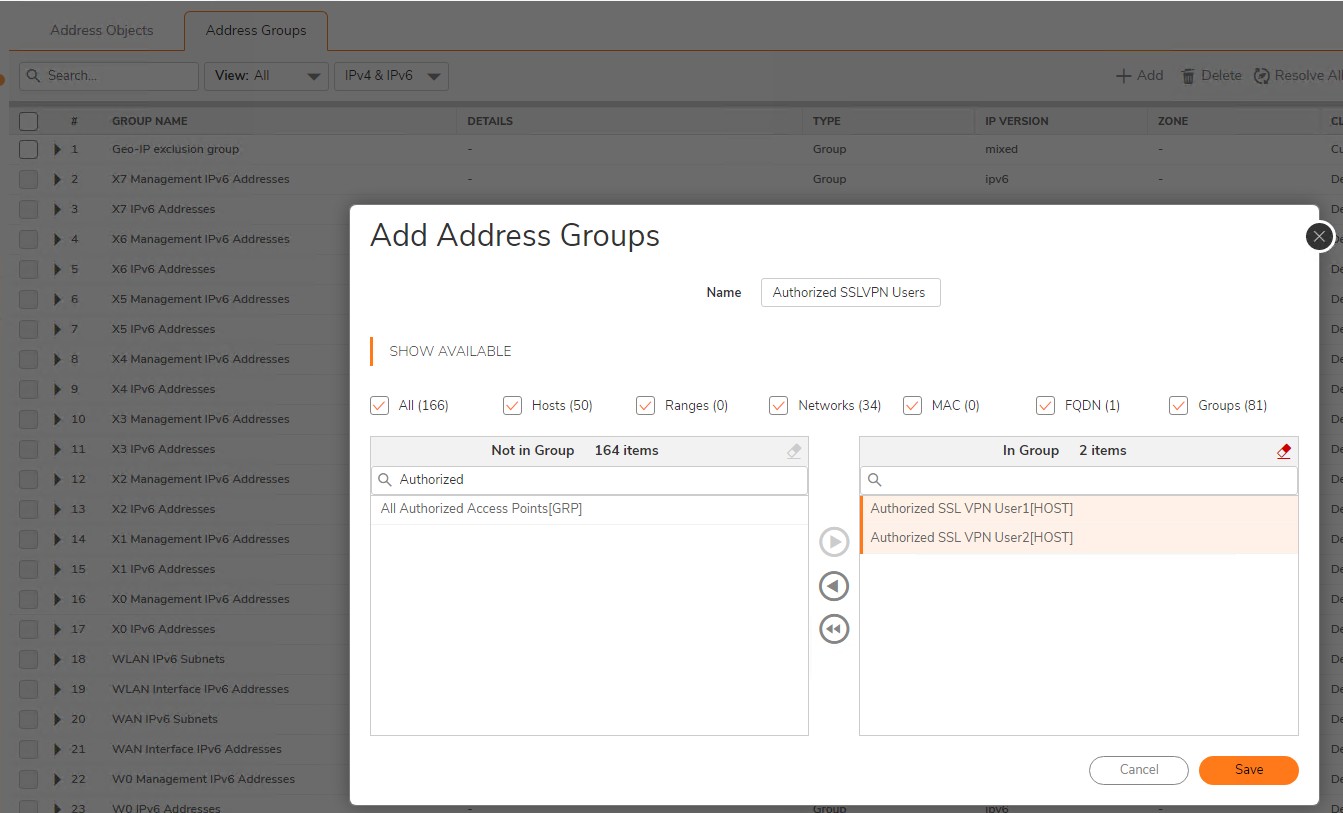
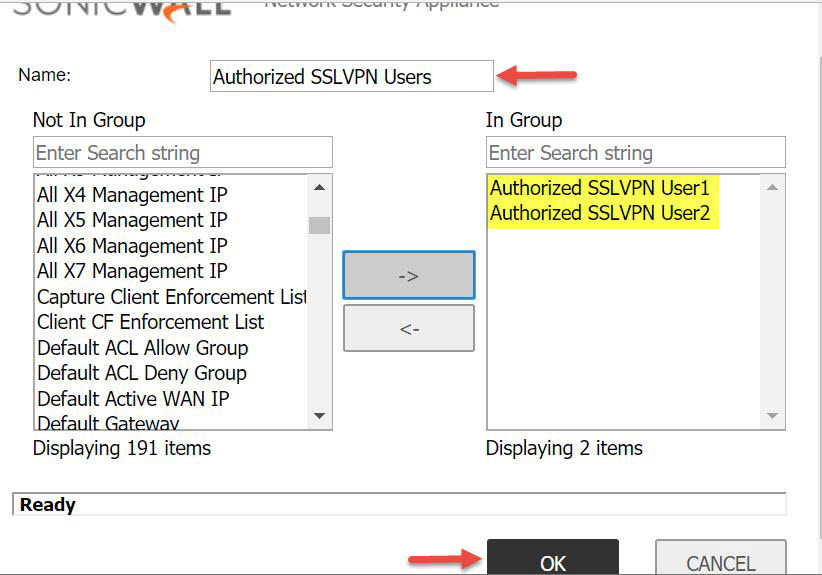
11. In the Address Group creation pop-up window, specify the Name of the group, enforce the address objects from LHS to RHS and click OK.
Step 3 - Updating the default SSLVPN access rule with the address objects created
12. Navigate to Rules | Access Rules page and visit WAN to WAN rules section.
13. Click on the Configure option of the default SSLVPN access rule as shown below.
14. To modify the access rule, in the General tab, change the Source field to the address objects/group containing the preferred public IP addresses of SSLVPN users and click OK.
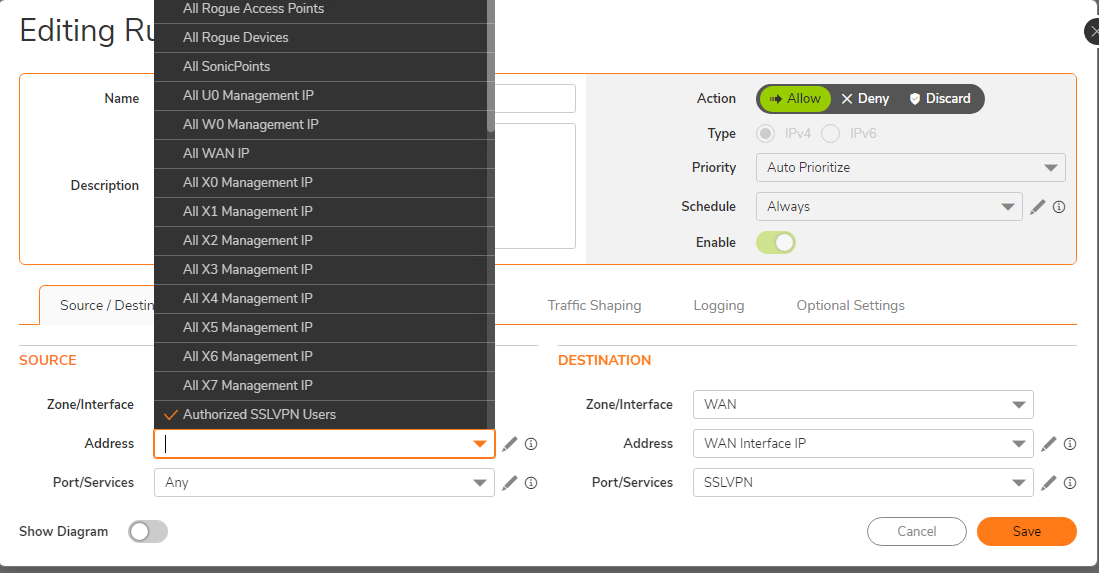
15. The Default SSLVPN WAN access rule looks as below with source being specific.

Resolution for SonicOS 6.5
This release includes significant user interface changes and many new features that are different from the SonicOS 6.2 and earlier firmware. The below resolution is for customers using SonicOS 6.5 firmware.
Step 1 - SonicWall diag page setting change for auto-added access rules edit
Step 2 - Creating Address Objects and Address Group(s)
Step 3 - Updating the default SSLVPN access rule with the address objects created
Step 1 - SonicWall diag page setting change for auto-added access rules edit
1. Login to the firewall and visit the diag page by replacing the keyword main in URL with diag (For ex: https://ipaddress/diag.html) and hit enter.
2. Click on Internal Settings and search for the section Firewall Settings.
3. Enable the checkbox Enable the ability to remove and fully edit auto-added access rules.
4. Click on Accept to save the configuration.
5. Click on CLOSE to visit SonicWall's conventional GUI.
NOTE: This is a temporary solution and the default SSLVPN access rule will be recreated after reboot in addition to the one that has the source modified, unfortunately GEN 6 and GEN 6.5 do not have a permanent option.
NOTE: Unfortunately, Gen 5 and Gen 5.5 firewall models are not embedded with the diag page option "Enable the ability to remove and fully edit auto-added access rules" to tweak the default rules/policies. Hence, Gen 5 and 5.5 firewall models do not follow this KB article. The embedded feature is available only from Gen 6 firewalls.
Step 2 - Creating Address Objects and Address Group(s)
6. Navigate to MANAGE | Objects | Address Objects page in the GUI.
7. In the Address Objects tab, click Add.
8. In the Address Object creation pop-up window, specify the Name, Zone Assignment, Type and IP Address details. (The address objects are created for the WAN IP addresses of the SSLVPN users)
9. Click ADD.

10. Put the address objects together in an Address Group by navigating to Address Groups tab and click on Add.
11. In the Address Group creation pop-up window, specify the Name of the group, enforce the address objects from LHS to RHS and click OK.
Step 3 - Updating the default SSLVPN access rule with the address objects created
12. Navigate to Rules | Access Rules page and visit WAN to WAN rules section.
13. Click on the Configure option of the default SSLVPN access rule as shown below.

14. To modify the access rule, in the General tab, change the Source field to the address objects/group containing the preferred public IP addresses of SSLVPN users and click OK.
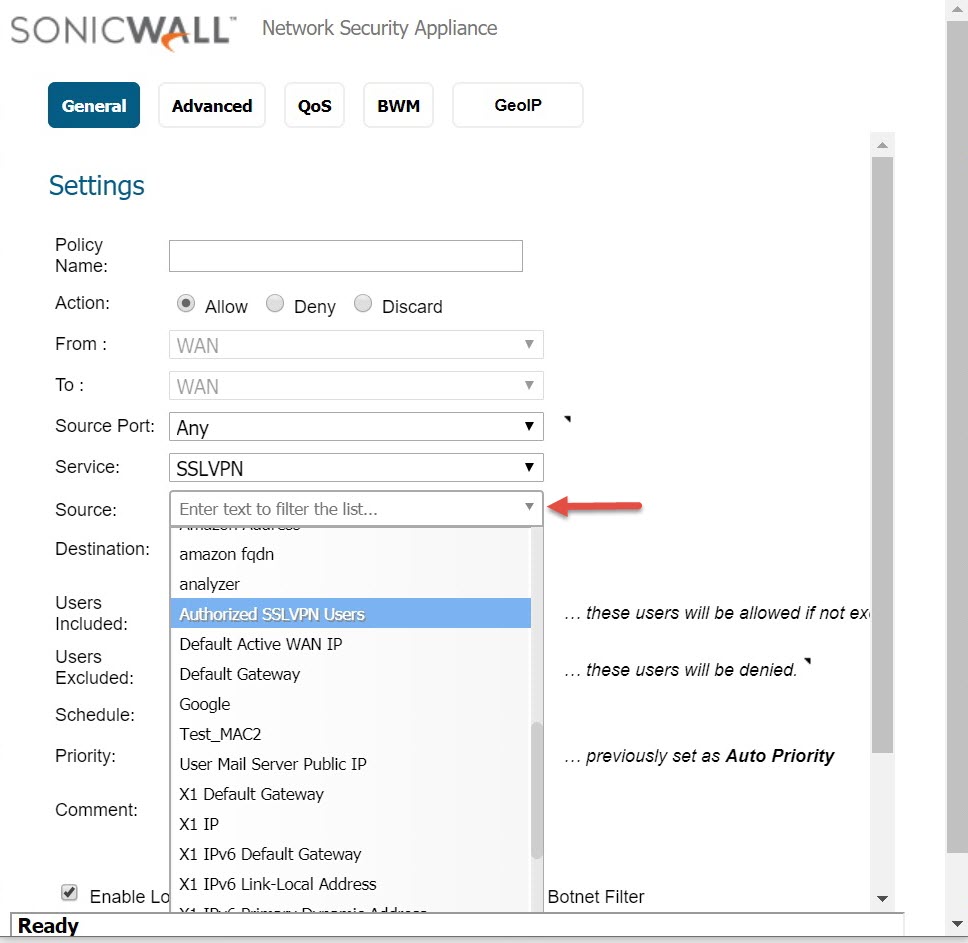
15. The Default SSLVPN WAN access rule looks as below with source being specific.

Related Articles
- Error:"Invalid API Argument" when modifying the access rules
- Cysurance Partner FAQ
- Configure probe monitoring for WAN Failover and Loadbalancing - SonicWall UTM
Categories
- Firewalls > TZ Series
- Firewalls > SonicWall SuperMassive 9000 Series
- Firewalls > NSsp Series
- Firewalls > NSa Series
- Firewalls > NSv Series
 YES
YES NO
NO