-
Products
-
SonicPlatform
SonicPlatform is the cybersecurity platform purpose-built for MSPs, making managing complex security environments among multiple tenants easy and streamlined.
Discover More
-
-
Solutions
-
Federal
Protect Federal Agencies and Networks with scalable, purpose-built cybersecurity solutions
Learn MoreFederalProtect Federal Agencies and Networks with scalable, purpose-built cybersecurity solutions
Learn More - Industries
- Use Cases
-
-
Partners
-
Partner Portal
Access to deal registration, MDF, sales and marketing tools, training and more
Learn MorePartner PortalAccess to deal registration, MDF, sales and marketing tools, training and more
Learn More - SonicWall Partners
- Partner Resources
-
-
Support
-
Support Portal
Find answers to your questions by searching across our knowledge base, community, technical documentation and video tutorials
Learn MoreSupport PortalFind answers to your questions by searching across our knowledge base, community, technical documentation and video tutorials
Learn More - Support
- Resources
- Capture Labs
-
- Company
- Contact Us
How to move SonicWave from firewall to WNM


Description
This article explain how to move a SonicWave Access Point to WNM(WiFi Cloud Manager)
Resolution
When moving your existing SonicWave Access Point from firewall managed to cloud managed you need to make a few changes. Make sure your firewall is on the latest firmware.
Licensing Requirement:
- Secure Cloud WiFi Management - Required
- Content Filtering: Premium Edition - Additional
- Capture Advanced Threat Protection - Additional
Resolution for SonicOS 7.X
This release includes significant user interface changes and many new features that are different from the SonicOS 6.5 and earlier firmware. The below resolution is for customers using SonicOS 7.X firmware.
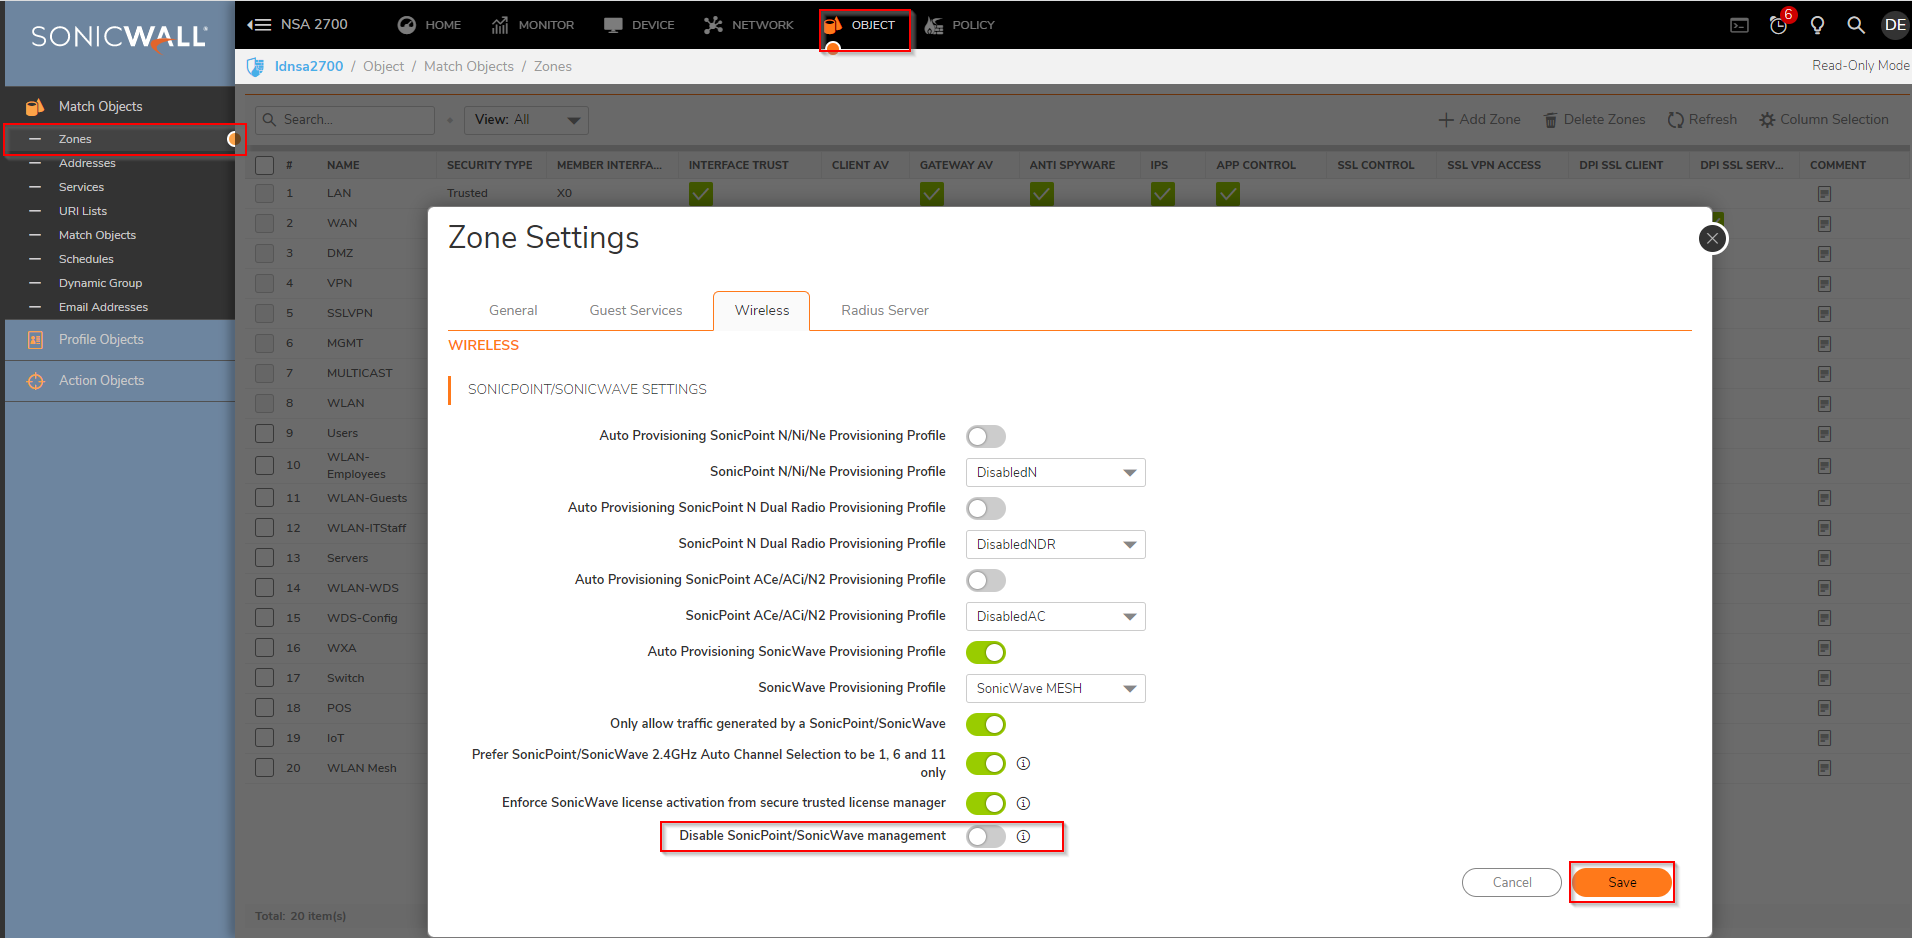
- You still can use the WLAN as a Security type as Wireless, but the option "Disable SonicPoint/SonicWave management" under OBJECT | Match Objects | Zones | WLAN | Wireless needs to be enabled. Doing that the devices should be showing on WNM. If the APs are not on the WLAN zone, no action is needed.
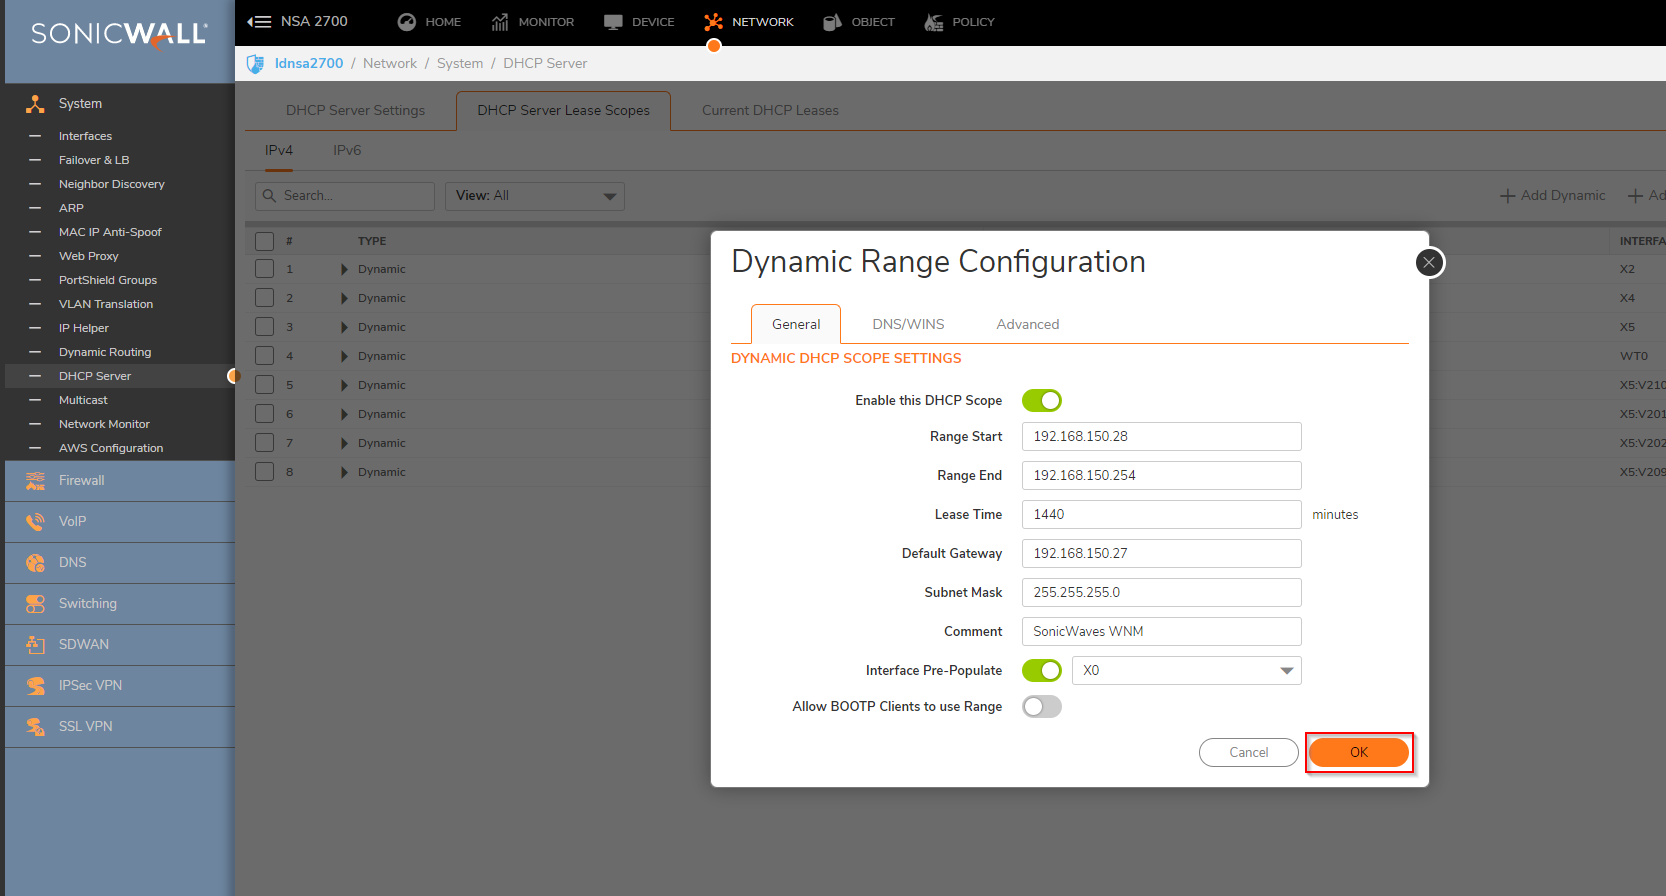
- Create the DHCP lease scope for the Access Points . Navigate to NETWORK | System | DHCP Server | DHCP Server Lease Scopes | Add Dynamic and click OK
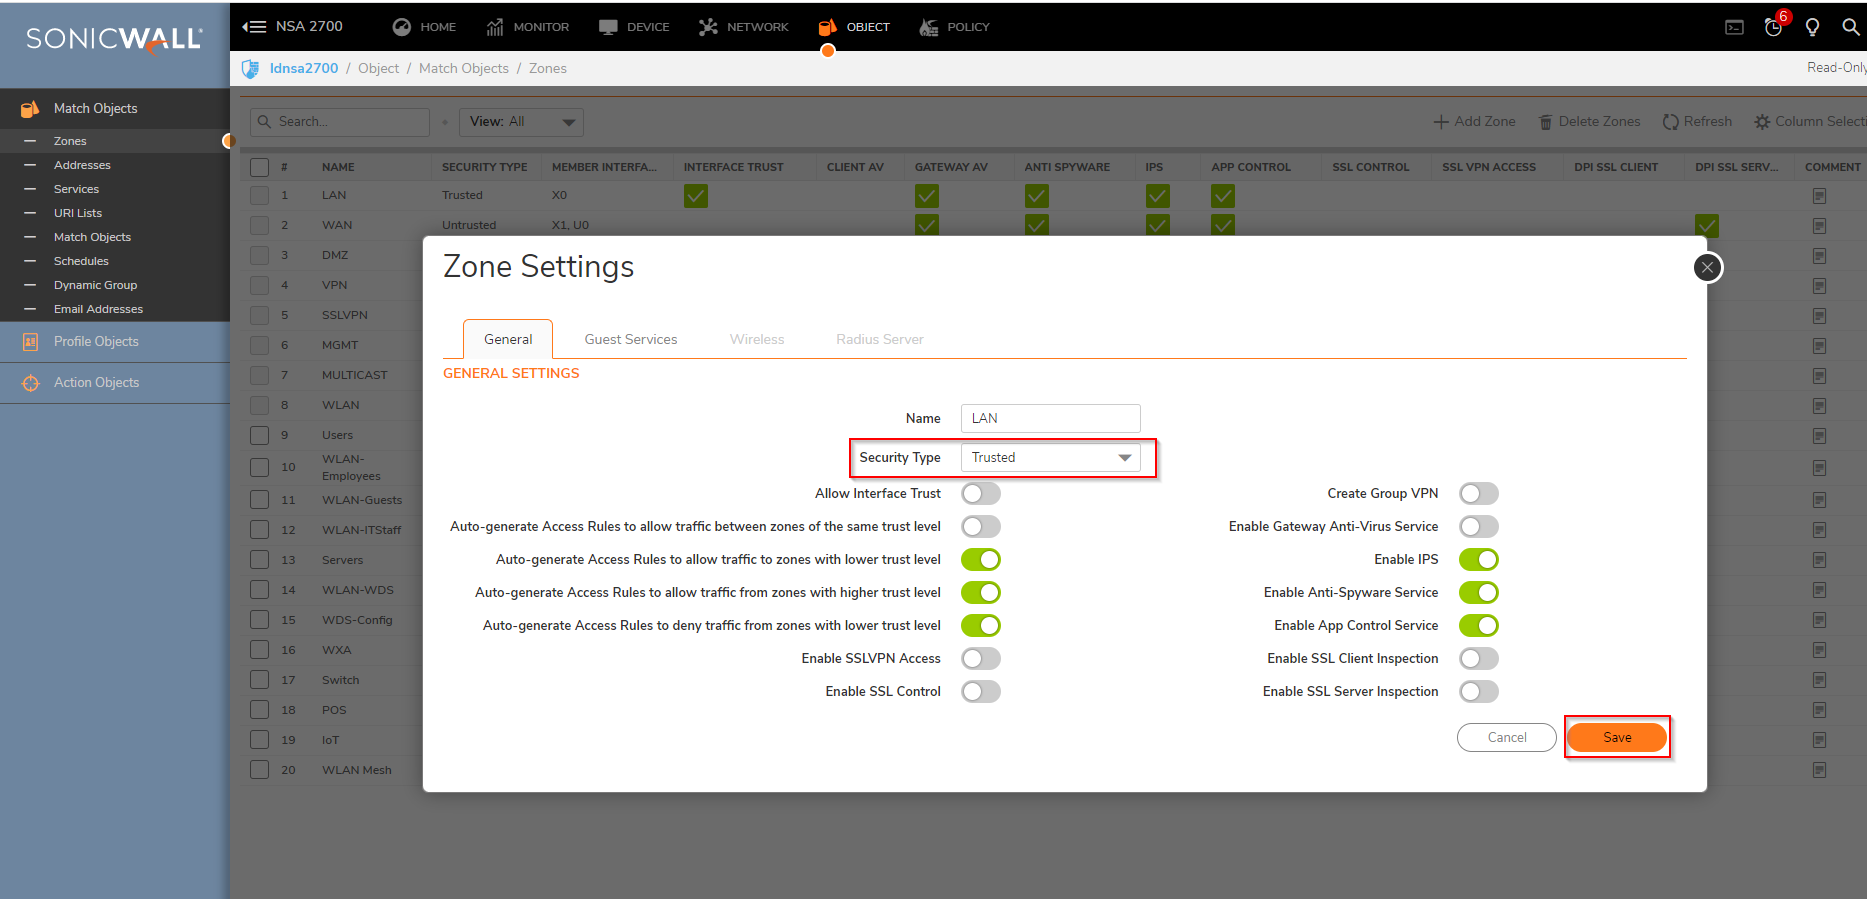
- If you prefer you can create a new LAN zone and make that the security type is set as Trusted or Public.
- In order to change the security type. Navigate to OBJECT | Match Objects | Zones and select the zone where the APs will be configurated and modify the security type for Trusted or Public and click Save.
- Create the DHCP lease scope for the Access Points . Navigate to NETWORK | System | DHCP Server | DHCP Server Lease Scopes | Add Dynamic and click OK
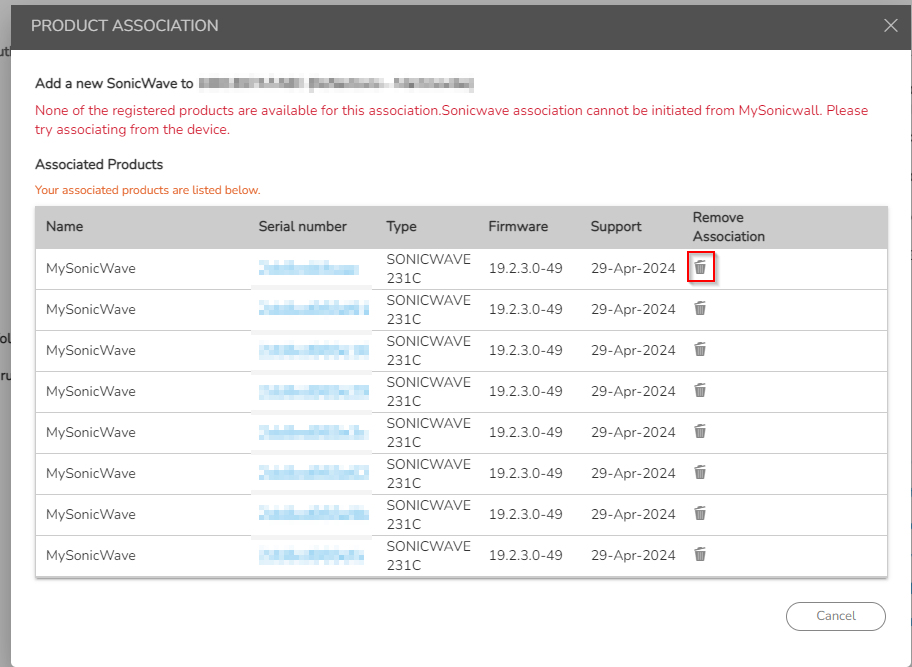
- On mysonicwall.com portal dissociate the SonicWave from the firewall. Go to Product Management | My Products | and find the relevant firewall product and remove the Access Point association.
- At this point, you may need to factory default the access points and/or reboot them and they will appear in your Wireless Network Manager portal where you can add/configure them into relevant groups and SSID's.
Resolution for SonicOS 6.5
This release includes significant user interface changes and many new features that are different from the SonicOS 6.2 and earlier firmware. The below resolution is for customers using SonicOS 6.5 firmware.
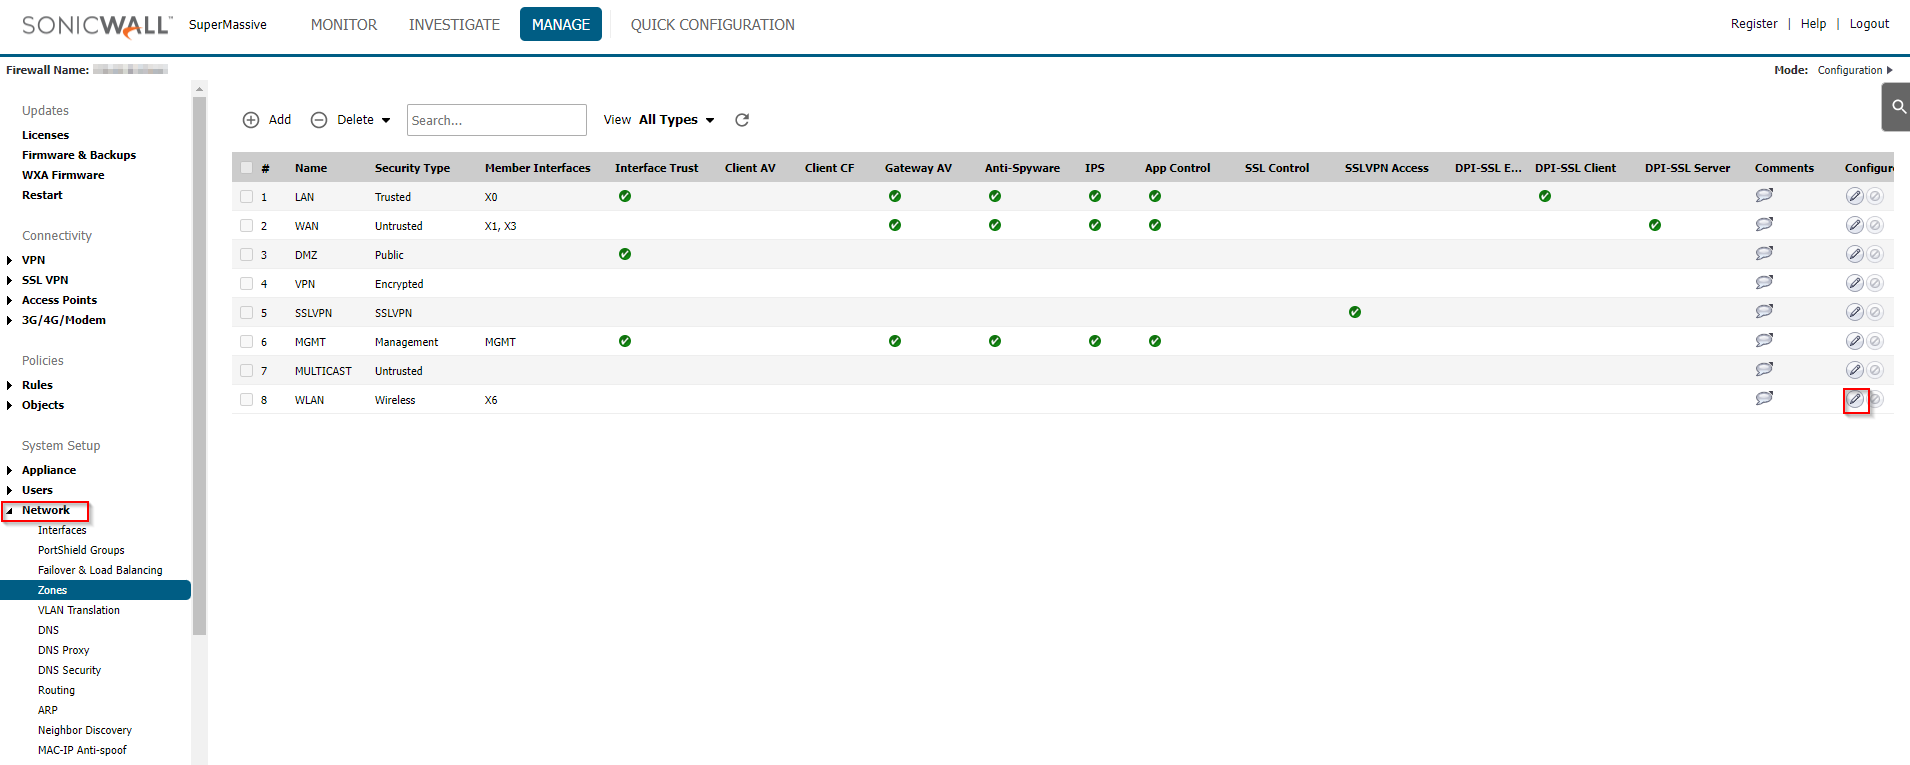
- On the firewall navigate to MANAGE | Network | Zones, select WLAN zone, and edit.
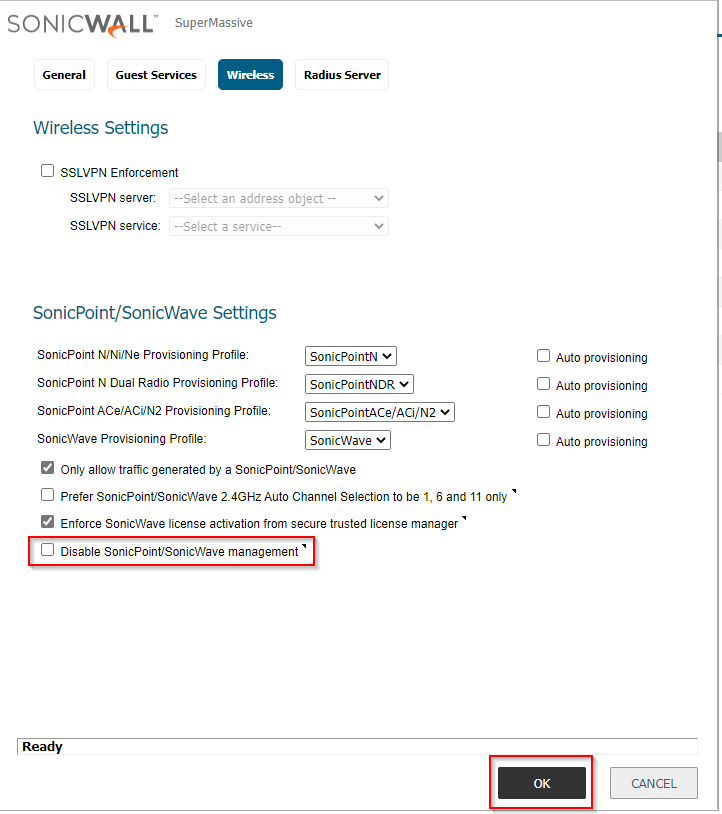
- You still can use the WLAN as a Security type as Wireless, but the option "Disable SonicPoint/SonicWave management" neeeds to be enabled On the Wireless tab. If the APs are not on the WLAN zone, no action is needed.
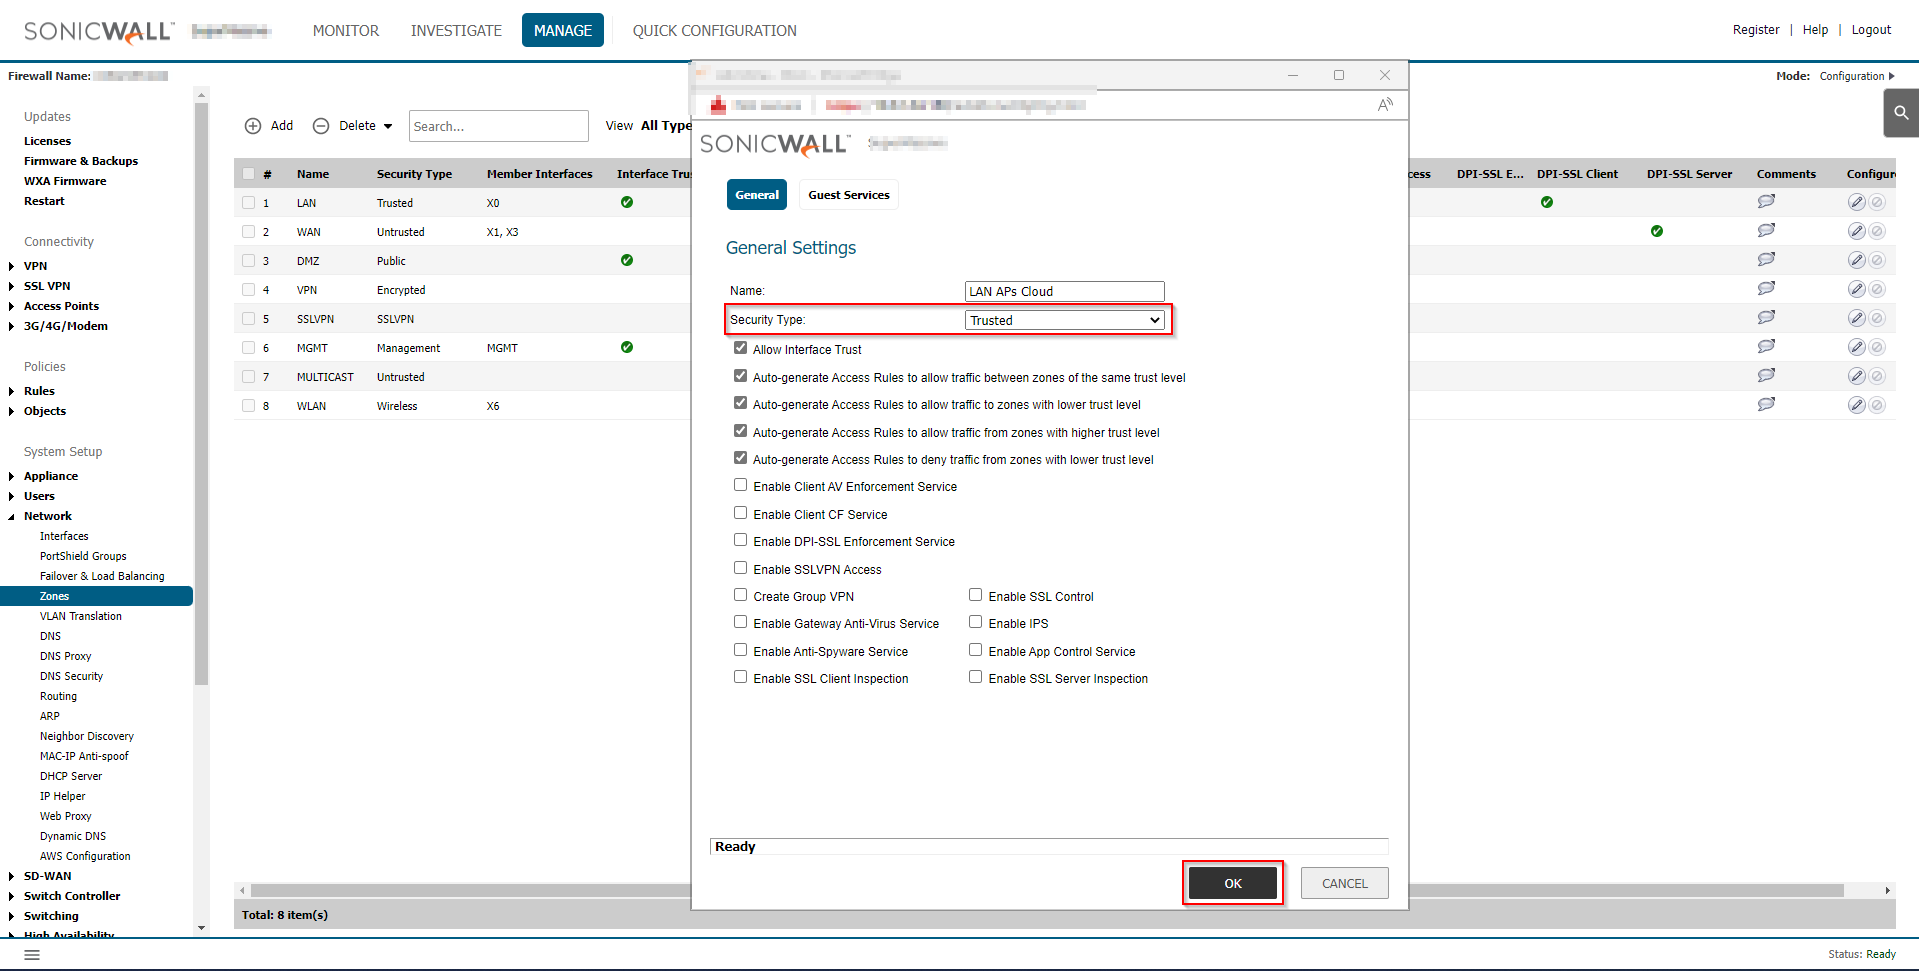
- If you prefer you can create a new LAN zone and make that the security type is set as Trusted or Public.
- In order to change the security type of the zone. Navigate to MANAGE | Network | Zones and select the zone where the APs will be configurates and modify the security type for Trusted or Public and click Save. If the Access Points are not on the WLAN and the security type is not Wireless, no action is needed.
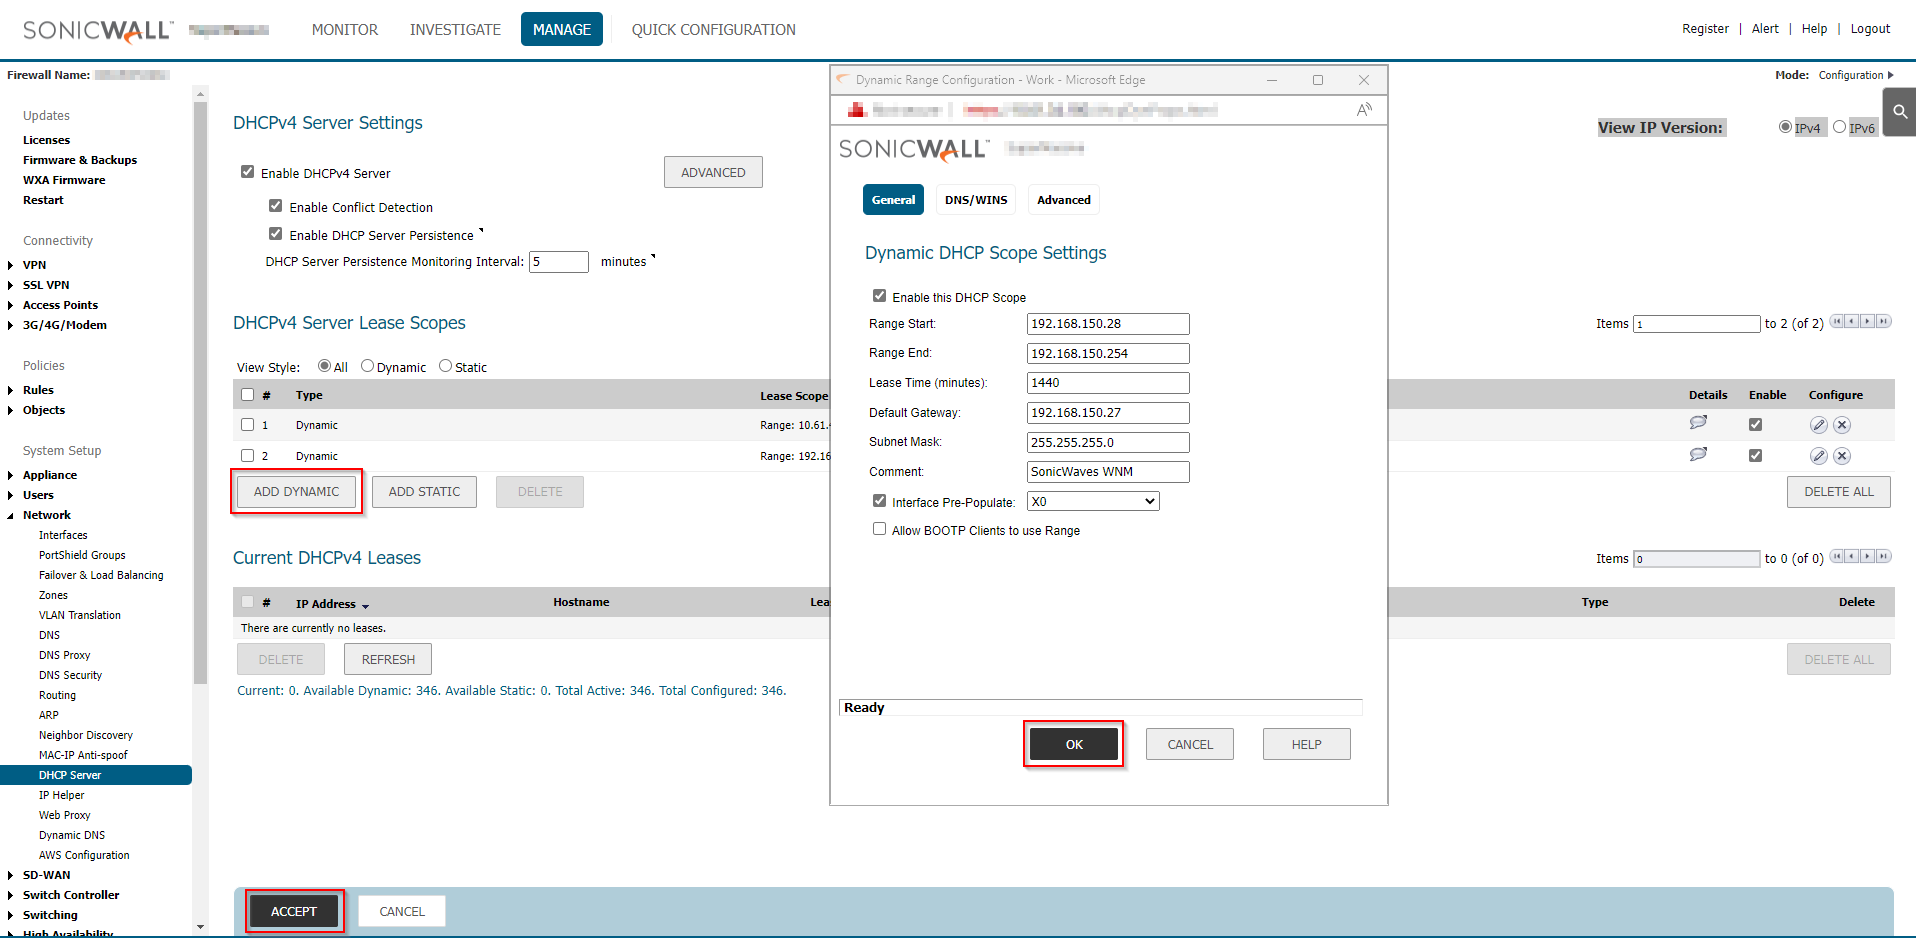
- Create a DHCP Lease scope for the Access Points. Navigate to MANAGE | Network | DHCP Server | ADD DYNAMIC | click OK and ACCEPT.
- On mysonicwall.com portal dissociate the SonicWave from the firewall. Go to Product Management | My Products | and find the relevant firewall product and remove the Access Point association.
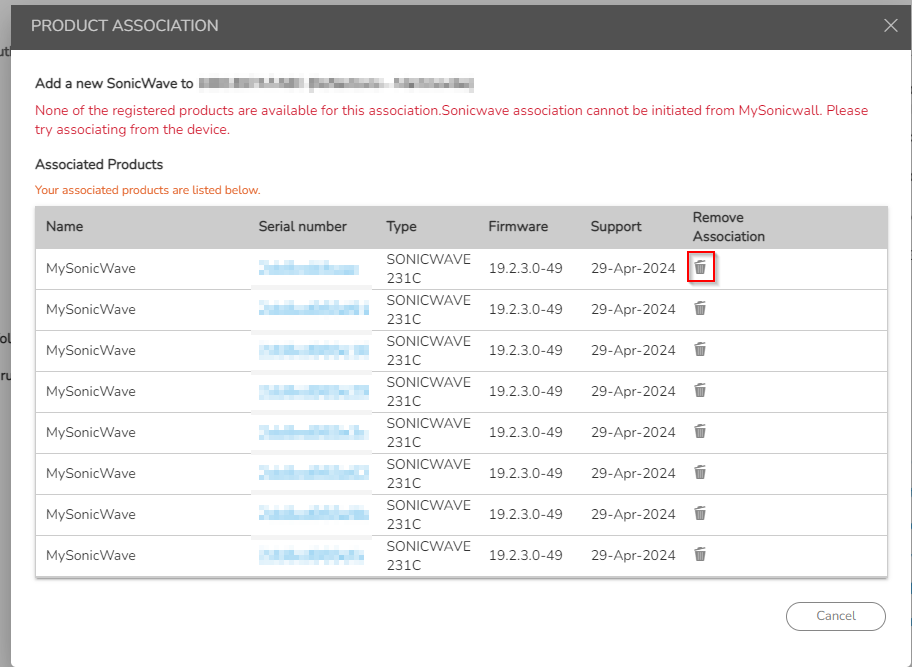
- At this point, you may need to factory default the Access Points and/or reboot them and they will appear in your Wireless Network Manager where you can add/configure them into relevant groups and SSID's.
Related Articles
- Wireless: SNR, RSSI and Noise basics of wireless troubleshooting
- What happens when a SonicWave's license expires?
- SonicWall deprecates support for WEP and TKIP encryption on SonicOS 8.0.0
Categories
- Secure Wireless > WiFi Cloud Manager
- Secure Wireless > SonicWave 400 Series
- Secure Wireless > SonicWave 200 Series


 YES
YES NO
NO