-
Products
-
SonicPlatform
SonicPlatform is the cybersecurity platform purpose-built for MSPs, making managing complex security environments among multiple tenants easy and streamlined.
Discover More
-
-
Solutions
-
Federal
Protect Federal Agencies and Networks with scalable, purpose-built cybersecurity solutions
Learn MoreFederalProtect Federal Agencies and Networks with scalable, purpose-built cybersecurity solutions
Learn More - Industries
- Use Cases
-
-
Partners
-
Partner Portal
Access to deal registration, MDF, sales and marketing tools, training and more
Learn MorePartner PortalAccess to deal registration, MDF, sales and marketing tools, training and more
Learn More - SonicWall Partners
- Partner Resources
-
-
Support
-
Support Portal
Find answers to your questions by searching across our knowledge base, community, technical documentation and video tutorials
Learn MoreSupport PortalFind answers to your questions by searching across our knowledge base, community, technical documentation and video tutorials
Learn More - Support
- Resources
- Capture Labs
-
- Company
- Contact Us
How to integrate a SonicWall switch with SonicWall UTM using Auto-discovery?


Description
This article lists the steps to be taken on the firewall to add a SonicWall switch using auto-discovery.
Resolution
 NOTE: In order for the firewall to auto-discovery the switch, its firmware must be at SonicOS 6.5.4.6-79n or higher. The switch firmware should be at 1.0.0.0-19 or higher.
The following steps are to be taken to add the SonicWall switch using auto-discovery:
- Select an interface on the firewall to connect to the switch. Navigate to Manage | Network | Interfaces and then click on Configure and select the Advanced tab. Select Enable AutoDiscovery of SonicWall Switches and click OK.


 TIP: Without this turned ON, the following message would show up under Manage | Switch Controller | Overview tab.

 NOTE: The Auto-discovery check box will be greyed out if the interface is in port shield, native bridge mode or assigned to WAN zone.
 - Connect the switch to the selected firewall interface. All the ports of the switch are on Native VLAN 1 and are enabled for auto-discovery. You can use any port of the switch to connect to the firewall.
 TIP: If you are connecting the switch for the first time, it is important to enable auto-discovery and then connect the cable between the firewall and the switch.
 - Navigate to Network | DHCP Server and verify DHCPv4 Server Lease Scope is enabled for the selected network.

- Navigate to Manage | Switch Controller | Overview, Click Authorize button to add the switch to the firewall.
 NOTE: SonicWall uses LLDP (Link layer discovery protocol) to auto-discover the SonicWall switch. It takes between 30 to 45 seconds for the switch to be discovered.
- It would ask you to reset the switch to factory default settings. If there were configuration done related to the switch already and you are deleting and re-adding the switch, it will reset the switch to factory defaults and boot up with the settings already configured.

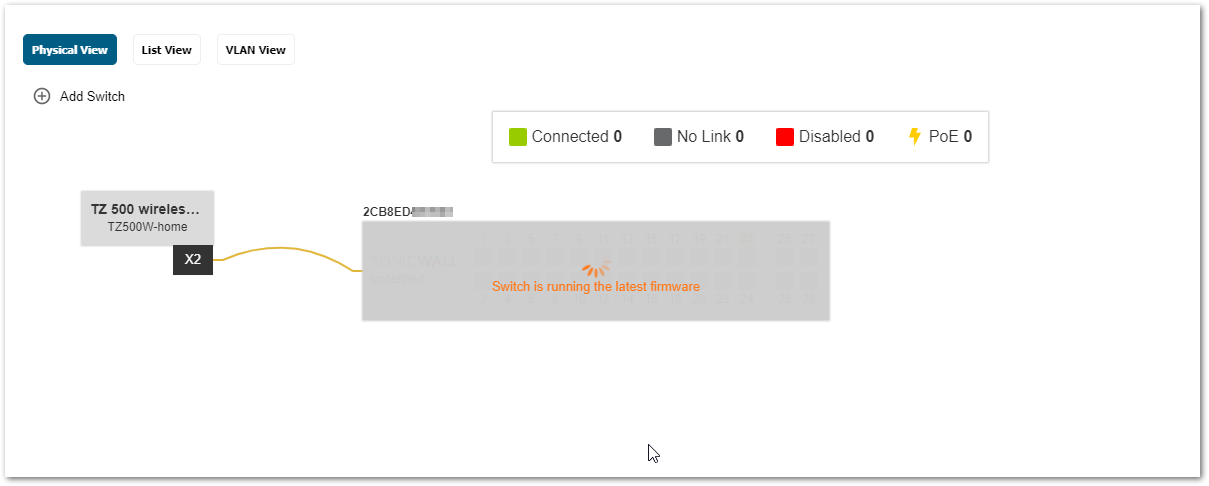
- The switch will fetch the latest firmware and if it is on an older firmware it would ask you to upgrade it at this stage. If not, it will inform that it is on the latest firmware and continue the reset procedure.


- The network topology will now appear on the Overview tab with the status of the switch as connected.

You can click on any port of the switch from Physical view (shown above), List view or VLAN view to configure individual ports of the switch from the firewall UI.
- List View:

- VLAN view:

Related Articles
- Supported SonicWall and 3rd party SFP and SFP+ Modules that can be used with SonicWall Switches
- How to enable Port Mirror on Sonicwall Switch.
- Create a new VLAN on Sonicwall Switch managed by WCM.


 YES
YES NO
NO