-
Products
-
SonicPlatform
SonicPlatform is the cybersecurity platform purpose-built for MSPs, making managing complex security environments among multiple tenants easy and streamlined.
Discover More
-
-
Solutions
-
Federal
Protect Federal Agencies and Networks with scalable, purpose-built cybersecurity solutions
Learn MoreFederalProtect Federal Agencies and Networks with scalable, purpose-built cybersecurity solutions
Learn More - Industries
- Use Cases
-
-
Partners
-
Partner Portal
Access to deal registration, MDF, sales and marketing tools, training and more
Learn MorePartner PortalAccess to deal registration, MDF, sales and marketing tools, training and more
Learn More - SonicWall Partners
- Partner Resources
-
-
Support
-
Support Portal
Find answers to your questions by searching across our knowledge base, community, technical documentation and video tutorials
Learn MoreSupport PortalFind answers to your questions by searching across our knowledge base, community, technical documentation and video tutorials
Learn More - Support
- Resources
- Capture Labs
-
- Company
- Contact Us
How to install wireguard Connector on windows OS?


Description
This article describes how to install a WireGuard based connector on a windows OS in your organization instead of creating a tunnel between your Cloud Edge and your Firewall/Router.
SYMPTOMS:
WireGuard connector is modern, Safe, secure and high-performance tunnel. We can create tunnel between your Cloud Edge and Windows system resides in your network. We can access all resources as per the configured subnet/Network.
Cause
The following conditions exist for WireGuard Connector errors:
- Peer configuration is wrongly configured
- Your Cloud Edge Gateway IP is not reachable from the windows OS
- Broken installation of the WireGuard connector on your windows OS
Resolution
To enable Wireguard tunnel between your Cloud Edge and the windows OS, we need to first create wireguard connector on the Cloud Edge and then Construct a peer configuration file for the wireguard connector on windows side configuration. The following steps need to be followed
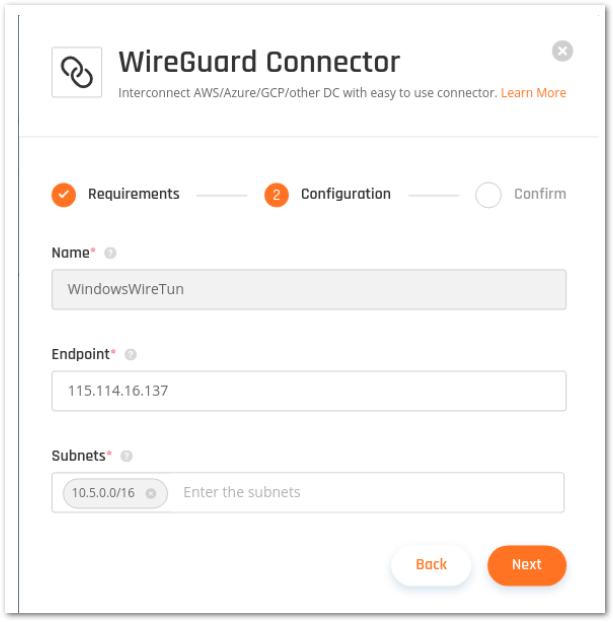
- Create a WireGuard Connector Tunnel in the Cloud Edge portal on your gateway. Usually, the tunnel gets the following settings:
- Endpoint: Public IP of your on-prem device(windows), In case windows does not have Public IP then you can create Dynamic IP Tunnel using the Endpoint IP as 0.0.0.0
- Subnets: The subnet(s) you are trying to reach via this tunnel
- Download the Windows Wireguard Service installation file.
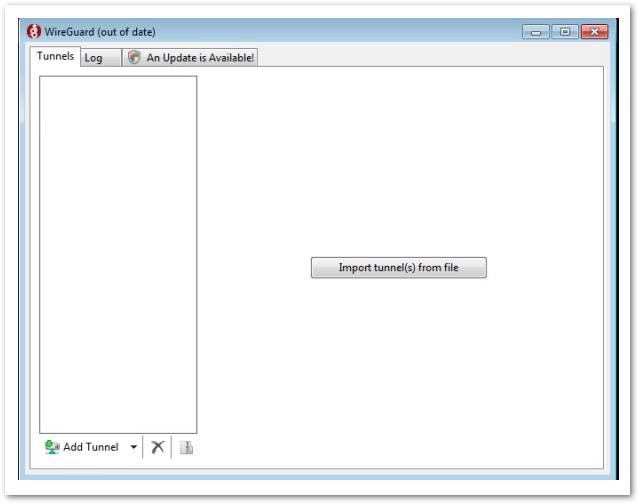
- Run the Windows Wireguard Service installation on to your device windows
Requirements- Windows Server 2016 / Windows 10 or any windows where WireGuard service can be installed and run
- All Microsoft updates and hotfixes are applied • Static internal IP address
- Internet traffic and UDP port 8000 are open
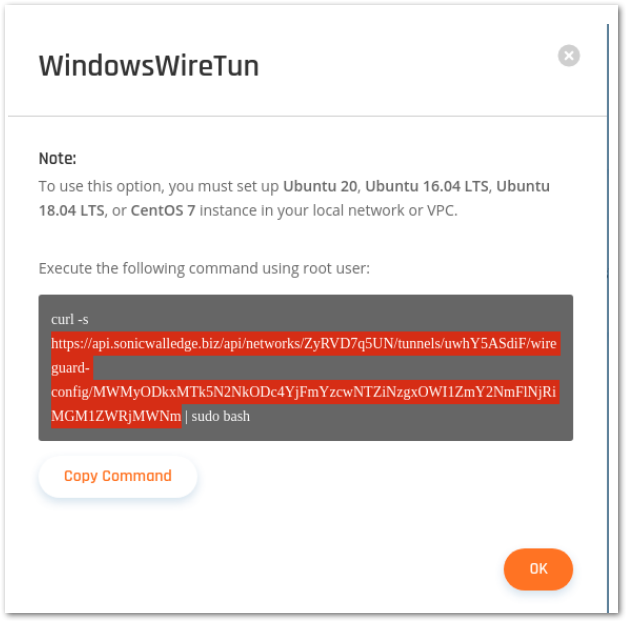
- Copy the URL in the configuration tab of the WireGuard connector on Cloud Edge
 NOTE: * Don't copy the command from this article - each tunnel will have a different URL and configuration file
- Paste the URL into a web browser on your device (Windows). This will immediately be followed by a file download. Download the config file.
- Create a conf file with any custom name like CloudEdge.conf & save it to your local machine/Windows
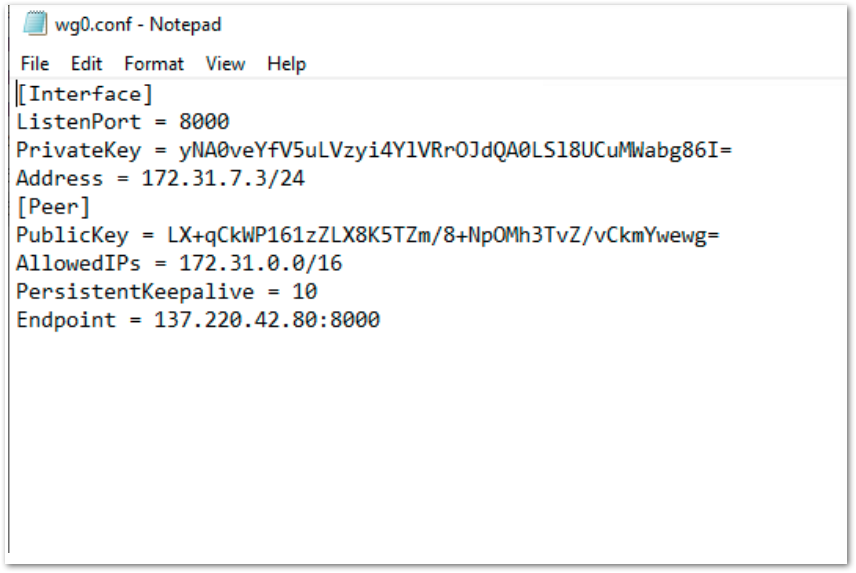
- Open the downloaded peer config and copy the Interface information as highlighted in the screen shot below. Copy & paste the code to the CloudEdge.conf file
[Interface]
ListenPort = ${CONFIG_port}
PrivateKey = ${CONFIG_privateKey}
Address = ${CONFIG_address}
[Peer]
PublicKey = ${CONFIG_pubKey}
AllowedIPs = ${CONFIG_allowedIP}
PersistentKeepalive = 10
Endpoint = ${CONFIG_endpoint}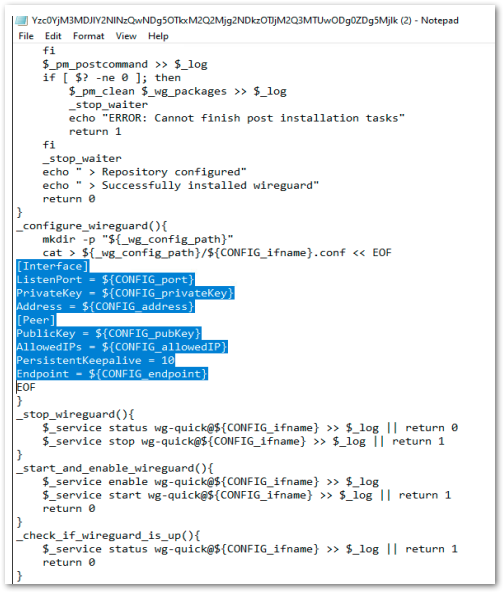
- Copy the Cloud Edge CONFIG_ for wireguard from the configuration file. It starts with ‘CONFIG_ ‘ see the screen shot of the config file and fill the details to the CloudEdge.conf file

- • After filling all data to the CloudEdge.conf file, this will look like below
- Paste the URL into a web browser on your device (Windows). This will immediately be followed by a file download. Download the config file.
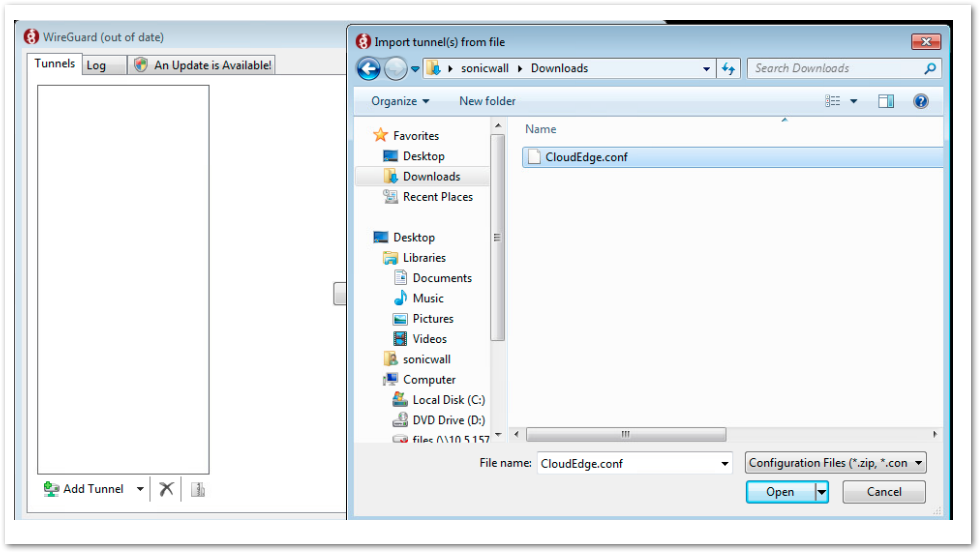
- Open the Wireguard Service application on your Windows machine and click on "Import tunnel(s) from file". Select the CloudEdge.conf file
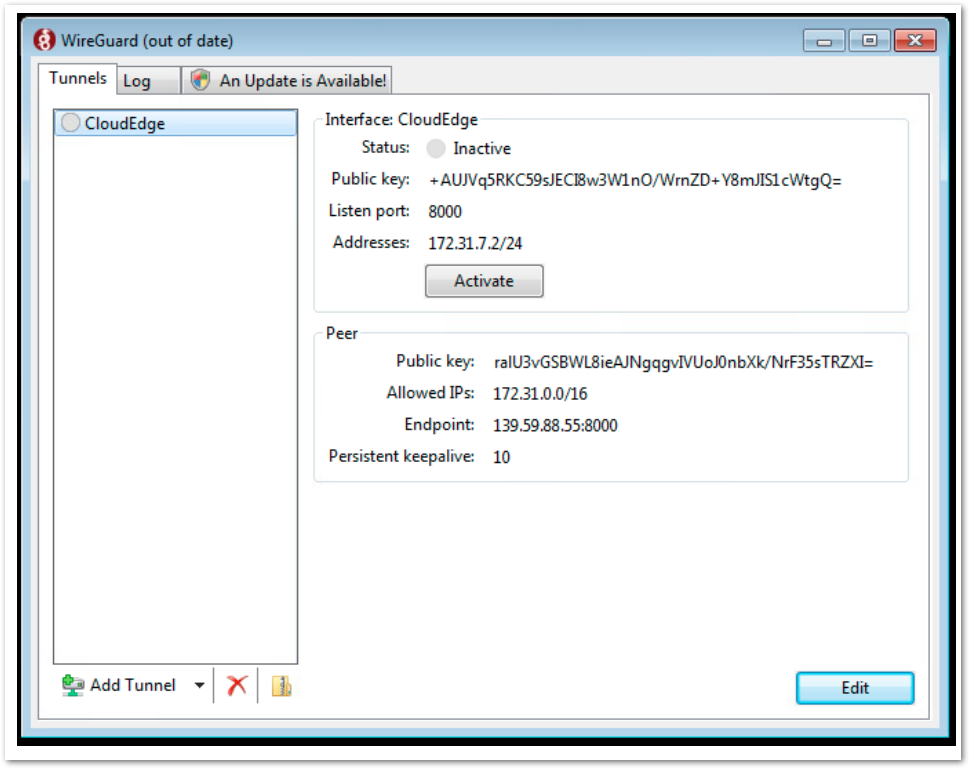
- Once the conf is imported then it will create a tunnel icon on the WireGuard service. Now activate the Tunnel in order to connect.
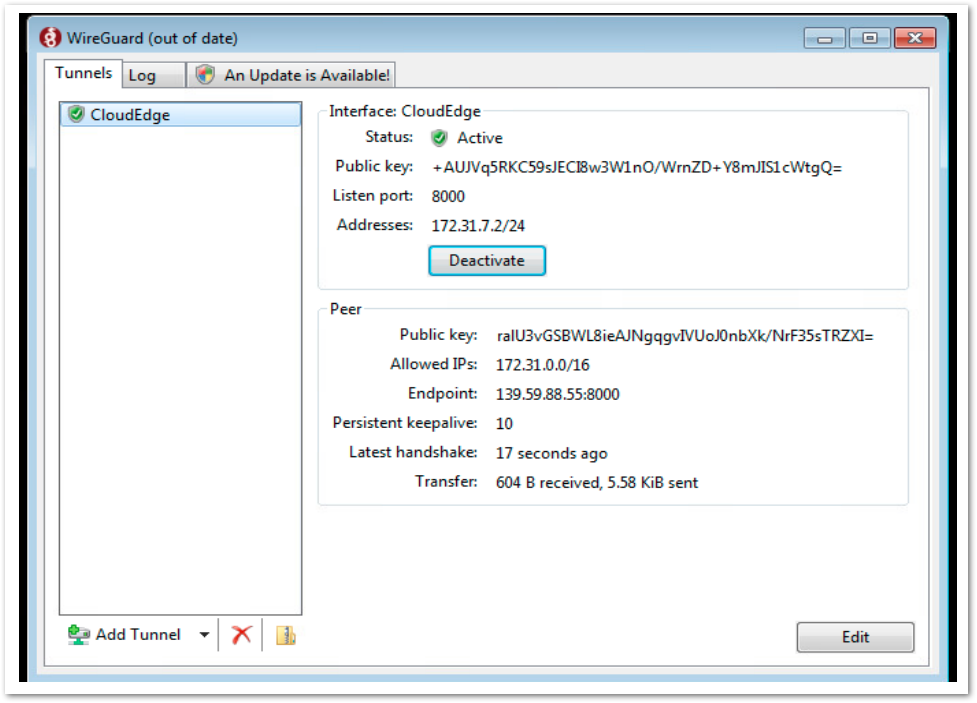
- Wireguard connection is successfully completed, we can verify the Wireguard tunnel status from the Cloud Edge

Troubleshooting:
- Connect to your Cloud Edge VPN agent or with the ZTNA application(s) (you can do it on any machine).
- Open the terminal and run the following command:
ping XXX.XXX.XXX.XXX - internal resource! - If the ping command fails, please make sure that port UDP/8000 is not blocked on your device/windows, and that you went through all the steps.
- Make sure the received bytes field fluctuates and increases. Wireguard will only communicate to an authenticated neighbor
- Ping the other side of the tunnel interface, if that works, its most likely your local firewall settings on the docker container
- You can edit the WireGuard network settings (endpoint and subnet) later for restrict the specific network subnet or resources from your device/windows. You can find the subnet/network details of the device/windows by going to CLI.
Related Articles
- Converting Cloud App Security licenses from annual to monthly
- Cloud Application Security FAQs
- Cloud Edge License Provisioning and Management through MSSP Monthly


 YES
YES NO
NO