


-
Products
-
SonicPlatform
SonicPlatform is the cybersecurity platform purpose-built for MSPs, making managing complex security environments among multiple tenants easy and streamlined.
Discover More
-
-
Solutions
-
Federal
Protect Federal Agencies and Networks with scalable, purpose-built cybersecurity solutions
Learn MoreFederalProtect Federal Agencies and Networks with scalable, purpose-built cybersecurity solutions
Learn More - Industries
- Use Cases
-
-
Partners
-
Partner Portal
Access to deal registration, MDF, sales and marketing tools, training and more
Learn MorePartner PortalAccess to deal registration, MDF, sales and marketing tools, training and more
Learn More - SonicWall Partners
- Partner Resources
-
-
Support
-
Support Portal
Find answers to your questions by searching across our knowledge base, community, technical documentation and video tutorials
Learn MoreSupport PortalFind answers to your questions by searching across our knowledge base, community, technical documentation and video tutorials
Learn More - Support
- Resources
- Capture Labs
-
- Company
- Contact Us
How to install SonicWall Enforced Client Anti-Virus on all clients in a Domain
 03/26/2020
  8 People found this article helpful
 505,224 Views

Description
To install SonicWall Enforced Client Anti-Virus on all clients in a domain, create your own MST transform files for a Microsoft Windows Installer MSI package and deploy SonicWall Enforced Client through domain group policy. An MST file is essentially an answer file for MSI packages. Use the Microsoft's Orca editor to create the MST transform file to use with SWECMSetup.msi for deployment of SonicWall Enforced Client through domain policy. The SWECMSetup.msi installer and your MST transform file can be deployed on multiple client machines by using group policy. When the client computers start, the assigned MSI package is installed automatically. The following sections provides detailed instructions for deployment of SonicWall Enforced Client through domain policy.
Resolution
Introduction
The following sections describes how to create your own MST transform file for use with a Microsoft Windows Installer MSI package to deploy SonicWall Enforced Client through domain group policy. An MST file is essentially an answer file for MSI packages. In this section you will learn how to use Microsoft's Orca editor to create the MST transform file to use with SWECMSetup.msi for deployment of SonicWall Enforced Client through domain policy. The SWECMSetup.msi installer with the help of your MST transform file can be deployed on multiple client machines by using group policy. When the client computers start, the assigned MSI package is installed automatically.
Prerequisites:
You will need the following for a Domain Group Policy installation:
• Workstation or member server (Windows 2003 server registered in Active Directory Domain 2003 or later) for creating an MST file
• Windows 2003 Server with Domain controller installed
• Microsoft's Orca Editor • Windows Installer 2.0
How to Get the Orca Editor
The Orca Editor is Microsoft's MSI file editor. Other editors are also available on the Internet. The Orca Editor allows you to edit the MSIfile directly, create new files, or change existing MST files. Follow these steps to download and install the editor. For our purposes, the Orca Editor is installed on a Windows workstation.
Download the Orca Editor from one of the following links:
• http://msdn.microsoft.com/en-us/library/aa370557(VS.85).aspx
• http://support.microsoft.com/kb/255905/en-us
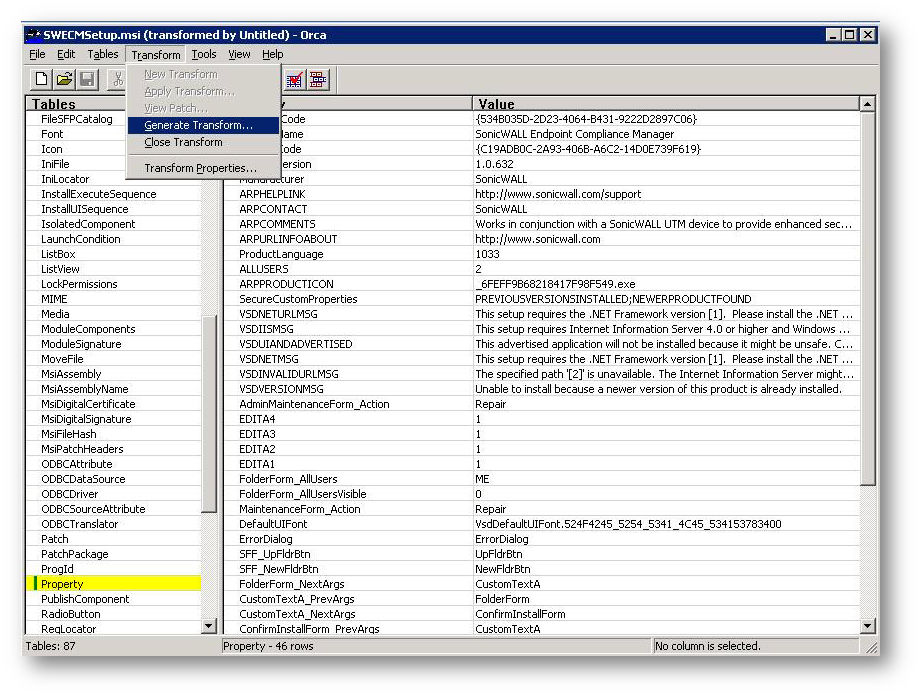
Creating an MST Transform File with Orca
To create an MST Transform file:
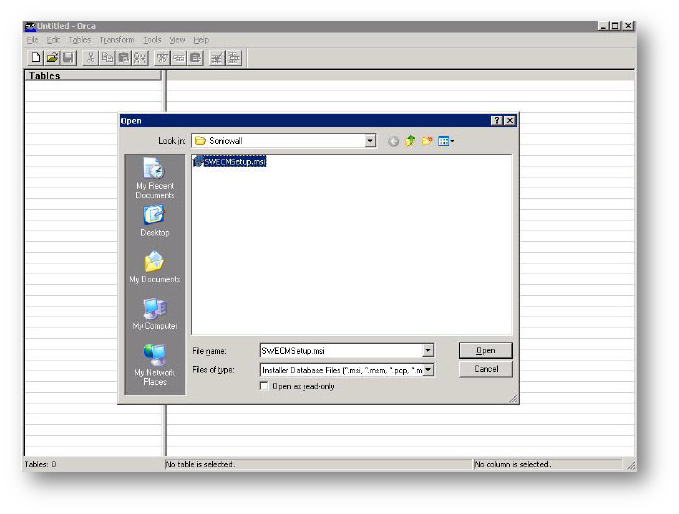
1. Launch Orca, click File > Open, navigate to the SWECMSetup.MSI file and click Open.
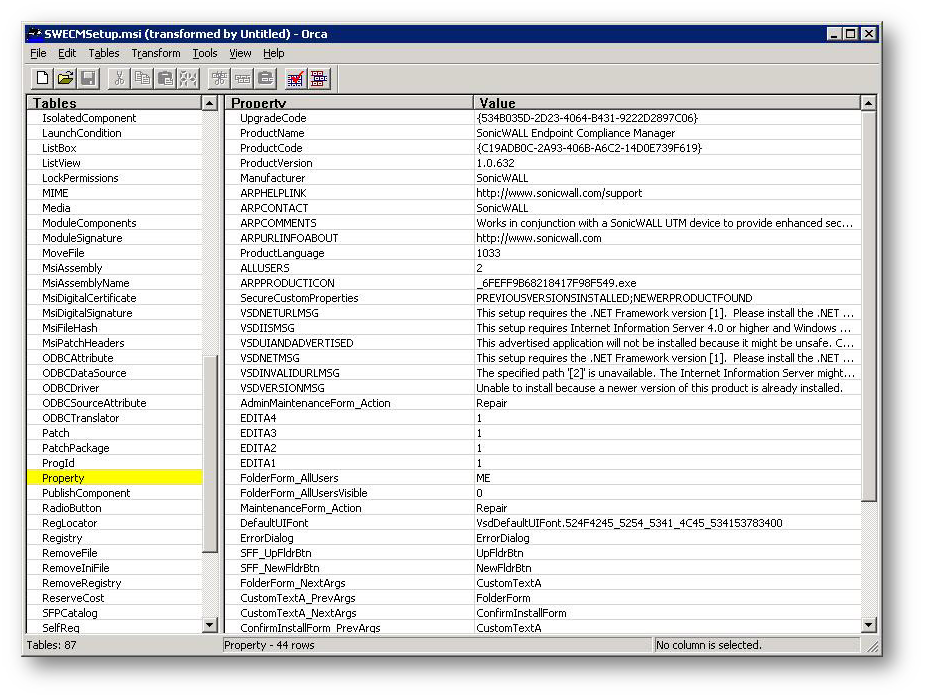
2. Click on New Transform under the Transform menu.

3. In the Tables pane, click Property to select the Property table.
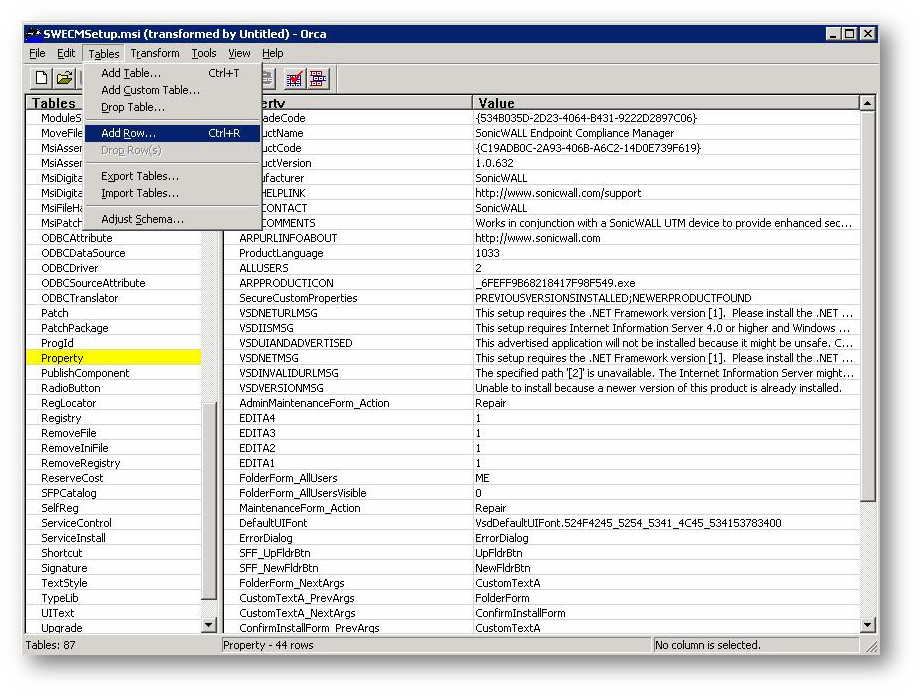
4. Click Tables > Add Row (Ctrl+R). The Add Row dialog box opens.
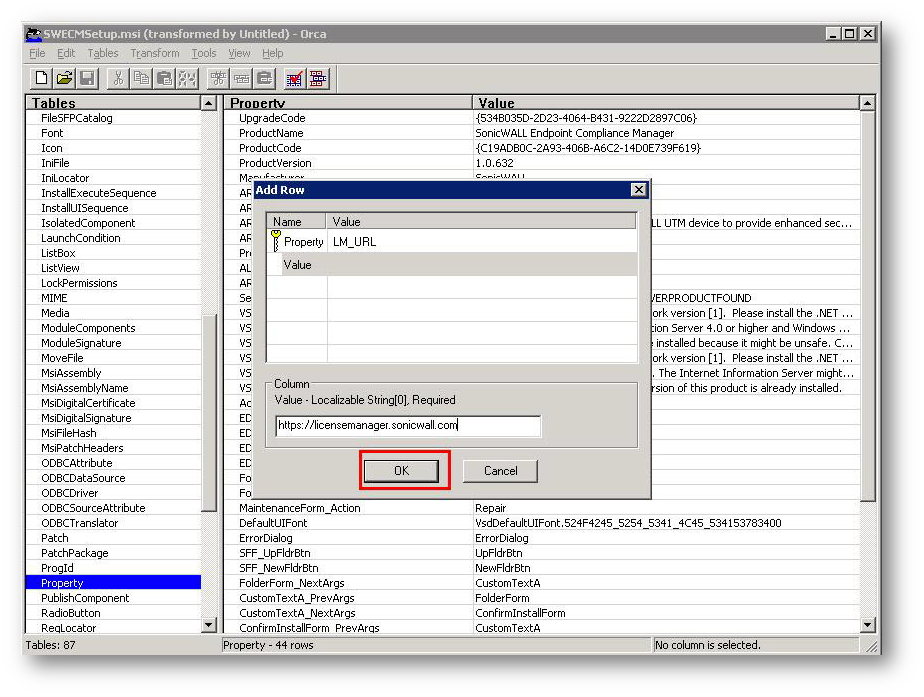
5. In the Add Row dialog box, add the following row and click OK.
Property Name = LM_URL, Value = https://clientmanager.global.SonicWall.com/ecm/getClientLicenseInfo
6. Click Tables > Add Row (Ctrl+R). In the Add Row dialog box, add the following row and click OK.
? Property Name = SECID, Value = (excluding the angle brackets, where Appliance_serial_number is in the form of 0017C510Cxxx)

7. Click Generate Transform under the Transform menu.
8. Type in a name for the file, and click Save to save the Transform.
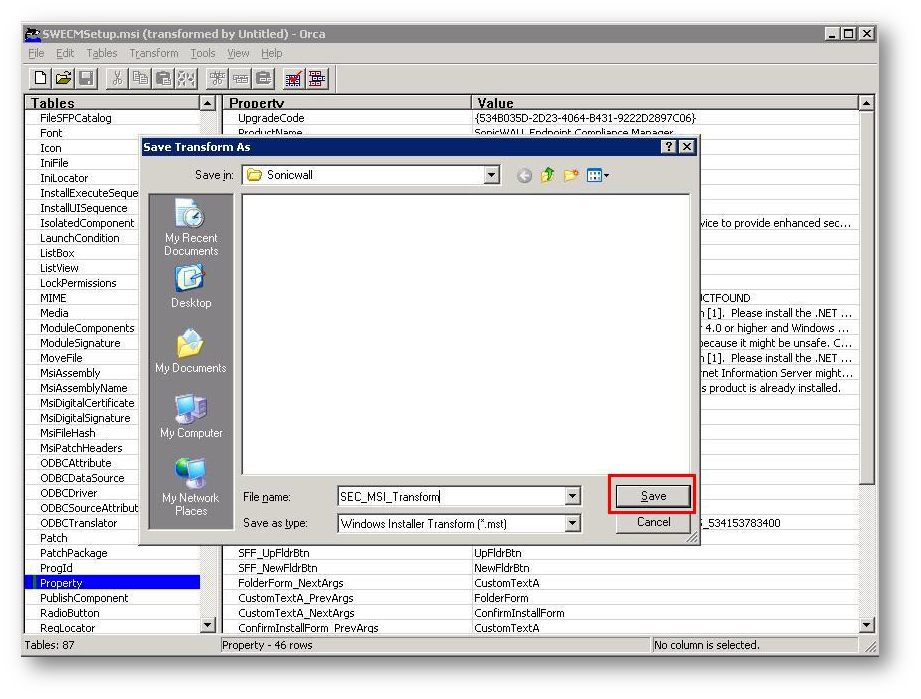
9. Use the saved MST transform file with SWECMSetup.msi for SonicWall Enforced Client deployment through domain policy.
Creating a Group Policy for SonicWall Enforced Client Deployment
This section describes how to deploy the SWECMSetup.msi installer on multiple machines using Group Policy for SonicWall Enforced Client Deployment.
Methods of Deployment
Group Policy supports the following two methods of deploying an MSI package:
• Assign software - A program can be assigned per-user or per-machine. If it is assigned per-user, it will be installed when the user logs on. If it is assigned per-machine, then the program will be installed for all users when the machine starts.
• Publish software - A program can be published for one or more users. This program will be added to the Add or Remove Programs list and the user will be able to install it from there.
For more information about these deployment methods, see Microsoft knowledge base article:
http://support.microsoft.com/kb/816102
For the Assign software and Publish software methods of deployment, you need a distribution point on a server where you can place the SWECMSetup.msi and Transform files. The distribution point must be accessible for all domain users. When a domain computer starts or connects, it will attempt to access the two files on the distribution point due to domain policy enforcement.
NOTE: This KB assumes the Assign software method.
Creating a Distribution Point
The first step in deploying an MSI through a Group Policy Object is to create a distribution point on the publishing server.
To deploy a distribution point on the publishing server:
1 Log on to the server as an Administrator.
2 Create a shared network folder (this folder will contain the MSI package).
3 Set permissions on this folder to allow access to the distribution package.
4 Copy the SWECMSetup.msi file and your SEC_MSI_Transform.mst Transform file into the shared folder.
Creating a Group Policy Object
An MSI package is deployed (distributed) as a Group Policy Object.
To create an object for your package:
1. Click on the Start button, go to Programs, select Administrative Tools and then select Active Directory Users and Computers. This brings up an Active Directory MMC snap-in.
2. In the console tree, right-click the domain name on which you want to deploy the SonicWall Enforced Client and select Properties.
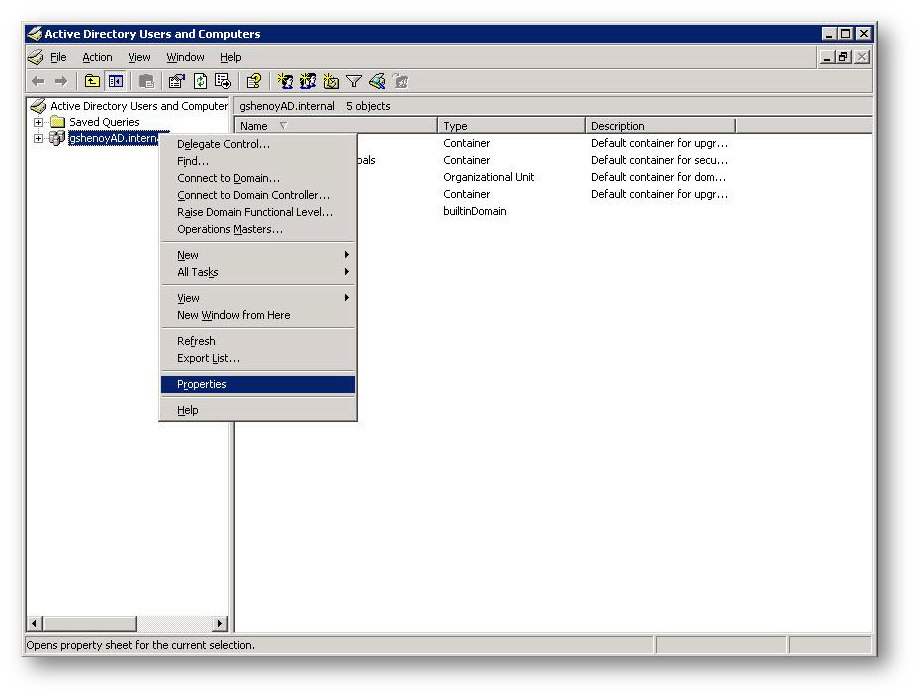
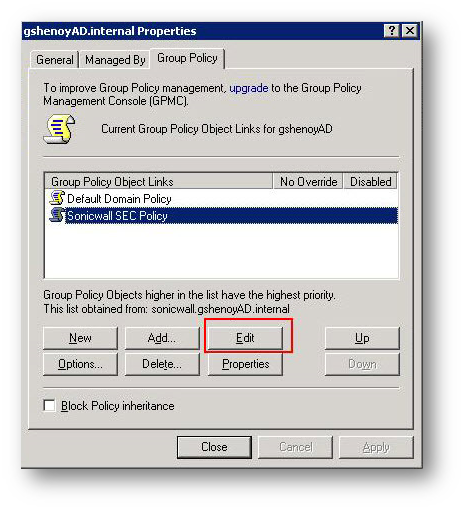
3. In the Properties window, select the Group Policy tab and click New.

4. Type in a name for the policy (for example, SonicWall SEC Policy) and click OK.
5. In the Properties window again, select your policy and click the Edit button to open the Group Policy Object Editor MMC snap-in.
6. In the Group Policy Object Editor, select Computer Configuration.
NOTE: A User Configuration option causes the policy to be enforced when a user logs in. This option causes a check for an enforced policy every time the user logs in, and is rarely used.
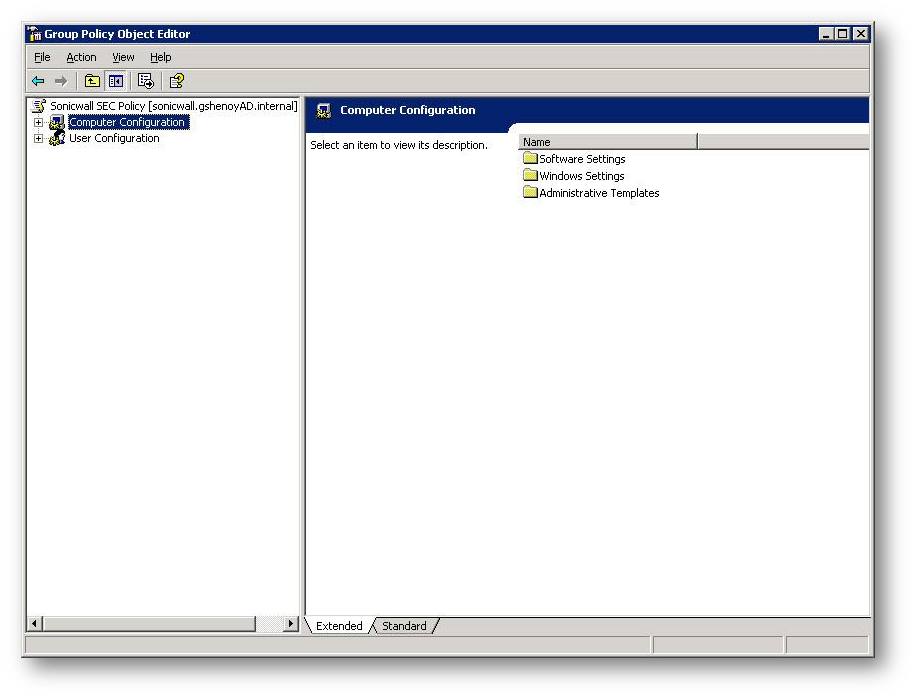
7. Expand Software Settings under Computer Configuration. Right-click Software Installations, select New and then click on Package.
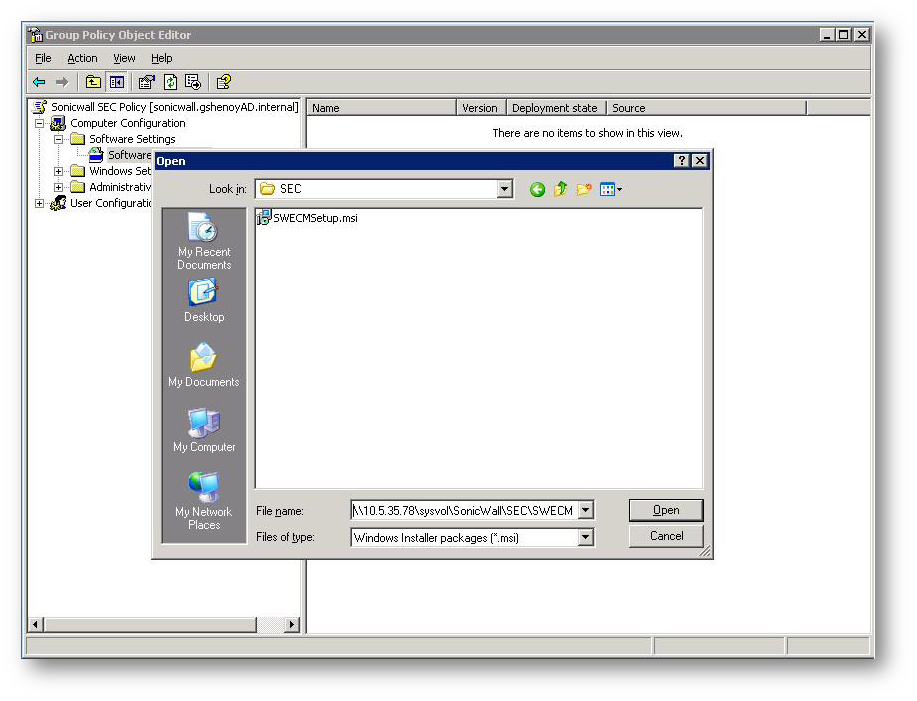
8. In the File name field of the Open dialog box, type the full UNC path (in the form: \ComputerNameSharedFolderPackageName) of the shared package to assign and then click Open.
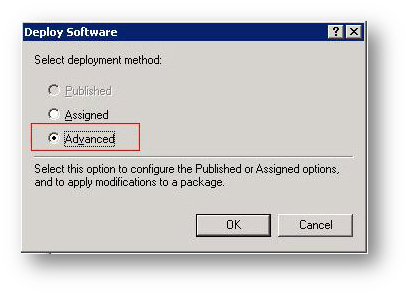
9. In the Deploy Software dialog box that pops up, select Advanced and then click OK (the package will be added to the right pane of the Group Policy window.
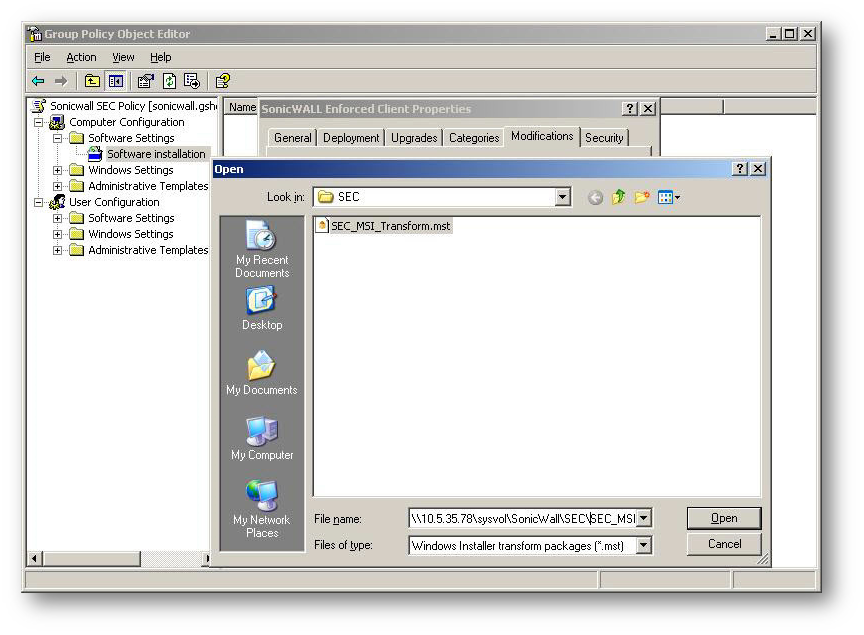
10. In the SonicWall Enforced Client Properties window, select the Modifications tab and then click Add.
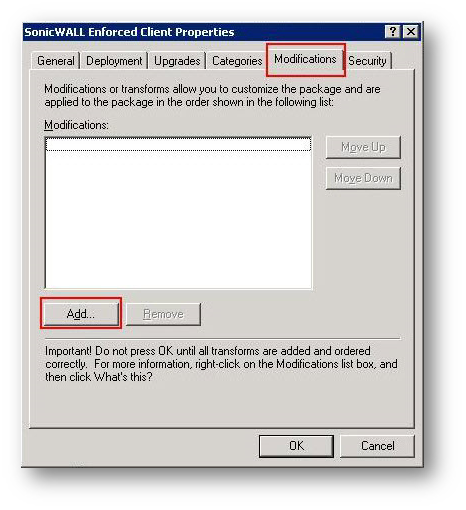
11. Navigate to the Transform file that you created (using the UNC path). Select it and then click Open.
12. In the SonicWall Enforced Client Properties window, select the Security tab.
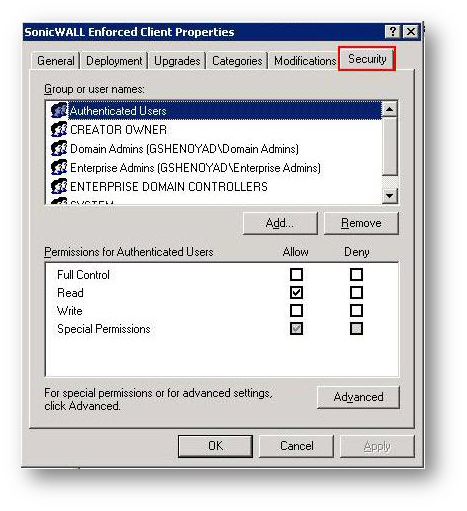
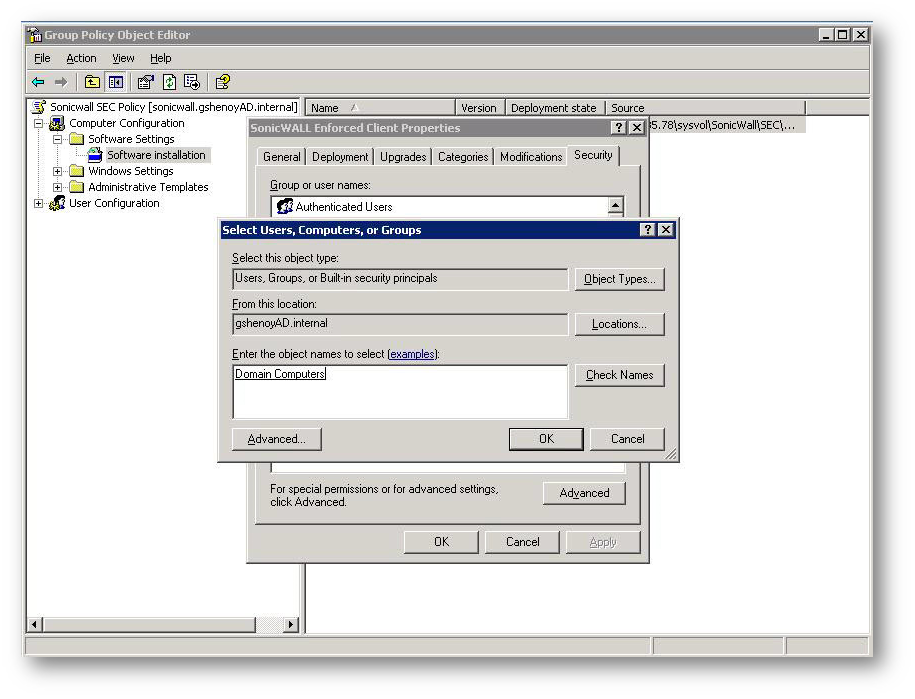
13. Click Add to open the Select Users, Computers, or Groups window. Add the Domain Computers group and click OK.
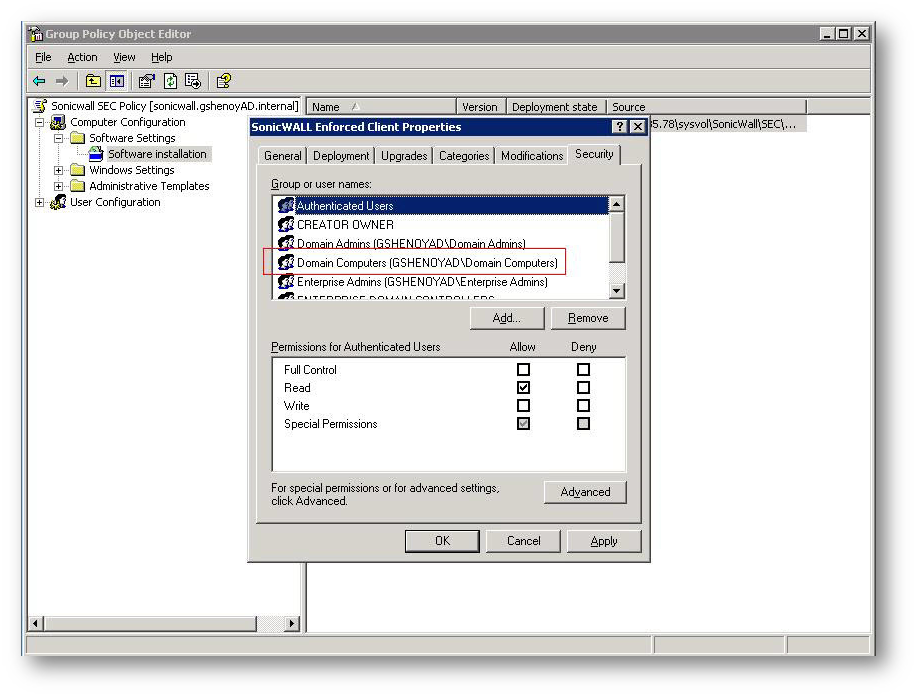
14. Verify that the Domain Computers group is added. Click Apply and then click OK.
15. Close the Group Policy Object Editor and other MMC snap-ins that are open. This completes the setup process. To refresh group policy and apply these settings see Refreshing Group Policy to Apply New Settings section.
Refreshing Group Policy to Apply New Settings
This section describes the refresh process for group topology to apply new settings.
To refresh group policy for the domain and apply the new Group Policy Object:
1. Click the Start button, then type cmd to open a command prompt window.
2. Type the command gpupdate at the prompt.
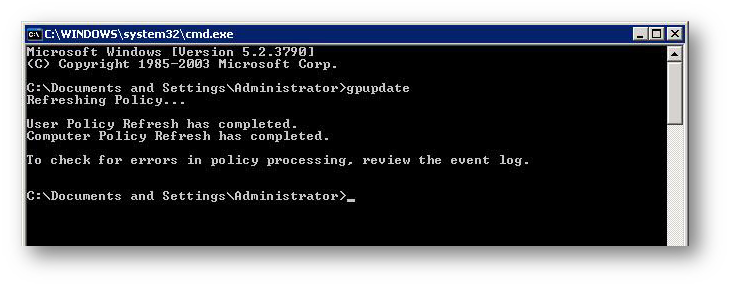
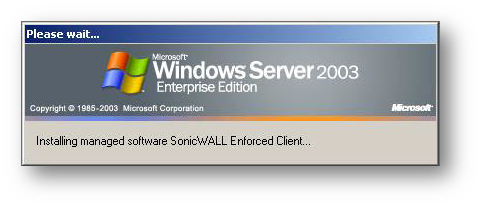
When domain computers start, the assigned package will be installed automatically. The message Installing managed software SonicWall Enforced Client is displayed.
Note: Auto install will not take place until there is any earlier AV software that is uninstalled.
At present Uninstall is a manual process
Uninstalling SonicWall Enforced Client
To uninstall the SonicWall Enforced Client Anti-Virus from a client computer:
1. Log in to the client computer as an Administrator.
2. Click the Start button, then type cmd to open a command prompt window.
3. Type the following command at the prompt, without the angle brackets and using the UNC path for Path: msiexec /x
<Pathswecmsetup.msi> /qb
Related Articles
- Error:"Invalid API Argument" when modifying the access rules
- Cysurance Partner FAQ
- Configure probe monitoring for WAN Failover and Loadbalancing - SonicWall UTM
Categories
- Firewalls > TZ Series
- Firewalls > SonicWall SuperMassive E10000 Series
- Firewalls > SonicWall SuperMassive 9000 Series
- Firewalls > SonicWall NSA Series
 YES
YES NO
NO