-
Products
-
SonicPlatform
SonicPlatform is the cybersecurity platform purpose-built for MSPs, making managing complex security environments among multiple tenants easy and streamlined.
Discover More
-
-
Solutions
-
Federal
Protect Federal Agencies and Networks with scalable, purpose-built cybersecurity solutions
Learn MoreFederalProtect Federal Agencies and Networks with scalable, purpose-built cybersecurity solutions
Learn More - Industries
- Use Cases
-
-
Partners
-
Partner Portal
Access to deal registration, MDF, sales and marketing tools, training and more
Learn MorePartner PortalAccess to deal registration, MDF, sales and marketing tools, training and more
Learn More - SonicWall Partners
- Partner Resources
-
-
Support
-
Support Portal
Find answers to your questions by searching across our knowledge base, community, technical documentation and video tutorials
Learn MoreSupport PortalFind answers to your questions by searching across our knowledge base, community, technical documentation and video tutorials
Learn More - Support
- Resources
- Capture Labs
-
- Company
- Contact Us
How to establish a secure SSLVPN connection from SonicWave to the SSLVPN Server?


Description
This article describes the steps for SSL VPN Client configuration on SonicWave access points (managed via WCM) connecting to an SSLVPN server.
Cause
Traditionally SonicWall NetExtender Client or the Mobile Connect client is used to connect to an SSLVPN Server [Firewall or SMA 100 / SMA 1000]. When a SonicWave is managed via WCM, we can configure the access point to connect to the SSLVPN server which will provide wireless clients with secure access to network resources and servers.
 NOTE: SonicWave access points only act as SSLVPN client, and not as an SSLVPN Server. SonicWall Firewall appliance or an SMA 100 / SMA 1000 device can be use as SSLVPN servers.
Resolution
Terms:
WCM- WiFi Cloud Manager
SSLVPN - Secure Socket Layer Virtual Private Network
SMA - Secure Mobile Access
CSC- Capture Security Center
Supported Access Points:
SonicWave 432i/432e/432o
SonicWave 224W/231c/231o
Sonicwave 621/641/681
Step1: Make sure that an SSLVPN server is properly configured.
Step 2: Login into WiFi Cloud Manager:
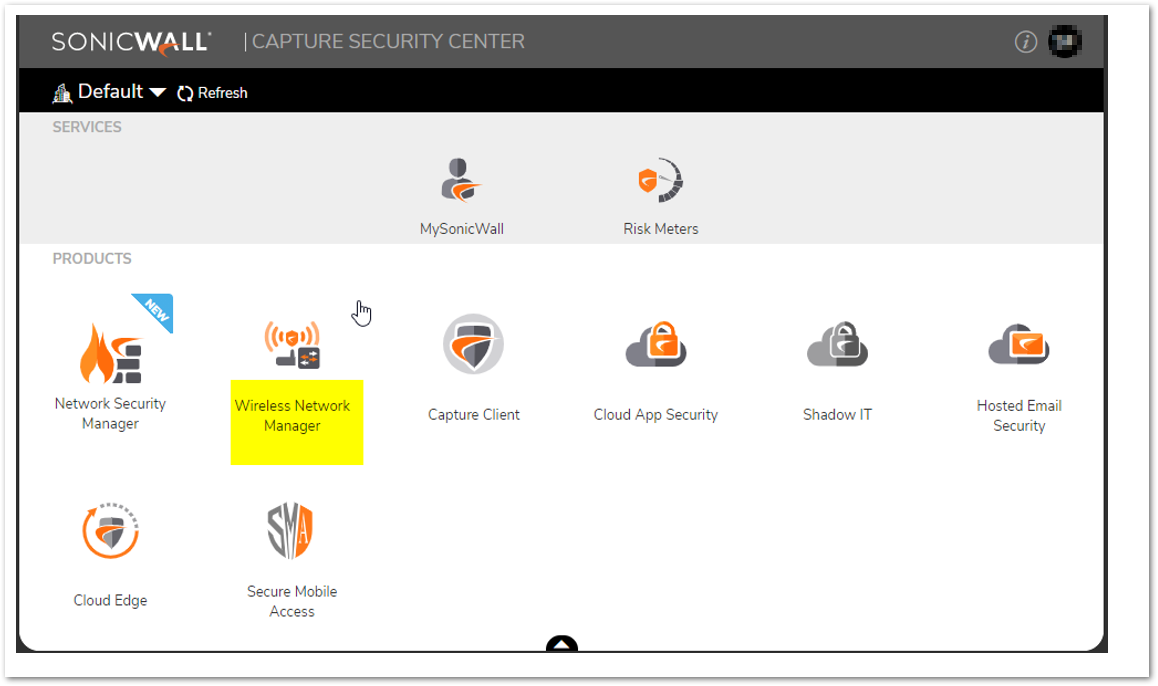
- Log into CSC (cloud.sonicwall.com) using your MySonicwall username and password, click on the Wireless tile to access WCM.

 CAUTION: This article's scope is to help setup SSL VPN client Profile and we assume that the SonicWave is being managed by WiFi Cloud Manger. If it is not please use this KB article: [[How do I register and deploy a SonicWave using Wireless Cloud Manager?|190317011046878]] to configure and manage SonicWaves on WiFi cloud Manager.
Step 3: Configure SSLVPN Client profile:
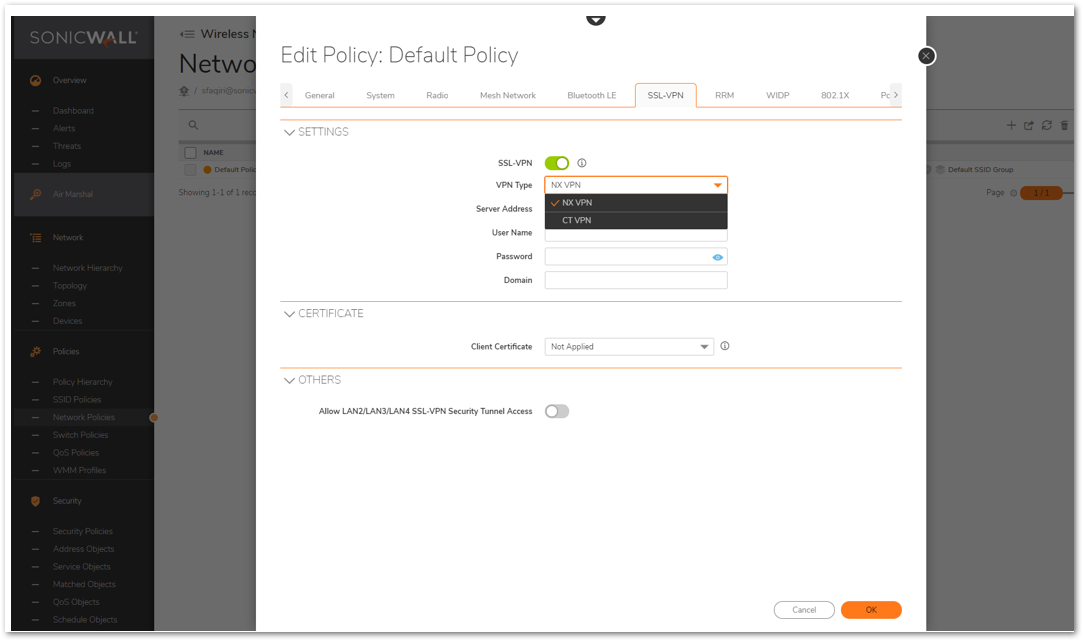
- Navigate to the Policies Tab | Policy Hierarchy | Select the Zone that the SonicWave belongs to [In Default settings the zone will be Default Policy]
- Navigate to the Right Pane of the screen and select SSL-VPN
- Enable the toggle switch for SSL-VPN
- Set the Server Address, Username,password and Domain for connecting to your already configured SSLVPN Server (From Step 1).
- Choose NX if you are connecting to a firewall or SMA 100 series appliance. Choose CT if you are connecting to a SMA 1000 series appliance.

 NOTE: SonicWave supports tunnel-all and split-tunnel modes. Client route is determined by SSLVPN server "Client Routes" profile.
Step4: Allow SSL-VPN Security Tunnel Access on Specific SSID's:
 CAUTION: If you do not Allow SSL-VPN Tunnel on any SSID you will not be able to access the resources that the SSL VPN Server has shared.
- Select the SSID that your Wireless Clients will connect to access resources via SSL Tunnel.
- Navigate to the SSID policies
- Look for the option SSL-VPN under SSID.
- Enable the toggle switch.

Step5: Verify the SSL VPN Connection Status:
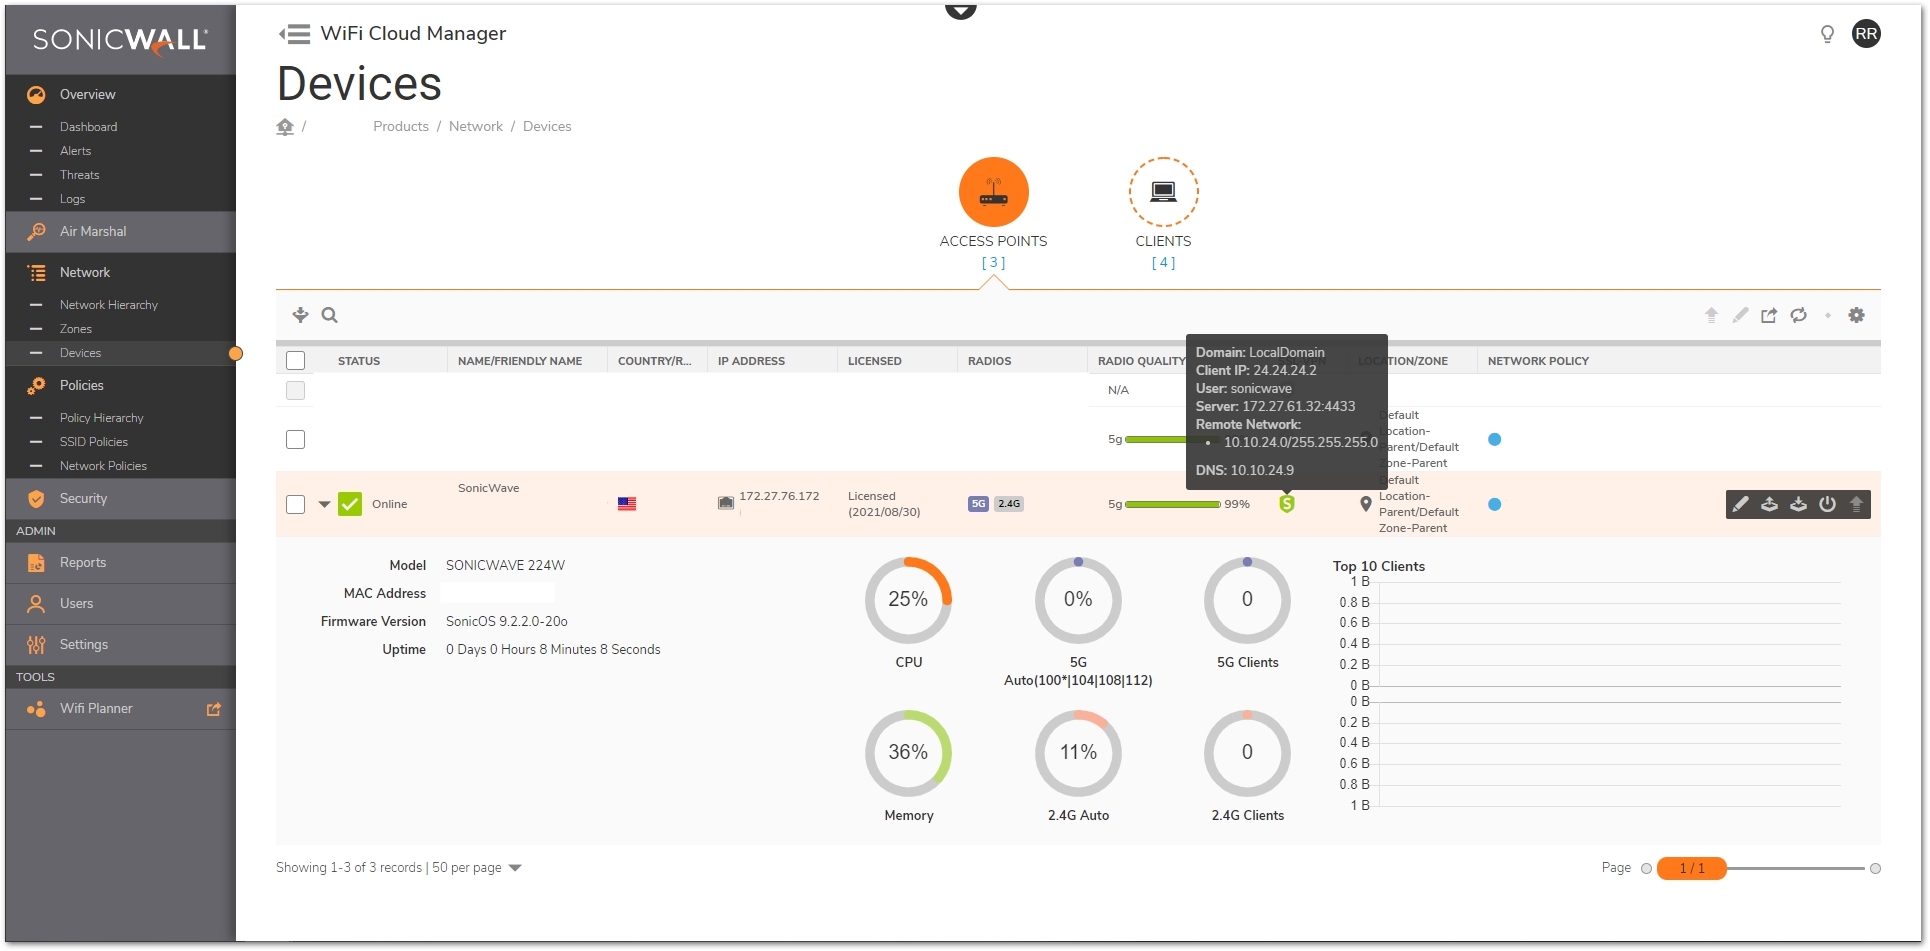
- Navigate to the network devices tab
- All the access points that share the zone for which we have enabled SSL VPN show display an Green Overlay on the SSLVPN Icon.
- If you hover on the icon it will display the Domain,Client IP, User, Server and the Remote Network and the DNS server IP acquired from the SSLVPN server.

Conclusion: We have successfully configured SSLVPN Client profile on the SonicWave via WiFi Cloud Manager.
Related Articles
- Wireless: SNR, RSSI and Noise basics of wireless troubleshooting
- What happens when a SonicWave's license expires?
- SonicWall deprecates support for WEP and TKIP encryption on SonicOS 8.0.0
Categories
- Secure Wireless > WiFi Cloud Manager
- Secure Wireless > SonicWave 400 Series
- Secure Wireless > SonicWave 200 Series
- Secure Mobile Access > SMA 1000 Series


 YES
YES NO
NO