


-
Products
-
SonicPlatform
SonicPlatform is the cybersecurity platform purpose-built for MSPs, making managing complex security environments among multiple tenants easy and streamlined.
Discover More
-
-
Solutions
-
Federal
Protect Federal Agencies and Networks with scalable, purpose-built cybersecurity solutions
Learn MoreFederalProtect Federal Agencies and Networks with scalable, purpose-built cybersecurity solutions
Learn More - Industries
- Use Cases
-
-
Partners
-
Partner Portal
Access to deal registration, MDF, sales and marketing tools, training and more
Learn MorePartner PortalAccess to deal registration, MDF, sales and marketing tools, training and more
Learn More - SonicWall Partners
- Partner Resources
-
-
Support
-
Support Portal
Find answers to your questions by searching across our knowledge base, community, technical documentation and video tutorials
Learn MoreSupport PortalFind answers to your questions by searching across our knowledge base, community, technical documentation and video tutorials
Learn More - Support
- Resources
- Capture Labs
-
- Company
- Contact Us
How to enable Service tunnel Discovery and Logging
 07/18/2024
  1 People found this article helpful
 78,353 Views

Description
Customers wanted to track each time a user accessed the Service Tunnel. This helps administrators see and manage the services used by their users through the tunnel.
Resolution
Before enabling, please ensure the following requirements are met:
- Service Tunnel is enabled.
- Access Tier version 2.2.0 or higher.
- Enabled on each Netagent.
- Log size and rollover follow Netagent’s advanced settings.
You can enable Service Tunnel discovery and logging via your API tool, in this scenario we will be using Postman.
- Download this postman collection:
Please request the Postman collection from your CSE and import the collection into your API tool.
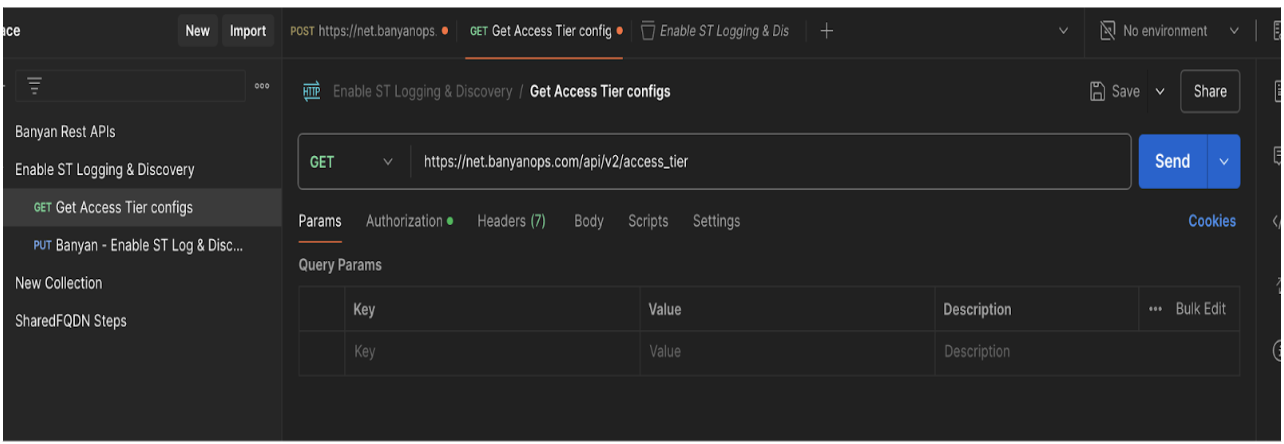
2. Get the list of access tiers:
- Choose the "GET" method.
- Use this URL: https://net.banyanops.com/api/v2/access_tier
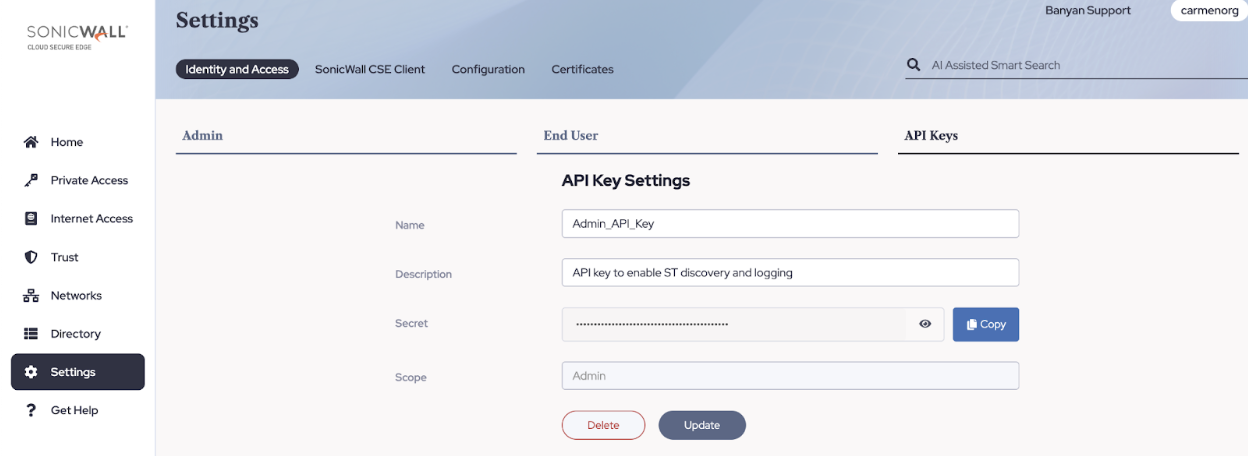
For authorization, choose "Bearer token" and enter the API key generated from the Command Center with "Admin Scope."
Note: To generate the API key with an Admin scope from the command center, please go to settings > API key > Add API key > enter a name, and description select “Admin” on the scope, and click on Add API key.

Find the API name on the list and you will see the option to copy and paste the secret value where it says “Token”

- After clicking "send," please find the access tier that is forwarding the service tunnel traffic and copy and paste the “Access tier ID”
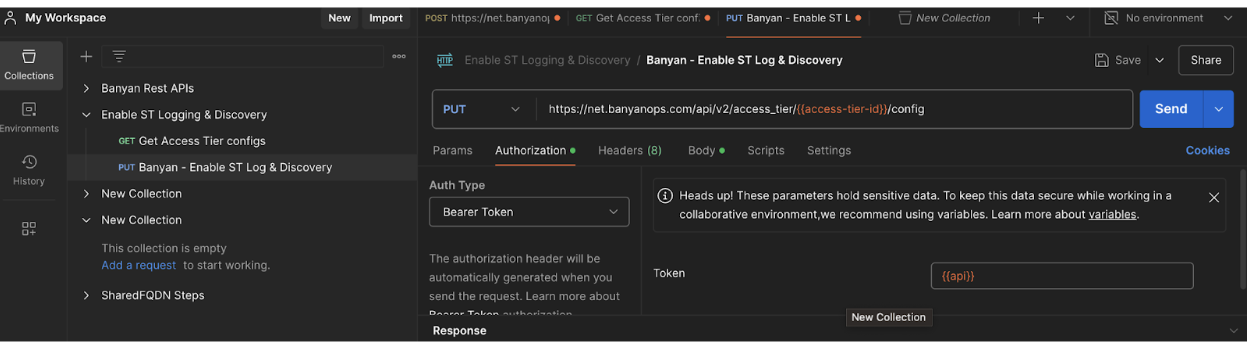
- You are ready to enable the ST discovery and logging:
- Choose the "PUT" method.
- Use this URL: https://net.banyanops.com/api/v2/access_tier/{{access-tier-id}}/config
Replace {{access-tier-id}} for the ID you got when listing the access tier info.
- For authorization, choose "Bearer token" and enter the API key generated from the Command Center with "Admin Scope."
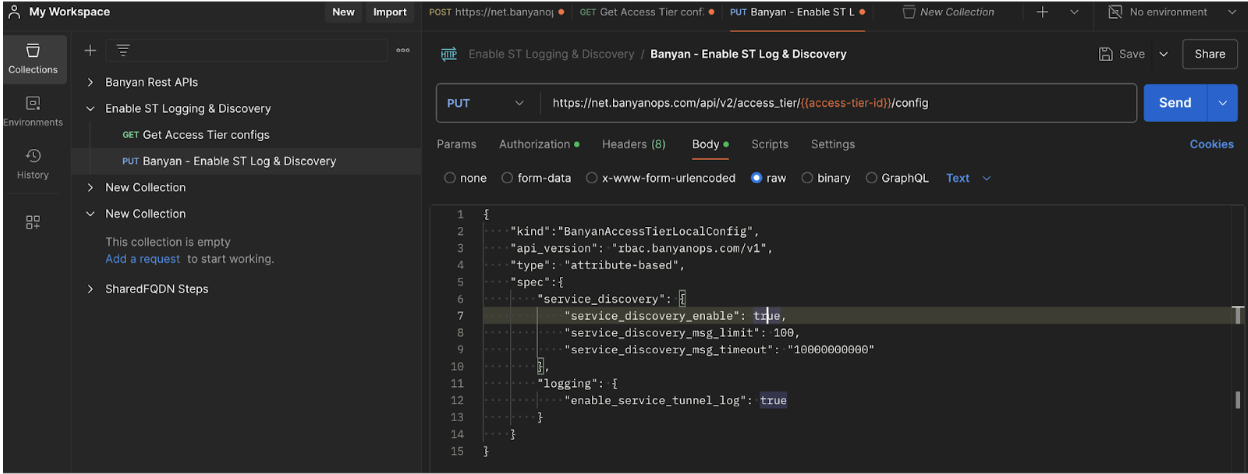
On the body, make sure “service_discovery_enable" and "enable_service_tunnel_log" are set to true. And click on “send” you should receive a 200 code indicating it was successfully activated.
- Then, please restart the access tier and you will be ready to collect the logs.
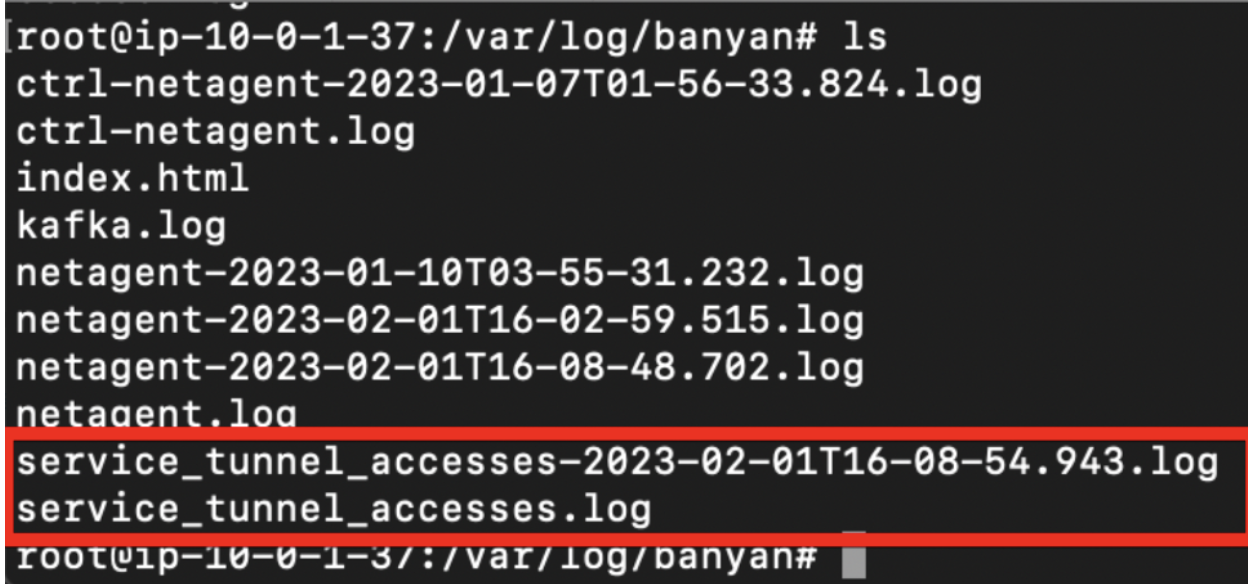
To collect the logs, SSH to the access tier, Go to the folder, /var/log/banyan/.
Each access event is recorded on Netagent’s disk and contains the following information:
{“protocol”: “tcp”,
  “email”: “sam@banyansecurity.io”,
  “device_serial_number”: “J4H3C62G4T”,
  “service_tunnel_id”: “5a8eb945-472d-4a4c-978f-6baa0d6bcce1",
  “source_ip”: “10.167.0.2",
  “source_port”: 61007,
  “destination_ip”: “10.128.0.37”,
  “destination_port”: 22,
  “timestamp”: 1674258163559875300,
  “accesstier_name”: “xyz-service-discovery-test”}
Further Reading
Service tunnel access logs https://docs.banyansecurity.io/docs/securing-networks/access-logs/
Related Articles
- DNS Filtering Transition FAQ
- Cloud Secure Edge (CSE) behavior when firewall is replaced or upgraded
- Cloud Secure Edge How to remove a Infrastructure service
 YES
YES NO
NO