-
Products
-
SonicPlatform
SonicPlatform is the cybersecurity platform purpose-built for MSPs, making managing complex security environments among multiple tenants easy and streamlined.
Discover More
-
-
Solutions
-
Federal
Protect Federal Agencies and Networks with scalable, purpose-built cybersecurity solutions
Learn MoreFederalProtect Federal Agencies and Networks with scalable, purpose-built cybersecurity solutions
Learn More - Industries
- Use Cases
-
-
Partners
-
Partner Portal
Access to deal registration, MDF, sales and marketing tools, training and more
Learn MorePartner PortalAccess to deal registration, MDF, sales and marketing tools, training and more
Learn More - SonicWall Partners
- Partner Resources
-
-
Support
-
Support Portal
Find answers to your questions by searching across our knowledge base, community, technical documentation and video tutorials
Learn MoreSupport PortalFind answers to your questions by searching across our knowledge base, community, technical documentation and video tutorials
Learn More - Support
- Resources
- Capture Labs
-
- Company
- Contact Us
How to download reports from SonicWall On-Prem Analytics


Description
This KB articles demonstrates how to download Custom Reports and Scheduled Reports from the On-Prem Analytics GUI.
 NOTE: The solution below is for downloading REPORTS from Syslog-based Analytics Interface. The images provided do not match every implementation, but should be viewed as an example that you can use as a guide while moving through the interface of either Syslog or Flow-based Analytics UI.
Resolution
CUSTOM REPORTS:
Select the REPORTS view, the default view is REPORTS | Overview | Status displaying Device Information and Licensing Status. Below which there are 14 report categories- Data Usage, Applications, User Activity, Web Activity, Web Filter, VPN Usage, Intrusions, Botnet, Geo-IP, Gateway Viruses, Spyware, Attacks, Authentication, Up/Down Status
- Select the Report category and it will expand with different Report types for that category.
 EXAMPLE: For example, let's download a custom Report for Data Usage category
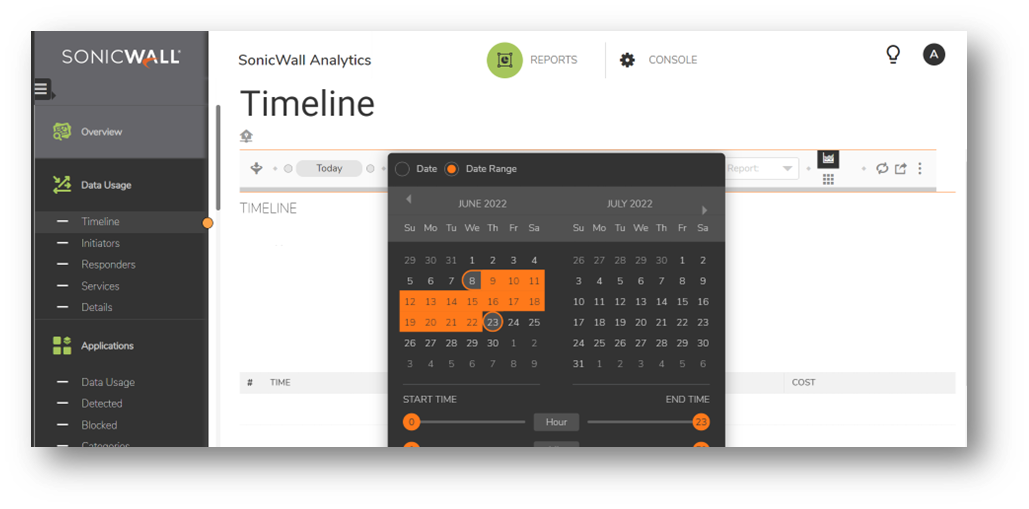
- Select any Report category, here we will select Data Usage | Timeline
- Click on Custom and select a Date or a Date Range as shown below and Refresh.
- Then, click on the
 icon on the right and export the REPORT in .pdf, .xml or .csv format.

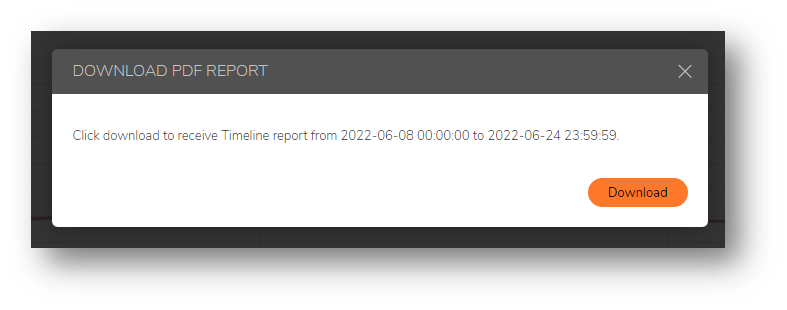
- Click Download.
SCHEDULED REPORTS:
- Navigate to CONSOLE | Reports | Scheduled Reports.
- Click on Create a Schedule Report
 icon on the right corner and Create Schedule launches.
 - Under TASK INFO, type the Schedule Name and select the Schedule Interval for Daily, Weekly or Monthly. The default time interval is Daily.
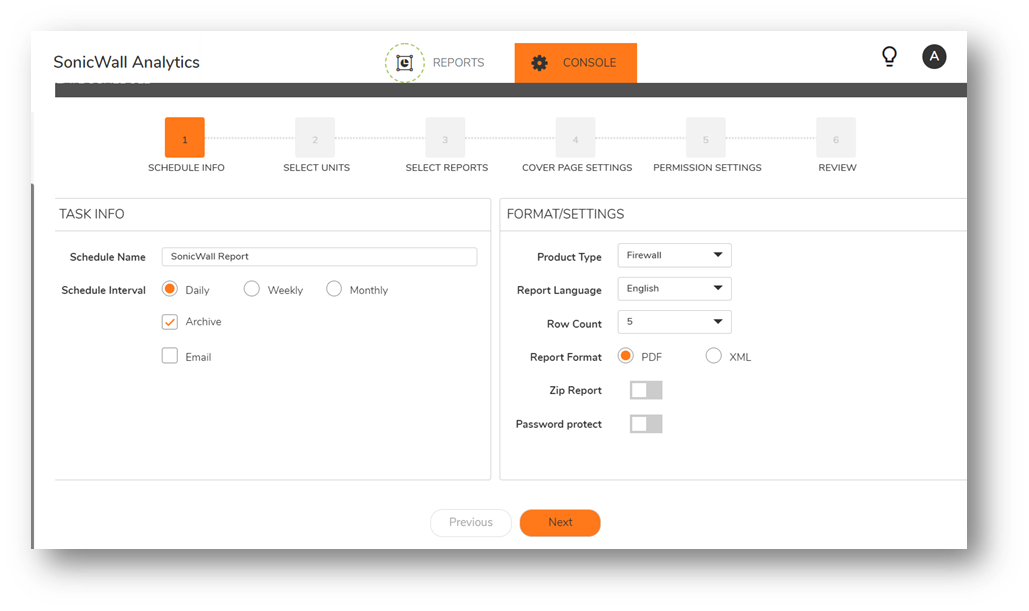
- Select Email if the Report has to be emailed directly to the email settings setup under E-Mail Destination as shown below:
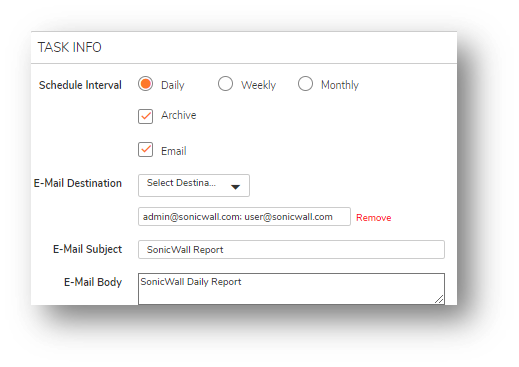
 NOTE: We can add multiple email addresses under E-Mail Destination. Selected here in the image is Adhoc User.
- You can also configure a password for the report for a increased security.
- The password can consist in numbers, letters and special characters (check the note below):
1234567890ABCDEFGHIJKLMNOPQRSTUVWXYZabcdefghijklmnopqrstuvwxyz

NOTE: You can also use special characters for the password. Below are the characters available for the use and the ones which are not:
Available characters for the password use:
! $ ^ * _ - = [ ] % ? / ( ) ; : \ | , . @
Unavailable characters for the password use:
& < > + { } ^ # ' "
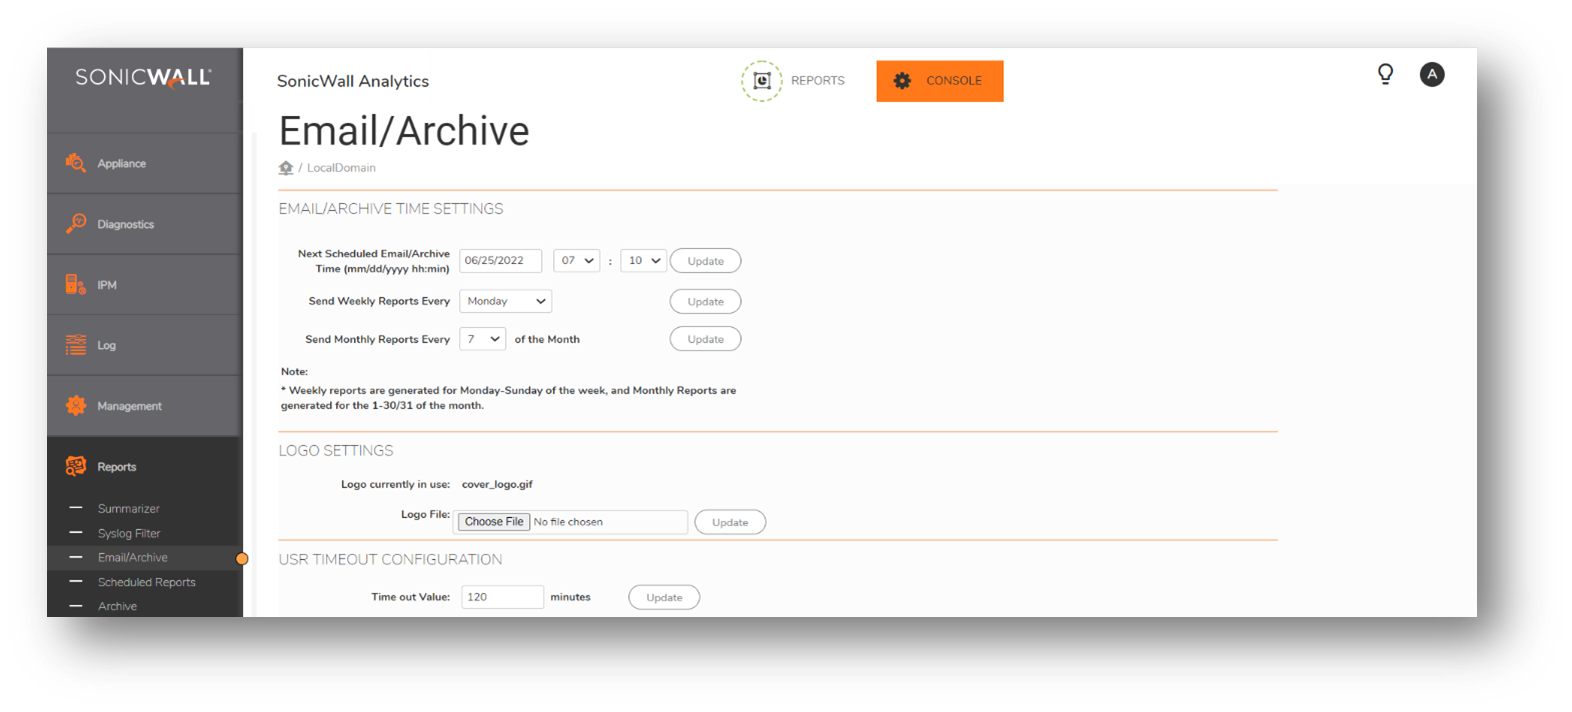
- To setup Email/Archive time settings, Navigate to Reports | Email/Archive where the schedule can be chosen to receive email on Daily, Weekly and Monthly basis.
- Select Archive if the report has to be stored locally.
 NOTE: Both Email and Archive can be selected while Creating Scheduled Report.
- Under FORMAT/SETTINGS, select the Report Language of your choice.
- Row Count can be chosen between 5,10,20 and 50. Report Format can be either PDF or XML.
- Check Zip Report and Password protect if needed.
- Click Next.
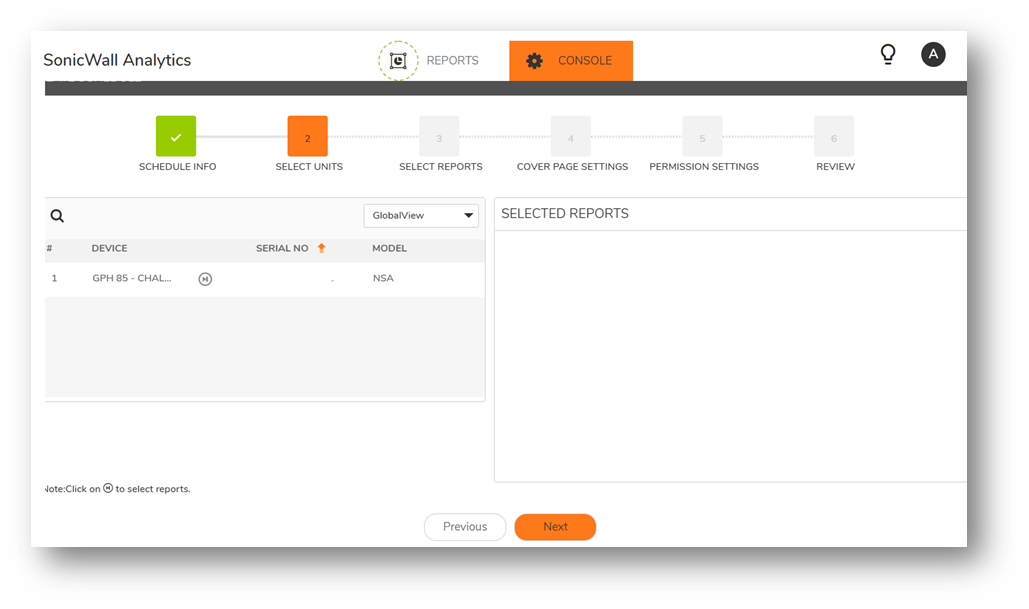
- Select the View from GlobalView, FirmwareView, ModelView or InstanceView and select the Device.
- Click Next.
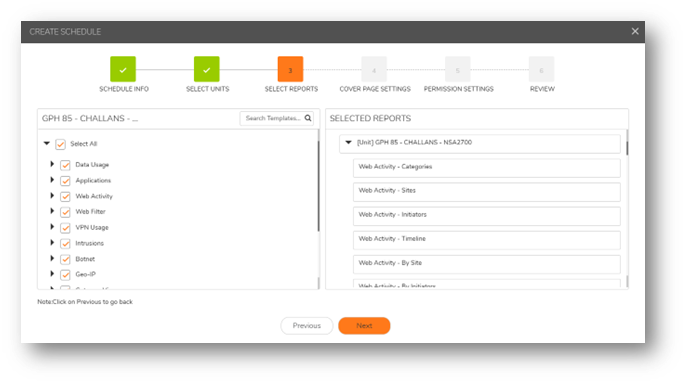
- Select Individual Reports you want or Select All and choices appear under SELECTED REPORT.
- Click Next.
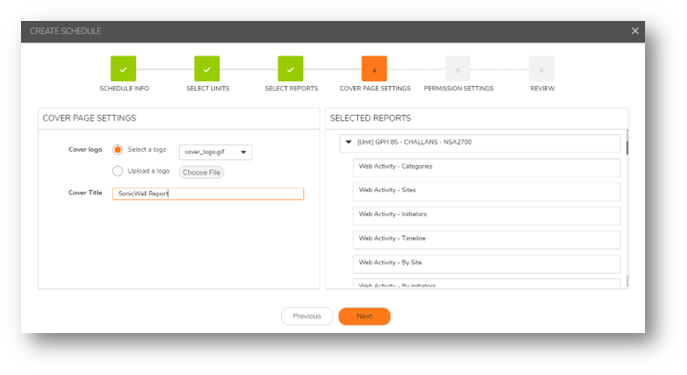
- Under COVER PAGE SETTINGS, choose Cover logo from the drop-down list or Upload a logo by clicking Choose File and type the Cover Title.
- Click Next.
- Check PERMISSION SETTINGS and SELECTED REPORTS. Click Next.
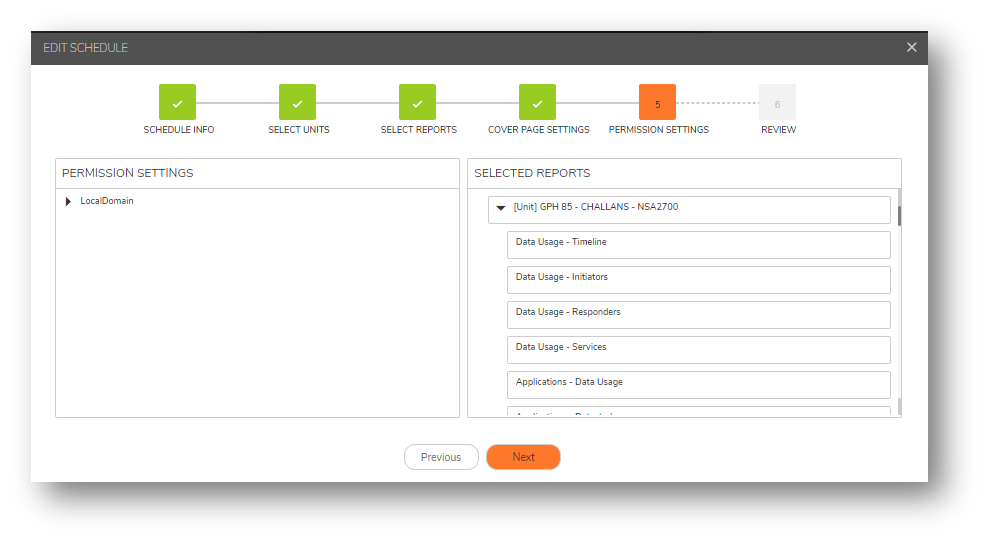
- Review the SCHEDULE DETAILS and SELECTED REPORTS. Click Create and Close when done.
- After saving the Reports, it can be verified if the configurations are saved as expected. Check the box next to the Report name and select the Archive for date range icon
 or Archive Now icon
  on the right corner.

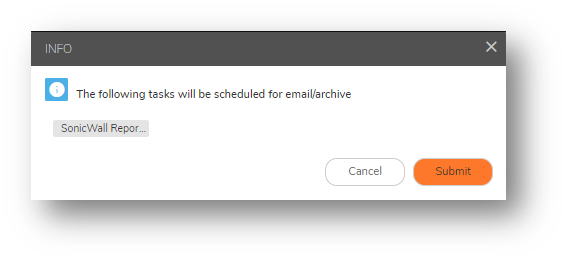
- This Archive Reports can be downloaded from Reports | Archive
- Click on download icon
 on the selected Archive Report. This will initiate download on the local desktop.
Related Articles
- Creating a license subscription report in GMS 9.3
- How to create SSLVPN login reports with Syslog GMS/Analytics
- Can I review, accept and deny the GMS changes before pushing to firewalls with workflow license?


 YES
YES NO
NO