-
Products
-
SonicPlatform
SonicPlatform is the cybersecurity platform purpose-built for MSPs, making managing complex security environments among multiple tenants easy and streamlined.
Discover More
-
-
Solutions
-
Federal
Protect Federal Agencies and Networks with scalable, purpose-built cybersecurity solutions
Learn MoreFederalProtect Federal Agencies and Networks with scalable, purpose-built cybersecurity solutions
Learn More - Industries
- Use Cases
-
-
Partners
-
Partner Portal
Access to deal registration, MDF, sales and marketing tools, training and more
Learn MorePartner PortalAccess to deal registration, MDF, sales and marketing tools, training and more
Learn More - SonicWall Partners
- Partner Resources
-
-
Support
-
Support Portal
Find answers to your questions by searching across our knowledge base, community, technical documentation and video tutorials
Learn MoreSupport PortalFind answers to your questions by searching across our knowledge base, community, technical documentation and video tutorials
Learn More - Support
- Resources
- Capture Labs
-
- Company
- Contact Us
How to deploy a Standalone Windows Connector


Description
To connect you and your users to a private resource through SonicWall CSE with Global Edge. A critical item to deploy is the Connector into your environment. In many cases, a Windows Server may be the best option to host such infrastructure. This Windows Server must have network connectivity to talk outward to the internet and communicate inward to the destination resources you would like to protect with SonicWall CSE
 NOTE: The Windows Connector currently supports Windows Server 2022
Resolution
- On the SonicWall CSE Command Center. Navigate to Networks > Connectors then click "Create Connector". Fill out the preliminary information as follows:
Connector Name: Friendly name for the Connector
Description (Optional): Write a short statement for the purpose of this Connector.
API Key - Select an API key that the Connector will use. If you do not wish to use an existing one, please reference this guide.
Available Networks (Optional) - By default all RFC 1918 addresses are made available to the Connector. If you wish to set a custom CIDR range to make available, you may configure custom CIDR Range(s) here.
Private Domains - Specify any domains that rely on an internal DNS server to resolve.
Then click "Continue".
- The installation screen will provide another place of guidance on this procedure as well as the variables we will need for a later step. For now, leave this page open. Navigate to the link below to download the installer for the Windows Connector:Download
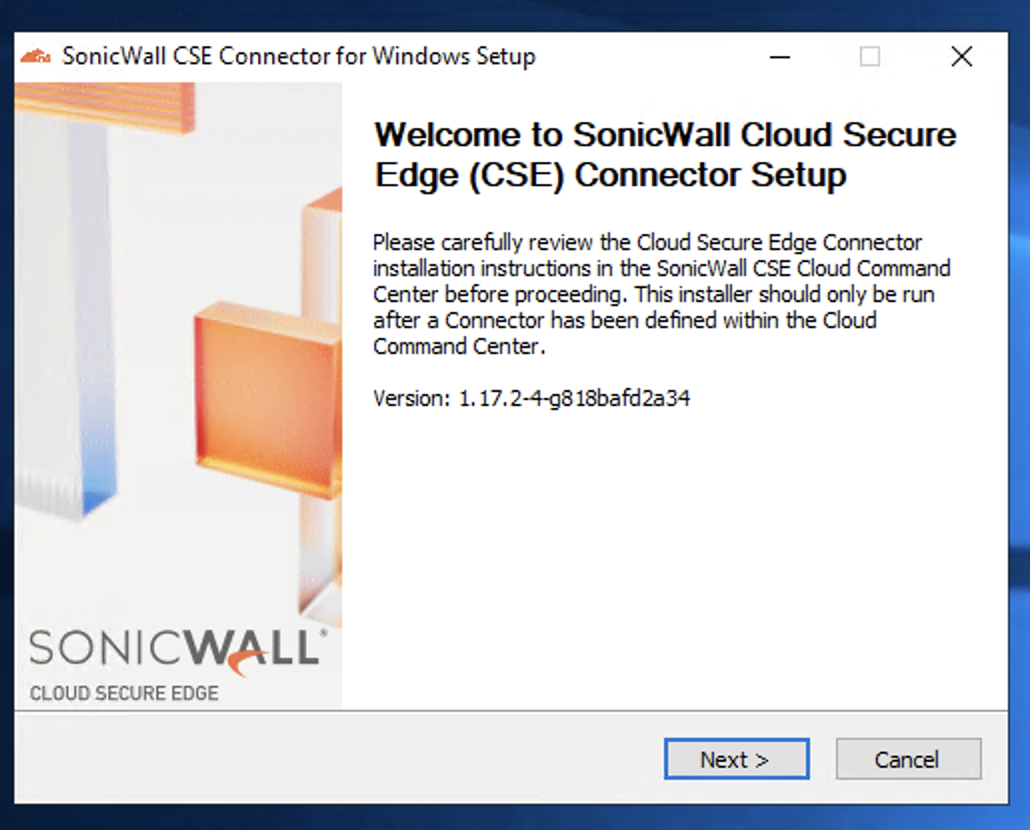
- On the Windows Server, you intend to install the Connector on, open the installer to begin the installation process. Then click Next.

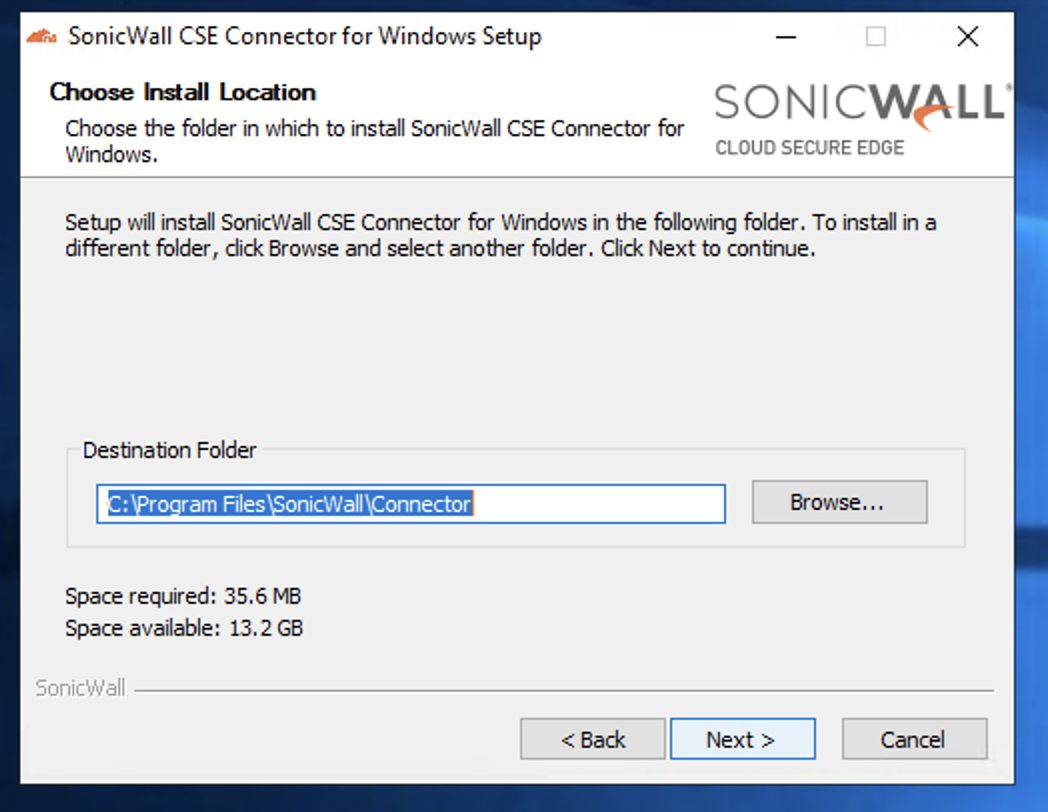
- Next choose the directory to install the SonicWall CSE Connector, or use the default, and click "Next".

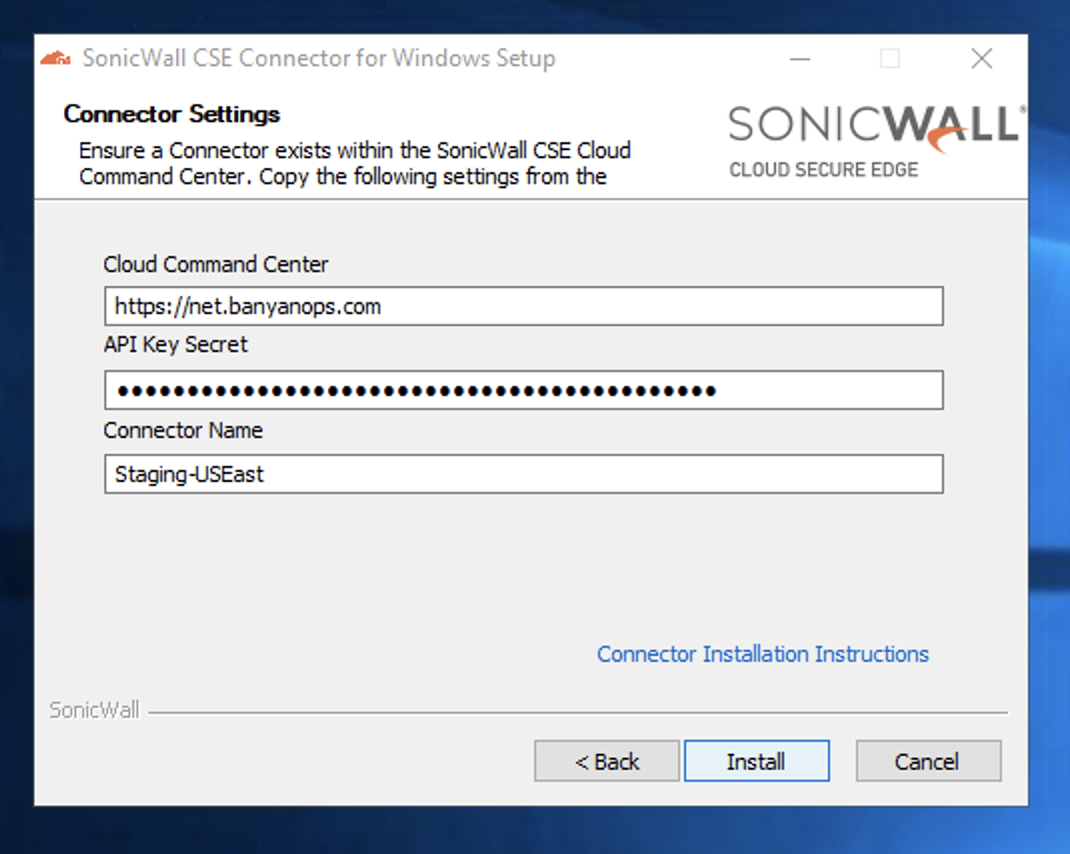
- From the installation page, you left open. Copy the variables and place them into the Windows Setup Prompt such as the example shown below:

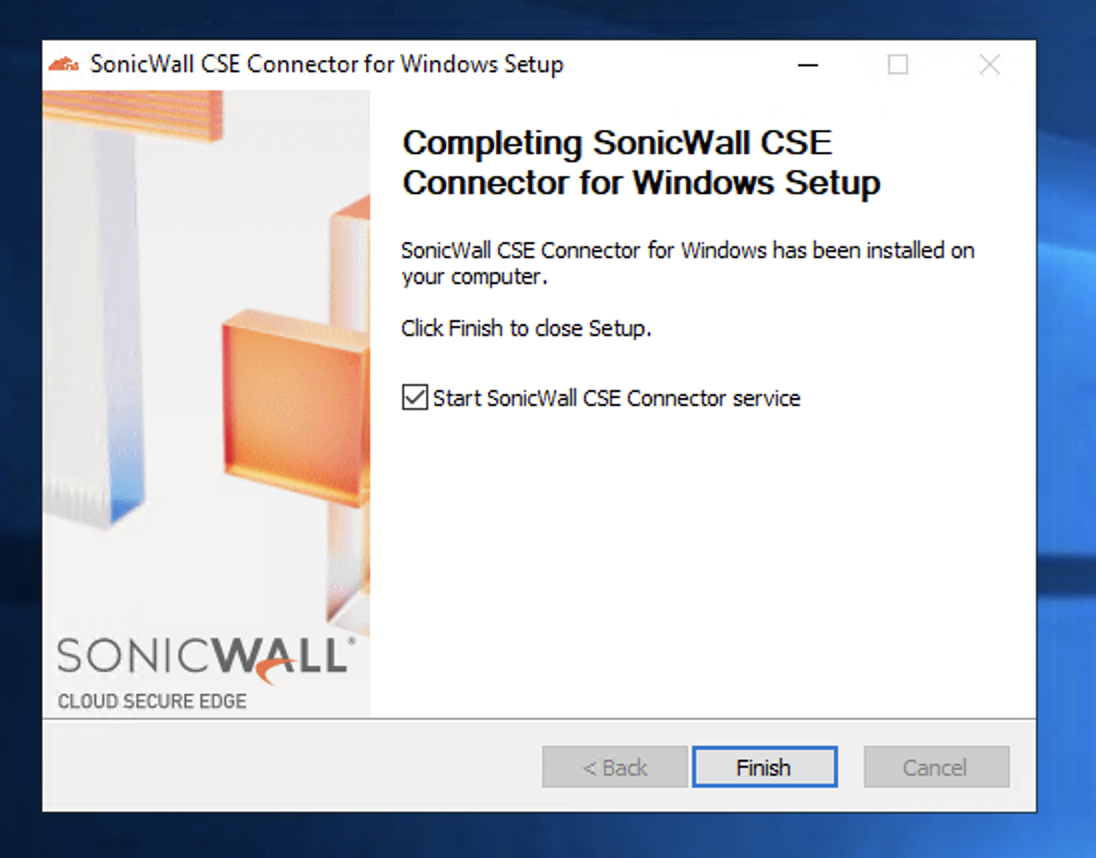
- Click "Install" and wait for the process to complete. Then choose "Finish".

- Then wait for the Connector to begin reporting on the Command Center's installation page. This may take a few minutes. Once reporting, click "Done".

You have now successfully set up and deployed a Connector on your Windows Server and may begin using it to serve your users.
Related Articles
Related Articles
- DNS Filtering Transition FAQ
- Cloud Secure Edge (CSE) behavior when firewall is replaced or upgraded
- Cloud Secure Edge How to remove a Infrastructure service


 YES
YES NO
NO