-
Products
-
SonicPlatform
SonicPlatform is the cybersecurity platform purpose-built for MSPs, making managing complex security environments among multiple tenants easy and streamlined.
Discover More
-
-
Solutions
-
Federal
Protect Federal Agencies and Networks with scalable, purpose-built cybersecurity solutions
Learn MoreFederalProtect Federal Agencies and Networks with scalable, purpose-built cybersecurity solutions
Learn More - Industries
- Use Cases
-
-
Partners
-
Partner Portal
Access to deal registration, MDF, sales and marketing tools, training and more
Learn MorePartner PortalAccess to deal registration, MDF, sales and marketing tools, training and more
Learn More - SonicWall Partners
- Partner Resources
-
-
Support
-
Support Portal
Find answers to your questions by searching across our knowledge base, community, technical documentation and video tutorials
Learn MoreSupport PortalFind answers to your questions by searching across our knowledge base, community, technical documentation and video tutorials
Learn More - Support
- Resources
- Capture Labs
-
- Company
- Contact Us
How to create scheduled blocking of website using App rules?


Description
This article describes how to block the application and website in a scheduled manner. You must enable Application Control before you can use it. App Control and App Rules are both enabled with global settings, and App Control must also be enabled on each network zone that you want to control.
You can configure policies in App Rules using the wizard or manually on the App Rules page. The wizard provides a safe method of configuration and helps prevent errors that could result in unnecessary blocking of network traffic. The manual configuration offers more flexibility for situations that require custom actions or policies. We can also create a schedule for blocking the applications and websites.
Resolution
Resolution for SonicOS 7.X
This release includes significant user interface changes and many new features that are different from the SonicOS 6.5 and earlier firmware. The below resolution is for customers using SonicOS 7.X firmware.
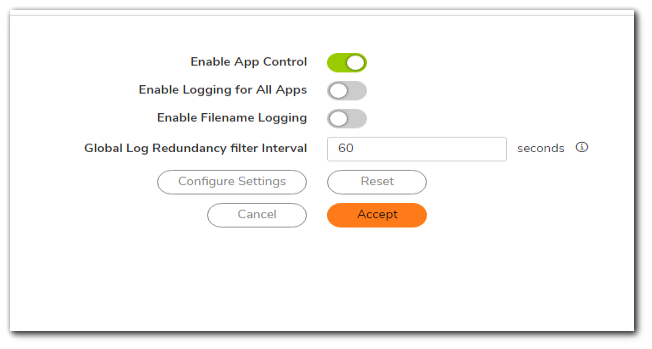
1. Navigate to Policy | Security services | App control, Enable App control
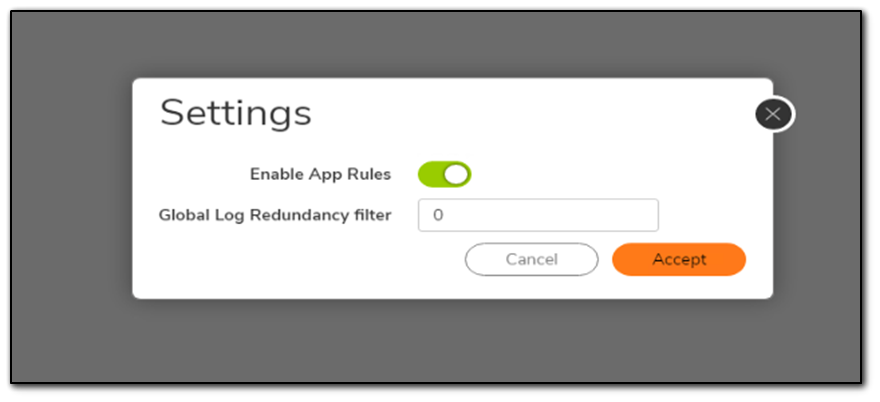
2. Navigate to Policy | App rules, click on settings on this page in top right corner, and enable App rules
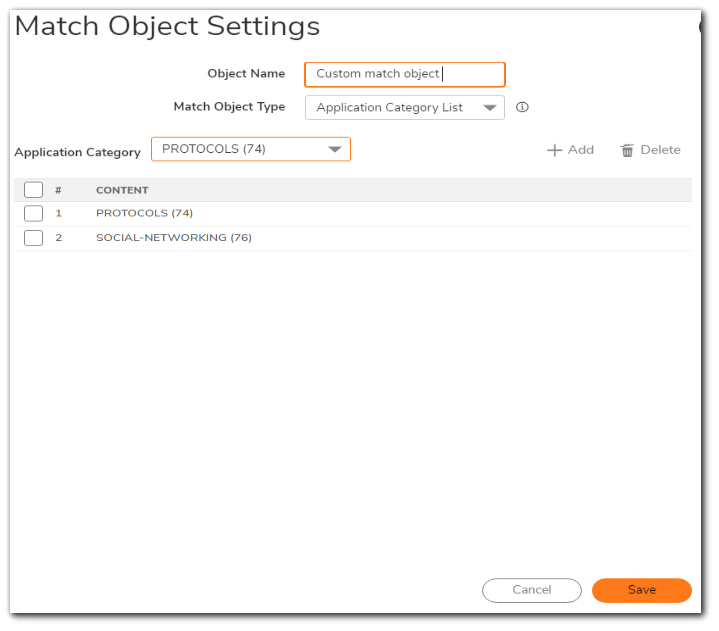
3. Navigate to Object | Match object, create a new object by clicking on add. Give a name for the object. Select the match object type as the Application category list to select a whole category or
Select the match object type as the Application signature list to select a particular application by selecting all signatures of that application, for example, to select social media applications in the below configuration. Here category social media and category protocols are used since some of the social media applications use these category protocols for access.
You can also search the application by App ID, category ID, and signature ID
 NOTE: For some application category and signature which is blocked will be used for other applications which are not configured to be blocked. In this case, please use the CFS policy feature to restrict access to websites instead of App rules. Also in CFS policy there is an option to select a schedule.
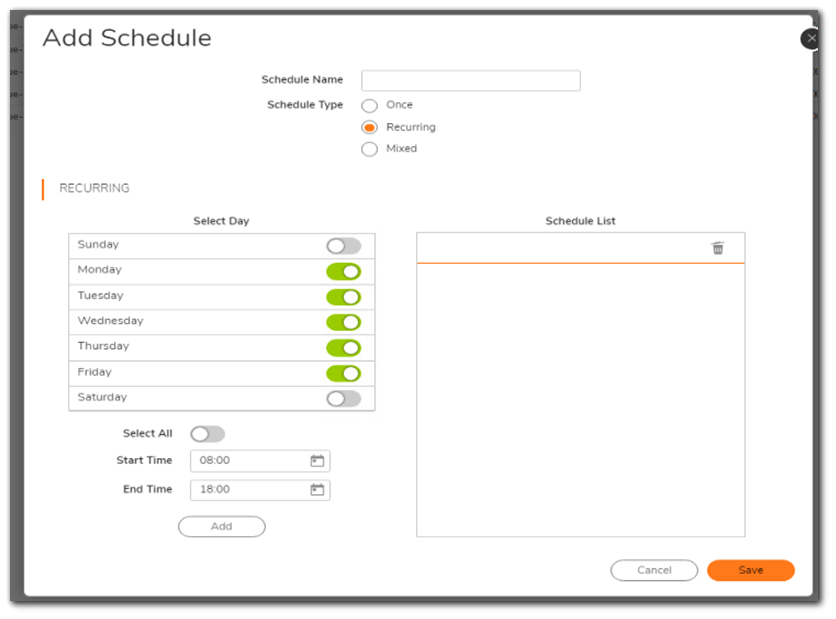
4. Creating a custom schedule for the application blocking
Navigate to Object | Match objects | Schedules, click on add and name the schedule name. Have the schedule type as recurring for weekdays and select the weekdays and select the timing hours and add. Save the schedule object created.
5. Navigate to Policy | App rules
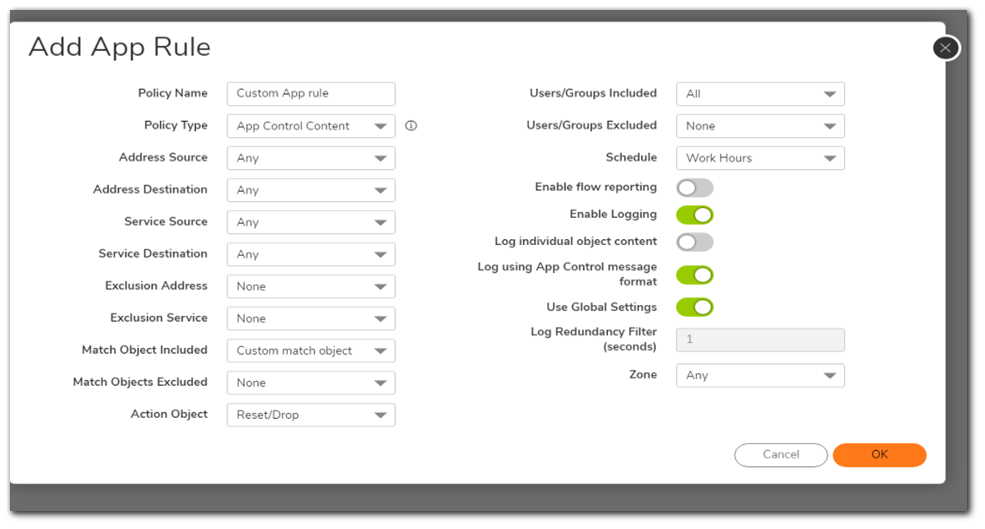
Create an App rule by clicking on add and name your app rule. Select the match object created under the match object included, select the schedule to the custom schedule which was created.
Select Reset/Drop under Action object
Resolution for SonicOS 6.5
This release includes significant user interface changes and many new features that are different from the SonicOS 6.2 and earlier firmware. The below resolution is for customers using SonicOS 6.5 firmware.
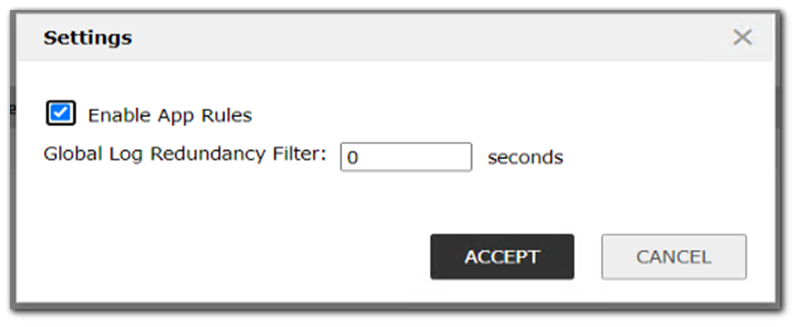
1. Navigate to Manage | Rules | App rules, click on settings on this page on the gear icon to enable App rules
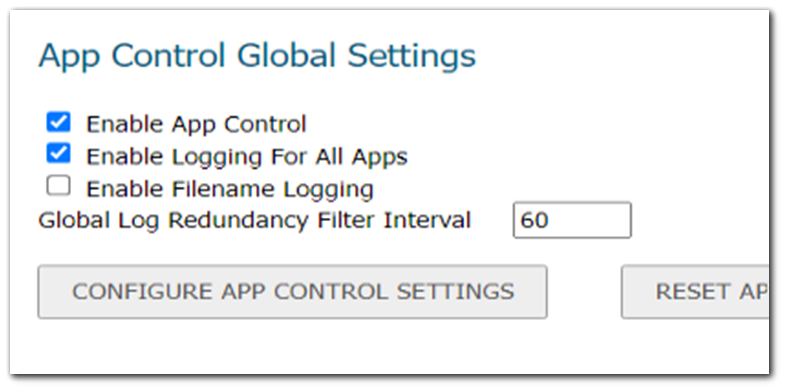
2. Navigate to Manage | Rules | App control, Enable App control
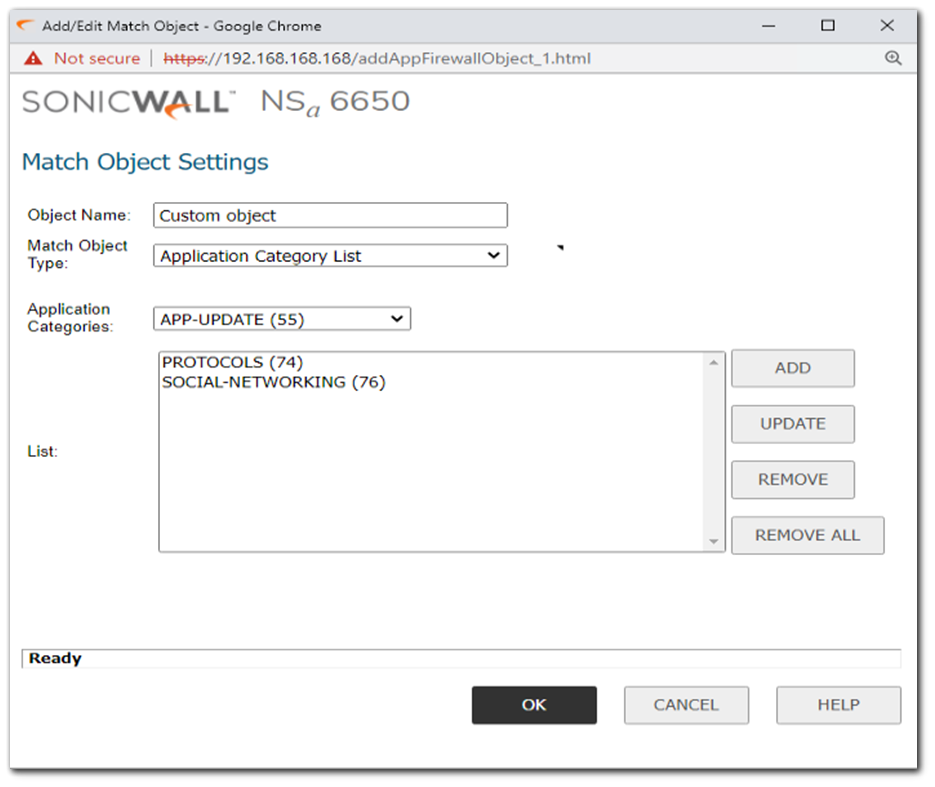
3. Navigate to Manage | Objects | Match Objects, and create a new object by clicking on add. Give a name for the object. Select the match object type as the Application category list to select a whole category or select the match object type as the Application signature list to select a particular application by selecting all signatures of that application, for example, Instagram in the below configuration
You can also search the application by App ID, category ID, and signature ID
 NOTE: For some application category and signature which is blocked will be used for other applications which are not configured to be blocked. In this case, please use the CFS policy feature to restrict access to websites instead of App rules. Also in CFS policy there is an option to select a schedule.
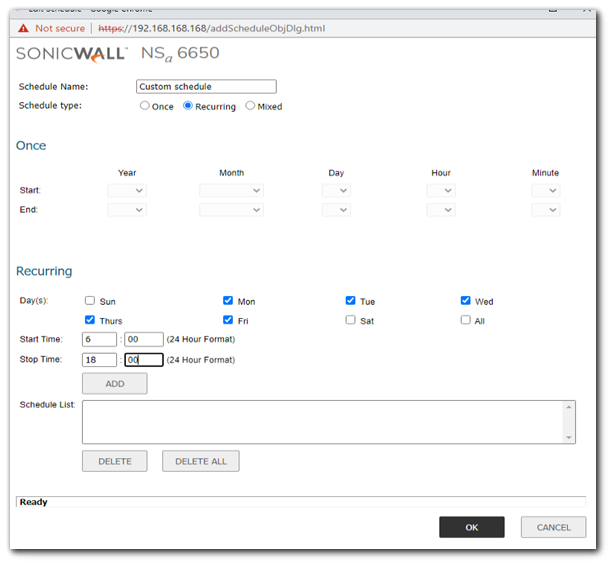
4. Creating a custom schedule for the application blocking
Navigate to Manage | Appliance | System Schedules, click on add, and name the schedule name. Have the schedule type as recurring for weekdays and select the weekdays and select the timing hours and add. Save the schedule object created.
5. Navigate to Manage | Rules | App rules
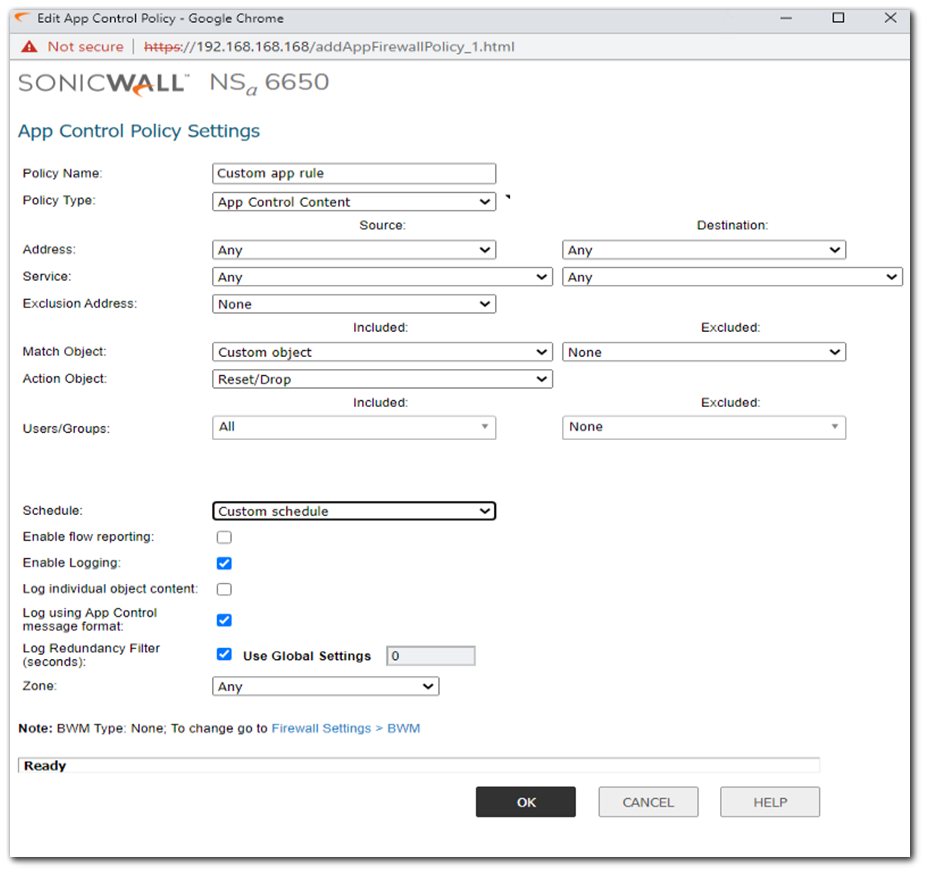
Create an App rule by clicking on add and name your app rule. Select the match object created under the match object included, select the schedule to the custom schedule which was created
Select Reset/Drop under Action object.
Related Articles
- Error:"Invalid API Argument" when modifying the access rules
- Cysurance Partner FAQ
- Configure probe monitoring for WAN Failover and Loadbalancing - SonicWall UTM


 YES
YES NO
NO