-
Products
-
SonicPlatform
SonicPlatform is the cybersecurity platform purpose-built for MSPs, making managing complex security environments among multiple tenants easy and streamlined.
Discover More
-
-
Solutions
-
Federal
Protect Federal Agencies and Networks with scalable, purpose-built cybersecurity solutions
Learn MoreFederalProtect Federal Agencies and Networks with scalable, purpose-built cybersecurity solutions
Learn More - Industries
- Use Cases
-
-
Partners
-
Partner Portal
Access to deal registration, MDF, sales and marketing tools, training and more
Learn MorePartner PortalAccess to deal registration, MDF, sales and marketing tools, training and more
Learn More - SonicWall Partners
- Partner Resources
-
-
Support
-
Support Portal
Find answers to your questions by searching across our knowledge base, community, technical documentation and video tutorials
Learn MoreSupport PortalFind answers to your questions by searching across our knowledge base, community, technical documentation and video tutorials
Learn More - Support
- Resources
- Capture Labs
-
- Company
- Contact Us
How to configure SAML 2.0 on Azure for CloudEdge


Description
This article describes how to configure Azure Active Directory through SAML 2.0 to use as an identity provider for SonicWall Cloud Edge.
- Configuring the Enterprise Application on Azure AD.
- Exporting the signing certificate.
- Configuring the SAML 2.0 connection in the Management Platform
Note - Group Support
Be aware that if you choose to configure Azure AD through SAML 2.0, your user's groups will not automatically be synced with their account on the SonicWall Cloud Edge side (like with the App Registration). You will have to manually add or remove users from groups in your SonicWall Cloud Edge console.
Resolution
Configuring the Enterprise Application in Azure Active Directory
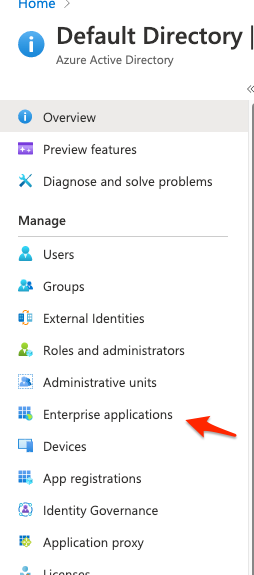
1.) Start by signing into your Azure Active Directory and selecting Enterprise Applications.
2.) Search for the "SonicWall Cloud Edge" application and click to select it.
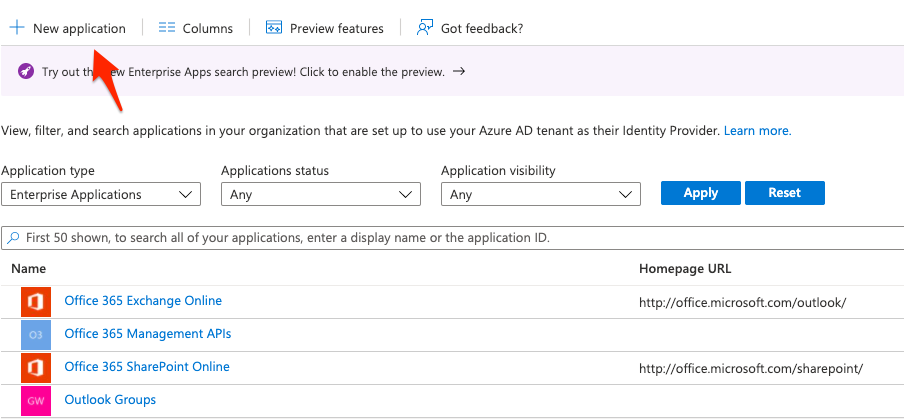
3.) If no Application is found then Create a "+ New Application"

4.) Select "Create" (This may take a few minutes)
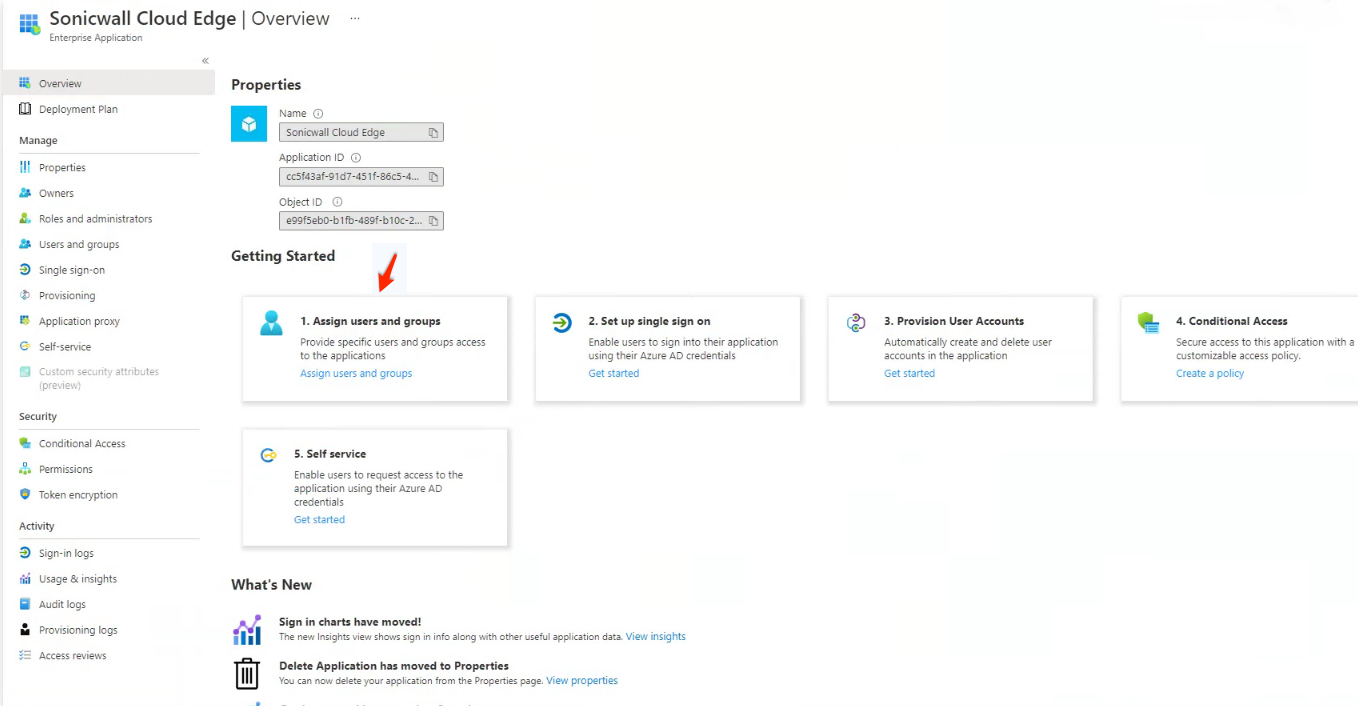
5.) You'll have to assign access to users or groups (if you are using the Azure AD free edition you won't be able to select groups and will have to select individual users)
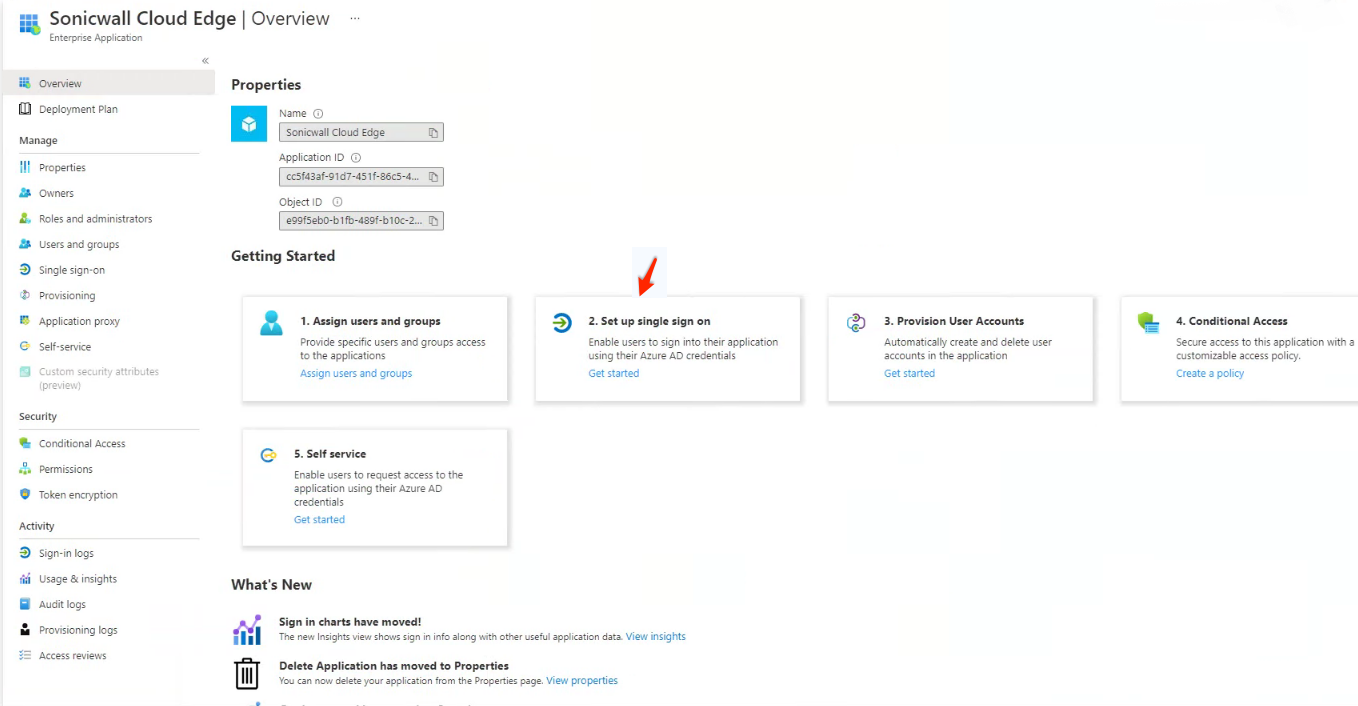
6.) Once users have been added and saved you will select the second option to "2. Set up single sign on"
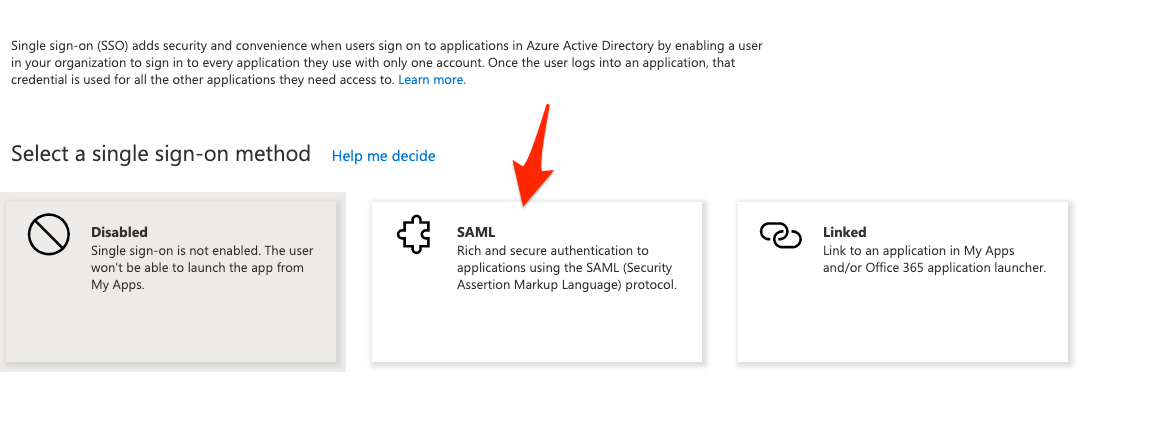
7.) You will then select the "SAML" method
8.) We'll be editing the "Basic SAML Configuration"
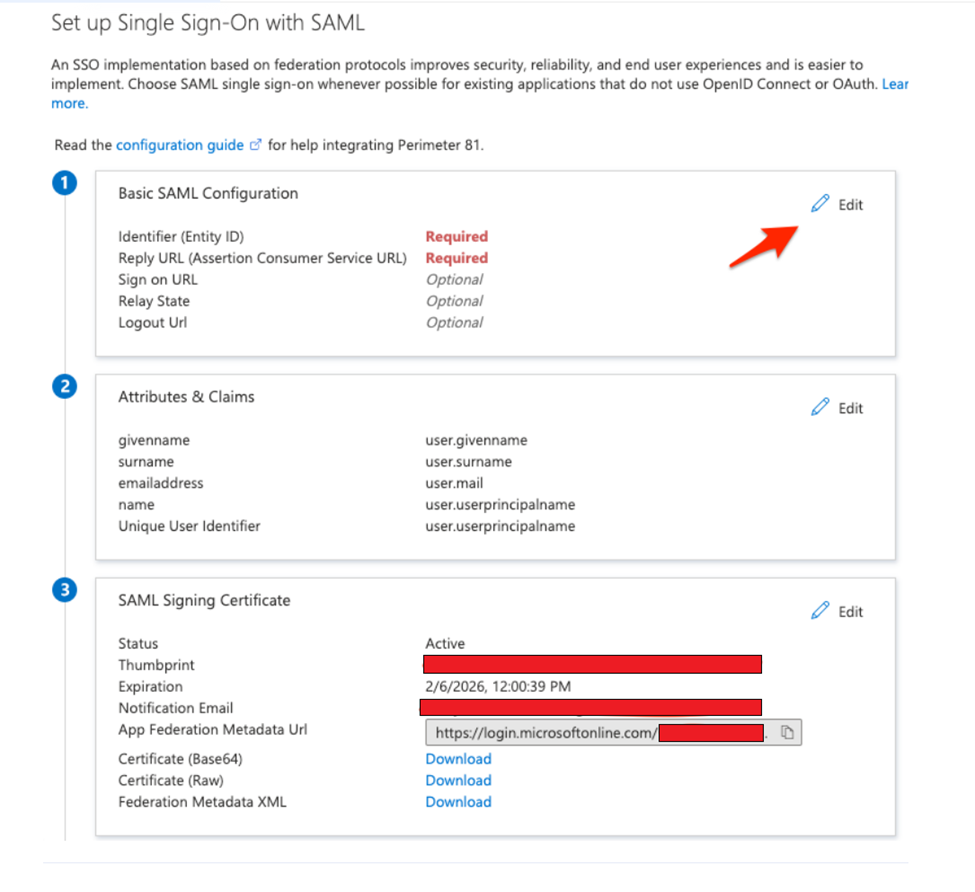
9.) On this step we'll be adding the following as our "Identifier":
urn:auth0:SonicWall-production:YOURWORKSPACEHERE-oc
For our "Reply URL (Assertion Consumer Service URL)" we'll be inputting the following:
https://auth.sonicwalledge.com/login/callback?connection=YOURWORKSPACE-oc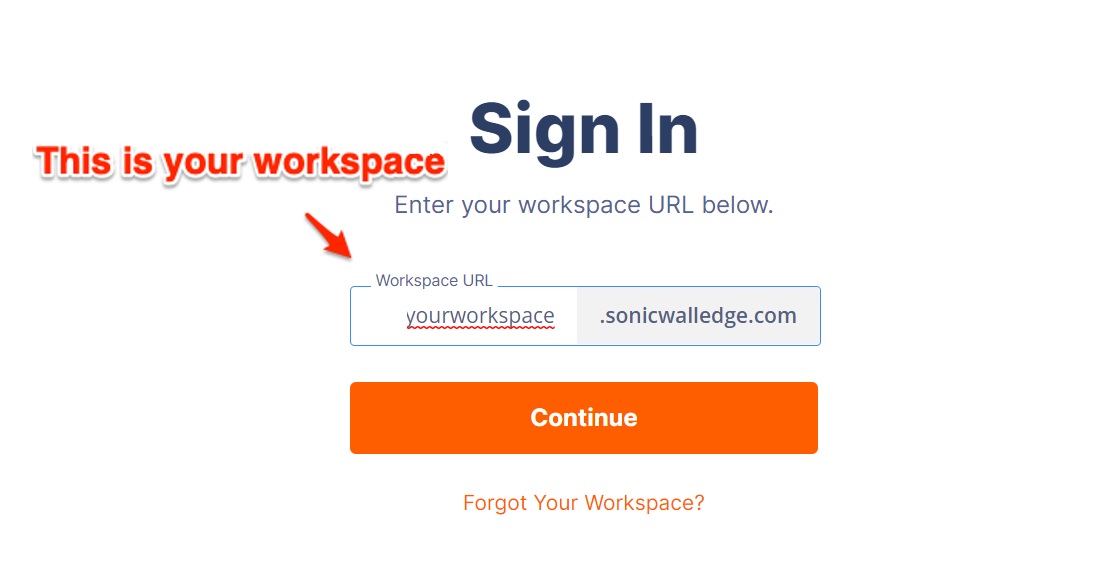
10.) Rename the Attributes & Claims in Step 2 to below given values.
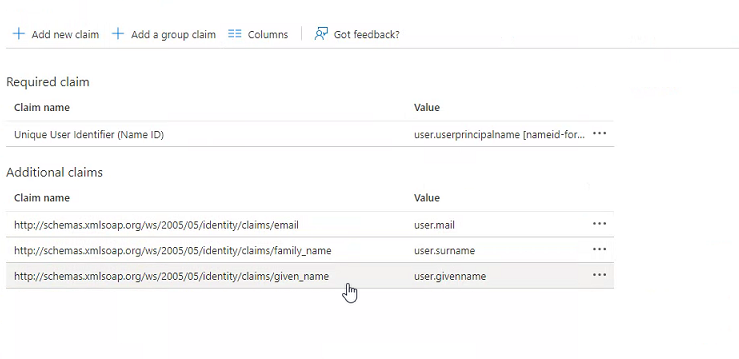
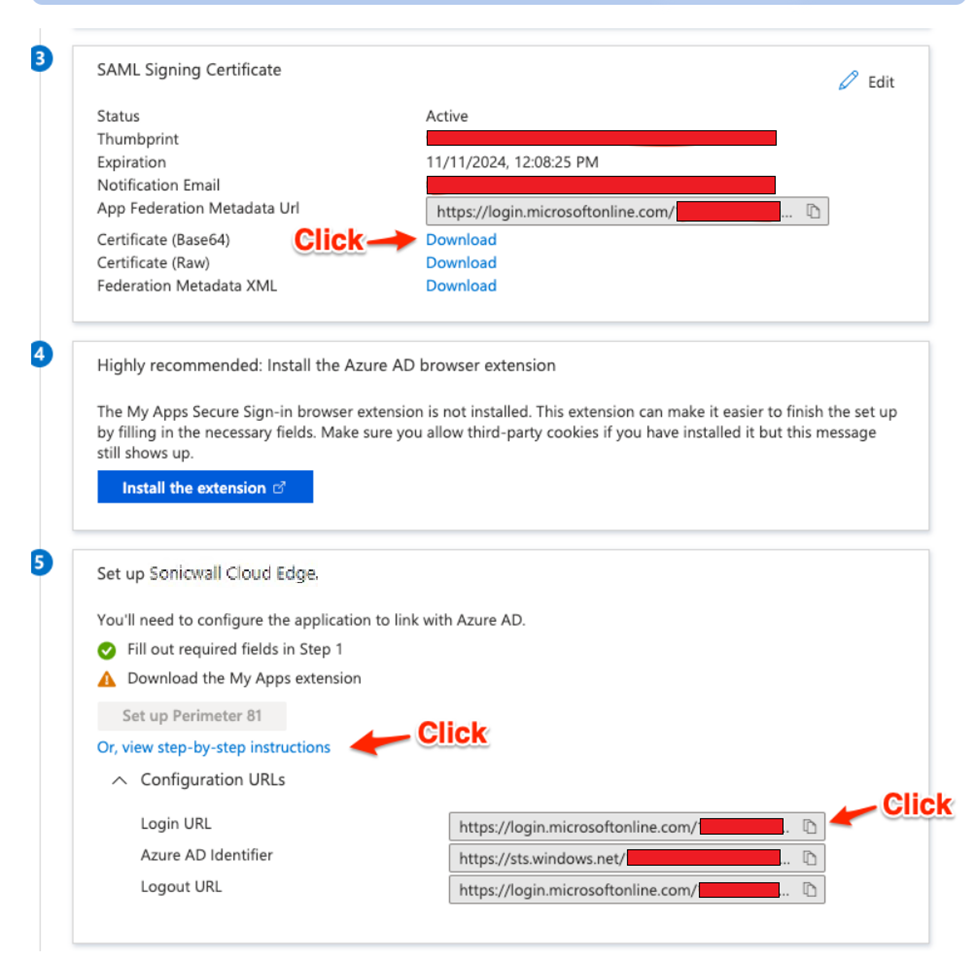
11.) Finally we'll be downloading your SAML Signing certificate in Step 3 (the Base64 version).
In step 5 we'll be expanding the "Step-by-step instructions" and copying your Login URL
Configuring the SAML 2.0 Application on SonicWall CloudEdge console
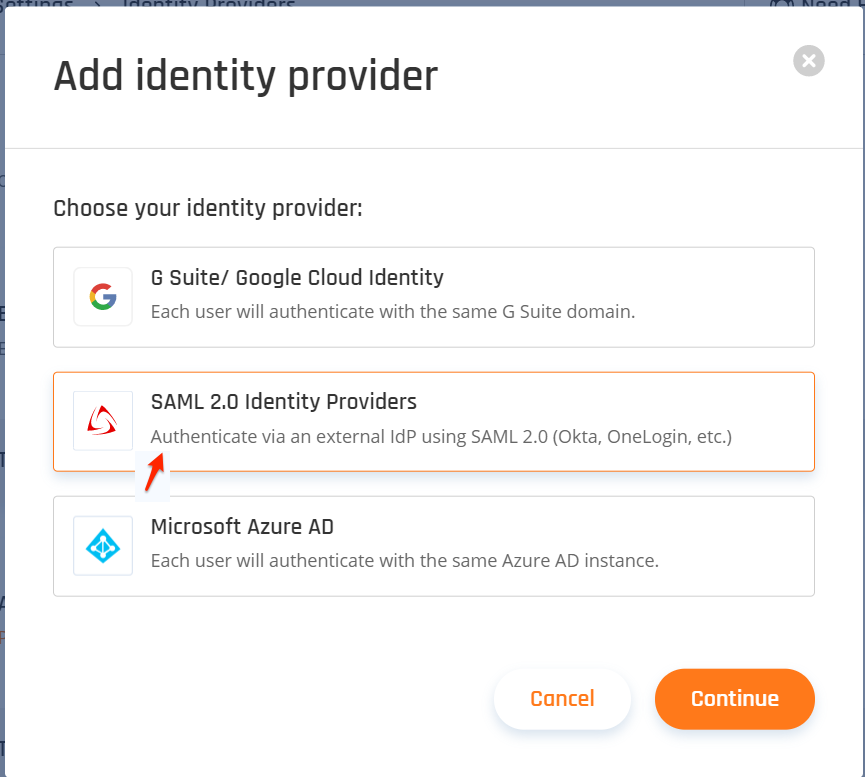
- ) Click on settings in your SonicWall CloudEdge console, go to your Identity Providers and select the option to " + Add Provider"

- ) Select "SAML 2.0 Identity Providers"and then "Continue"
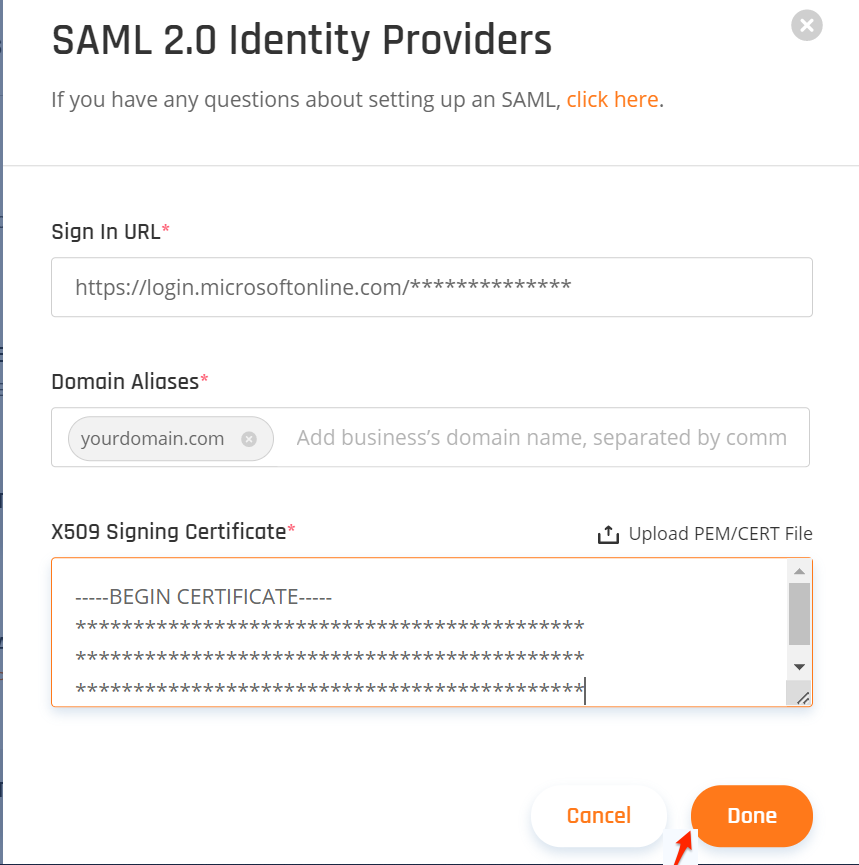
3.) Fill out the following:
- Sign in URL:This will be your "Login URL" you copied from Azure
- Domain Aliases:This will be the domain used by your users (everything after the "@" sign in their email)
- X509 Signing Certificate:This will be the certificate we downloaded from Azure.
- After everything has been added select "Done"
Related Articles
- Converting Cloud App Security licenses from annual to monthly
- Cloud Application Security FAQs
- Cloud Edge License Provisioning and Management through MSSP Monthly


 YES
YES NO
NO