-
Products
-
SonicPlatform
SonicPlatform is the cybersecurity platform purpose-built for MSPs, making managing complex security environments among multiple tenants easy and streamlined.
Discover More
-
-
Solutions
-
Federal
Protect Federal Agencies and Networks with scalable, purpose-built cybersecurity solutions
Learn MoreFederalProtect Federal Agencies and Networks with scalable, purpose-built cybersecurity solutions
Learn More - Industries
- Use Cases
-
-
Partners
-
Partner Portal
Access to deal registration, MDF, sales and marketing tools, training and more
Learn MorePartner PortalAccess to deal registration, MDF, sales and marketing tools, training and more
Learn More - SonicWall Partners
- Partner Resources
-
-
Support
-
Support Portal
Find answers to your questions by searching across our knowledge base, community, technical documentation and video tutorials
Learn MoreSupport PortalFind answers to your questions by searching across our knowledge base, community, technical documentation and video tutorials
Learn More - Support
- Resources
- Capture Labs
-
- Company
- Contact Us
How to configure Firewall to route all traffic from L2TP VPN client to the remote site via MPLS VPN


Description
Resolution
Resolution for SonicOS 6.5
This release includes significant user interface changes and many new features that are different from the SonicOS 6.2 and earlier firmware. The below resolution is for customers using SonicOS 6.5 firmware.
In the below scenario, outside laptop connects to Site A through L2TP VPN. Both Site A and Site B can access to Internet via WAN interface X1, while there is an MPLS VPN tunnel between these two sites. This article will describe how to route all traffic from terminal laptop to the remote Site B through MPLS VPN tunnel.
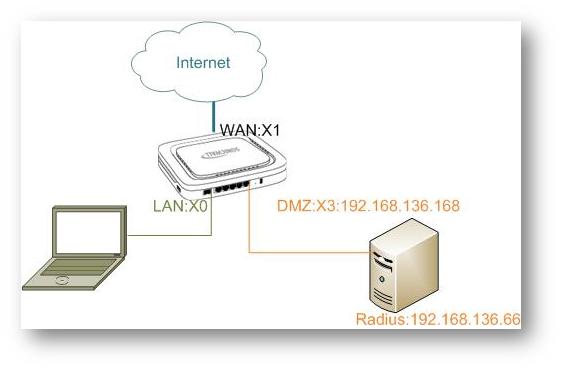


Step 1: Configure L2TP Server on the firewall of Site A.
Please refer to the KB 5378: Configuring L2TP Server on SonicOS Enhanced
- Navigate to Manage | Users | LocalUsers & Groups, Click the Edit button of L2TP VPN user (If non existant please create a user)
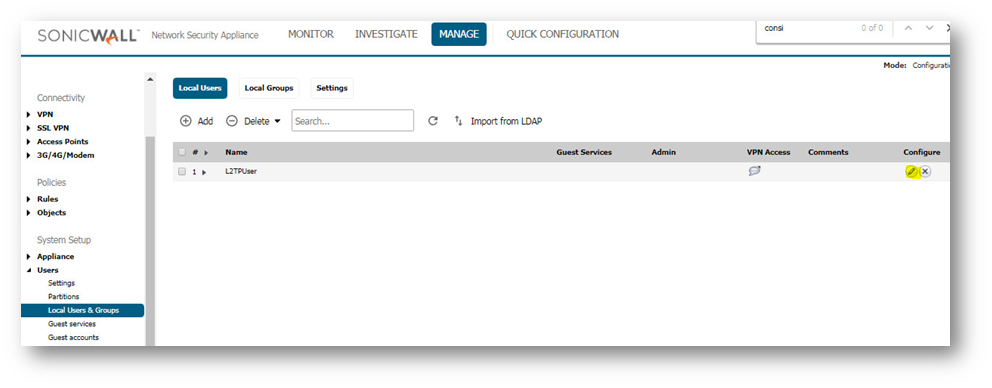
- Add group Trusted Users (Configured for L2TP) in the Groups tab.

- Add WAN RemoteAccess Networks in the VPN Access tab.

- Navigate to Manage | VPN | Base Settings page
- Enable WAN Group VPN | Click the Edit button of WAN GroupVPN
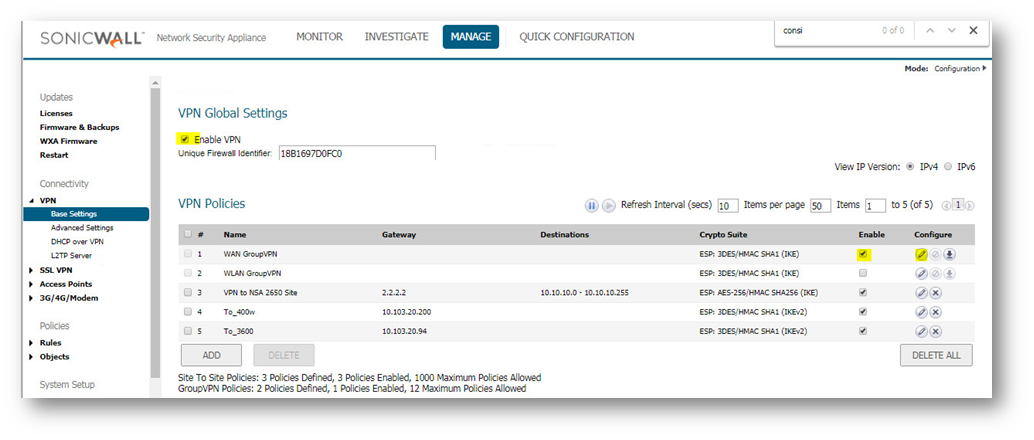
- Select This Gateway Only for option Allow Connections to: at Client tab | Tick options Set Default Route as this Gateway and also Apply VPN Access Control List.

- Add a routing policy on the firewall of Site A. Go to Manage| Network | Routing | Routing Policies | Click button Add.
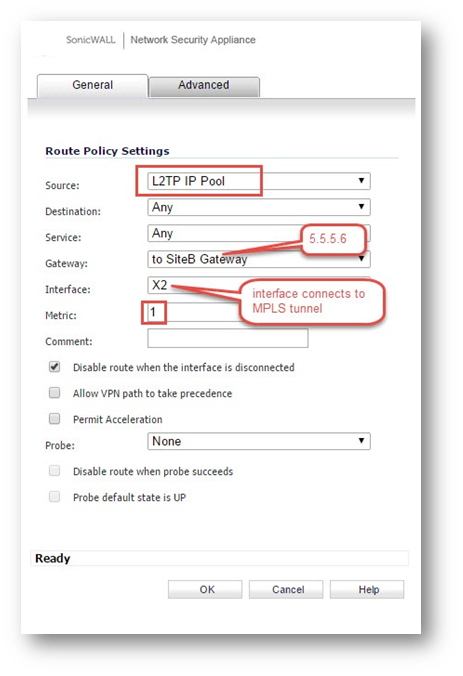
- Source: L2TP IP Pool
- Destination: Any
- Service: Any
- Gateway: To SiteB Gateway
- Interface: Select interface connected to MPLS Tunnel
- Metric: 1

- On site A, add a NAT policy to translate L2TP IP Pool addresses to the IP address visible on Site B (you can choose IP address of the interface connecting to MPLS tunnel ).
- Navigate to Manage | Rules | NAT Policies | Click button Add.
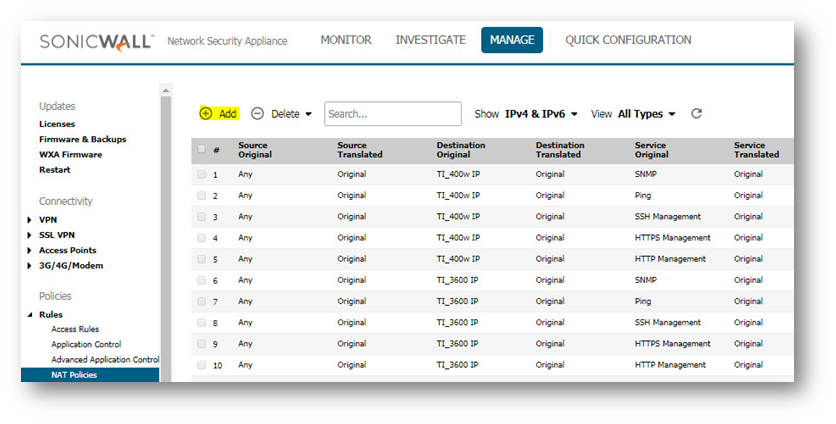

Note: when browse NAT policies you will find there is a default NAT policy for L2TP IP Pool which was generated by system when configuring WAN GroupVPN. In order to ensure the policy you just created can be hit as default, y ou are required to change the Priority of the NAT policy you just added to be prior to the default NAT Policy by clicking Priority button. In this case, the priority for the policy is configured as 3.
How to test:
- On the mobile laptop, connect to the L2TP server of site A and ping any LAN subnet IP address of site B or Interet site.
- You can capture the packets on Site B to check whether the traffic has been routed.
Resolution for SonicOS 6.2 and Below
The below resolution is for customers using SonicOS 6.2 and earlier firmware. For firewalls that are generation 6 and newer we suggest to upgrade to the latest general release of SonicOS 6.5 firmware.
In the below scenario, outside laptop connects to Site A through L2TP VPN. Both Site A and Site B can access to Internet via WAN interface X1, while there is an MPLS VPN tunnel between these two sites. This article will describe how to route all traffic from terminal laptop to the remote Site B through MPLS VPN tunnel.


Step 1: Configure L2TP Server on the firewall (TZ205) of Site A.
Please refer to the KB 5378: Configuring L2TP Server on SonicOS Enhanced
- Navigate to Users | LocalUsers | Click the Edit button of L2TP VPN user | Add group Trusted Users (Configured for L2TP) in the Groups tab | Add WAN RemoteAccess Networks in the VPN Access tab.


- Navigate to VPN | Settings page | Enable WAN Group VPN | Click the Edit button of WAN GroupVPN | Select This Gateway Only for option Allow Connections to: at Client tab | Tick options Set Default Route as this Gateway and also Apply VPN Access Control List.

- Add a routing policy on the firewall of Site A. Go to Network | Routing | Click button Add.
- On site A, add a NAT policy to translate L2TP IP Pool addresses to the IP address visible on Site B (you can choose IP address of the interface connecting to MPLS tunnel ). Navigate to Network | NAT Policies | Click button Add.

Note: when browse NAT policies you will find there is a default NAT policy for L2TP IP Pool which was generated by system when configuring WAN GroupVPN. In order to ensure the policy you just created can be hit as default, y ou are required to change the Priority of the NAT policy you just added to be prior to the default NAT Policy by clicking Priority button. In this case, the priority for the policy is configured as 3.
How to test:
- On the mobile laptop, connect to the L2TP server of site A and ping any LAN subnet IP address of site B or Interet site.
- You can capture the packets on Site B to check whether the traffic has been routed.
Related Articles
- Error:"Invalid API Argument" when modifying the access rules
- Cysurance Partner FAQ
- Configure probe monitoring for WAN Failover and Loadbalancing - SonicWall UTM
Categories
- Firewalls > TZ Series
- Firewalls > SonicWall SuperMassive E10000 Series
- Firewalls > SonicWall SuperMassive 9000 Series
- Firewalls > SonicWall NSA Series


 YES
YES NO
NO