-
Products
-
SonicPlatform
SonicPlatform is the cybersecurity platform purpose-built for MSPs, making managing complex security environments among multiple tenants easy and streamlined.
Discover More
-
-
Solutions
-
Federal
Protect Federal Agencies and Networks with scalable, purpose-built cybersecurity solutions
Learn MoreFederalProtect Federal Agencies and Networks with scalable, purpose-built cybersecurity solutions
Learn More - Industries
- Use Cases
-
-
Partners
-
Partner Portal
Access to deal registration, MDF, sales and marketing tools, training and more
Learn MorePartner PortalAccess to deal registration, MDF, sales and marketing tools, training and more
Learn More - SonicWall Partners
- Partner Resources
-
-
Support
-
Support Portal
Find answers to your questions by searching across our knowledge base, community, technical documentation and video tutorials
Learn MoreSupport PortalFind answers to your questions by searching across our knowledge base, community, technical documentation and video tutorials
Learn More - Support
- Resources
- Capture Labs
-
- Company
- Contact Us
How to change the Colo for an NSM tenant?


Description
Sometimes we see a tenant for NSM getting created under a different Colo than the expected one based on the Geo Location.
Resolution
Steps to change Colo for a Tenant on NSM tenant:
In this example, we have used the following:
- Old tenant: NSM which, Colo: North America
- New Tenant: NSM Frankfurt, Colo: Europe
- Firewall Model: NSv 270
To find Colo information for a firewall, please follow the steps described in the KB :Find NSM Colo Information
In order to move Firewall from one tenant to another, we need to perform the following two steps:
1. Create a New Tenant.
2. Delete the firewall from Old Tenant with Old Colo.
 CAUTION: This process will delete the firewall as well as its reporting data available on the existing Colo which cannot be reverted.
3. Move the firewall to New Tenant and bind it with New Colo.
4. Enable Cloud Management and Zero touch for the device to get acquired under New Tenant.
1. Create a New Tenant:
Login to your mysonicwall account and Create a New tenant:

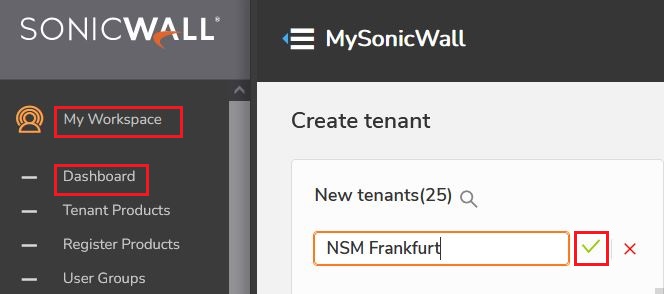
Choose the respective user group for the new tenant from the available groups under this mysonicwall account:
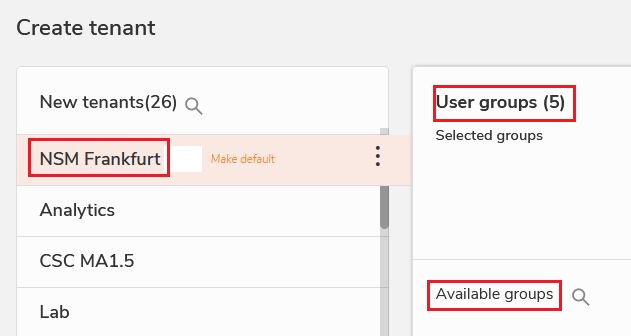
2. Delete the firewall from Old Tenant with Old Colo:
- In Mysonicwall, go to My Workplace -> Tenant Products.
Choose the existing Tenant "NSM" from the dropdown, this will list out the firewalls under this Tenant. Click the firewall serial to be moved to New Tenant.
 NOTE: Here "NSM" is the Tenant Created under North America Colo.

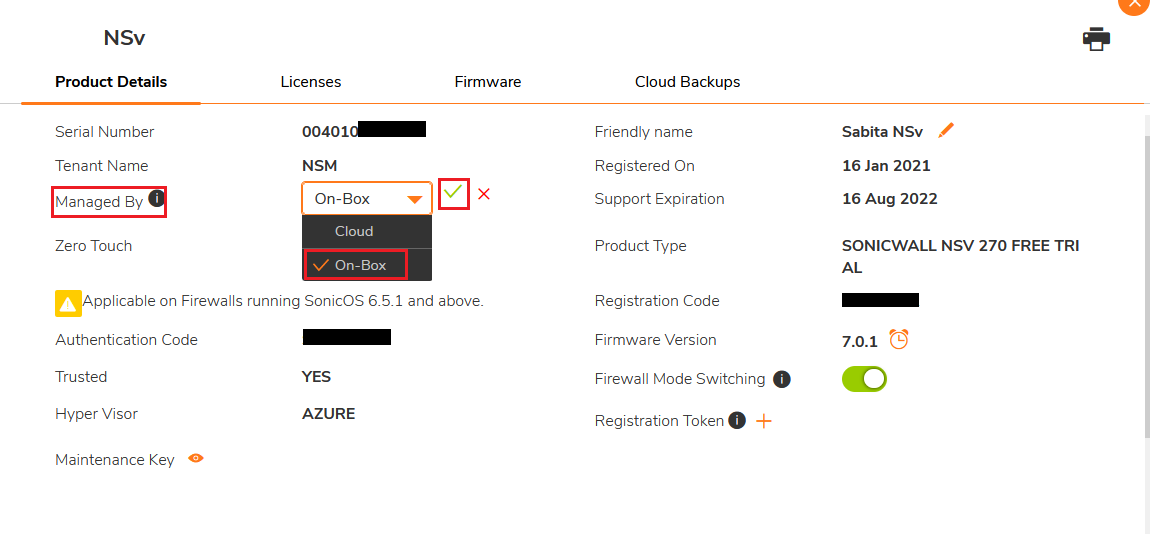
This will bring up the Product Details page:
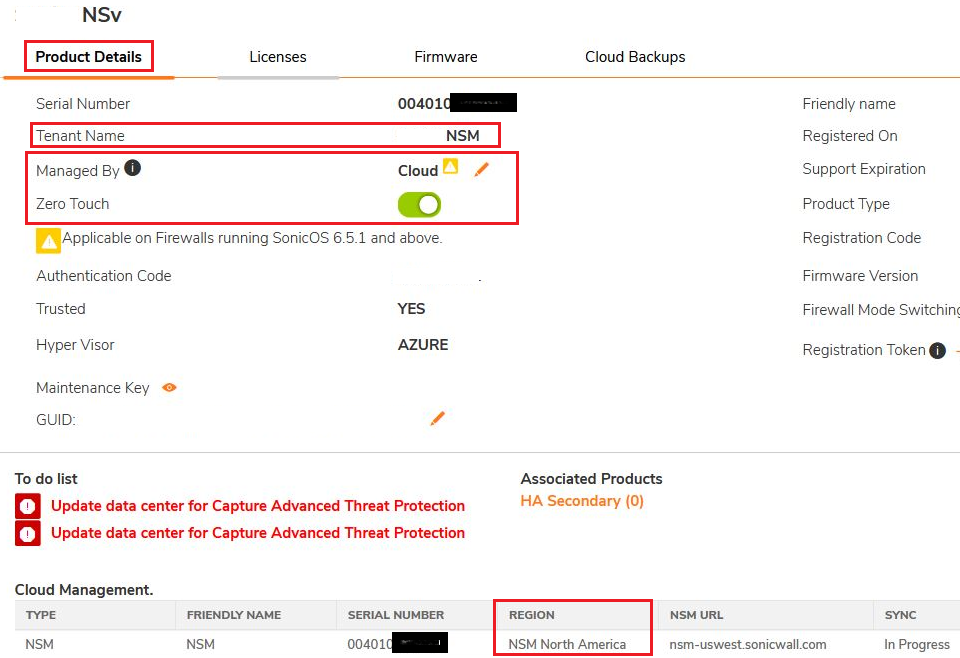
Here "NSM" is the Tenant for Firewall NSv270 under North America Region.
- Disable Zero Touch for the firewall serial:
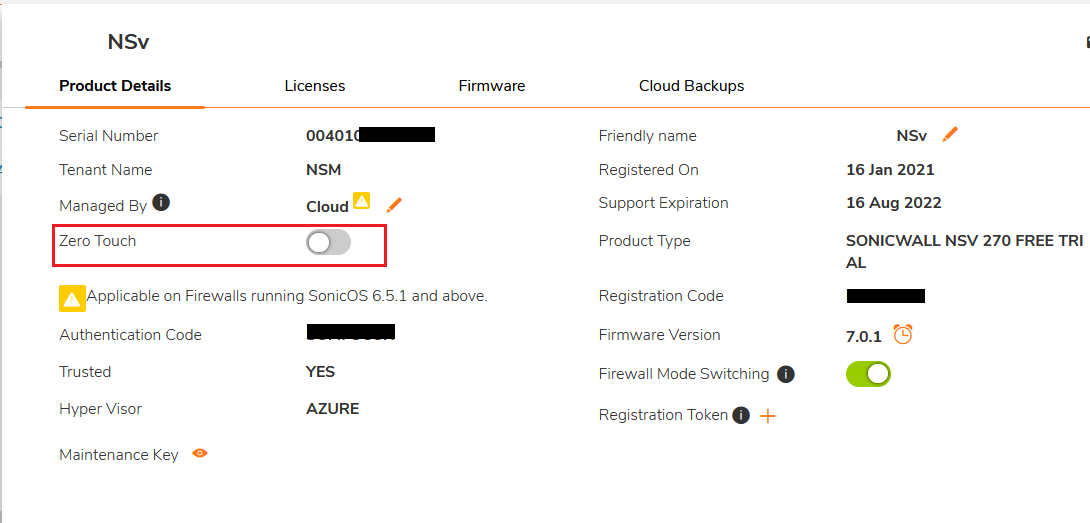
- Set Managed By option to "On-Box":
When set to On-Box, a prompt stating Loss of existing Report data will be shown, click on "Yes" to proceed:
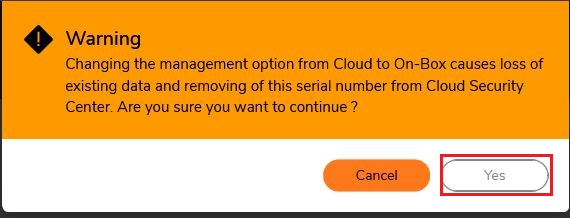
After this step, the firewall will be removed from the NSM Cloud.
3. Move the firewall to New Tenant and bind it with New Colo.
- From the Tenant Products, Select the Firewall -> Transfer Products:
Prompt to choose the New Tenant will appear, Select the New Tenant. In this example, "NSM Frankfurt" is the New Tenant.

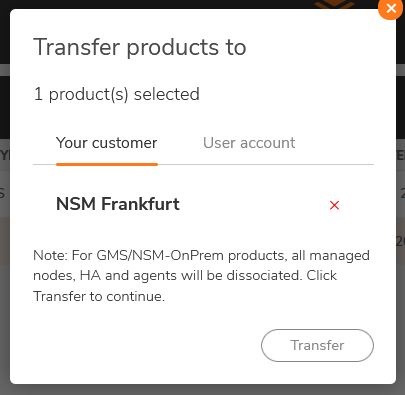
- Again a prompt warning Loss of Existing data will appear, Click on Save:
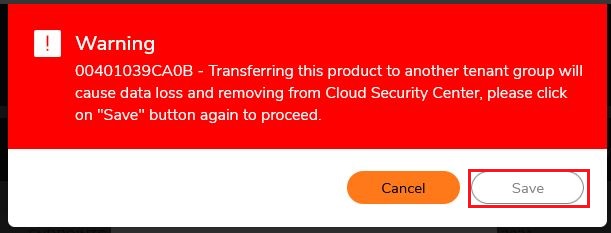
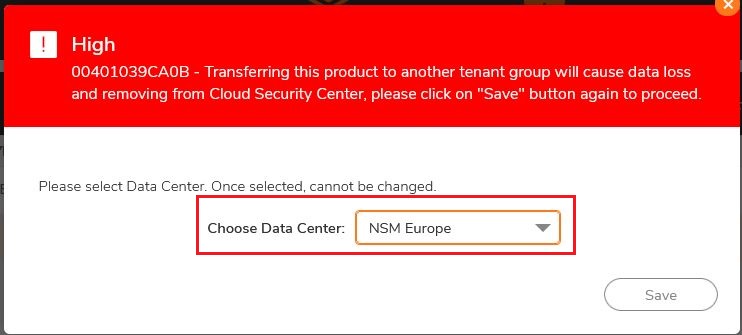
- Another Prompt will appear to choose the NSM Datacenter/Colo for the firewall:
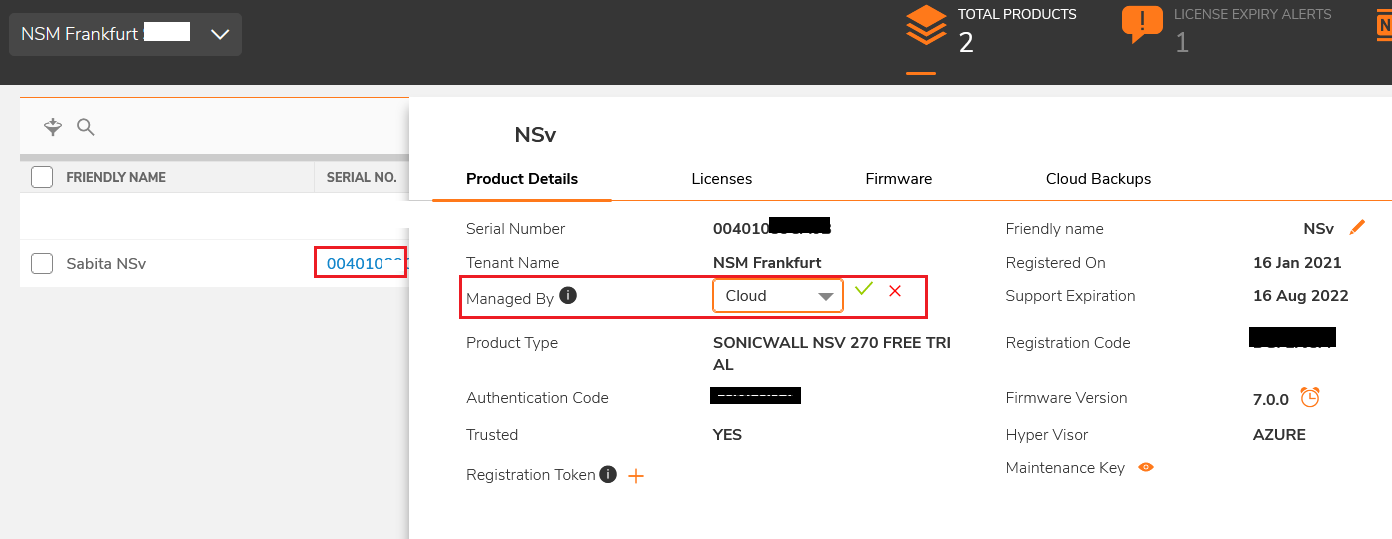
4. Enable Cloud Management and Zero touch for the device to get acquired under New Tenant from Product Details section of the firewall serial:
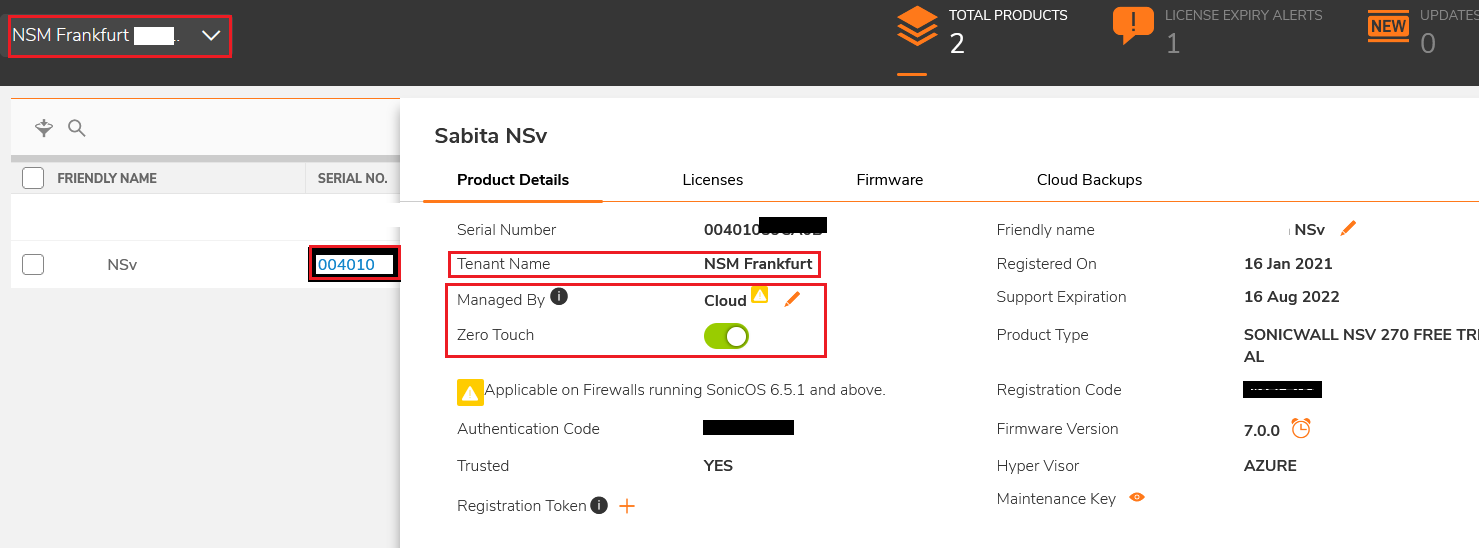
The firewall gets added to the New Tenant under Different Colo, in this example, the new Colo is Europe:

In order to verify, Login to cloud.sonicwall.com, choose the New tenant from the drop down list. It will show the firewall added under New Tenant in NSM.
Related Articles
- Creating a license subscription report in GMS 9.3
- How to create SSLVPN login reports with Syslog GMS/Analytics
- Can I review, accept and deny the GMS changes before pushing to firewalls with workflow license?


 YES
YES NO
NO