-
Products
-
SonicPlatform
SonicPlatform is the cybersecurity platform purpose-built for MSPs, making managing complex security environments among multiple tenants easy and streamlined.
Discover More
-
-
Solutions
-
Federal
Protect Federal Agencies and Networks with scalable, purpose-built cybersecurity solutions
Learn MoreFederalProtect Federal Agencies and Networks with scalable, purpose-built cybersecurity solutions
Learn More - Industries
- Use Cases
-
-
Partners
-
Partner Portal
Access to deal registration, MDF, sales and marketing tools, training and more
Learn MorePartner PortalAccess to deal registration, MDF, sales and marketing tools, training and more
Learn More - SonicWall Partners
- Partner Resources
-
-
Support
-
Support Portal
Find answers to your questions by searching across our knowledge base, community, technical documentation and video tutorials
Learn MoreSupport PortalFind answers to your questions by searching across our knowledge base, community, technical documentation and video tutorials
Learn More - Support
- Resources
- Capture Labs
-
- Company
- Contact Us
How to backup flow data or syslog data in Analytics 2.5


Description
There are scenarios where the disk attached to the Analytics server is full or about to get full, we can use the following steps to detach that disk from analytics server and attach a new disk for reporting.
As and when needed, we can re attach the old disk to check for the old flow data stored on the old disk.
This process is applicable if Analytics is running on ESXi hist or Hyper-V Server.
 CAUTION: We need to remember mounting password in order to mount old disk.
The disk encryption key used here is "test".
Resolution
Steps to De- attach and Re-attach the external disk on an analytics server:
In this example, we have taken a Flow based Analytics server.
1. Login to the ESXi host and choose the analytics server. Click on Edit Settings->Choose the Detach option for the Second disk (Hard Disk 2) here:
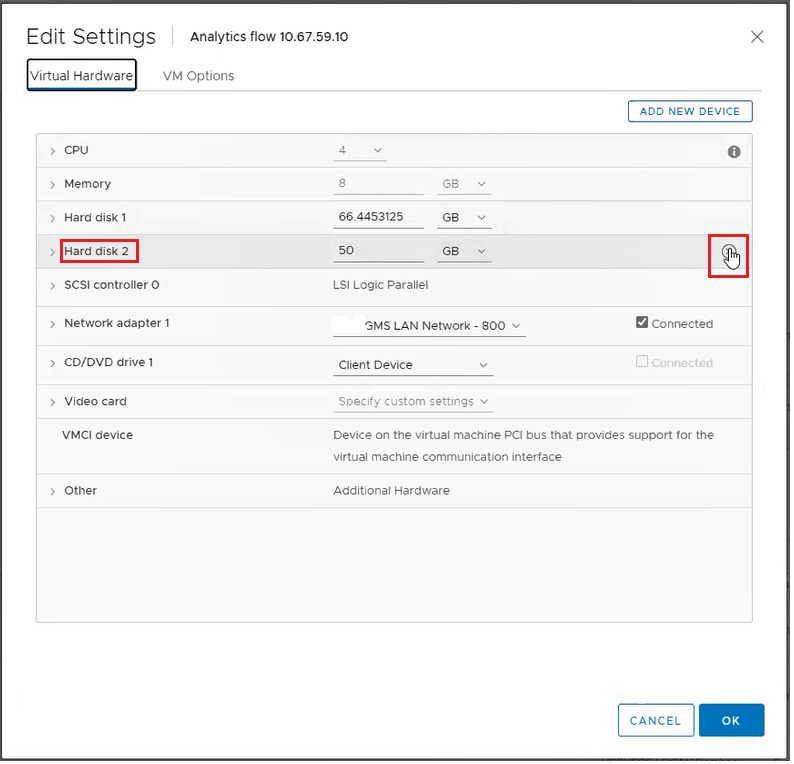
 CAUTION: Do not check the box for "Delete the files from the Datastore". This will delete the disk from the datastore and that cannot be retrieved.
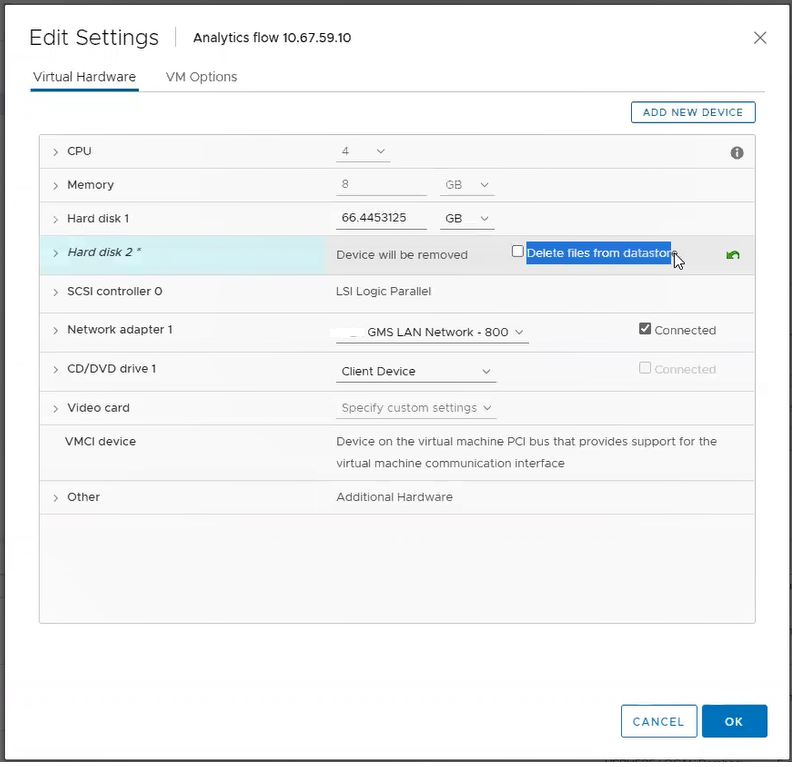
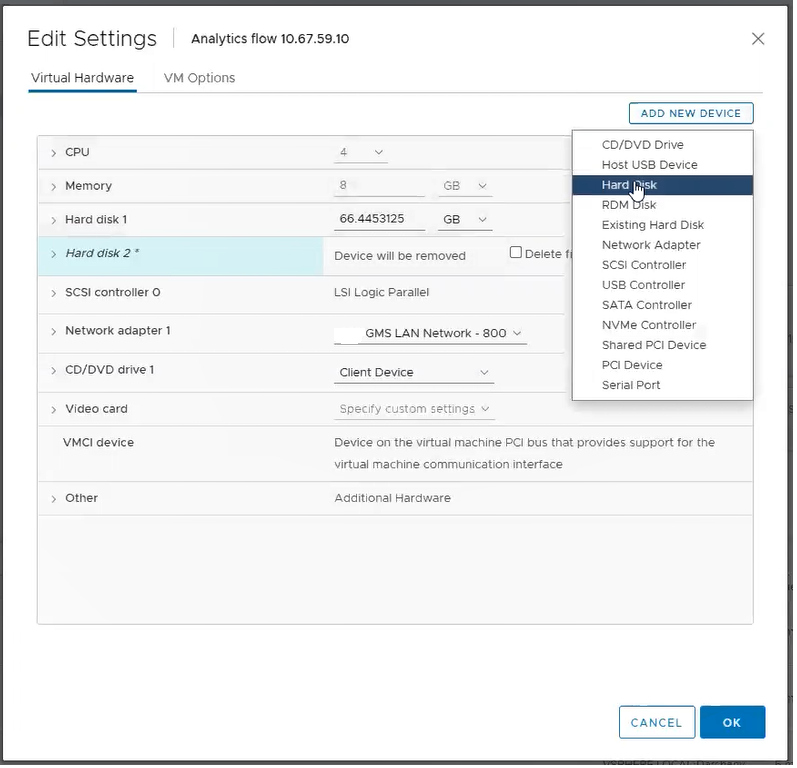
2. Click on "ADD NEW DEVICE" and choose "Hard Disk"
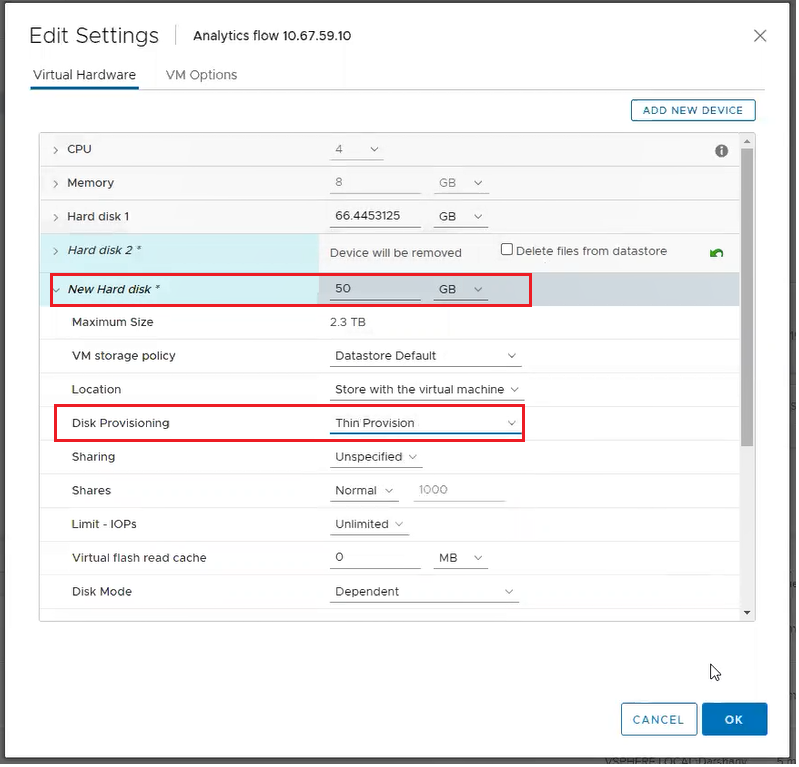
3. Set the Disk size and choose Disk Provisioning as "Thin Provisioning":
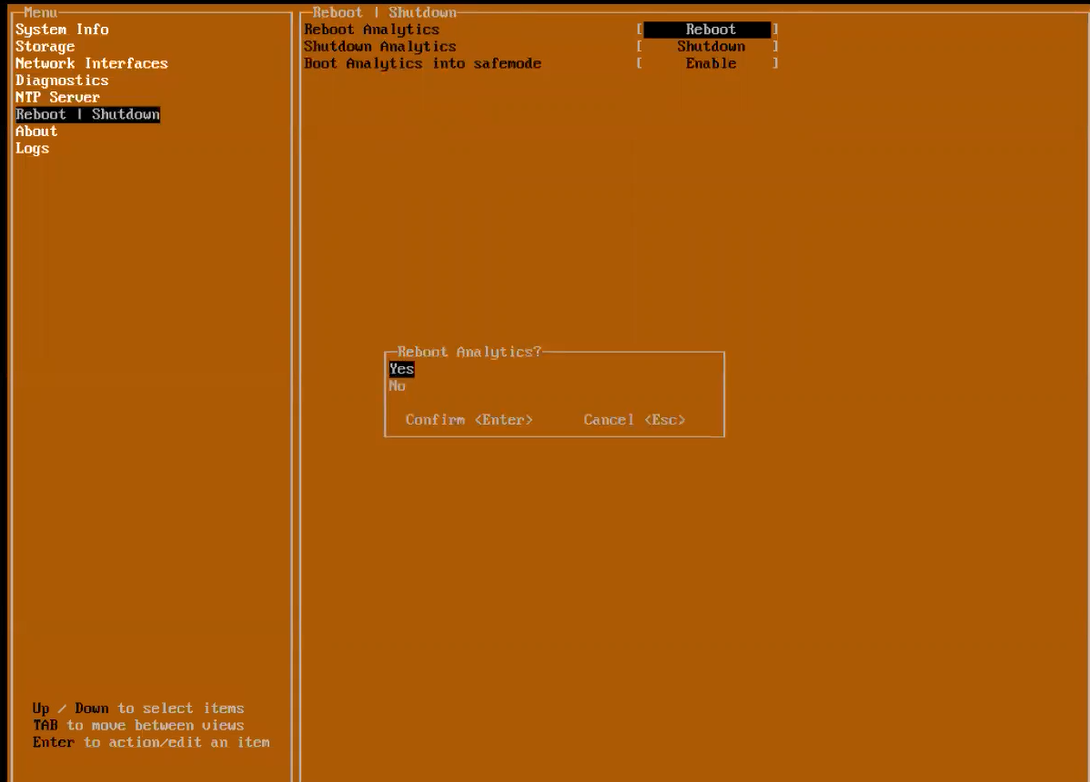
4. Go to the Web console of Analytics server on the ESXi host, Go to Reboot | Shutdown -> Reboot -> Click Yes for Reboot:
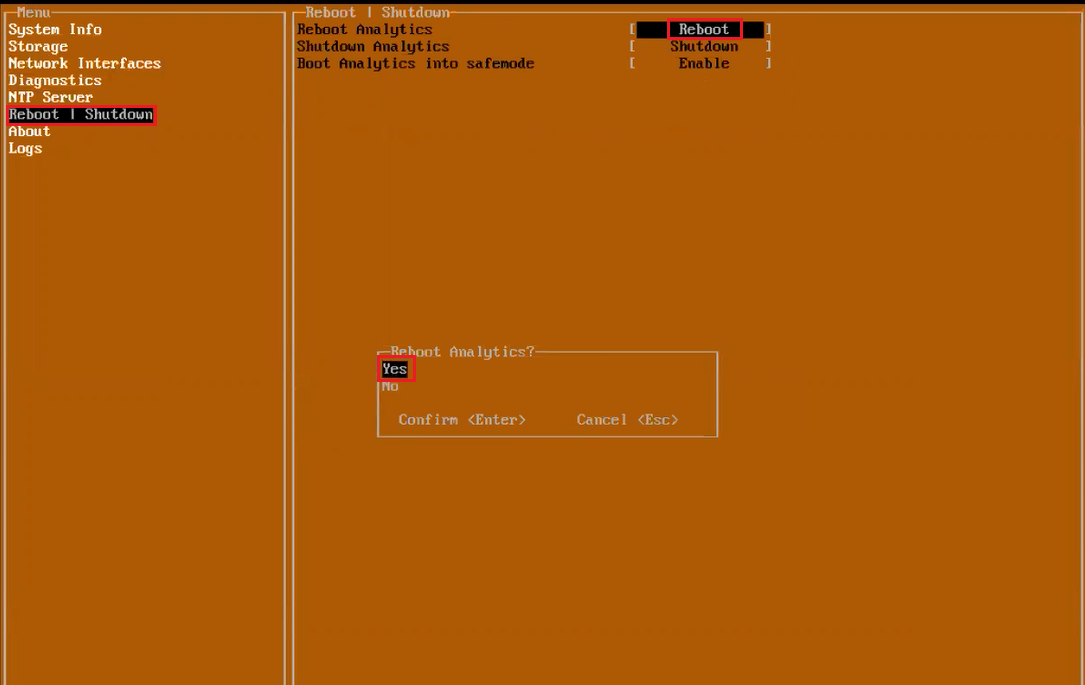
5. Once the Analytics is rebooted, Go to Web Console->Storage->Additional Storage->Add Storage->

6. User will be prompted to encrypt the disk, Select Yes:
We need to provide the encryption key here (This key is needed when we try to re-attach/mount this disk). The key used here is "test":
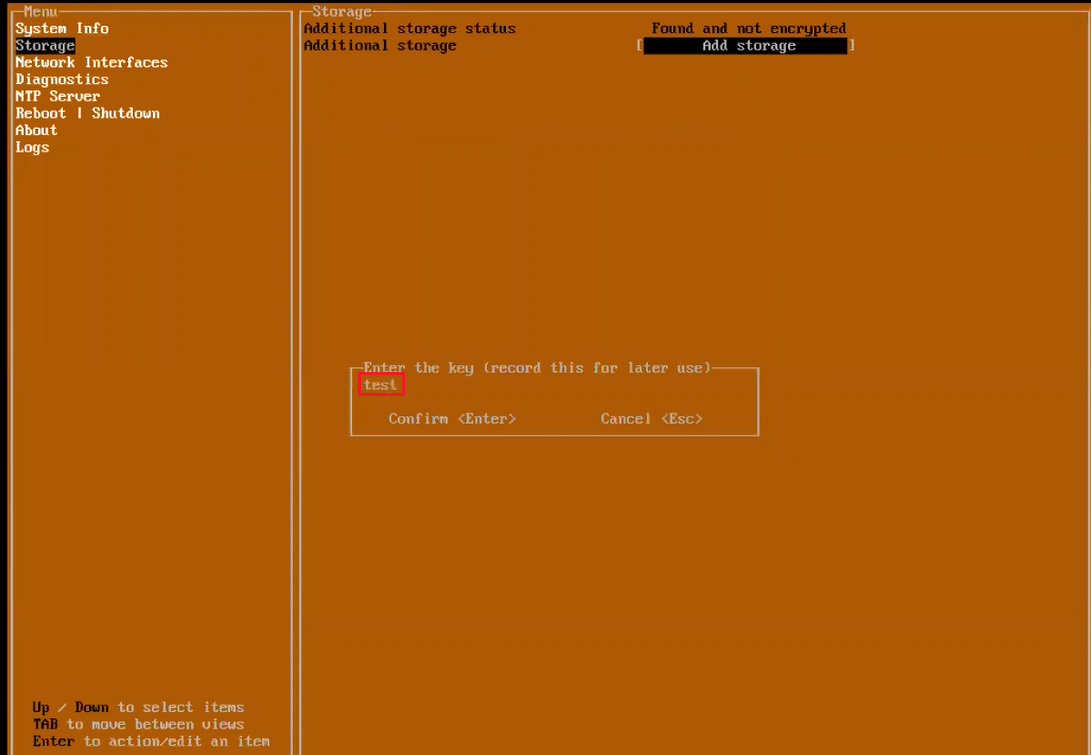
The disk encryption process gets started:
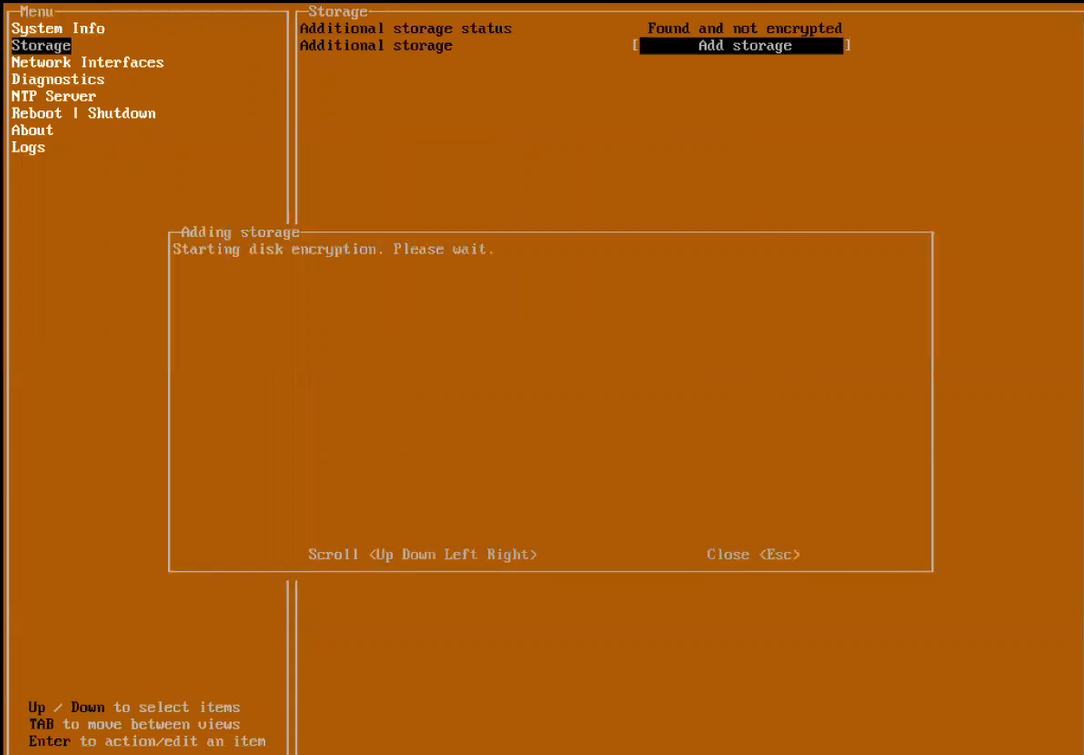
 NOTE: Do not do anything on the web console or analytics server during disk encryption as it can lead up to issues.
7. Once disk encryption gets completed, we get an option to Mount the new disk:

8. When we click on "Mount Storage", we will be prompted to Reboot the system. Proceed with the reboot.
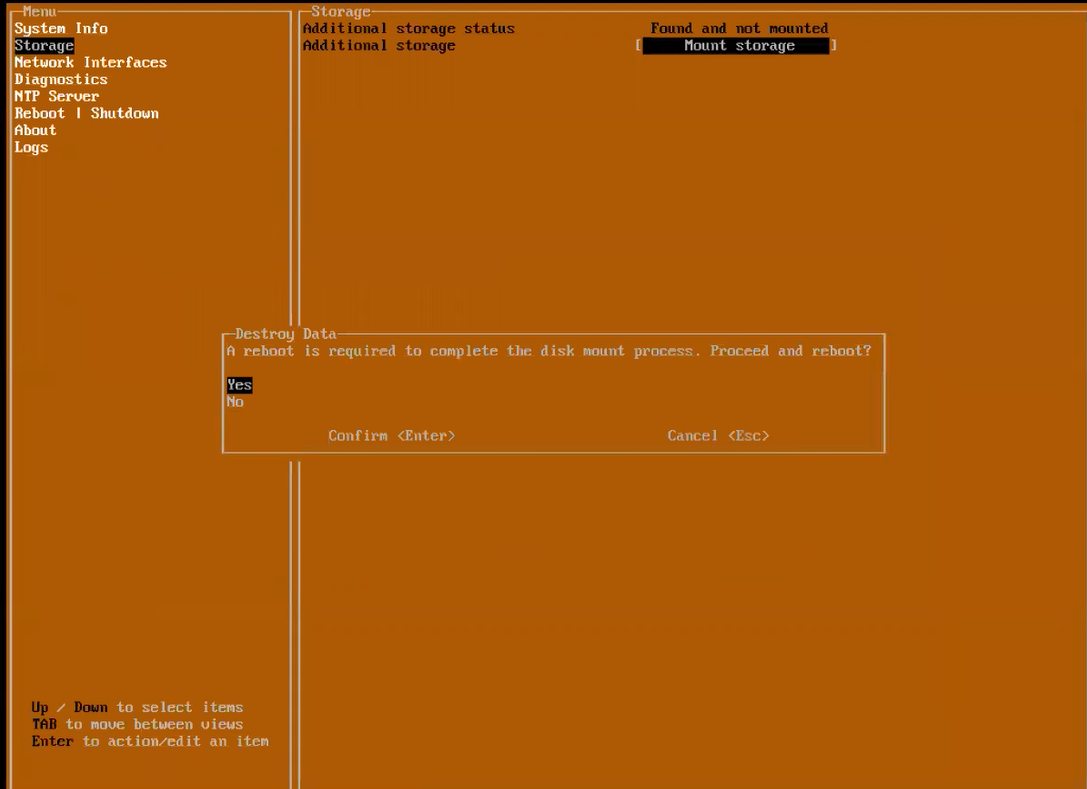
9. For mounting the disk, we will be prompted for disk encryption key. After the key is entered, Disk Mounting process will start:
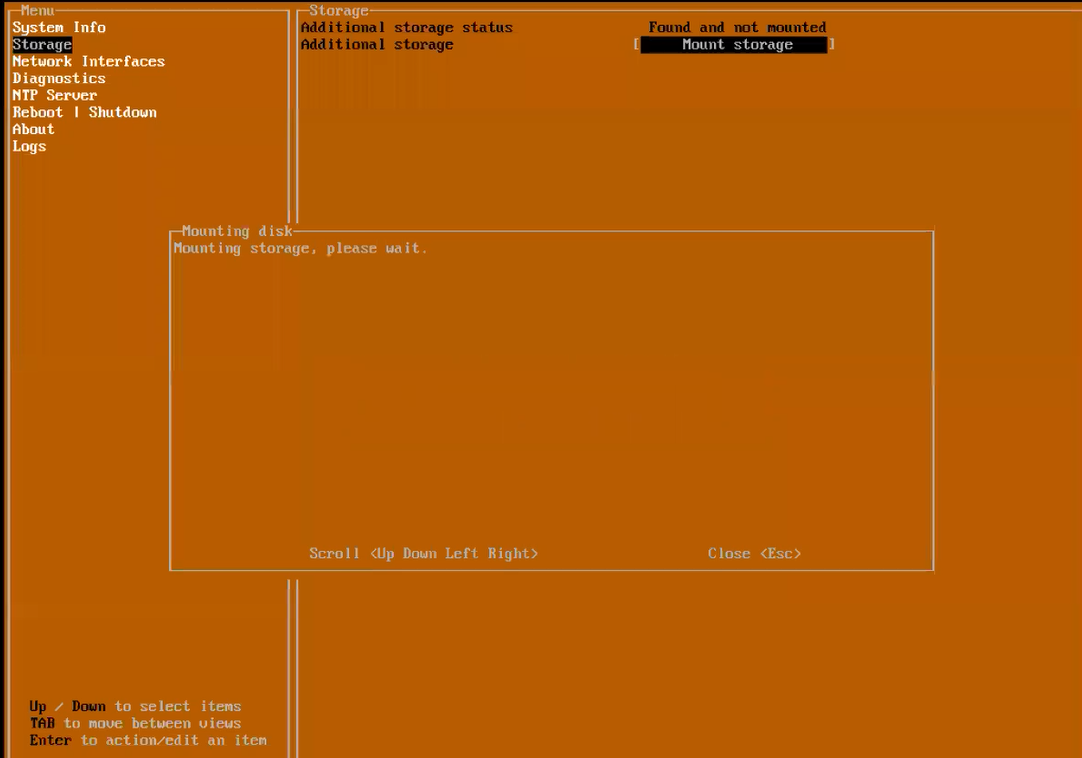
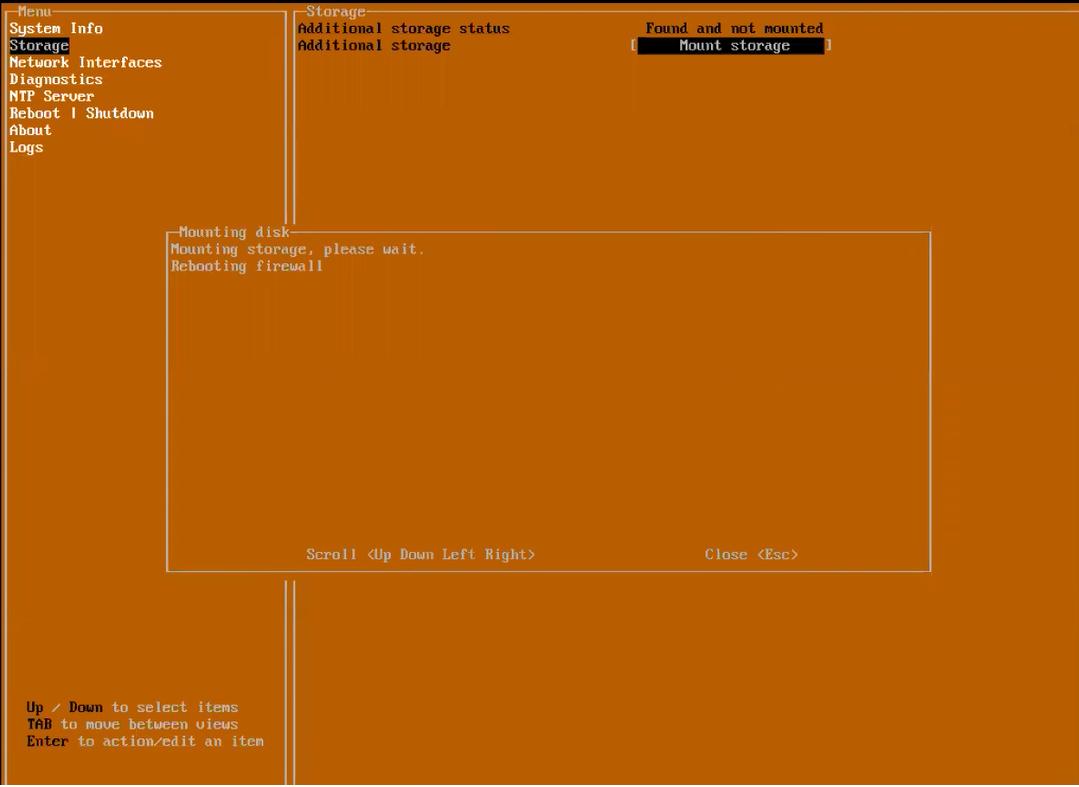
10. Once the Analytics is rebooted, Check the Storage on Web console-> It will shows status as Ready for Additional Storage.
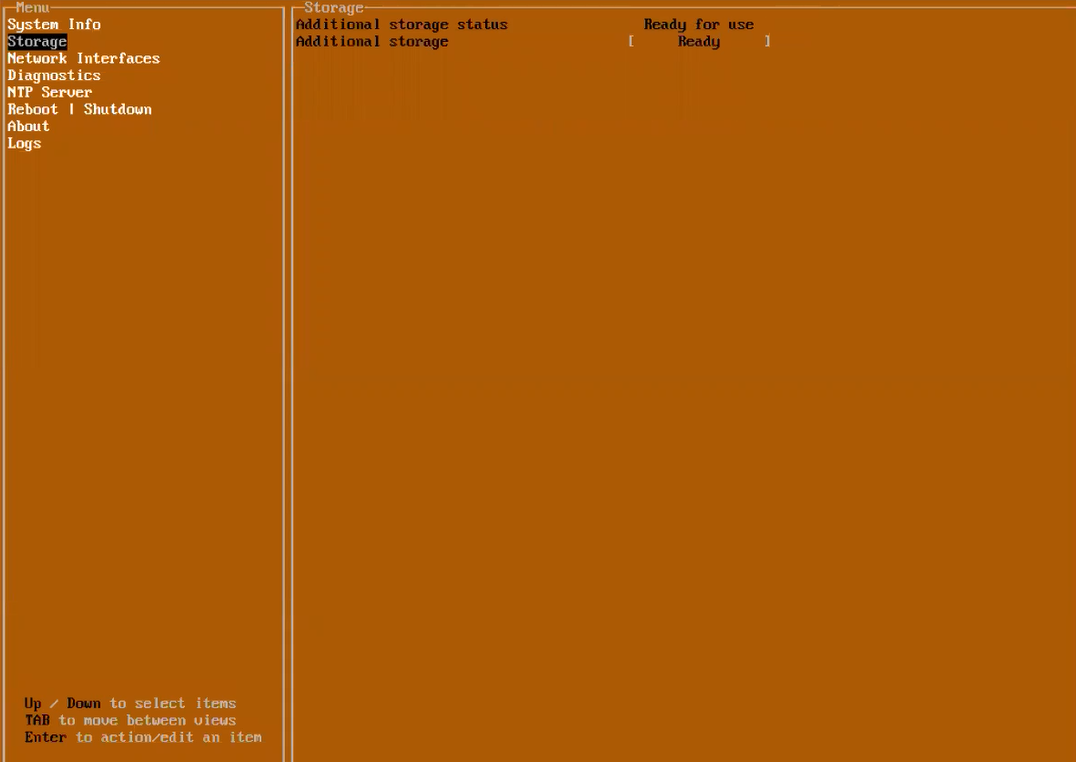
Now the Analytics server is ready to use the newly added disk for storing the flow reports.
Below are the steps to re-mount the old deattached disk to get old report data on the Analytics server:
1. Login to Analytics web interface->Console->Appliance->Deployment->Services->Stop the Flow Summarizer and Flow Agent services.
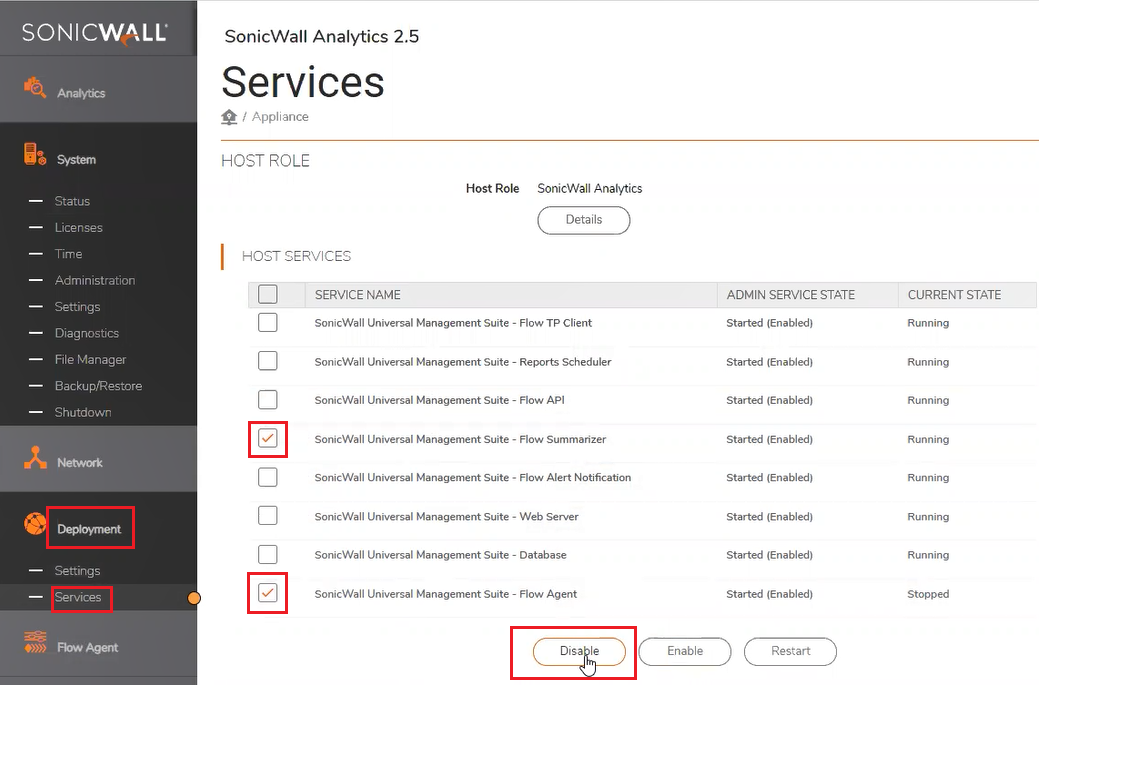
2. Go to ESXi server, Choose your Analytics Server and click on Edit Settings-> Click on Remove Hard Disk 2->
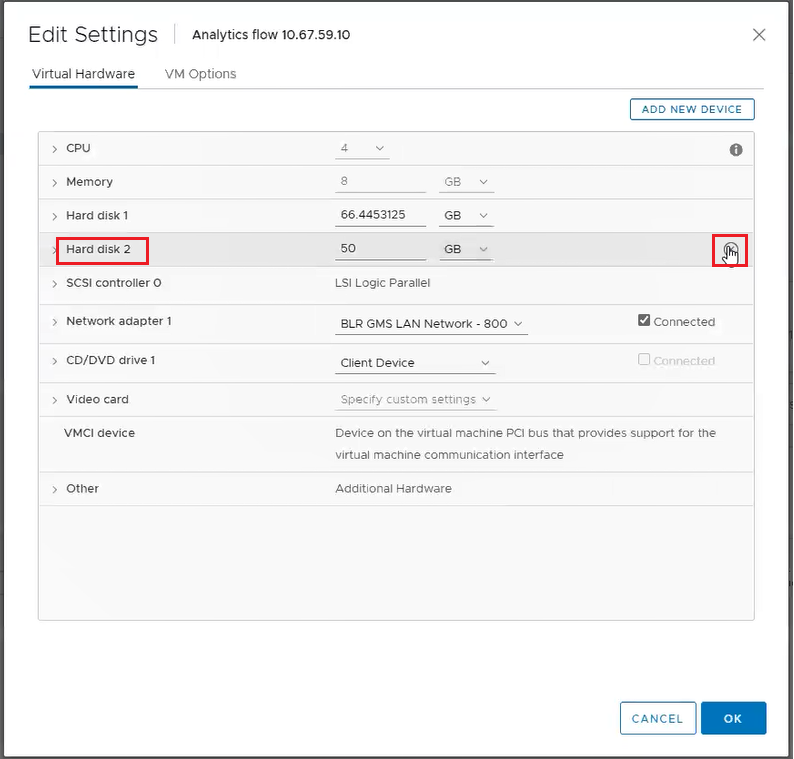
 CAUTION: Do not check the box for "Delete files from Datastore", it will delete the disk.
3. Click on ADD NEW DEVICE and then choose Existing Hard Disk"
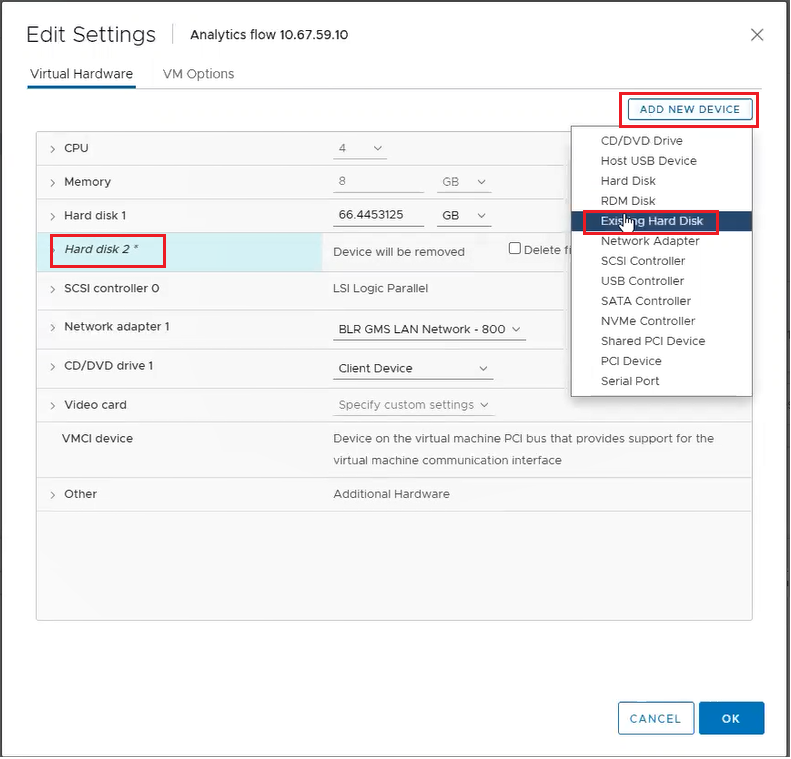
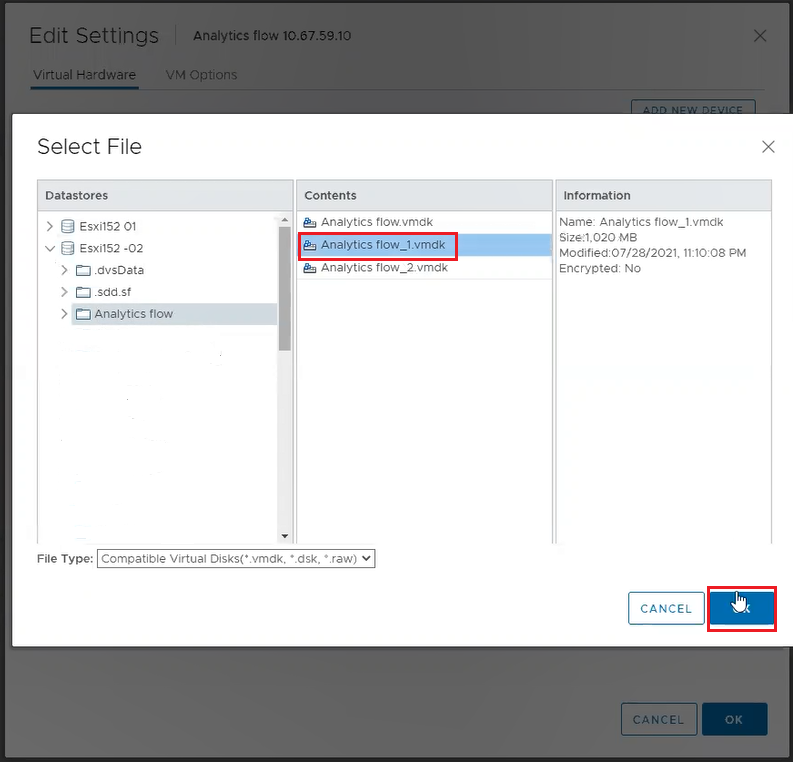
4. Select the old disk which had the old report data stored in it from the list on the ESXi Server:
5. Reboot the Analytics server:
6. After the reboot, go to Storage-> It will show that the attached old disk is detected but we have to mount it. Select Mount Storage, it will prompt for reboot again to mount the storage:
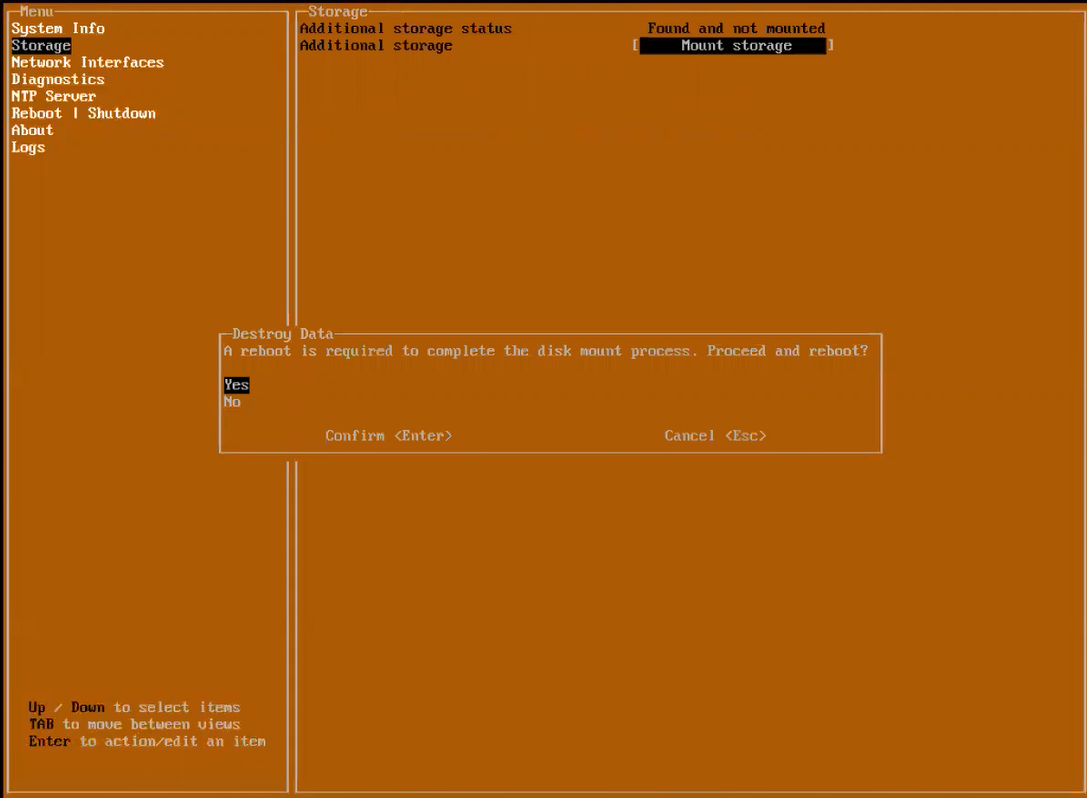
7. While mounting the storage, it will ask to enter the Disk Encryption key which was provided when this old disk was initially added to the server during the initial setup, in this example it is "test":
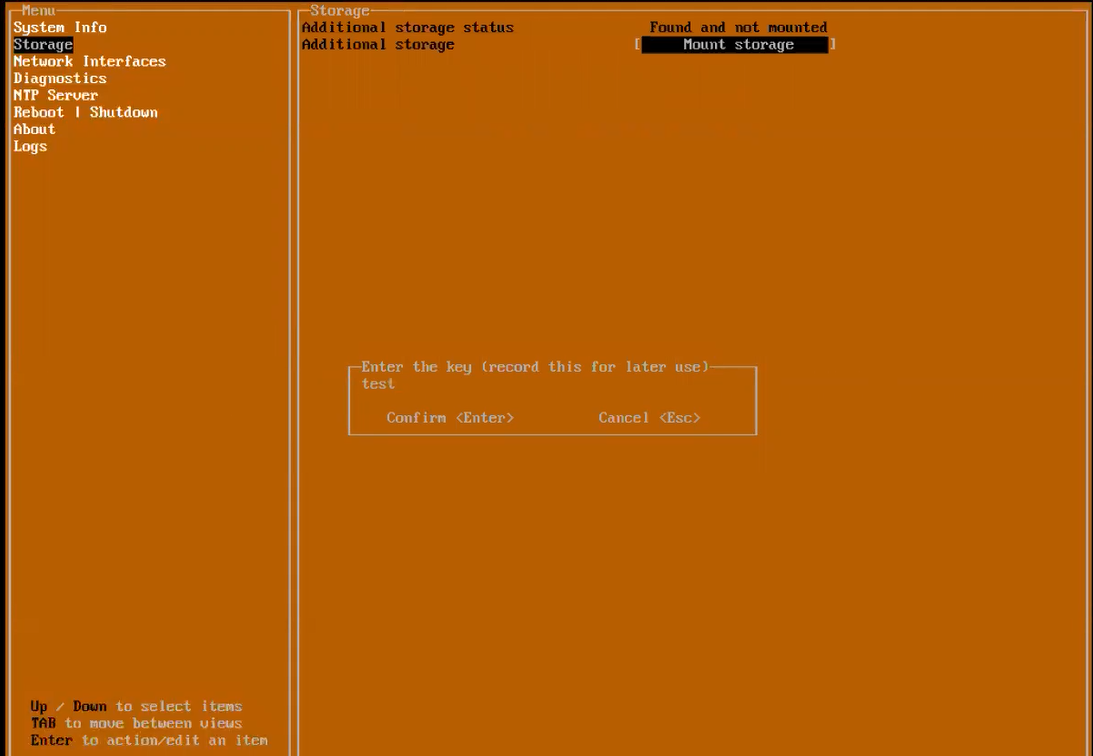
If this key is wrong, the mounting will fail and we won't be able to attach this disk to analytics to view old reports.
8. Once the key is provided, the old disk will be mounted to the analytics server and we can view old reports stored in this disk on the Web interface of analytics server.
Related Articles
- Creating a license subscription report in GMS 9.3
- How to create SSLVPN login reports with Syslog GMS/Analytics
- Can I review, accept and deny the GMS changes before pushing to firewalls with workflow license?


 YES
YES NO
NO