-
Products
-
Gen 7 Firewalls
SonicWall's Gen 7 platform-ready firewalls offer performance with stability and superior threat protection — all at an industry-leading TCO.
Read More
-
-
Solutions
-
Federal
Protect Federal Agencies and Networks with scalable, purpose-built cybersecurity solutions
Learn MoreFederalProtect Federal Agencies and Networks with scalable, purpose-built cybersecurity solutions
Learn More - Industries
- Use Cases
-
-
Partners
-
Partner Portal
Access to deal registration, MDF, sales and marketing tools, training and more
Learn MorePartner PortalAccess to deal registration, MDF, sales and marketing tools, training and more
Learn More - SonicWall Partners
- Partner Resources
-
-
Support
-
Support Portal
Find answers to your questions by searching across our knowledge base, community, technical documentation and video tutorials
Learn MoreSupport PortalFind answers to your questions by searching across our knowledge base, community, technical documentation and video tutorials
Learn More - Support
- Resources
- Capture Labs
-
- Company
- Contact Us
How to activate and configure Anti-Spam feature in SonicWall firewalls


Description
Anti-spam - How to activate and configure the Anti-Spam feature in SonicWall UTM appliances.
Key points for CASS from junkstore perspective:
1. Mail server must reside in the LAN.
2. Java should remain the same version.
3. Although possible, CASS should not be installed on an SBS server.
4. Although possible, CASS should not be installed on an exchange server.
5. SonicWall Directory Services / SSO for access should not be required.
6. Requiring valid certificates on the junkstore is currently not supported.
7. For troubleshooting purposes, CASS should be installed on a server that can be rebooted.
Installation points:
1. Gen6 JunkStore Version 7.6.9 can be installed on Server 2012 and above
2. Gen7 JunkStore version 10.1.X can be installed on Server 2012 and above
3. UAC needs to be disabled. DEP must be set to essential windows programs and services only. Disable all AV and endpoint security (Post installation, if you have AV software, the entire SonicwallES folder must be excluded from any form of virus scanning.) In 2012 and 2016 there is a registry setting that must be changed as well.
Deactivating User Access Control Windows Server 2012
Disable User Access Control with Group Policy Windows Server 2016
Resolution
Resolution for SonicOS 7.X
This release includes significant user interface changes and many new features that are different from the SonicOS 6.5 and earlier firmware. The below resolution is for customers using SonicOS 7.X firmware.
Activating Anti-Spam:
Once you have registered Anti-Spam, activate it to start your firewall-level protection from spam and phishing messages.
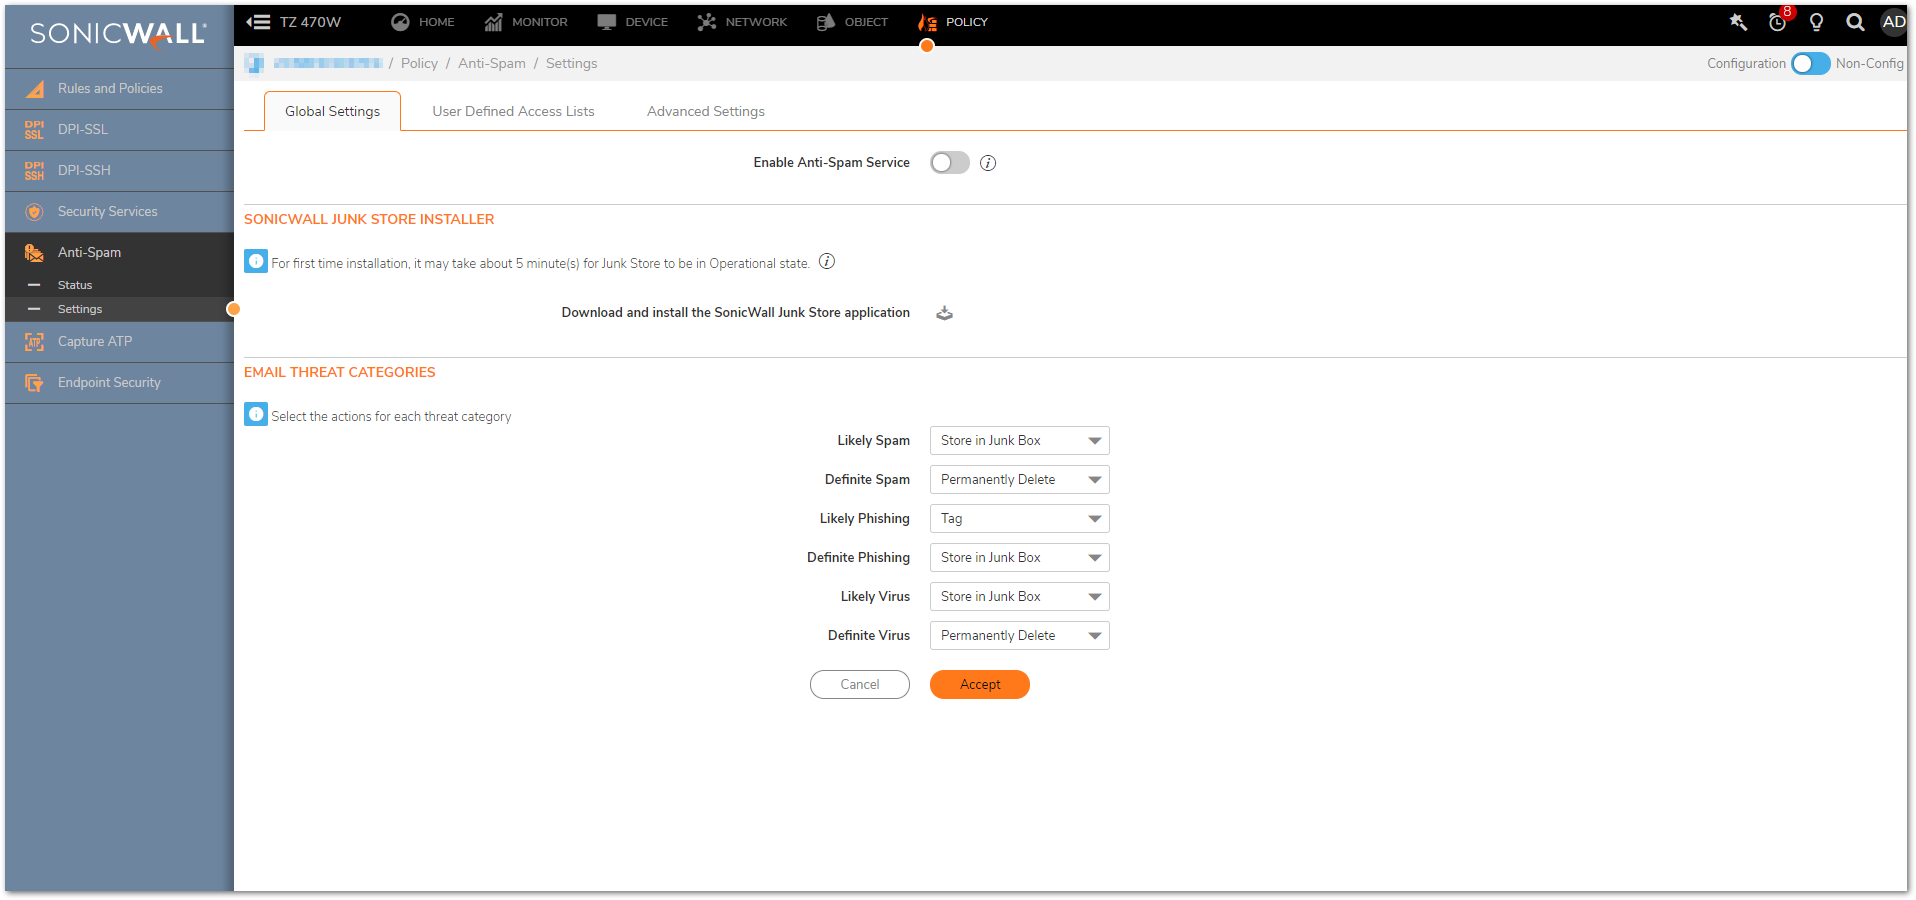
Configuring Anti-Spam:
When Anti-Spam for SonicOS is activated, set your preferences. Once these are configured, your email will be filtered and sorted according to your configuration
Settings:
The Email Threat Category Settings section enables administrator to set default settings for users’ messages. Choose default settings for messages that contain spam, phishing, and virus issues. Use the dropdown options to choose how to to handle messages in each threat category. Your options are:
Filtering off: SonicWall SonicOS does not filter messages for this type of threat. All messages of this type are passed through to the recipient.
Tag With: The email is tagged with a term in the subject line, for example, [JUNK] or [Possible Junk?]. Selecting this option allows the user to have control of the email and can junk it if it is unwanted.
Store in Junk Box (default setting): The email message is stored in the Junk Box. It can be unjunked by users and administrators with appropriate permissions. This option is the recommended setting but junk store must be installed for this to work.
Reject Mail: The message is returned to sender with a message indicating that it was not deliverable.
Permanently Delete: The email message is permanently deleted.
CAUTION: If you select this option, your organization risks losing emails.
Use the Email Domains setting to select the number of domains your organization is using. If you are using more than one domain, choose the Multiple Domains option.
User-defined Access Lists: Designate which clients are allowed to connect to deliver email. You can also set clients to be automatically rejected.
Advanced options allow you to set the following:
Setting Description:
Allow/Reject delivery of unprocessed mails when SonicWall Anti-Spam Service is Unavailable: If the Anti-Spam service is not enabled or unavailable for some other reason, you can choose to let all unprocessed emails go through. Spam messages will be delivered to users, as well as good email. If the setting is reject, no email will be delivered until the Anti-Spam Service is re-enabled.
Tag and Deliver/Reject/Delete emails when SonicWall Junk Store is unavailable: If the SonicWall Junk Store cannot accept spam messages, you can choose to delete them, reject them, or deliver them with cautionary subject lines such as [Phishing] Please renew your account”
Probe Interval: Set the number of minutes between messages to the monitoring service.
Success Count Threshold: Set the number of successes required to report a success to the monitoring service.
Failure Count: Threshold Set the number of failures required to report a failure to the monitoring service.
Server Public IP Address: The IP address of the server that is available for external connections (MX record).
Server Private IP Address: The IP address of the server for internal traffic (Mail server).
Inbound Email Port: The port your UTM has open to receive email from outside sources.
Enable Subsystem Detection: It should be enabled.
Installing the Junk Box on Exchange Server (If you have any other mail server anti-spam junk store won’t work):
Anti-Spam for SonicOS can create a Junk Store on your Microsoft Exchange Server. The Junk Store quarantines messages for end-user analysis and provides statistics. Log in to your Exchange system, then open a browser and log in to the SonicWall Web management interface, and install the Junk Store.
Step 1 Log in to your Exchange system, and on that system, open a web browser and log in to the SonicWall Web Management Interface.
Step 2 On the Anti-Spam | Settings page, click the Junk Store Installer icon to install the Junk Store on your Exchange Server (Don’t navigate to any other page or the download will break).
Figure: Junk Store Installer
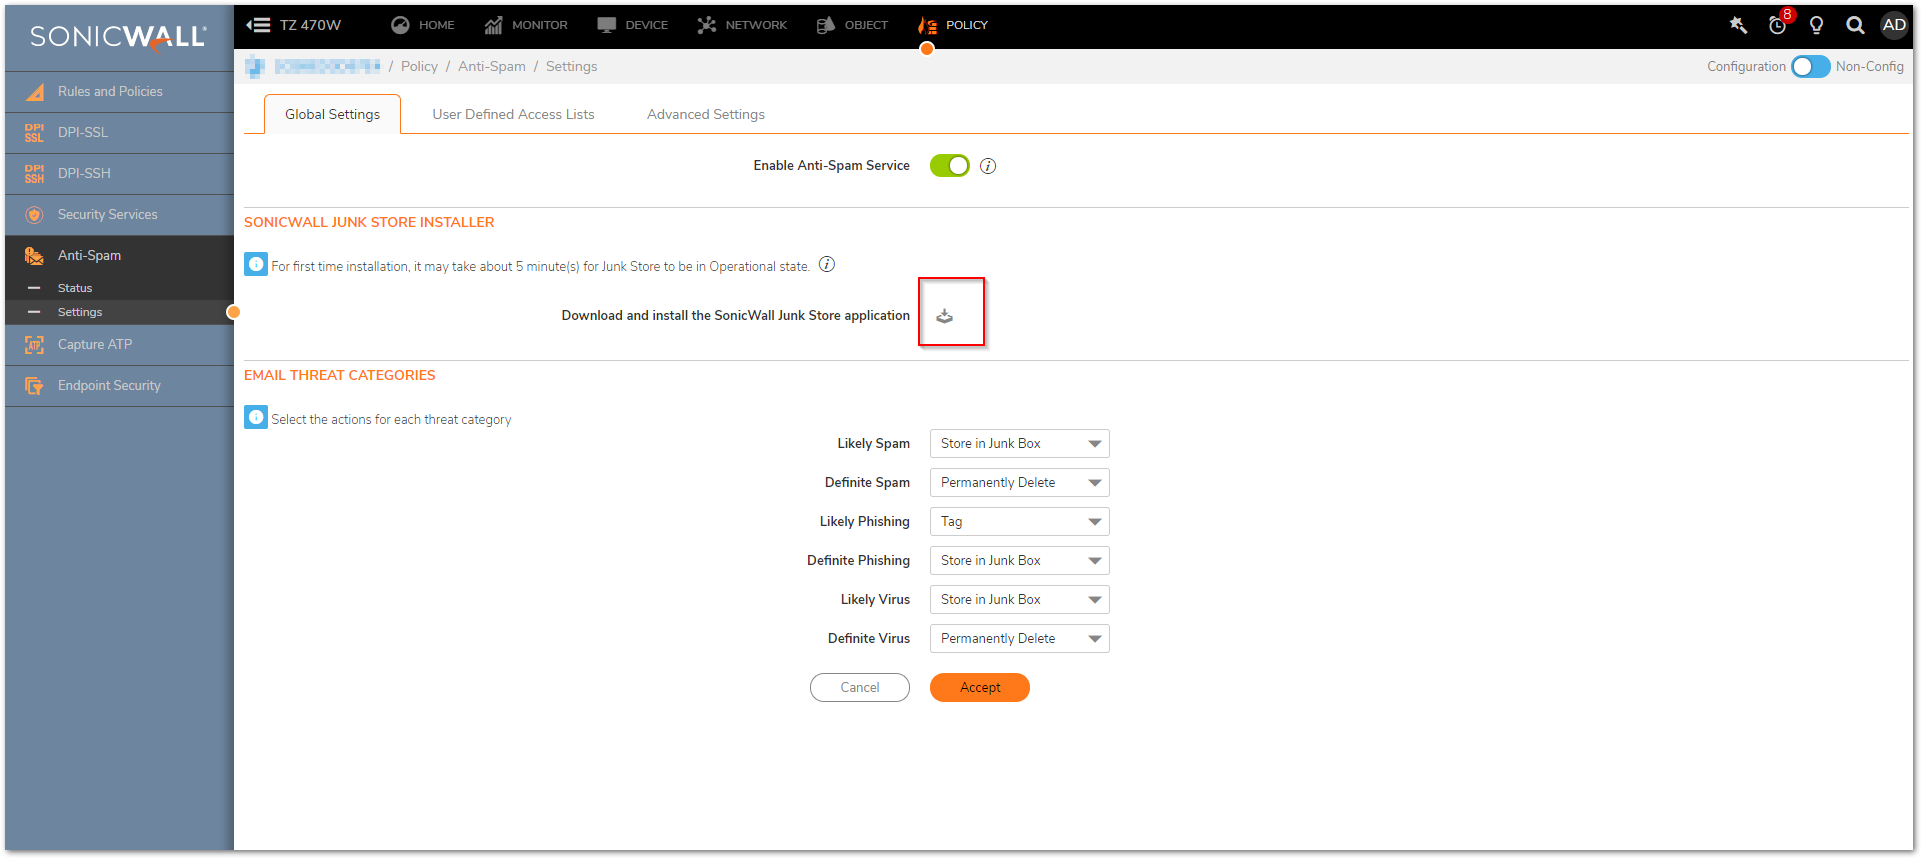
Step 3 Your browser may warn you that the Web site is trying to load the SonicWall Email Security add-on. Click in the Information Bar and select Install ActiveX Control in the Popup menu.
Step 4 On the Security Warning screen, click Install.
Step 5 On the Anti-Spam | Settings page, click the Junk Store Installer icon again. A progress bar is displayed on the page, changing color as it nears completion.
Step 6 The installer launches when it is fully downloaded. Migrating data in the Junk Store may take a long time. Wait for the data migration to complete.
Step 7 Approximately 15 minutes after the Junk Store is installed the SonicWall Anti-Spam Service, SonicWall Junk Store, Destination Mail Server will be Operational on the Anti-Spam | Status page.
 NOTE: If the server has another application using Tomcat (Web server used by Junk Store), then junk store may not run. Please contact support for such issues.
Use this page to view the statistics on how many messages are being blocked by your Anti-Spam for SonicOS feature. The type of message blocked and the number are listed.
Junk Box Summary:
SonicWall SonicOS sends an email message to users listing all the messages that have been placed in their Junk Box. Users can Unjunk items listed in the Junk Box Summary email by clicking links in the email.
To manage the Junk Box summary:
Step 1 Choose Frequency of Summaries from the drop-down box.
Step 2 Choose the dates and times to receive email notification.
Step 3 Choose whether to include in message summary All Junk Messages or Likely Junk Only (hide definite junk).
Step 4 Choose Language of summary emails from the drop-down list.
Step 5 Choose a plain or graphics rich summary.
Step 6 Set Single Click Viewing of messages to Full access.
Step 7 Select to send summary only to users in LDAP. (Won’t work in CASS 1.0)
Step 8 Select Email from which summary will be sent. Message summary can come from the individual user or another email address which you enter here.
Select the name to be displayed in end user’s email client for the summary emails.
Subject: Enter the subject line for the Junk Box Summary email.
URL for User View: This text box is filled in automatically based on your server configuration and is included in the Junk Box Summary email. Clicking on the email link will allow users to Unjunk messages. The URL should be like http://<IP Address of Junk Store or Exchange server>:10080
Step 9 Click the Accept button.
Junk Box View:
This will store all the junked emails. Administrator can Unjunk or delete the emails.
Some important points:
1. Make sure that anti-spam is licensed.
2. Before enabling anti-spam please ensure that none of the service groups are using SMTP as one of the service.
Resolution for SonicOS 6.5
This release includes significant user interface changes and many new features that are different from the SonicOS 6.2 and earlier firmware. The below resolution is for customers using SonicOS 6.5 firmware.
Activating Anti-Spam:
Once you have registered Anti-Spam, activate it to start your firewall-level protection from spam and phishing messages.
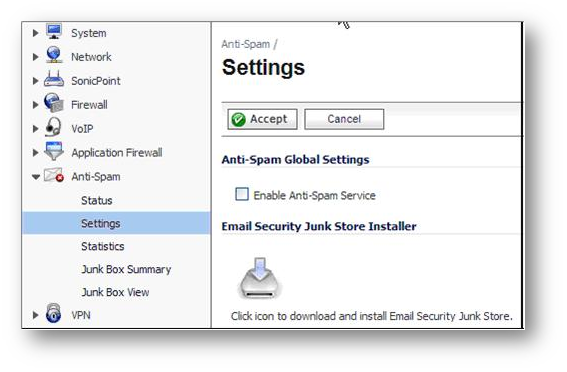
Configuring Anti-Spam:
When Anti-Spam for SonicOS is activated, set your preferences. Once these are configured, your email will be filtered and sorted according to your configuration
Settings:
The Email Threat Category Settings section enables administrator to set default settings for users’ messages. Choose default settings for messages that contain spam, phishing, and virus issues. Use the dropdown options to choose how to to handle messages in each threat category. Your options are:
Filtering off: SonicWall SonicOS does not filter messages for this type of threat. All messages of this type are passed through to the recipient.
Tag With: The email is tagged with a term in the subject line, for example, [JUNK] or [Possible Junk?]. Selecting this option allows the user to have control of the email and can junk it if it is unwanted.
Store in Junk Box (default setting): The email message is stored in the Junk Box. It can be unjunked by users and administrators with appropriate permissions. This option is the recommended setting but junk store must be installed for this to work.
Reject Mail: The message is returned to sender with a message indicating that it was not deliverable.
Permanently Delete: The email message is permanently deleted.
CAUTION: If you select this option, your organization risks losing emails.
Use the Email Domains setting to select the number of domains your organization is using. If you are using more than one domain, choose the Multiple Domains option.
User-defined Access Lists: Designate which clients are allowed to connect to deliver email. You can also set clients to be automatically rejected.
Advanced options allow you to set the following:
Setting Description:
Allow/Reject delivery of unprocessed mails when SonicWall Anti-Spam Service is Unavailable: If the Anti-Spam service is not enabled or unavailable for some other reason, you can choose to let all unprocessed emails go through. Spam messages will be delivered to users, as well as good email. If the setting is reject, no email will be delivered until the Anti-Spam Service is re-enabled.
Tag and Deliver/Reject/Delete emails when SonicWall Junk Store is unavailable: If the SonicWall Junk Store cannot accept spam messages, you can choose to delete them, reject them, or deliver them with cautionary subject lines such as [Phishing] Please renew your account”
Probe Interval: Set the number of minutes between messages to the monitoring service.
Success Count Threshold: Set the number of successes required to report a success to the monitoring service.
Failure Count: Threshold Set the number of failures required to report a failure to the monitoring service.
Server Public IP Address: The IP address of the server that is available for external connections (MX record).
Server Private IP Address: The IP address of the server for internal traffic (Mail server).
Inbound Email Port: The port your UTM has open to receive email from outside sources.
Enable Subsystem Detection: It should be enabled.
Installing the Junk Box on Exchange Server (If you have any other mail server anti-spam junk store won’t work):
Anti-Spam for SonicOS can create a Junk Store on your Microsoft Exchange Server. The Junk Store quarantines messages for end-user analysis and provides statistics. Log in to your Exchange system, then open a browser and log in to the SonicWall Web management interface, and install the Junk Store.
Step 1 Log in to your Exchange system, and on that system, open a web browser and log in to the SonicWall Web Management Interface.
Step 2 On the Anti-Spam > Settings page, click the Junk Store Installer icon to install the Junk Store on your Exchange Server (Don’t navigate to any other page or the download will break).
Figure: Junk Store Installer
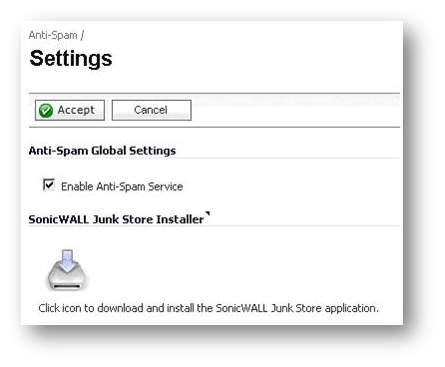
Step 3 Your browser may warn you that the Web site is trying to load the SonicWall Email Security add-on. Click in the Information Bar and select Install ActiveX Control in the Popup menu.
Step 4 On the Security Warning screen, click Install.
Step 5 On the Anti-Spam > Settings page, click the Junk Store Installer icon again. A progress bar is displayed on the page, changing color as it nears completion.
Step 6 The installer launches when it is fully downloaded. Migrating data in the Junk Store may take a long time. Wait for the data migration to complete.
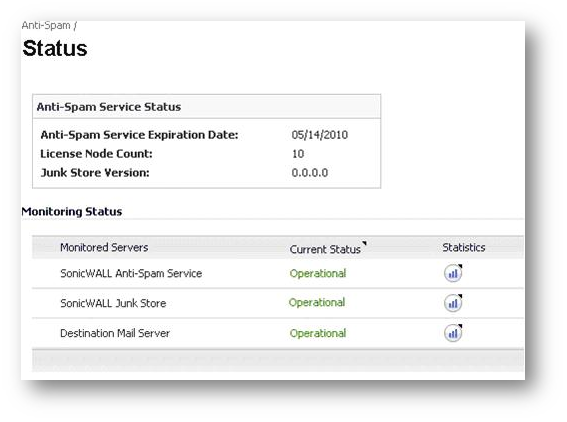
Step 7 Approximately 15 minutes after the Junk Store is installed, the Junk Store status changes to Operational on the Anti-Spam > Status page.
Figure: Checking the Junk Store status
Note: If the server has another application using Tomcat (Web server used by Junk Store), then junk store may not run. Please contact support for such issues.
Statistics:
Use this page to view the statistics on how many messages are being blocked by your Anti-Spam for SonicOS feature. The type of message blocked and the number are listed.
Junk Box Summary:
SonicWall SonicOS sends an email message to users listing all the messages that have been placed in their Junk Box. Users can Unjunk items listed in the Junk Box Summary email by clicking links in the email.
To manage the Junk Box summary:
Step 1 Choose Frequency of Summaries from the drop-down box.
Step 2 Choose the dates and times to receive email notification.
Step 3 Choose whether to include in message summary All Junk Messages or Likely Junk Only (hide definite junk).
Step 4 Choose Language of summary emails from the drop-down list.
Step 5 Choose a plain or graphics rich summary.
Step 6 Set Single Click Viewing of messages to Full access.
Step 7 Select to send summary only to users in LDAP. (Won’t work in CASS 1.0)
Step 8 Select Email from which summary will be sent. Message summary can come from the individual user or another email address which you enter here.
Select the name to be displayed in end user’s email client for the summary emails.
Subject: Enter the subject line for the Junk Box Summary email.
URL for User View: This text box is filled in automatically based on your server configuration and is included in the Junk Box Summary email. Clicking on the email link will allow users to Unjunk messages. The URL should be like http://<IP Address of Junk Store or Exchange server>:10080
Step 9 Click the Apply Changes button.
Junk Box View:
This will store all the junked emails. Administrator can Unjunk or delete the emails.
Some important points:
1. Make sure that anti-spam is licensed.
2. Before enabling anti-spam please ensure that none of the service groups are using SMTP as one of the service.
Related Articles
- How to enable DNS Doctoring?
- Understanding TCP Handshake violation
- How can I Install SonicWall NSv on AWS ?
Categories
- Firewalls > TZ Series
- Firewalls > SonicWall SuperMassive E10000 Series
- Firewalls > SonicWall SuperMassive 9000 Series
- Firewalls > SonicWall NSA Series


 YES
YES NO
NO