-
Products
-
SonicPlatform
SonicPlatform is the cybersecurity platform purpose-built for MSPs, making managing complex security environments among multiple tenants easy and streamlined.
Discover More
-
-
Solutions
-
Federal
Protect Federal Agencies and Networks with scalable, purpose-built cybersecurity solutions
Learn MoreFederalProtect Federal Agencies and Networks with scalable, purpose-built cybersecurity solutions
Learn More - Industries
- Use Cases
-
-
Partners
-
Partner Portal
Access to deal registration, MDF, sales and marketing tools, training and more
Learn MorePartner PortalAccess to deal registration, MDF, sales and marketing tools, training and more
Learn More - SonicWall Partners
- Partner Resources
-
-
Support
-
Support Portal
Find answers to your questions by searching across our knowledge base, community, technical documentation and video tutorials
Learn MoreSupport PortalFind answers to your questions by searching across our knowledge base, community, technical documentation and video tutorials
Learn More - Support
- Resources
- Capture Labs
-
- Company
- Contact Us
How to access the new NSv on VMware ESXi deployment?


Description
This article depicts the steps involved in configuring and accessing the new NSv appliance deployed on the ESXi server. The NSv appliance can be configured for access using two methods as listed below and any one method can be followed.
- Using the ESXi Remote Console
- Using the NSv Management Console
Resolution
Using the ESXi Remote Console:
1. Login to the vSphere or vCenter and select respective NSv instance in the left pane.
2. Do one of the following to open the ESXi Remote Console:
• Click on the Console Image (Black Screen) to access the console in browser window.
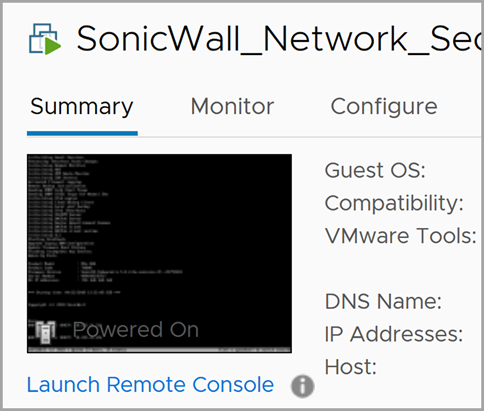
• Click Launch Remote Console.
• Click Actions | Open Remote Console.
3. Click inside the console window and login using the NSv default credentials admin / password.
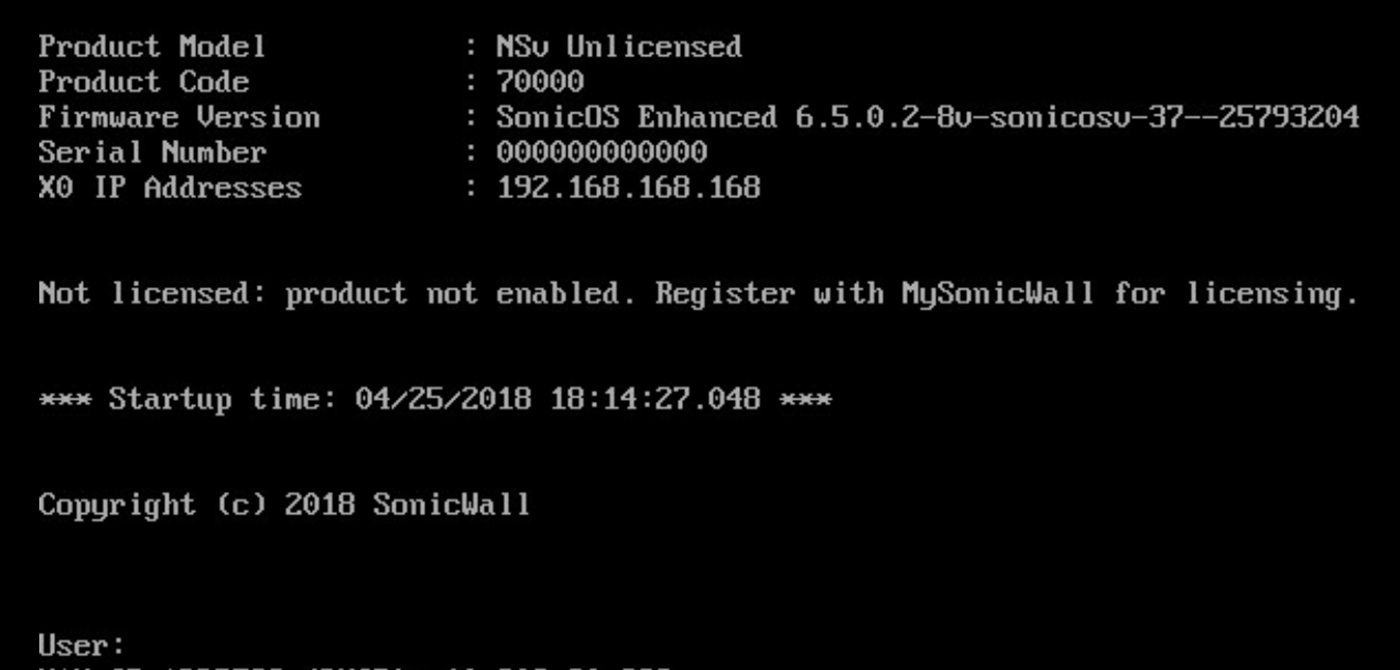
4. For the NSv, the WAN IP address can be configured statically or can be obtained dynamically. The below points represent both static and dynamic IP configuration. Any one of the following can be followed.
• To use a static IP address for the WAN, type the following sequence of commands to enable a static IP and management access on the X1 WAN interface. (The command prompt will change as entered or exit at different command levels. This command sequence shown below uses example IP address settings in the 10.203.26.0 network, which should be replaced with the correct IP settings according to the environment.)
configure t
interface x1
ip-assignment WAN static
ip 10.203.26.228 netmask 255.255.255.0
gateway 10.203.26.1
exit
management https
management ping
management ssh
exit
commit
After entering commit, the console displays Applying changes and other status information, then displays the config prompt. Type exit to return to the admin command level prompt.
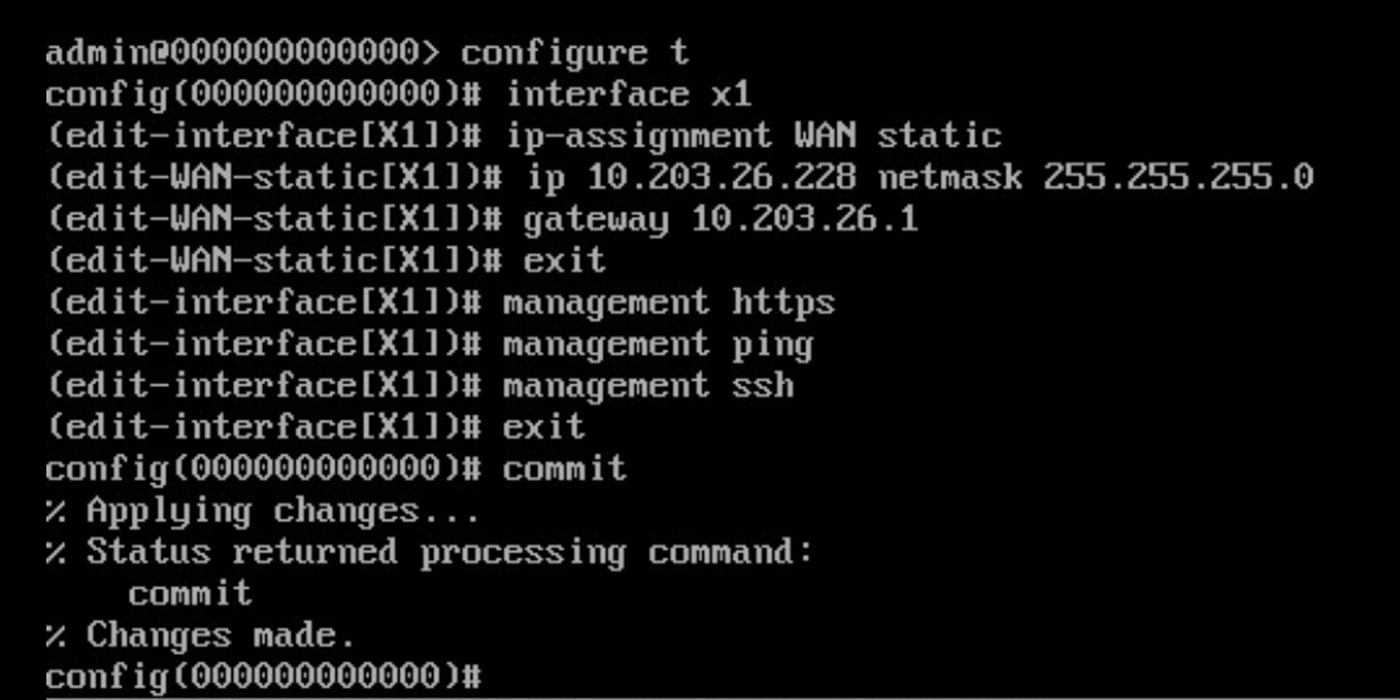
• To use DHCP for the WAN address, type the following sequence of commands to enable DHCP and management access on the X1 WAN interface.
configure t
interface x1
ip-assignment WAN dhcp
exit
management https
management ping
management ssh
exit
commit
After entering commit, the console displays Applying changes and other status information, then displays the config prompt. After a few seconds, the assigned DHCP address is displayed. You can access the SonicOS web management interface at that address.
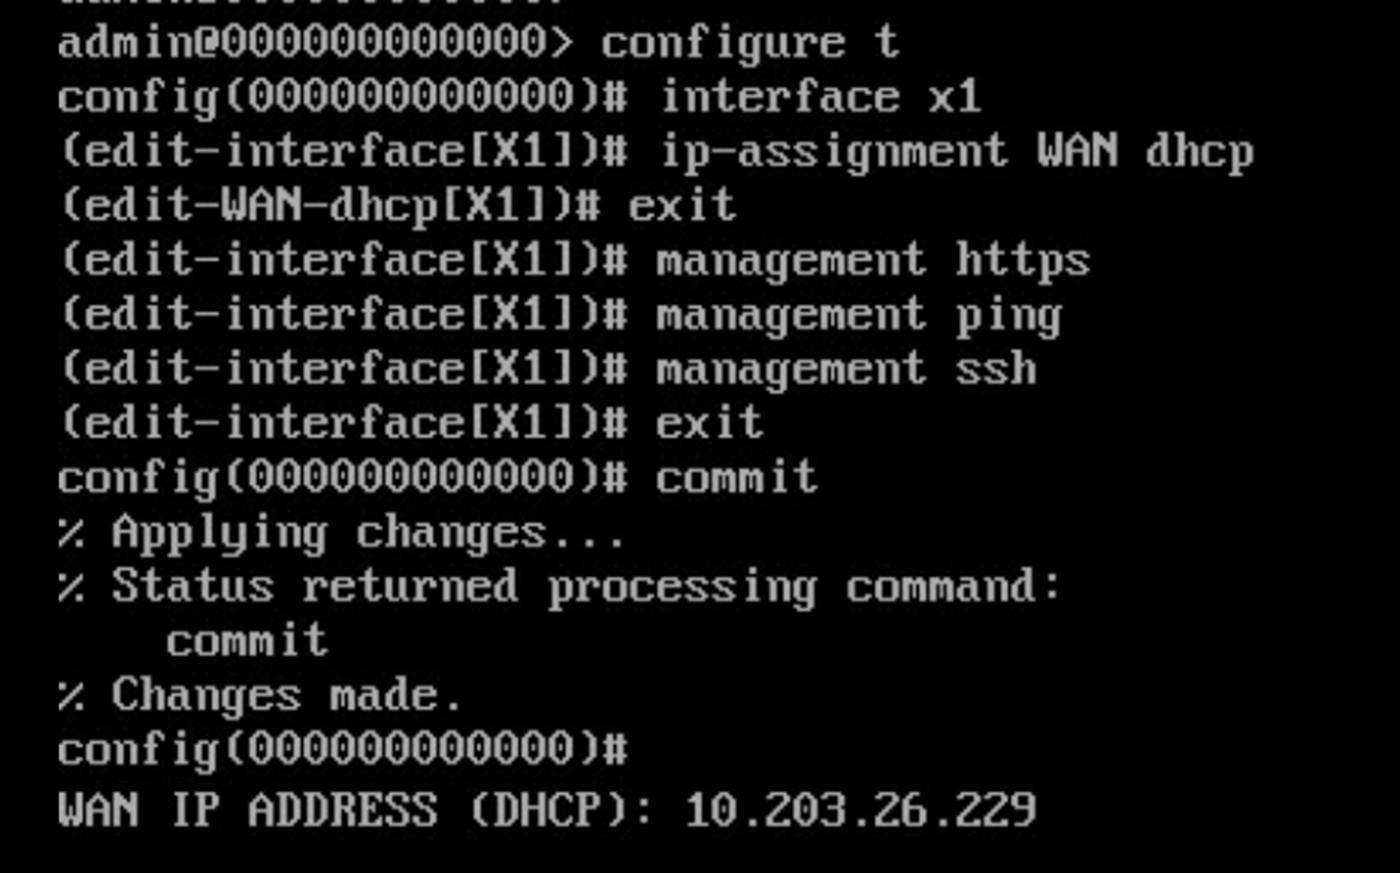
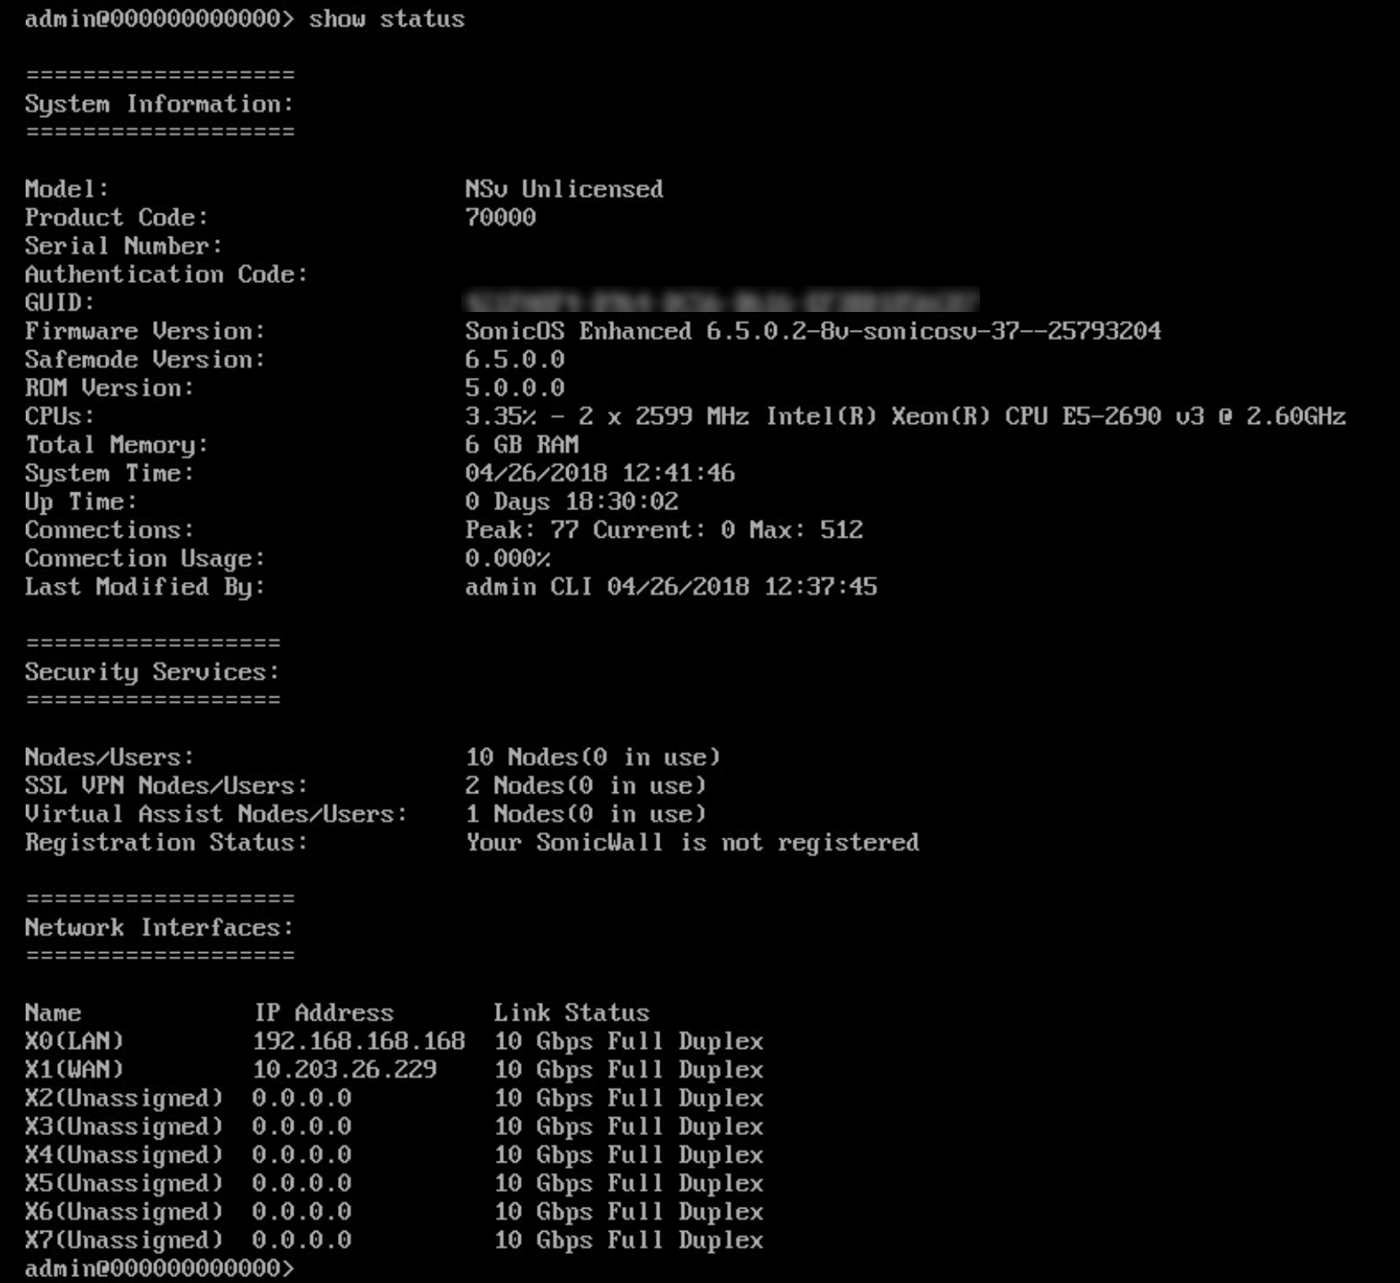
5. Use the show status command at the admin prompt to view the assigned IP address for the X1 (WAN) interface and other information.
Using the NSv Management Console:
1. Login to the vSphere or vCenter and select respective NSv instance in the left pane.
2. Do one of the following to open the ESXi Remote Console:
• Click on the Console Image (Black Screen) to access the console in browser window.

• Click Launch Remote Console.
• Click Actions | Open Remote Console.
3. Click inside the console window and login using the NSv default credentials admin / password.

4. Press Ctrl+s and then press the spacebar to toggle between the ESXi remote console and the NSv management console. (i.e., press the Ctrl key and ‘s’ key together, then release and press the spacebar.)
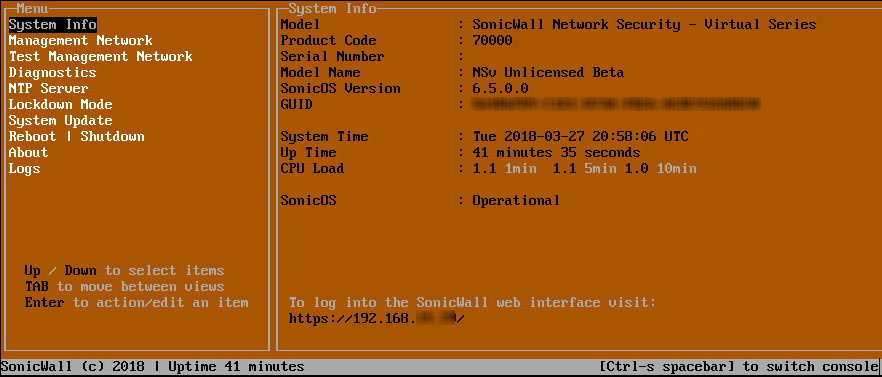
5. The main menu is displayed in the side menu (left pane). Use the up/down arrow keys to move the focus between menu items. As the focus shifts, the right pane displays the options and information for that menu item. The currently selected item is highlighted in black. Press the Tab key to move the focus from side menu to the main view (right pane), or vice versa.
6. In the Management Network screen, the network settings displayed in the white text are read-only except when the management console is in SafeMode. In SafeMode, you can configure these settings Management Interface, IPv4 Address, Netmask, Mac Address, IPv6 address, Gateway and DNS.
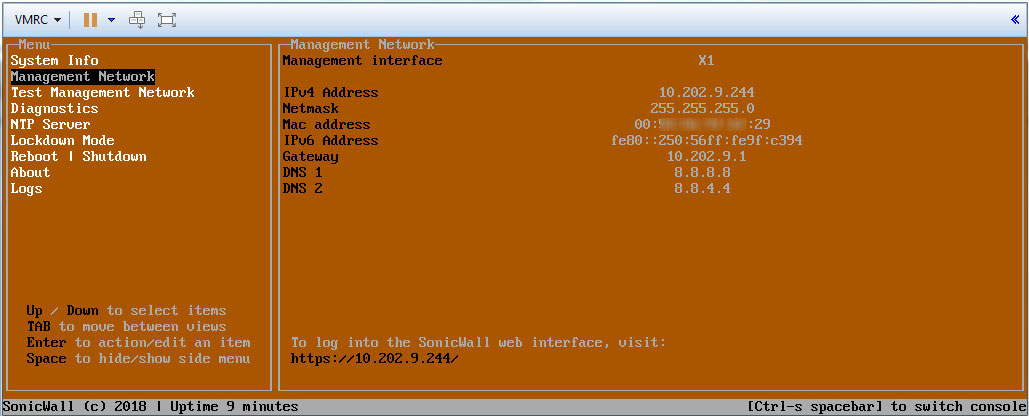
• After configuring an IP address and enabling management on the WAN (X1) interface, login to the NSv instance from a browser or ping the virtual appliance from a command prompt window or other applications are allowed.
Related Articles
- Error:"Invalid API Argument" when modifying the access rules
- Cysurance Partner FAQ
- Configure probe monitoring for WAN Failover and Loadbalancing - SonicWall UTM


 YES
YES NO
NO