-
Products
-
SonicPlatform
SonicPlatform is the cybersecurity platform purpose-built for MSPs, making managing complex security environments among multiple tenants easy and streamlined.
Discover More
-
-
Solutions
-
Federal
Protect Federal Agencies and Networks with scalable, purpose-built cybersecurity solutions
Learn MoreFederalProtect Federal Agencies and Networks with scalable, purpose-built cybersecurity solutions
Learn More - Industries
- Use Cases
-
-
Partners
-
Partner Portal
Access to deal registration, MDF, sales and marketing tools, training and more
Learn MorePartner PortalAccess to deal registration, MDF, sales and marketing tools, training and more
Learn More - SonicWall Partners
- Partner Resources
-
-
Support
-
Support Portal
Find answers to your questions by searching across our knowledge base, community, technical documentation and video tutorials
Learn MoreSupport PortalFind answers to your questions by searching across our knowledge base, community, technical documentation and video tutorials
Learn More - Support
- Resources
- Capture Labs
-
- Company
- Contact Us
How do I configure CAS - SaaS security group filter?


Description
The group filter is designed for admin to select which user’s mailbox are getting scanned. There are two types of groups supported, user group and distribution list. Each mailbox (user) will need to have a valid license assigned by the system automatically and alphabetically. When using CAS – SaaS Security (not using group filter feature) if the number of users defined by the group exceeds the number of licensed users, system decides to choose the users for the unassigned licenses and apply for the next available user in alphabetical order.
 EXAMPLE: If there are 50 user licenses among which you have used 25 licenses, rest of the 25 licenses are getting applied automatically by the system from alphabetical order. If any of those licenses are unchecked, then the system will apply to the next available user in alphabetical order. The suggested solution is to use Group Filter to avoid licenses are getting applied automatically by the system from alphabetical order.
 NOTE: It’s an expected behavior if you are not using “Group Filter” feature on CAS – SaaS Security.
Resolution
Group filter can be configured either during onboarding process or editing the policy rules under policy tab.
- During SaaS Application Onboarding
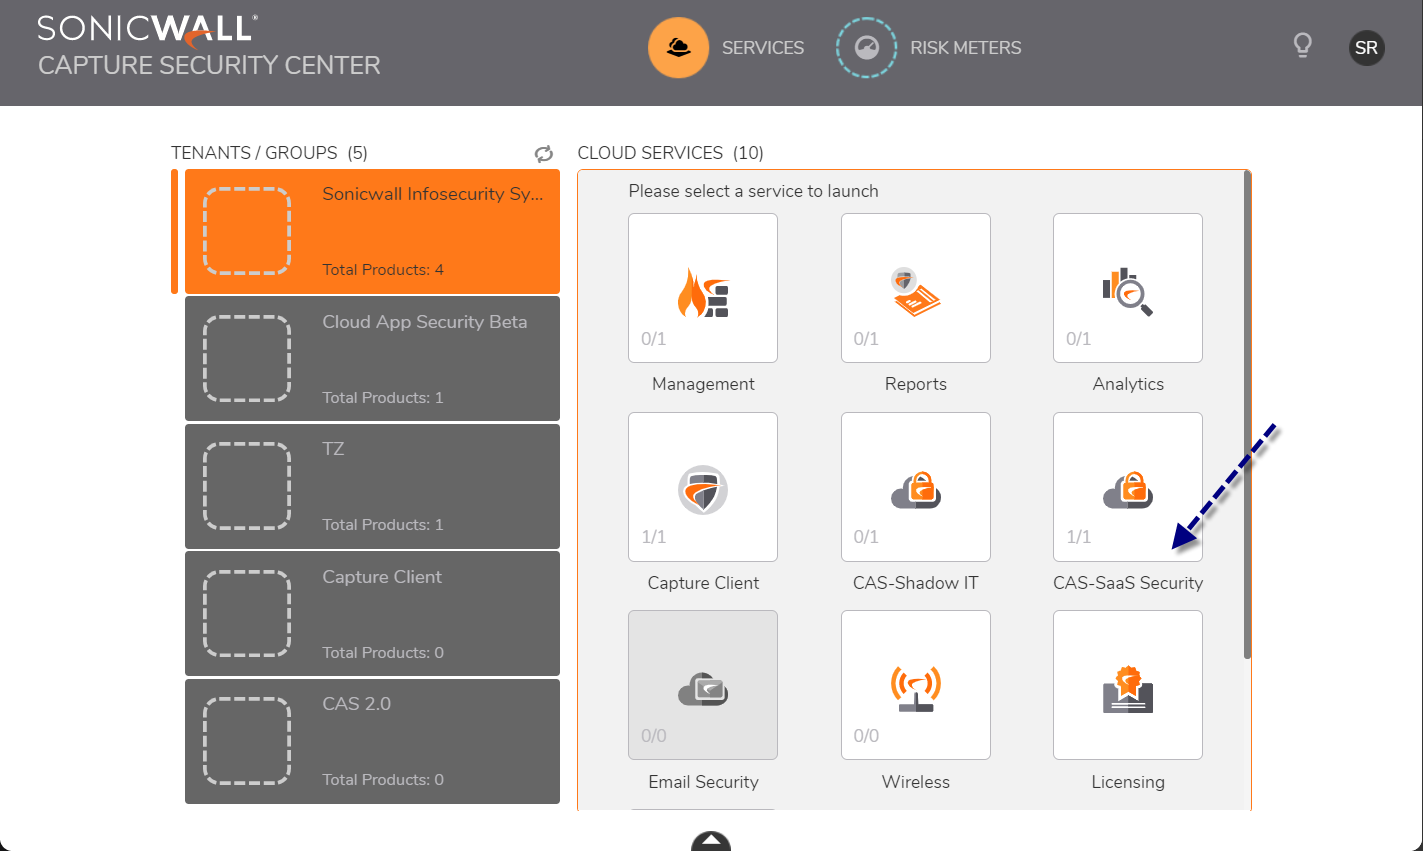
- Once you have activated CAS -SaaS Security on your MySonicwall account, please type in https://cloud.sonicwall.com on your browser and login with your MySonicWall credentials and click CAS – SaaS Security tile and you will be redirected to your CAS tenant, ex: https://abcxyz.sonicwallcloudsec.com.
- Click Let’s get Started and you will be redirected to SaaS Selection Page.
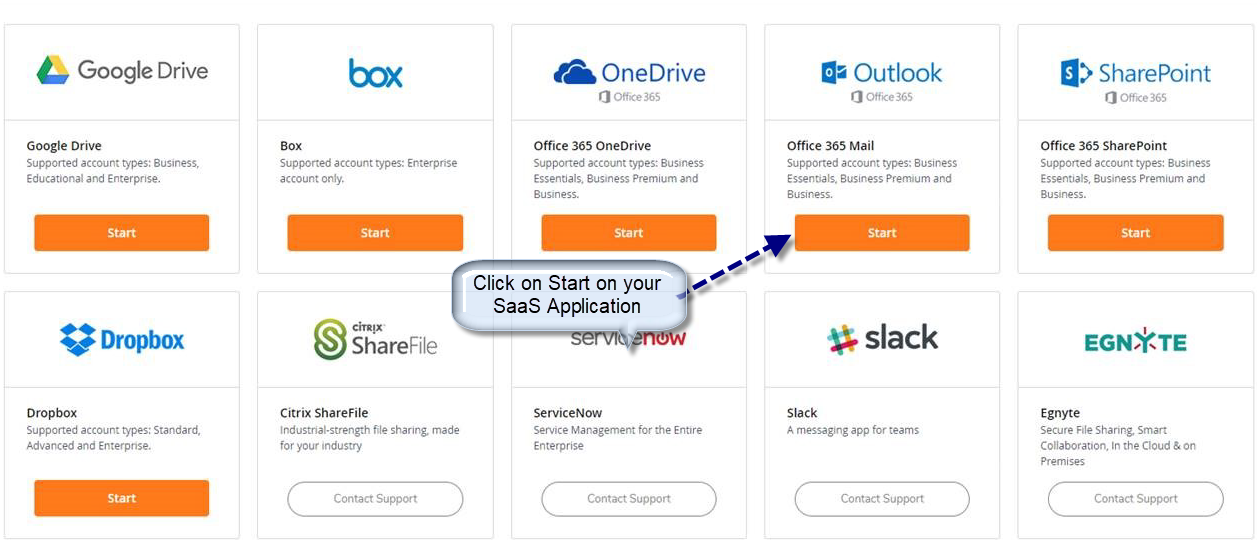
- Click Start for SaaS Application you would like to integrate with SonicWall CAS – SaaS Security.
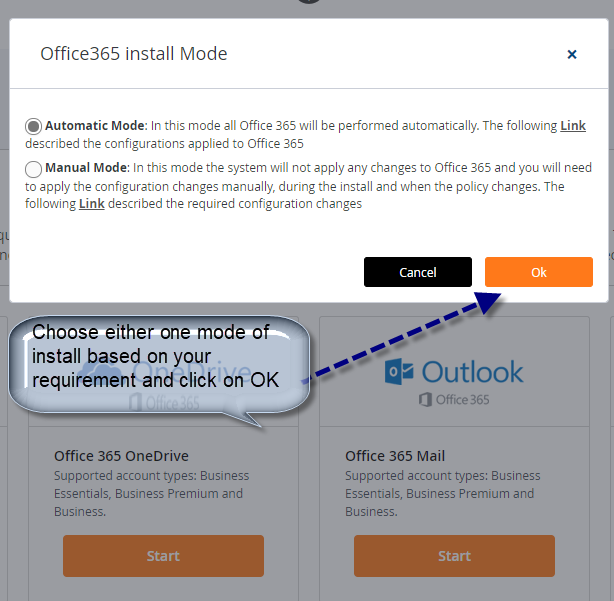
- Select office 365 install mode (recommended install mode: Automatic Mode). Click OK.
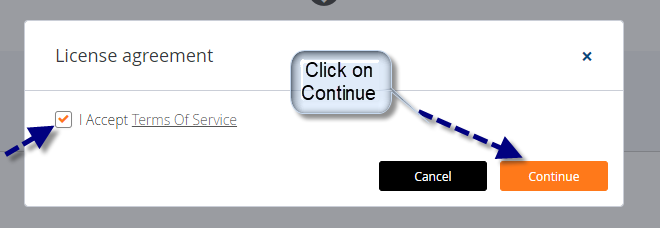
- Accept terms and condition and click Continue.
- Authorize Office365 event monitoring.
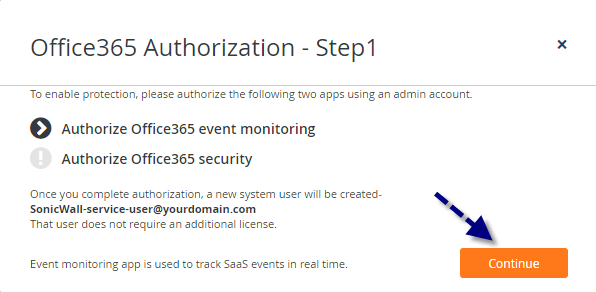
- Choose/type in your Office 365 credentials.
- Click Accept.
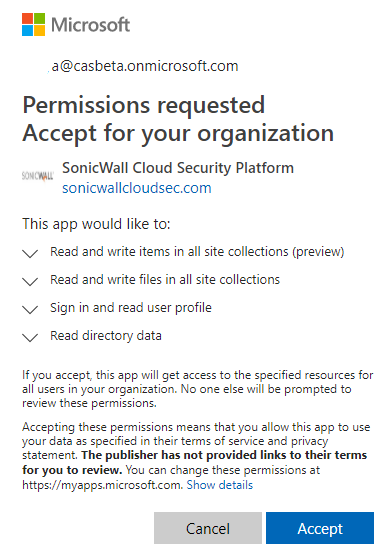
- Authorize Office365 event monitoring.
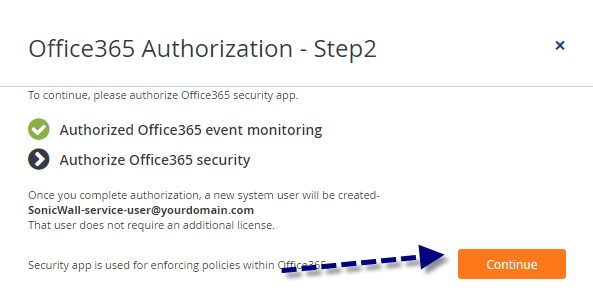
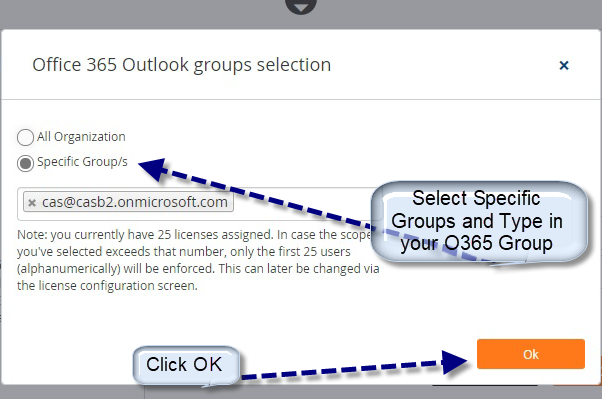
- Select Specific group/s and type in your Office 365 group name.
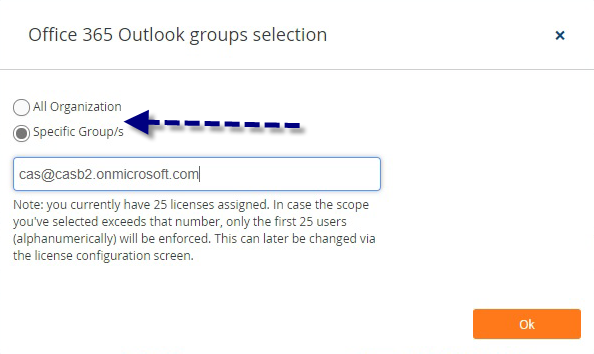
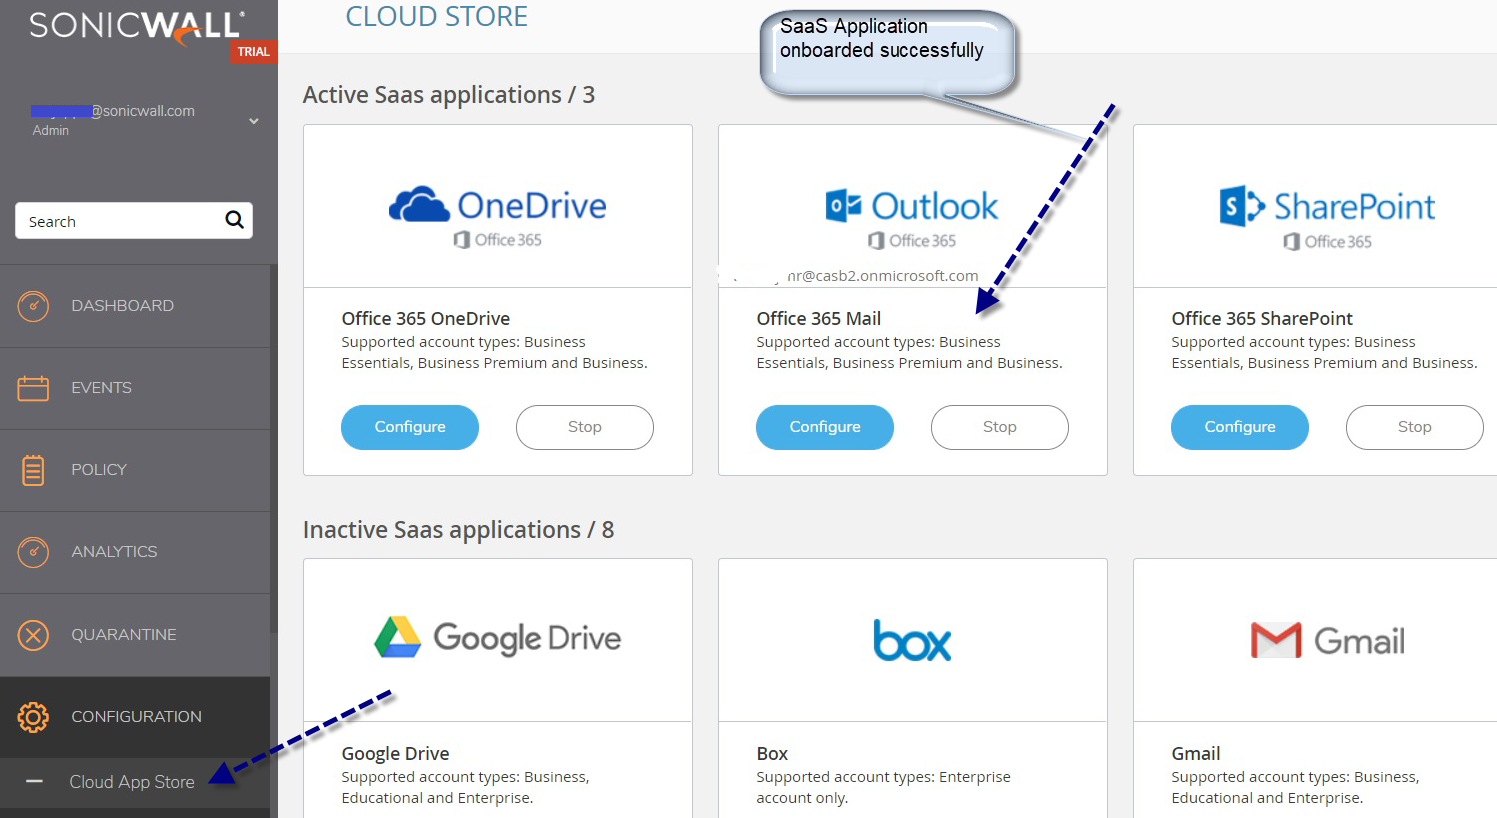
- Log back into your CAS - SaaS Security tenant upon receiving onboarding confirmation email from SonicWall for your SaaS Application to verify Active SaaS Applications.
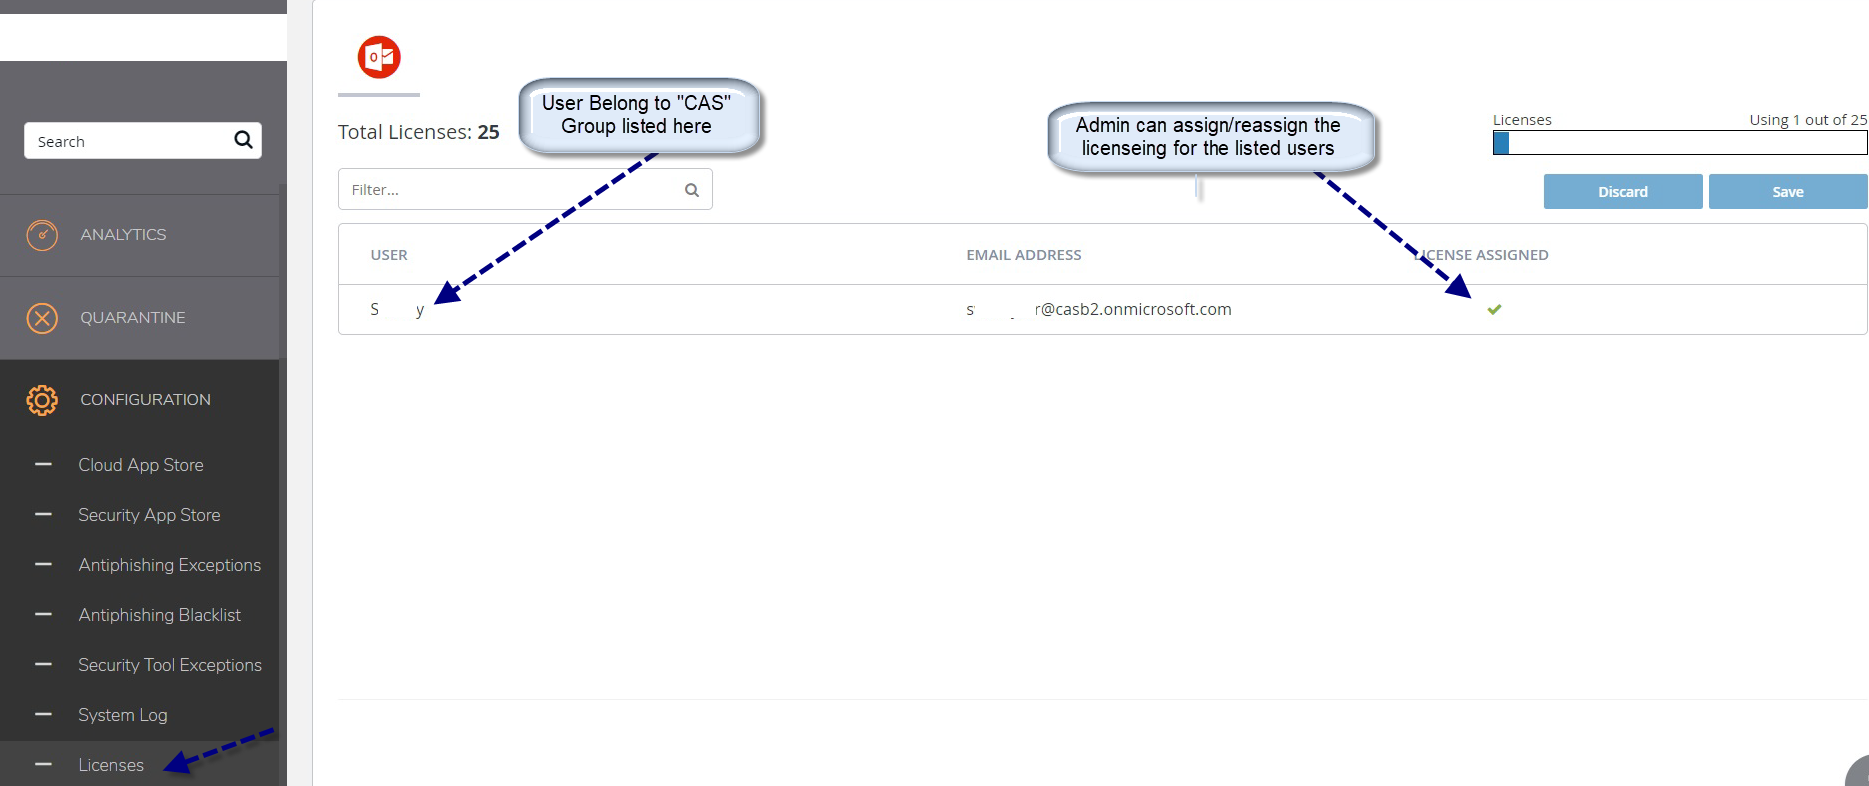
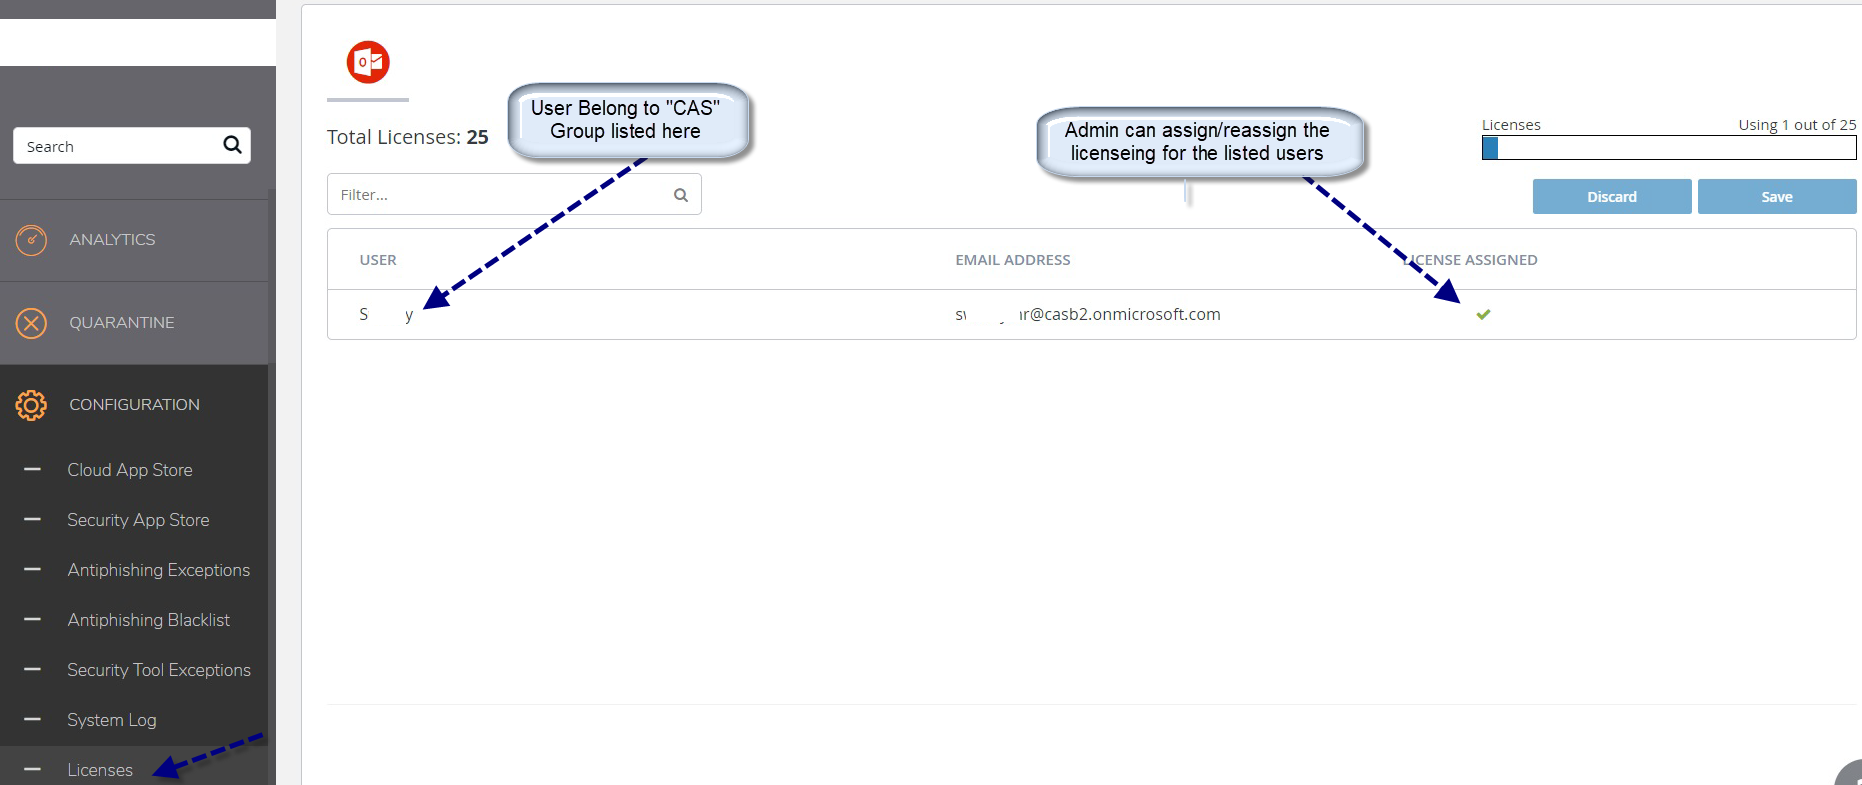
- Navigate to Configure | Licenses tab to verify if the licenses assignment.
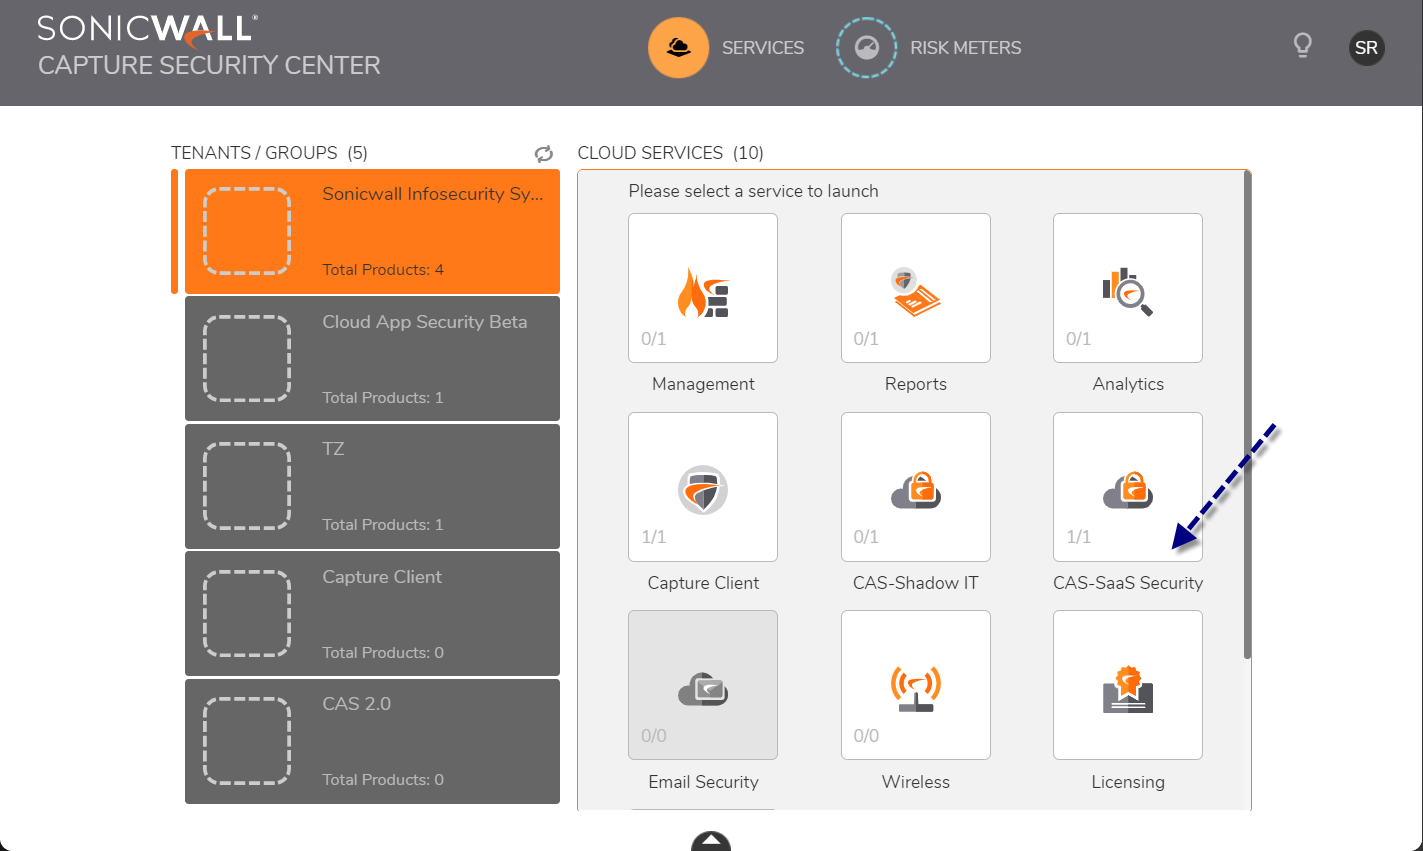
- Once you have activated CAS -SaaS Security on your MySonicwall account, please type in https://cloud.sonicwall.com on your browser and login with your MySonicWall credentials and click CAS – SaaS Security tile and you will be redirected to your CAS tenant, ex: https://abcxyz.sonicwallcloudsec.com.
- Post Onboarding (Any SaaS Application)
- Once you have activated CAS -SaaS Security on your MySonicwall account, please type https://cloud.sonicwall.com in your browser and login with your MySonicWall credentials and click CAS – SaaS Security tile. You will be redirected to your CAS tenant, ex: https://abcxyz.sonicwallcloudsec.com.
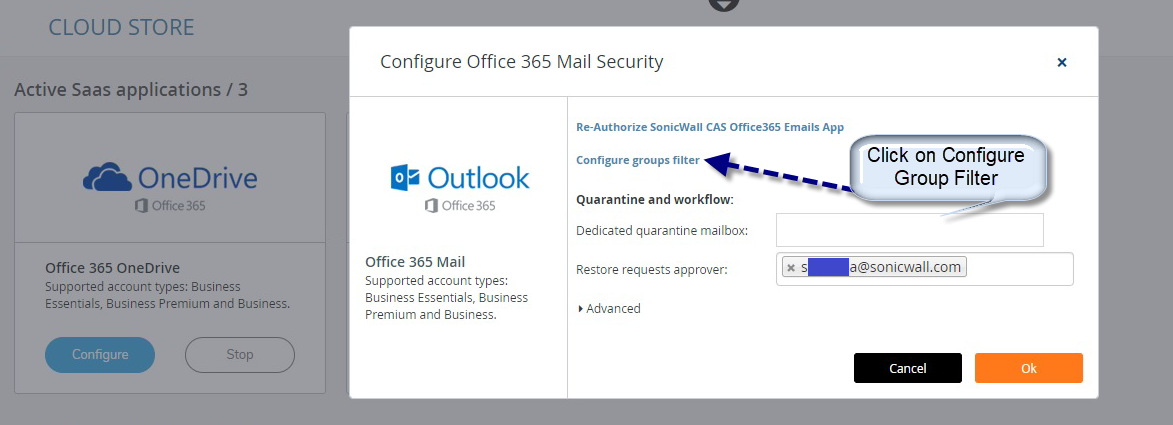
- Navigate to Configuration | Cloud App Security click SaaS Application and then click Configure on which you would like to apply the group filter.
- Click Configure group filter under Configure SaaS Application Security.
- Select Specific Group/s and enter the name of the Office365 group or distribution list, then click OK. If the group doesn't exist an error will be displayed.
- Navigate to Configuration | Licenses tab to verify the Licenses assignment.
- Once you have activated CAS -SaaS Security on your MySonicwall account, please type https://cloud.sonicwall.com in your browser and login with your MySonicWall credentials and click CAS – SaaS Security tile. You will be redirected to your CAS tenant, ex: https://abcxyz.sonicwallcloudsec.com.
 NOTE: If a customer does not utilize the Group Filter option, all O365\G Suite users will be brought in as CAS users. CAS licenses will be assigned automatically alphanumerically until the CAS license count is fully utilized. These can be reassigned as necessary by the customer.
Only one Group can be specified in Group Selection at the moment. And If you make any configuration change under Group Filter post onboarding a SaaS application it may take some time to complete depending on size of the group. User synchronization (add and remove users from the group) will take up to 12 hrs. Mailbox scan for those newly added/removed users will only take effect after user synchronization is complete.
 TIP: When on-boarding O365 or G Suite, always use group filter instead of All Organization.
Related Articles
- Converting Cloud App Security licenses from annual to monthly
- Cloud Application Security FAQs
- Cloud Edge License Provisioning and Management through MSSP Monthly


 YES
YES NO
NO