-
Products
-
SonicPlatform
SonicPlatform is the cybersecurity platform purpose-built for MSPs, making managing complex security environments among multiple tenants easy and streamlined.
Discover More
-
-
Solutions
-
Federal
Protect Federal Agencies and Networks with scalable, purpose-built cybersecurity solutions
Learn MoreFederalProtect Federal Agencies and Networks with scalable, purpose-built cybersecurity solutions
Learn More - Industries
- Use Cases
-
-
Partners
-
Partner Portal
Access to deal registration, MDF, sales and marketing tools, training and more
Learn MorePartner PortalAccess to deal registration, MDF, sales and marketing tools, training and more
Learn More - SonicWall Partners
- Partner Resources
-
-
Support
-
Support Portal
Find answers to your questions by searching across our knowledge base, community, technical documentation and video tutorials
Learn MoreSupport PortalFind answers to your questions by searching across our knowledge base, community, technical documentation and video tutorials
Learn More - Support
- Resources
- Capture Labs
-
- Company
- Contact Us
How do I configure a BGP route based VPN between a SonicWall firewall and Azure?


Description
This article covers how to configure a BGP route based VPN between a SonicWall firewall and Microsoft Azure.
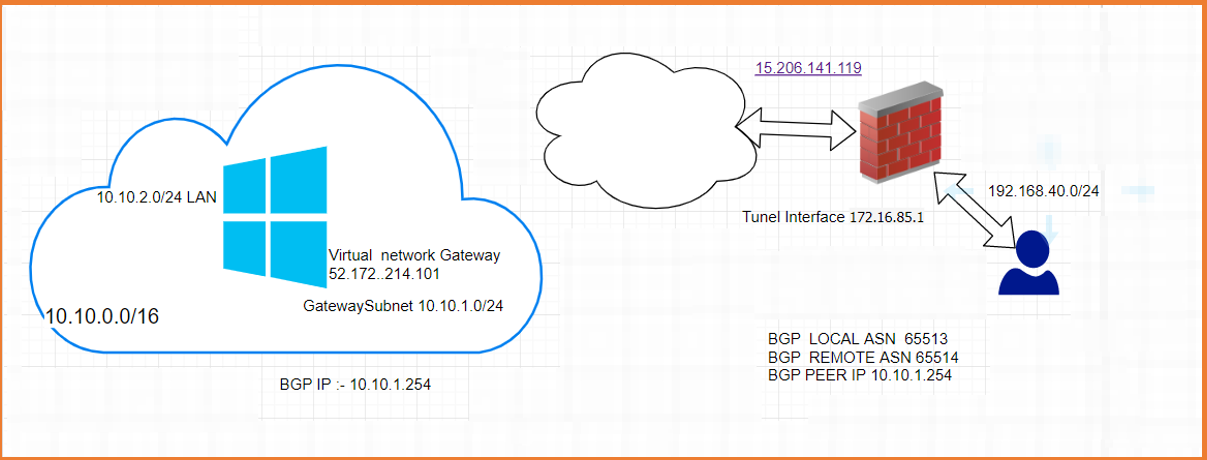
The following networks will be used for demonstration purposes during this article. Your networks may be different.
Azure Side Resources
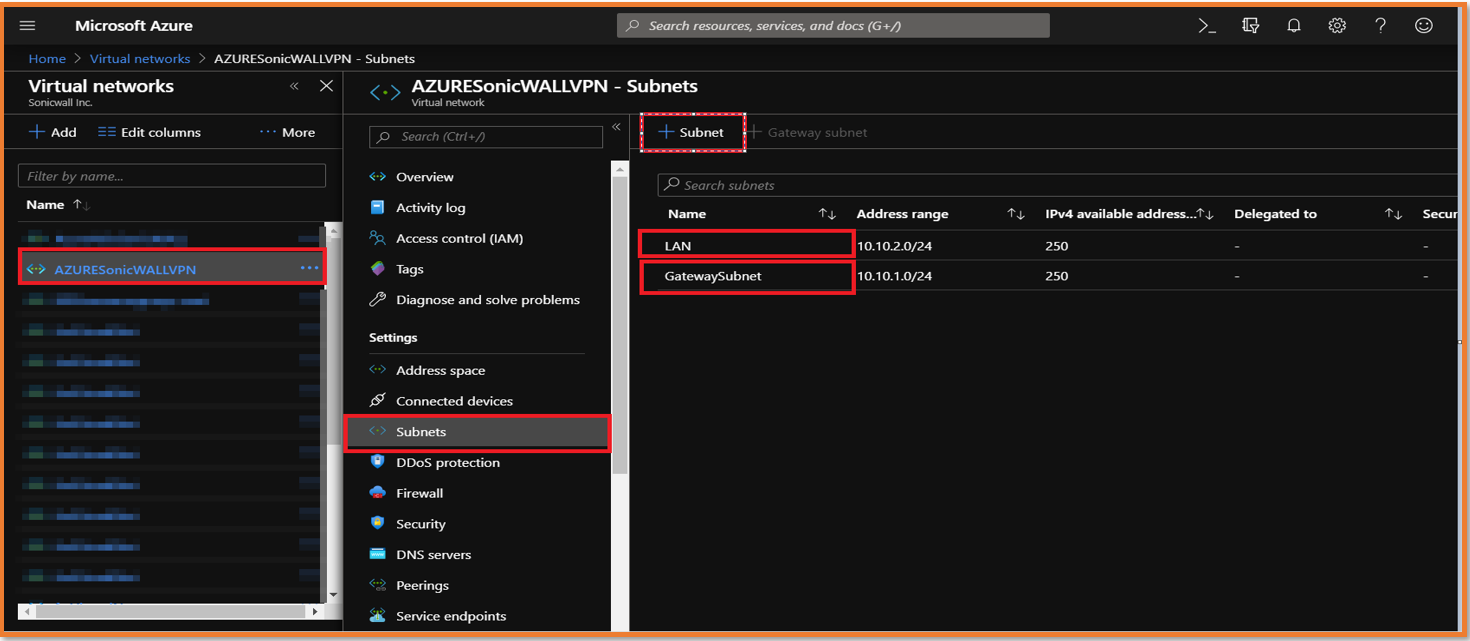
- Gateway subnet: 10.10.1.0/24
- LAN subnet: 10.10.2.0/24
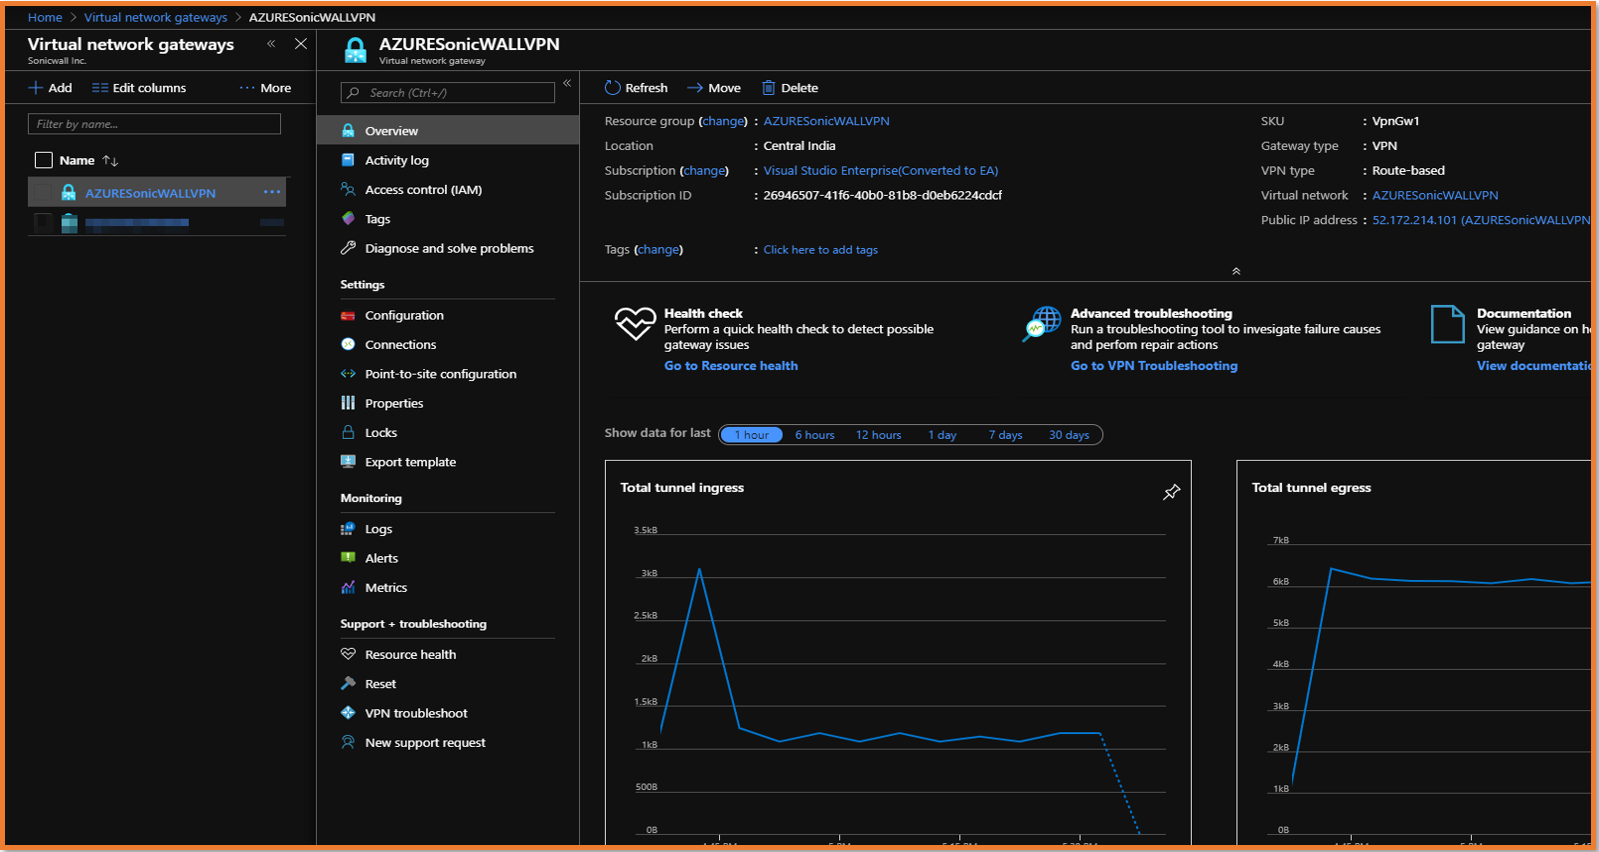
- Public IP: 52.172.214.101
SonicWall Side Resources
- LAN subnet: 192.168.40.0/24
- Public IP: 15.206.141.119
- BGP Local ASN 65513
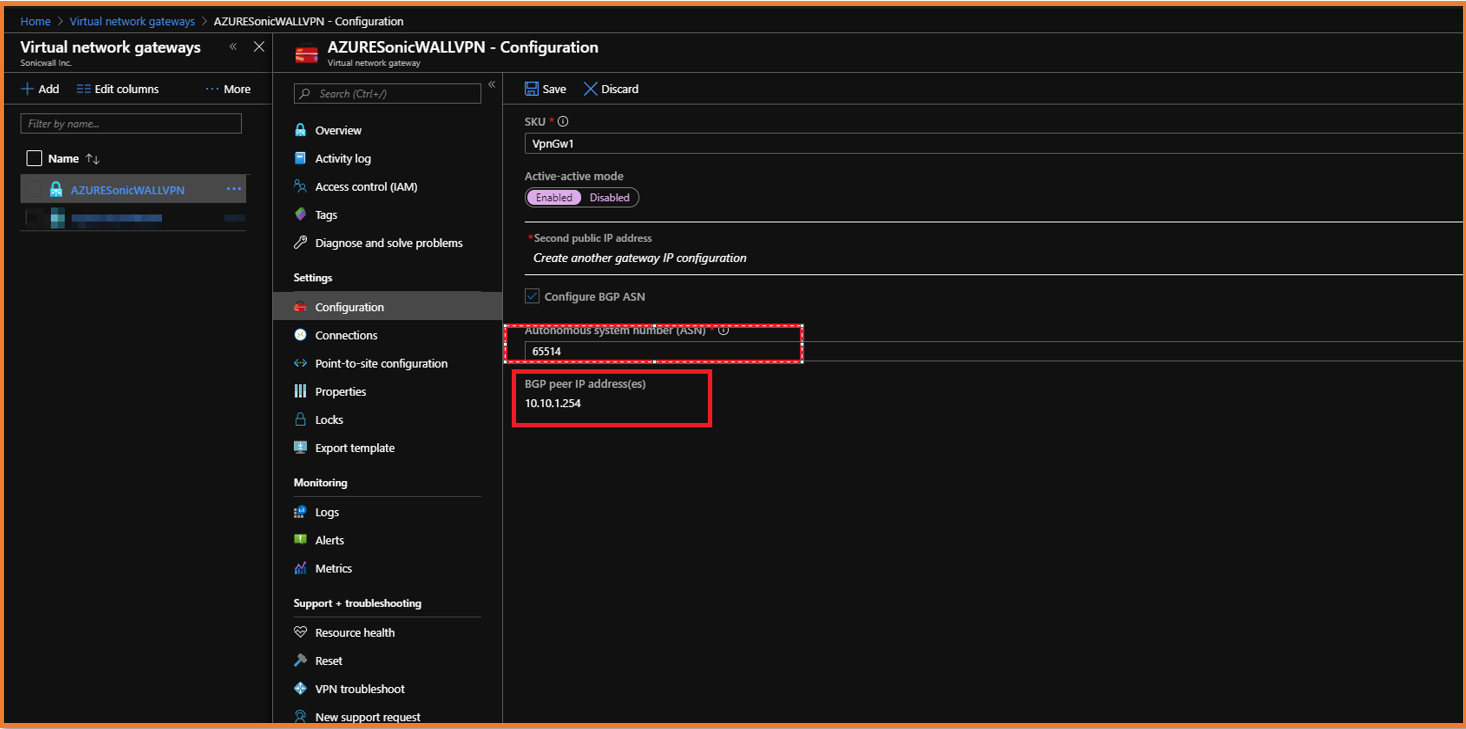
- BGP REMOTE ASN 65514
- BGP PEER IP 10.10.1.254
- TUNNEL INTERFACE IP 172.16.85.1/30
Resolution
Azure Configuration
- Login to the Azure portal https://portal.azure.com.
- Navigate to Virtual Networks and click Add to create a new network scheme.
- In this scenario we've defined the following network. Once filled out click Create.
- Define the LAN subnet and gateway subnet.
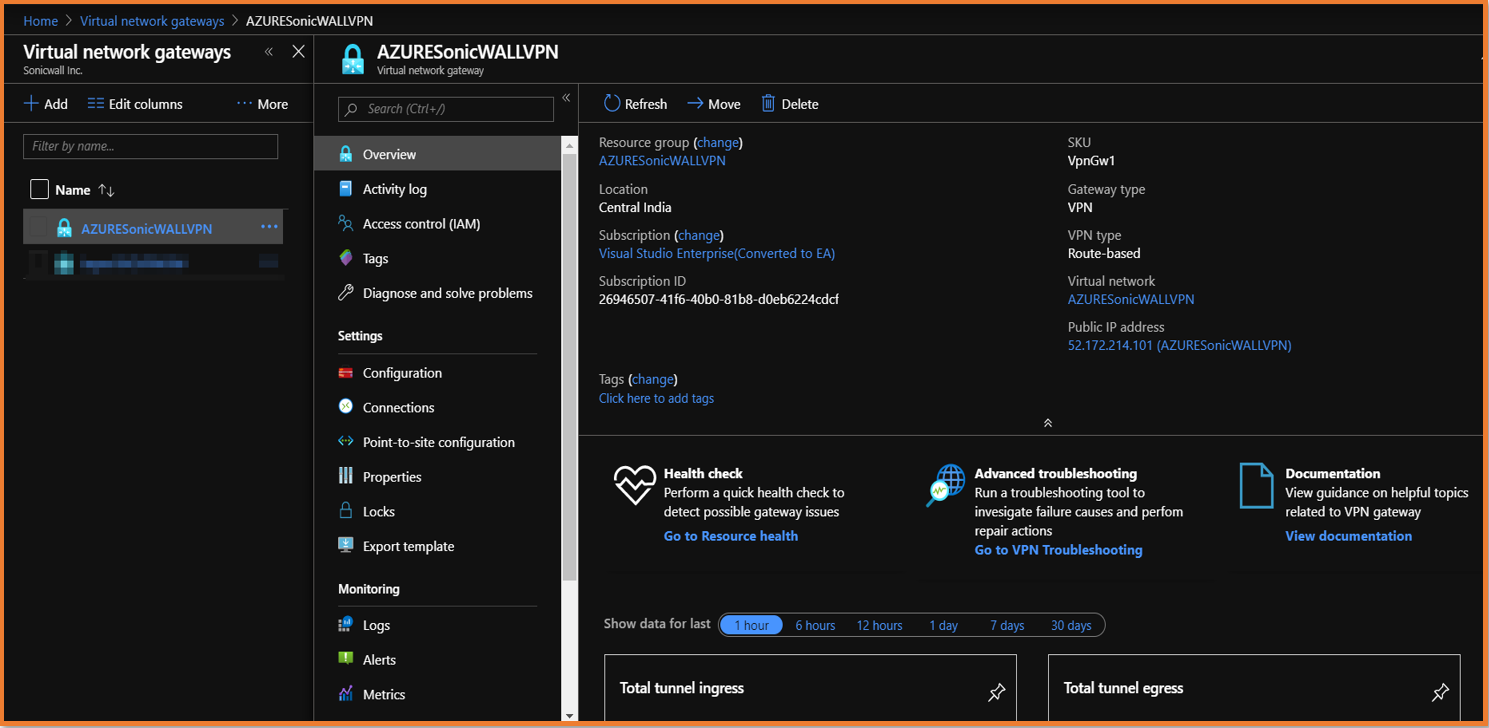
- Create a virtual network gateway under Home > Virtual network gateway.

- Click on Configuration and Enable BGP.
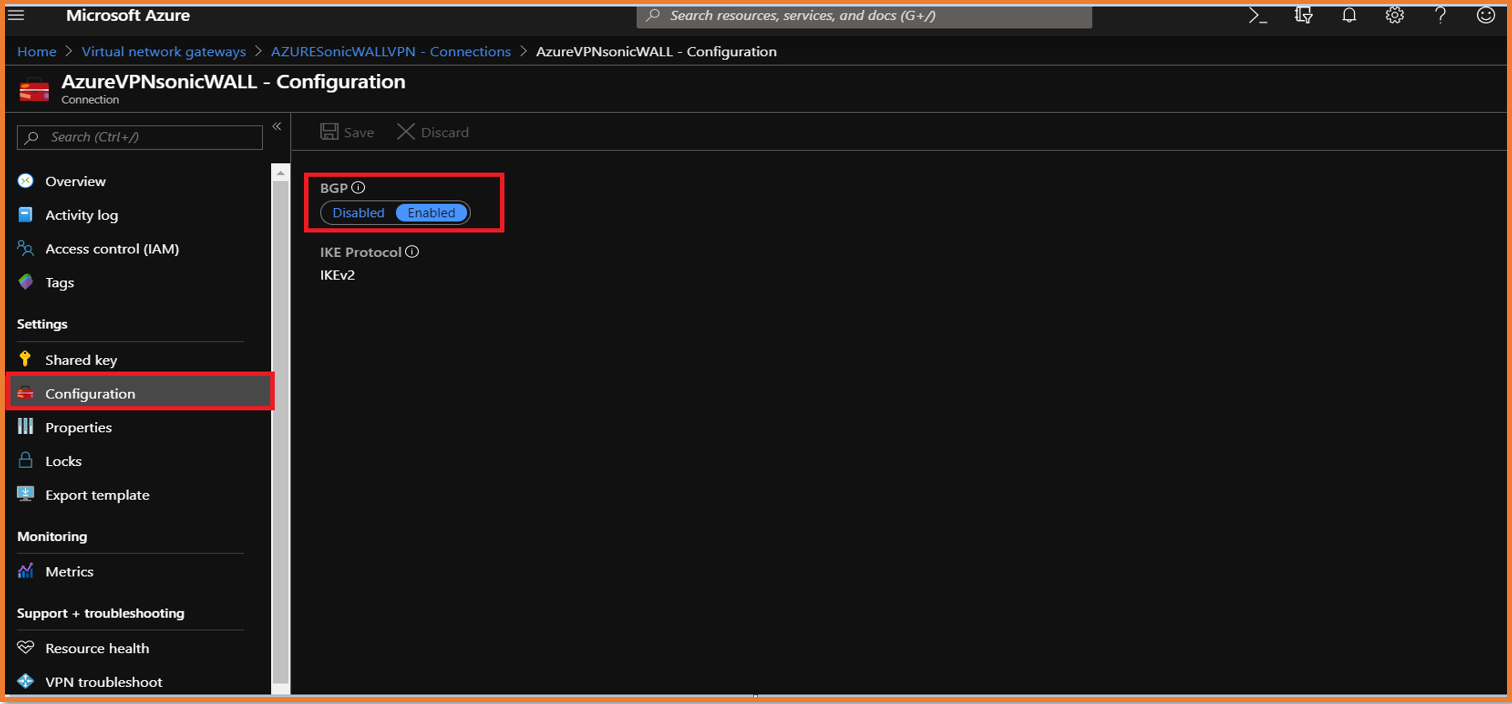
- Add a connection by defining the local network gateway, IKEV2, and preshared key.
- Enable BGP.
- Under the local network gateway configuration please define an address space, ASN BGP peer IP address.
Note: The below details will be used in the SonicWall configuration.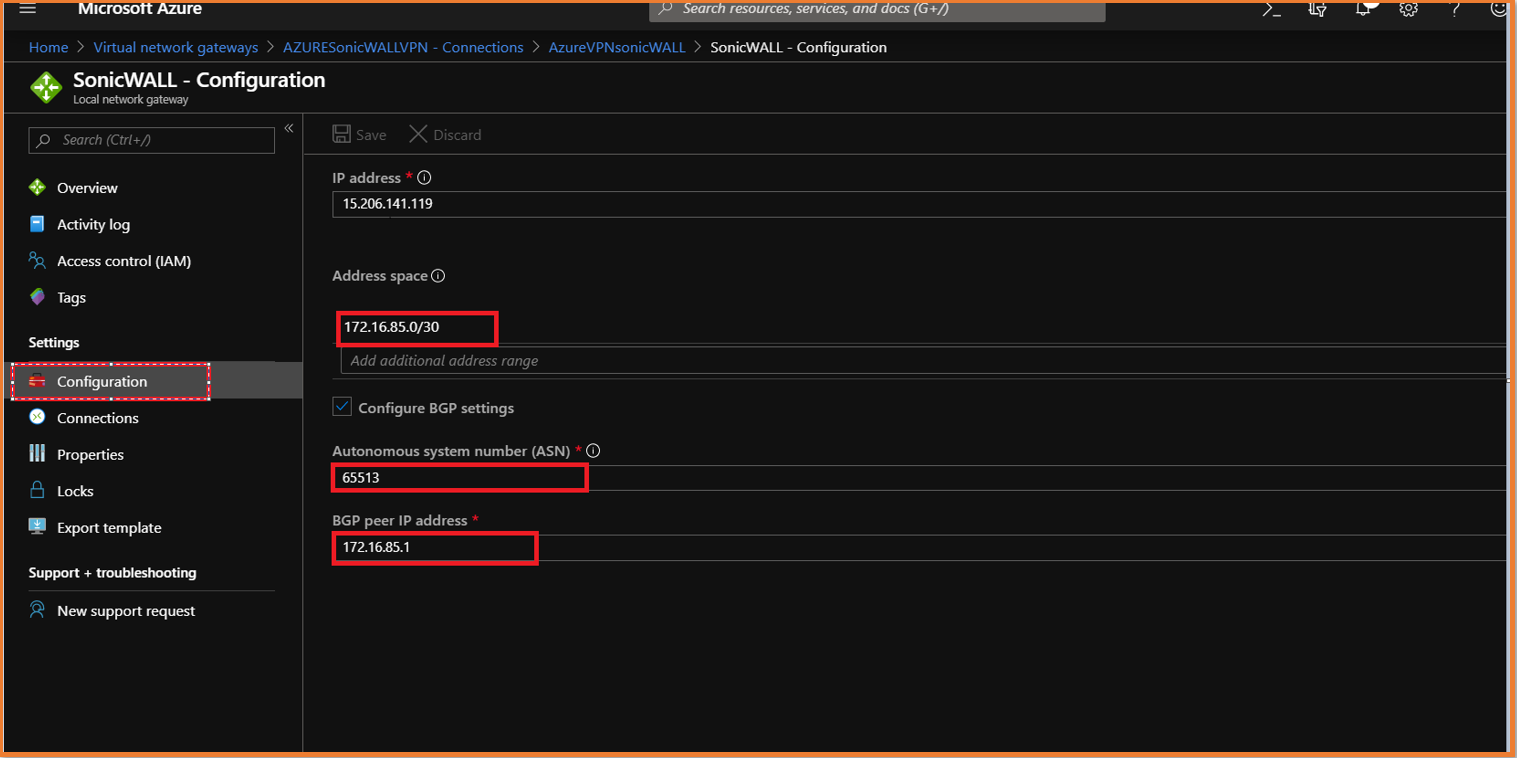
SonicWall Configuration
- Login to the SonicWall firewall.
- Navigate to the VPN policy tab. We're using the latest SonicOS 6.5 firmware. Click Manage | VPN | Base Settings. Click Add to create a new VPN policy.
- Give the VPN policy a name. We'll use the following settings:
Policy Type: Tunnel Interface
Authentication Method: IKE using Preshared Secret.
Next click the Proposals tab and use default proposals.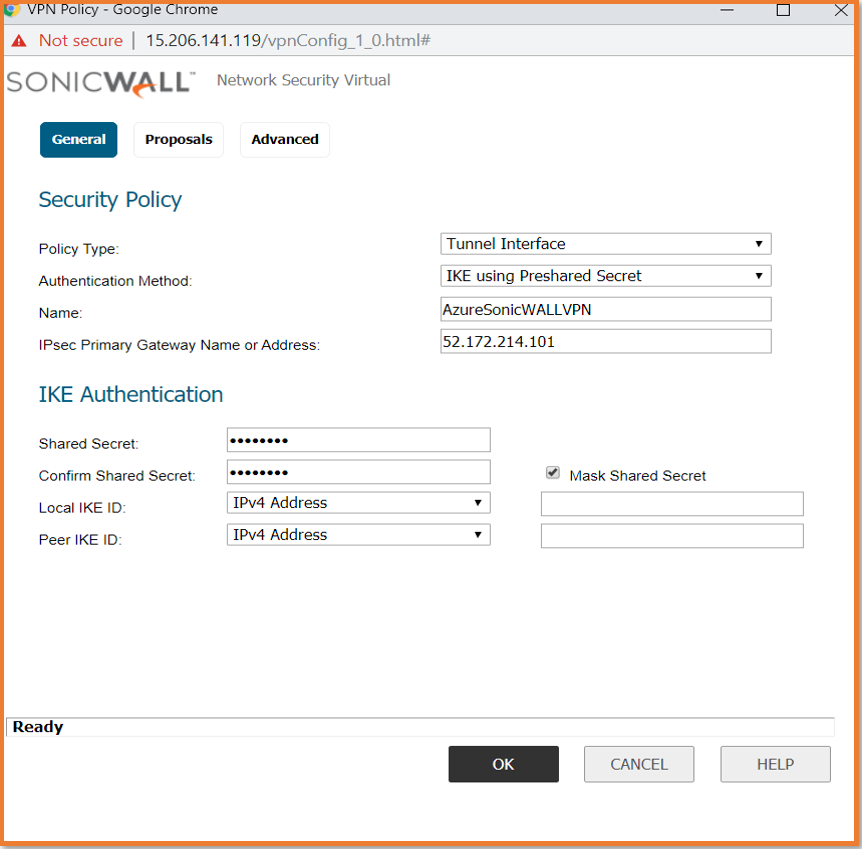
- Create a tunnel interface by navigating to Network | Interfaces.
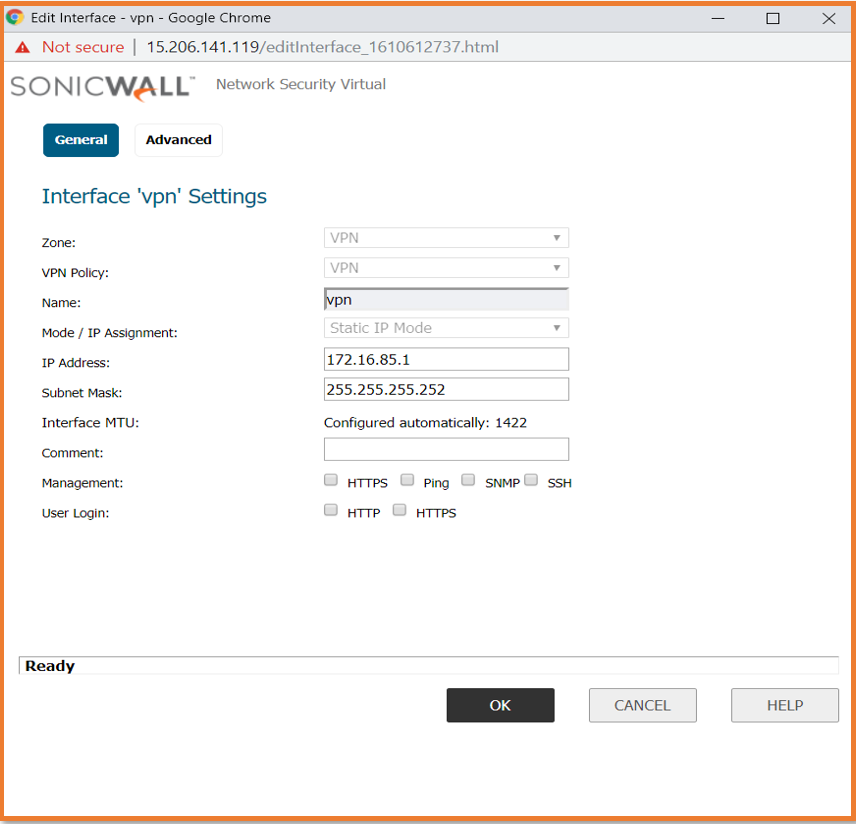
- Create a route to reach the BGP peer IP under Network | Routing.
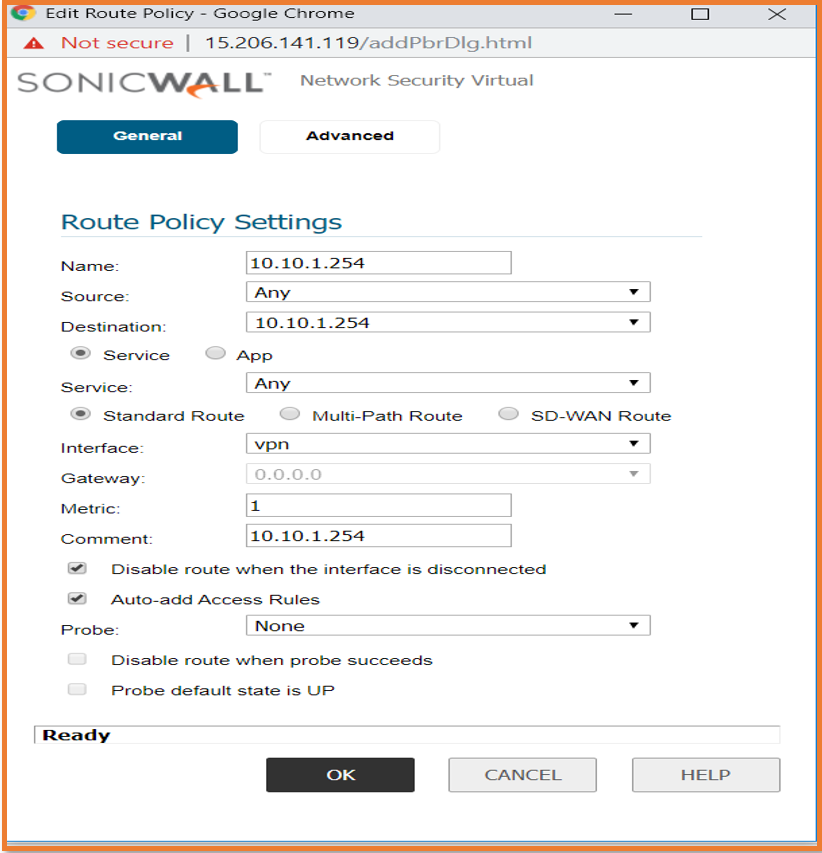
- Enable advance routing under Network | Routing | Settings and configure BGP using CLI.

admin@0040103538F8> config t
config(0040103538F8)# routing
(config-routing)# bgp
ARS BGP>show run
router bgp 65513
neighbor 10.10.1.254 remote-as 65514
neighbor 10.10.1.254 ebgp-multihop 2
 NOTE: Please disable exclude from route advertisement (NSM,OSPF,BGP,RIP) under Network | Interfaces | WAN.
Related Articles
- Error:"Invalid API Argument" when modifying the access rules
- Cysurance Partner FAQ
- Configure probe monitoring for WAN Failover and Loadbalancing - SonicWall UTM
Categories
- Firewalls > NSv Series > Azure


 YES
YES NO
NO