-
Products
-
SonicPlatform
SonicPlatform is the cybersecurity platform purpose-built for MSPs, making managing complex security environments among multiple tenants easy and streamlined.
Discover More
-
-
Solutions
-
Federal
Protect Federal Agencies and Networks with scalable, purpose-built cybersecurity solutions
Learn MoreFederalProtect Federal Agencies and Networks with scalable, purpose-built cybersecurity solutions
Learn More - Industries
- Use Cases
-
-
Partners
-
Partner Portal
Access to deal registration, MDF, sales and marketing tools, training and more
Learn MorePartner PortalAccess to deal registration, MDF, sales and marketing tools, training and more
Learn More - SonicWall Partners
- Partner Resources
-
-
Support
-
Support Portal
Find answers to your questions by searching across our knowledge base, community, technical documentation and video tutorials
Learn MoreSupport PortalFind answers to your questions by searching across our knowledge base, community, technical documentation and video tutorials
Learn More - Support
- Resources
- Capture Labs
-
- Company
- Contact Us
How do I bring a new or RMA Appliance to a current firmware version?


Description
New or RMA SMA 1000 series appliances may arrive with a different firmware version than desired. It is typical that the firmware version is older than the desired version.
This is the easy and simple way to upgrade the system to the desired current firmware version, with minimal time and difficulty.
With 12.1.0 firmware it is possible to downgrade to 11.4.0. This is the only downgrade available.
See KB https://www.sonicwall.com/en-us/support/knowledge-base/170502558229507
Resolution
The standard practice to upgrade involves applying the latest hotfixes in the current firmware, platform first, then applying the next supported firmware upgrade and the platform then client hotfix for that version, and so on, possibly through many firmware versions. For a system with a complicated configuration, where that configuration must be maintained, this is the required process. Care must be taken to ensure each firmware upgrade is correct and supported.
With a NEW system or an RMA replacement there is no configuration to preserve. The abbreviated process below provides a reliable way to go to the desired firmware version with minimal difficulty.
Here are the steps:
1. Boot the appliance.
2. Connect the console cable that came with it. Set the communications software for 115,200 baud, 8-N-1 and no hand shake.
3. Hit enter and the login prompt should appear, user name is 'root', there is no password
4. Configure the initial x0 interface IP address, MASK, and gateway. Confirm the settings and the system will restart.
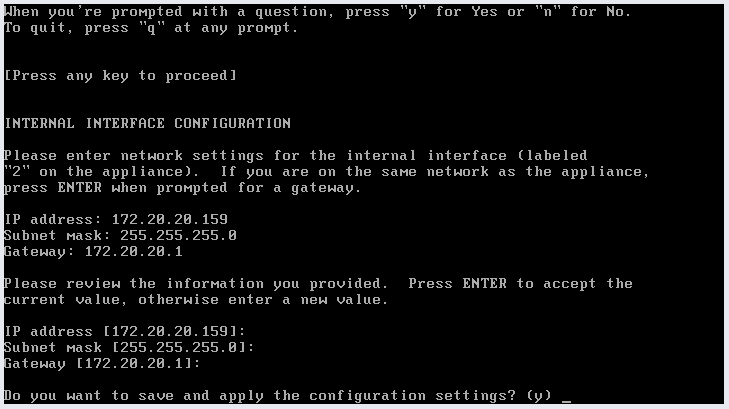
5. Connect a PC to the x0 Ethernet interface configured with an IP address in the same subnet as you configured. In a web browser open an HTTPS session to that IP address using port 8443.
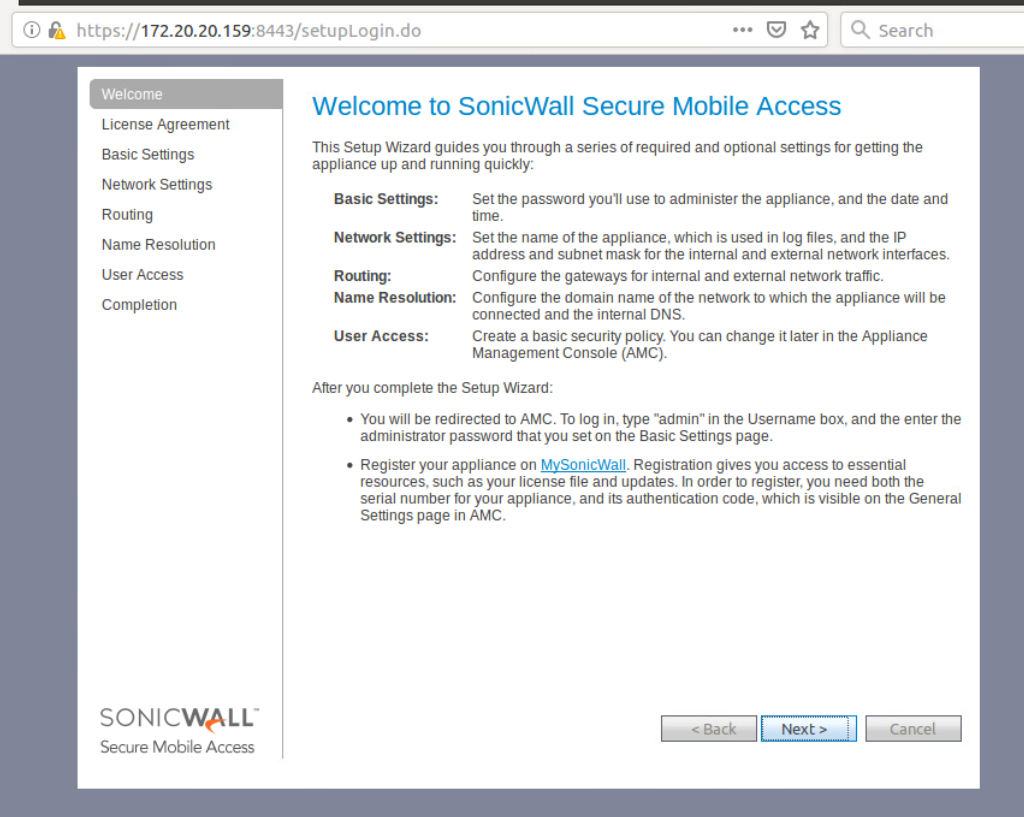
6. Complete the setup wizard. Configure only what is required as this will be erased after the firmware upgrade. When this initial configuration is completed the system will restart.
Steps:
- Accept the license agreement - select Next.
- Configure an admin password - select Next.
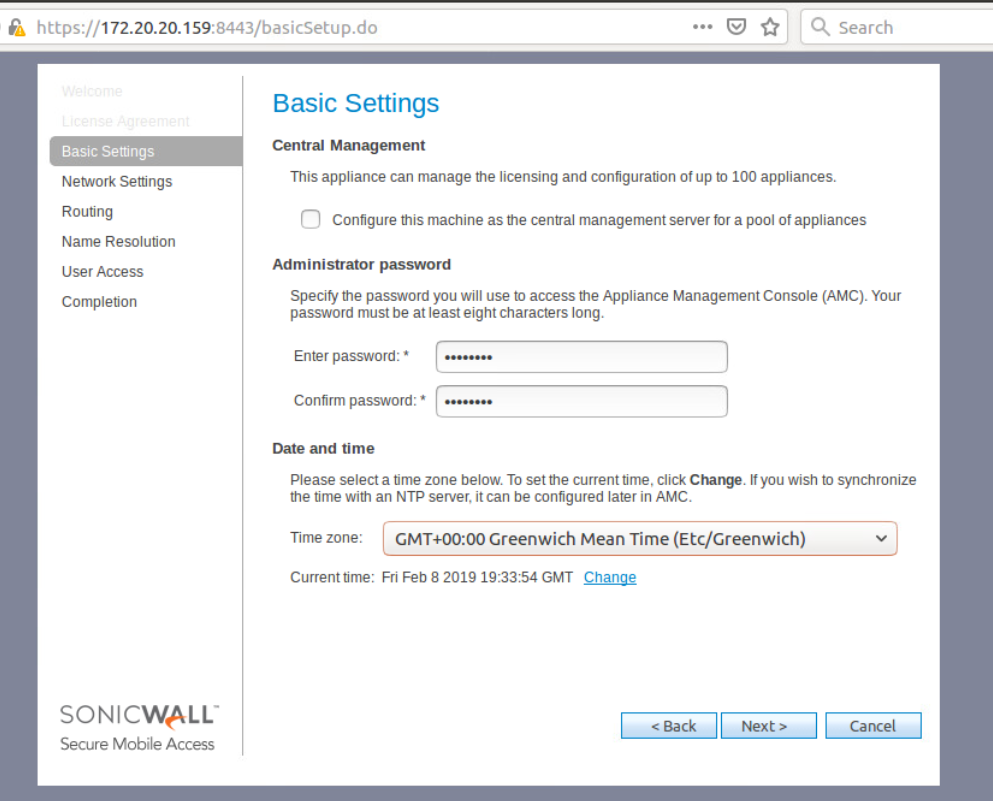
- Configure an appliance name and minimal networking settings - select Next.
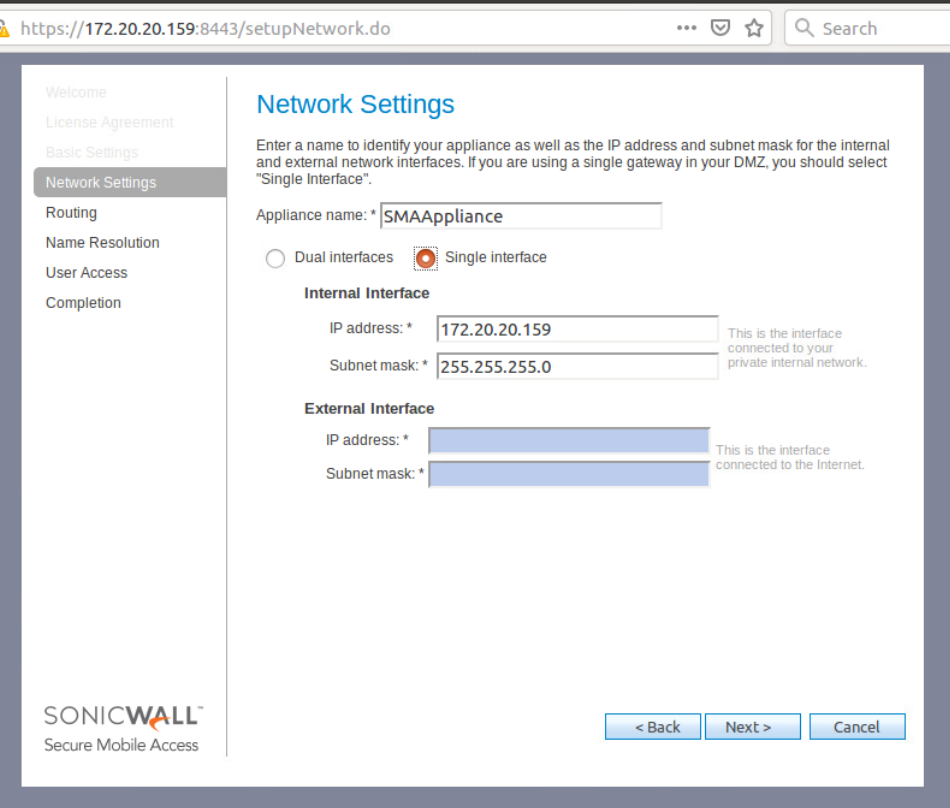
- Routing can be left blank - select Next.
- Enter the domain name - at this point no DNS is required - select Next.
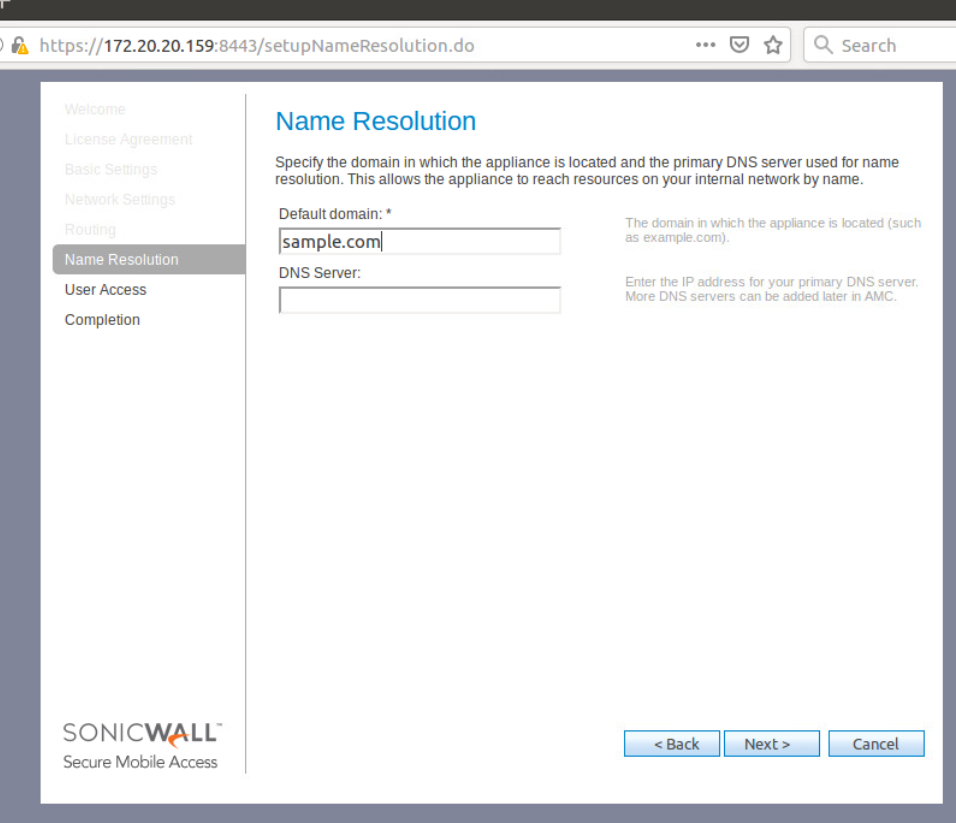
- User Access can be left as default - Select Next.
- Select Finish - the system will restart.
NOTE: Before the next step, you must check the upgrade guide for the firmware version you are going to and ensure the upgrade is supported. If an upgrade direct from the original version to the desired version is not supported in the upgrade guide you will require an intermediate upgrade to a supported version from the original version. Then confirm that version is supported to upgrade to the desired version.
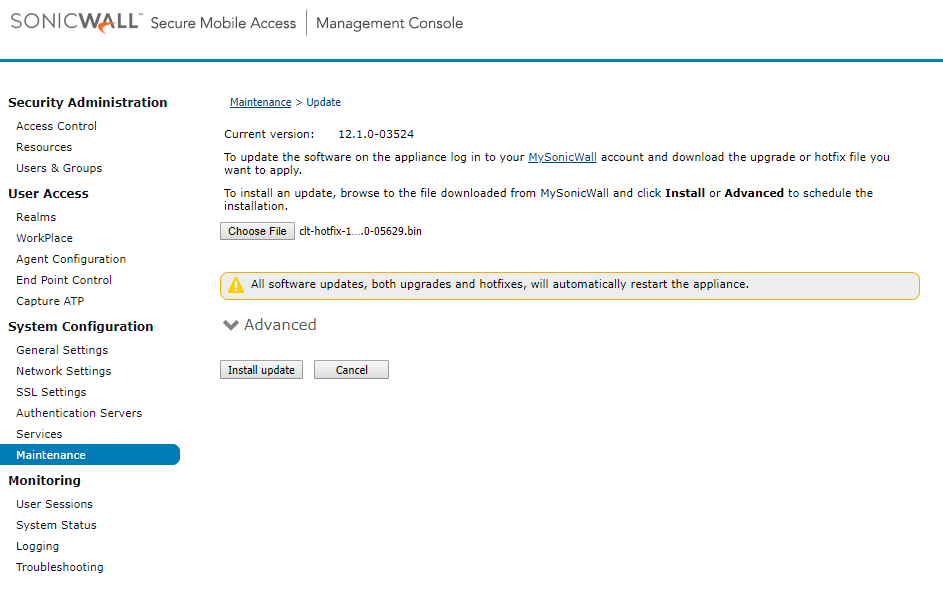
7. Refresh the browser window to connect to Appliance Management Console (AMC). Log in as 'admin', using the configured password, and select 'Maintenance', click on the 'Update' button under 'System Software Updates'. Select the upgrade file for the desired firmware. Click 'Install Update'. The system will upload the file and upgrade the system, rebooting.
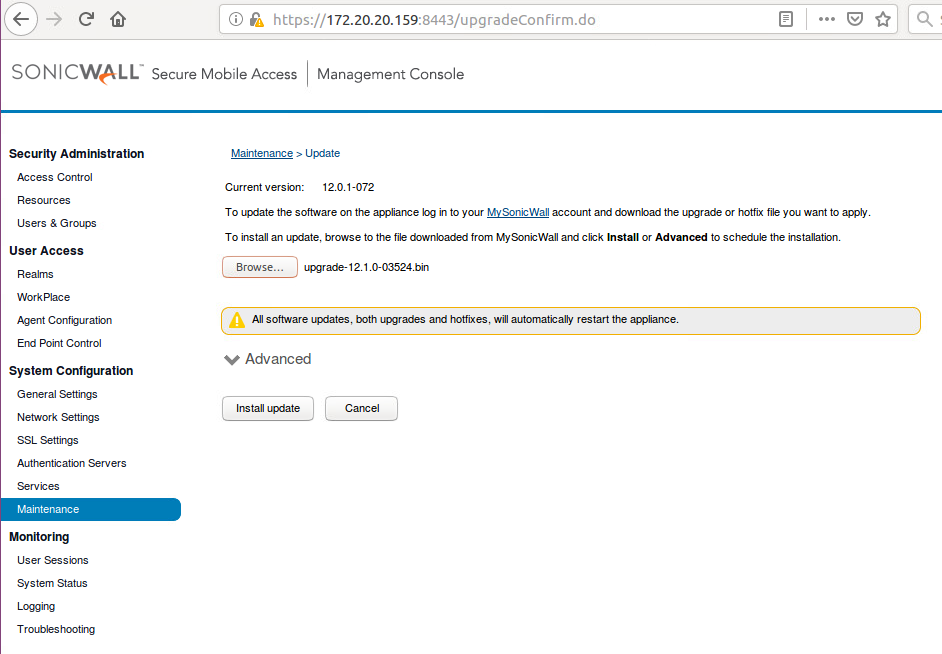
8. Connect with the console cable. After the system boots, the login prompt will be displayed. Enter user name 'root' and the admin password you entered on the setup wizard.
9. At the root prompt (#) enter this command: config_reset and hit enter
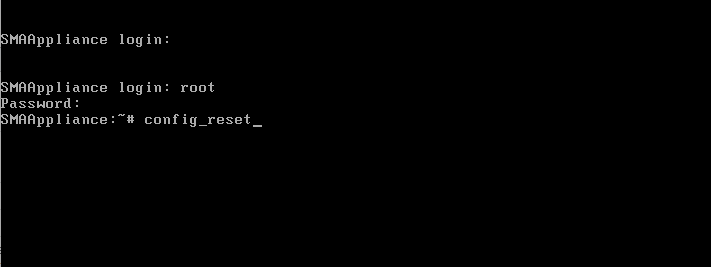
10. The system will erase the configuration and restart running the desired firmware.
11. Go thru the initial setup procedure, as above, again to bring the system up for web access to the Appliance Management Console (AMC).
12. Load the current hotfixes, platform first. Each hotfix will cause the system to reboot.
Steps:
- Select 'Maintenance', click on the 'Update' button under 'System Software Updates'. Navigate to and select the file for the platform hotfix. Click 'Install Update'. The system will upload the file, apply it, and reboot.
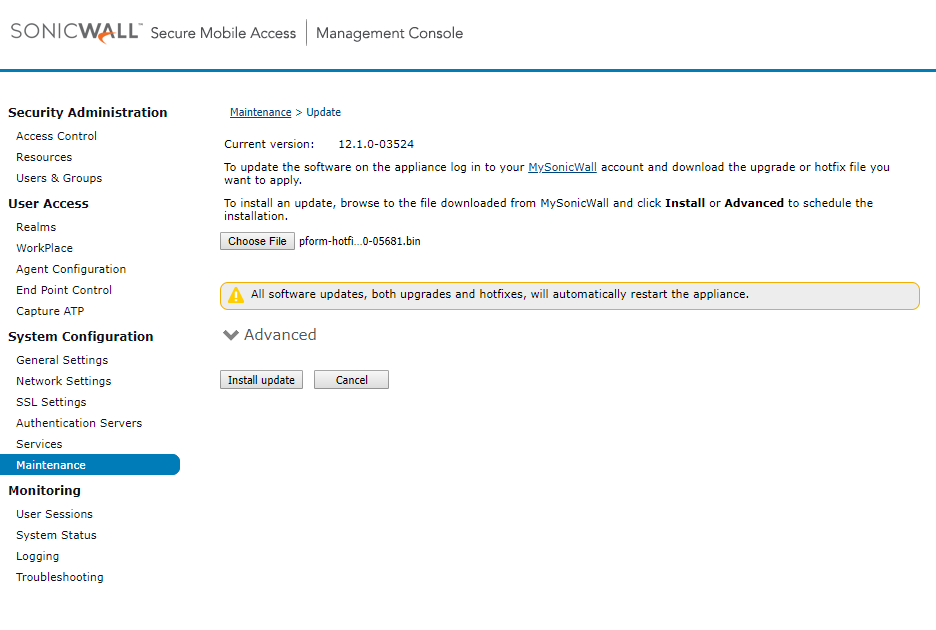
- Log in again, select 'Maintenance', click on the 'Update' button under 'System Software Updates'. Select the file for the client hotfix. Click 'Install Update'. The system will upload the file, apply it, and reboot.
13. Load the desired configuration or do a complete manual configuration of the system.
Related Articles
- How to download Client Installation package and the access agents from the appliance using WinSCP
- SMA 1000: How to update Advanced EPC Signatures to the Latest Version
- If OTP is enabled, NX disconnects after SMA100 Connect Agent installation


 YES
YES NO
NO