-
Products
-
SonicPlatform
SonicPlatform is the cybersecurity platform purpose-built for MSPs, making managing complex security environments among multiple tenants easy and streamlined.
Discover More
-
-
Solutions
-
Federal
Protect Federal Agencies and Networks with scalable, purpose-built cybersecurity solutions
Learn MoreFederalProtect Federal Agencies and Networks with scalable, purpose-built cybersecurity solutions
Learn More - Industries
- Use Cases
-
-
Partners
-
Partner Portal
Access to deal registration, MDF, sales and marketing tools, training and more
Learn MorePartner PortalAccess to deal registration, MDF, sales and marketing tools, training and more
Learn More - SonicWall Partners
- Partner Resources
-
-
Support
-
Support Portal
Find answers to your questions by searching across our knowledge base, community, technical documentation and video tutorials
Learn MoreSupport PortalFind answers to your questions by searching across our knowledge base, community, technical documentation and video tutorials
Learn More - Support
- Resources
- Capture Labs
-
- Company
- Contact Us
How can I use the RADIUS filter-id attribute to assign users to different RADIUS groups?


Description
This article explains how to make use of the RADIUS filter-id attribute to configure the RADIUS client and server in order to be able to apply different SRA policies (bookmarks, EPC, etc.) to specific AD groups.
In this example we have the following elements:
- SRA acting as a RADIUS client.
- Windows Server 2008 R2 with the Network Policy Server and Active Directory Domain Services roles that is acting as the RADIUS server.
Resolution
First of all, create different Security Groups in AD. In this example, we created 2 groups named Internal and External.

We also created 2 users in AD (testing and testext) and assigned both to the “Internal” and “External” Security groups respectively.
Configuration of the RADIUS server
The following example shows how to configure the Windows Server 2008 R2 with the Network Policy Server role.
 NOTE: This is an example of basic configuration and it can vary from customer to customer, depending on the different requirements.
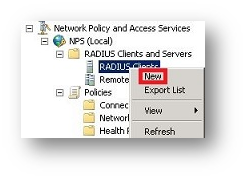
- Add a new RADIUS client by right-clicking on RADIUS Clients | New.
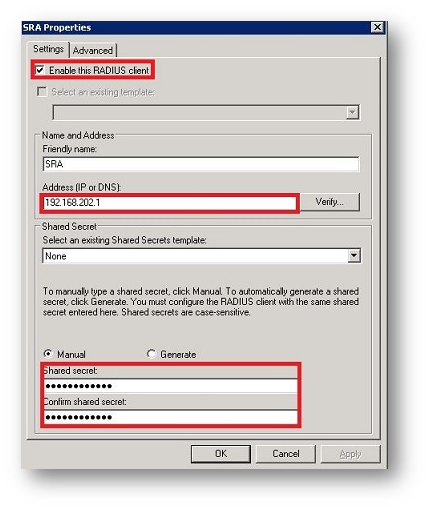
- Configure the IP address of the RADIUS Client (SRA) and the Shared secret and make sure this one matches the one you configured in the SRA. Also, ensure that the option Enable this RADIUS client is selected.
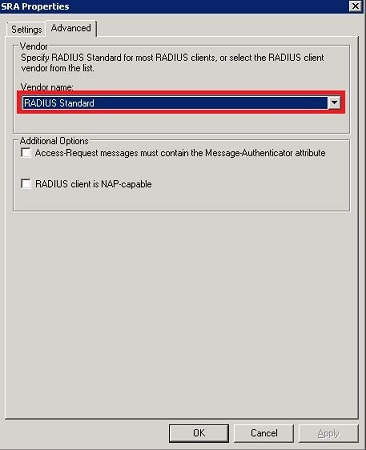
- From the Advanced tab, select RADIUS Standard, from the Vendor name drop-down list.
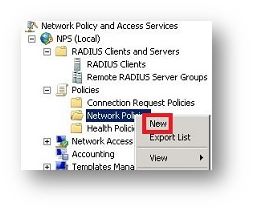
- Create a new Network Policy by right-clicking on Network Policies| New.
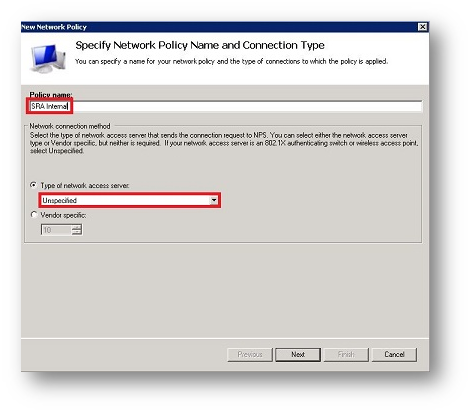
- Type in the Policy name (in this case we called it “SRA Internal”) and choose Unspecified from the Type of network access server.
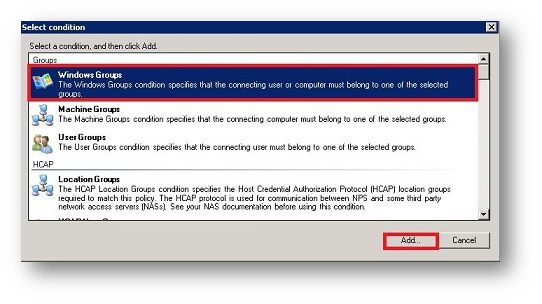
- In the next screen, click Add to add a new condition and select Windows Groups.
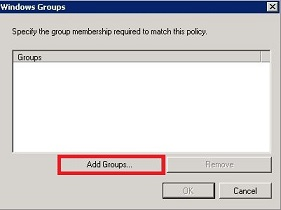
- Click Add Groups and search for the corresponding Active Directory group (in our case Internal).
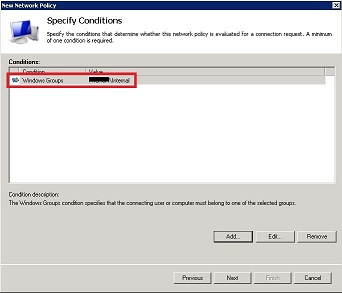
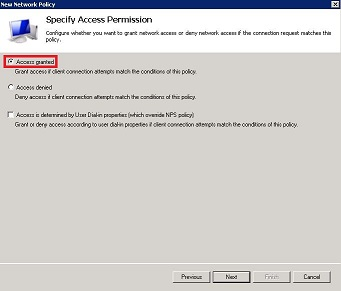
- In the next screen specify the Access Permission. In our case Access granted.
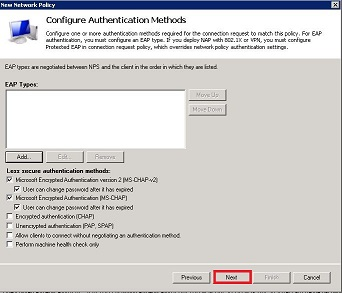
- In the next screen select the authentication method you will use for the SRA authentication.
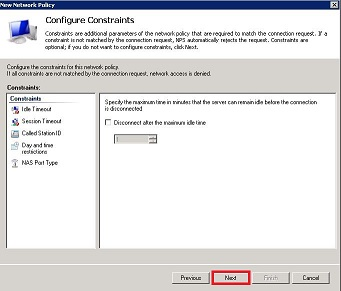
- The next dialog window will ask you to configure the constraints for connection from the SRA. In this case we did not configure any additional constraint.
- In the next screen, under RADIUS Attributes, select “Standard” and click Add.
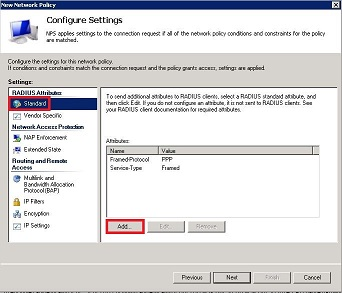
- Search for Filter-Id and add a new Filter-id String attribute. This must match the Filter-id configured on the SRA (in our case we called it Internal).
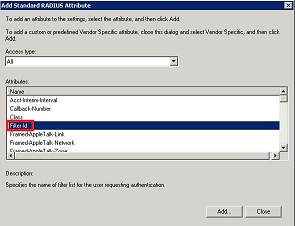
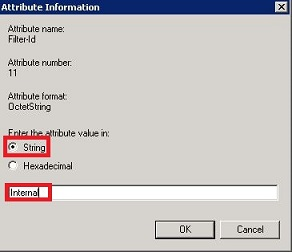
- Click Next to finish the configuration of the policy.
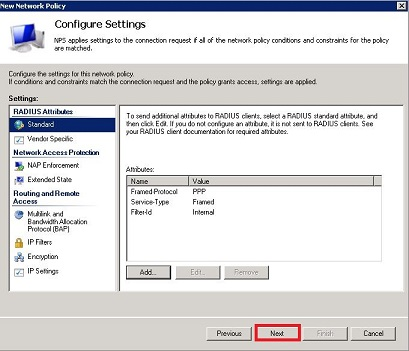
- Repeat the same steps as above for the other group External, adding the filter-id attribute External.
- At the end, we will have 2 policies: SRA Internal and SRA External.

Configuration of the RADIUS client (SRA)
- Ensure the checkboxes Use Filter-ID For RADIUS Groups and Auto-assign groups at login are selected like in the image below.


- Navigate to Users| Local Groups, create 2 new groups for the RADIUS domain (in our case Internal and External) and select the option Associate with RADIUS filter-id .
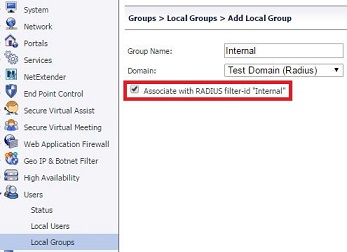
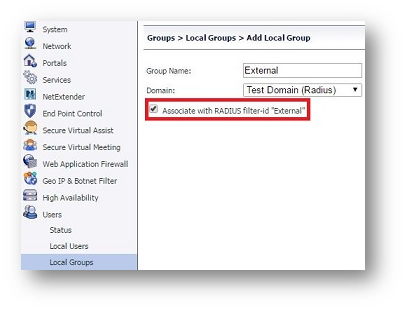
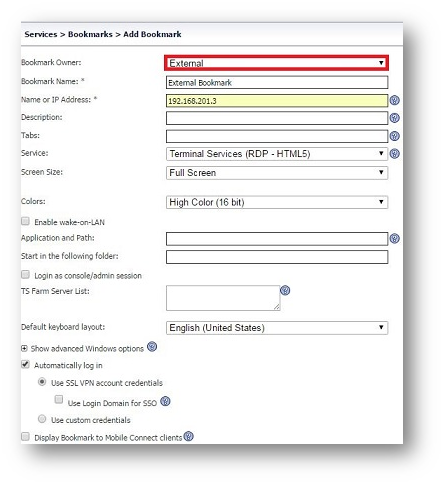
- You can test this by creating 2 different bookmarks and assigning each of them to the Internal and External groups.
 EXAMPLE: Image below.
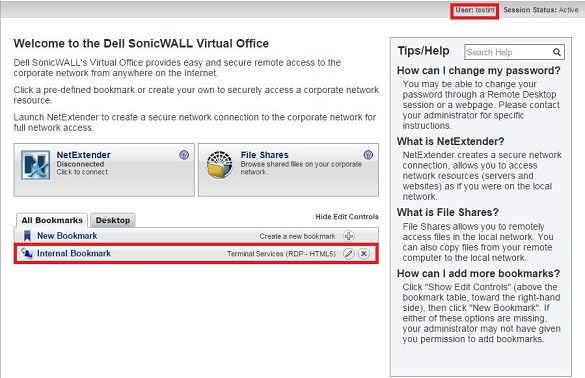
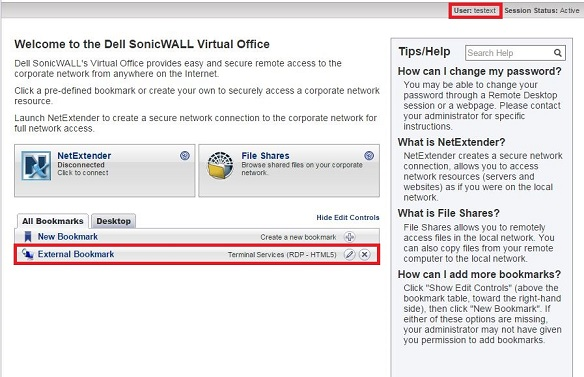
- Try to log in to the portal using the test users we created in AD (testint and testext) and you will observe that they are assigned different bookmarks depending on the AD group (Internal or External) they are members of.
Related Articles
- How to download Client Installation package and the access agents from the appliance using WinSCP
- SMA 1000: How to update Advanced EPC Signatures to the Latest Version
- If OTP is enabled, NX disconnects after SMA100 Connect Agent installation


 YES
YES NO
NO