-
Products
-
SonicPlatform
SonicPlatform is the cybersecurity platform purpose-built for MSPs, making managing complex security environments among multiple tenants easy and streamlined.
Discover More
-
-
Solutions
-
Federal
Protect Federal Agencies and Networks with scalable, purpose-built cybersecurity solutions
Learn MoreFederalProtect Federal Agencies and Networks with scalable, purpose-built cybersecurity solutions
Learn More - Industries
- Use Cases
-
-
Partners
-
Partner Portal
Access to deal registration, MDF, sales and marketing tools, training and more
Learn MorePartner PortalAccess to deal registration, MDF, sales and marketing tools, training and more
Learn More - SonicWall Partners
- Partner Resources
-
-
Support
-
Support Portal
Find answers to your questions by searching across our knowledge base, community, technical documentation and video tutorials
Learn MoreSupport PortalFind answers to your questions by searching across our knowledge base, community, technical documentation and video tutorials
Learn More - Support
- Resources
- Capture Labs
-
- Company
- Contact Us
Gen 7: How can I create a DPI-SSL certificate for the purpose of DPI-SSL certificate resigning?


Description
SonicWall DPI-SSL is a proxy for SSL connections, acting as an intermediary to provide secure connections between the client PC and the secure website. The SonicWall DPI-SSL accepts the certificate offered by the secure website and re-signs the certificate before sending it to the client's browser. The SonicWall DPI-SSL services acts as a client when it accepts the secure websites' certificate and then acts as a Certificate Authority (CA) when it resigns the website's certificate before sending it to the PC. To establish trust between the client PC and SonicWall DPI-SSL, the SonicWall DPI-SSL CA certificate must be installed in the client's Trusted Root Certification Authorities store.
Resolution
The SonicWall has two types of certificates
- Certificate for HTTPS management
- The self-signed certificate for HTTPS management is also called the device certificate.
- The self-signed device certificate can be replaced with a signed device certificate.
- The HTTPS management certificate is unrelated to the DPI-SSL CA certificate
- DPI-SSL certificate
- The DPI-SSL CA certificate is used for establishing trust between a client PC and SonicWall DPI-SSL.
- The default SonicWall DPI-SSL CA certificate is used for certificate re-signing.
- In some cases, the customer may decide to replace the default DPI-SSL CA certificate.
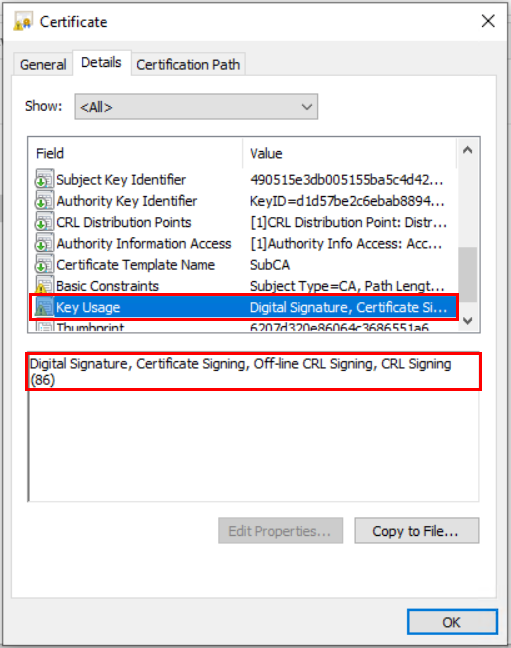
- If you decide to replace the default SonicWall DPI-SSL CA certificate, make sure that the replacement CA certificate must have Certificate Signing or Certificate Re-signing authority.
Here is the Default SonicWall DPI-SSL CA certificate with Key Usage for Certificate Signing
What are my options if I choose to replace the Default SonicWall DPI-SSL CA certificate?
- You cannot request a DPI-SSL CA certificate from a commercial certificate authority.
- Commercial certificate authorities will not issue certificates with Certificate Signing or Certificate Re-signing authority.
- Commercial certificate authorities will not issue certificates with Certificate Signing or Certificate Re-signing authority.
- You can create certificates from a private Certificate Authority Server.
- The customer chooses to implement their own Certificate Authority servers such as a Microsoft Certificate Authority Server or an OpenSSL CA server.
- The customer may also choose to replace the SonicWall self-signed HTTPS management certificate with a certificate issued by their own Certificate Authority server.
- The customer may also choose to replace the default SonicWall DPI-SSL CA certificate, the replacement CA certificate must have Certificate Signing or Certificate Re-signing authority.
Generating a Certificate Enrollment Request (CER)
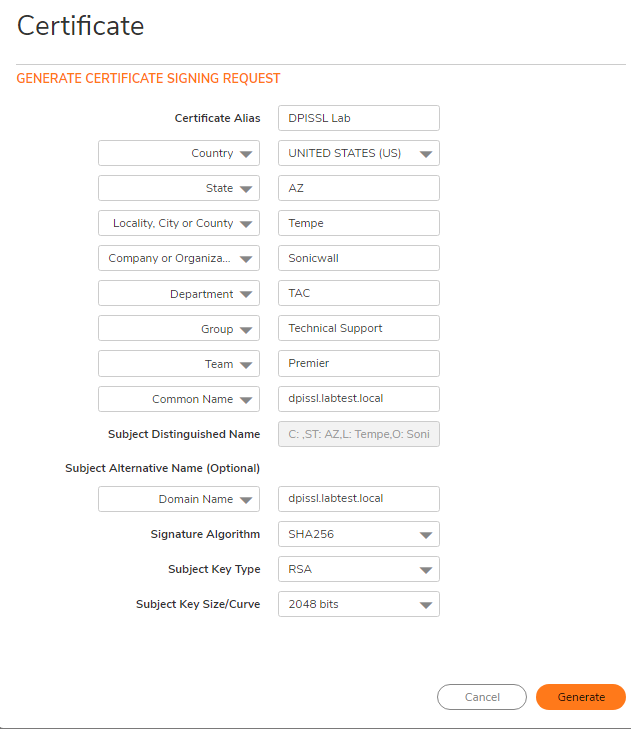
- Navigate to Device | Settings | Certificates and click New signing Request.

2. Complete the Generate Certificate Signing Request form and select Generate.
 NOTE: A minimum of SHA256 and 2048 bits is required.
Export the pending Certificate Enrollment Request (CER)
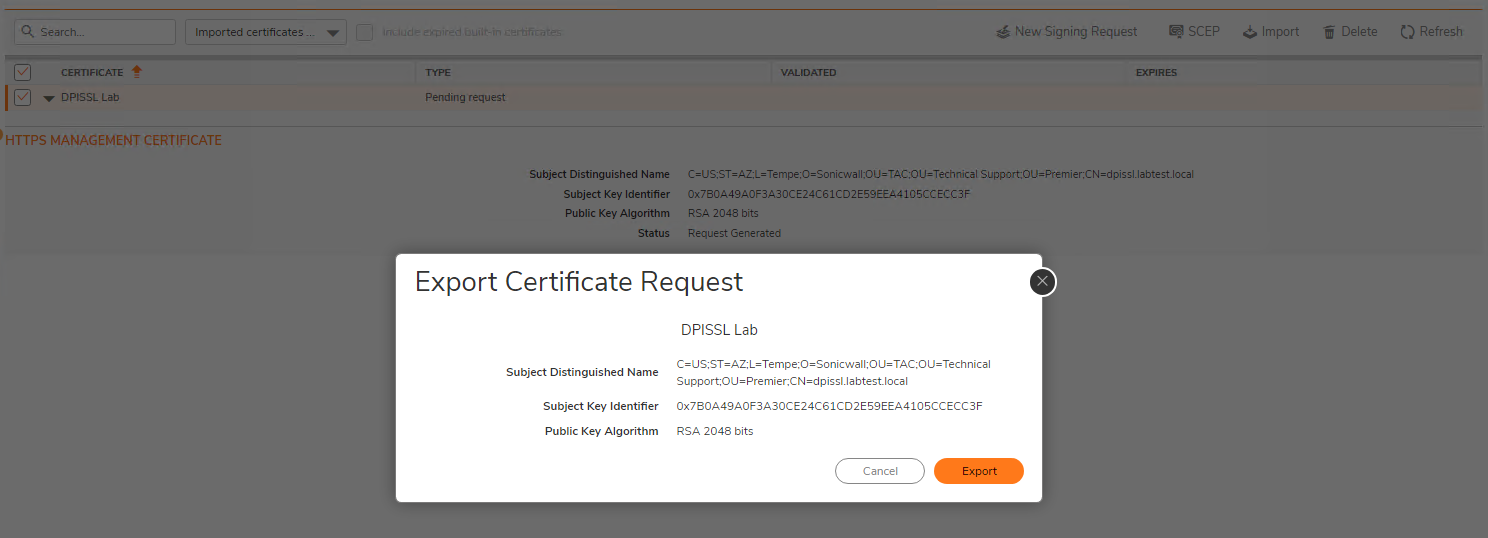
- Navigate to Device | Settings | Certificates and select your certificate pending request Export button.
- Click Export in your Export Certificate Request Popup.
3. Open the export file with notepad for temporary storage
Go to Microsoft CA Server and request a certificate
- Request a certificate.
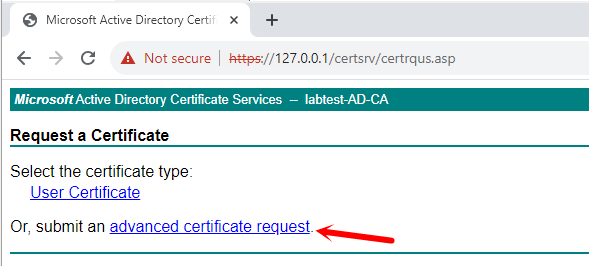
- Submit an advanced certificate request.

3. Click advanced certificate request.
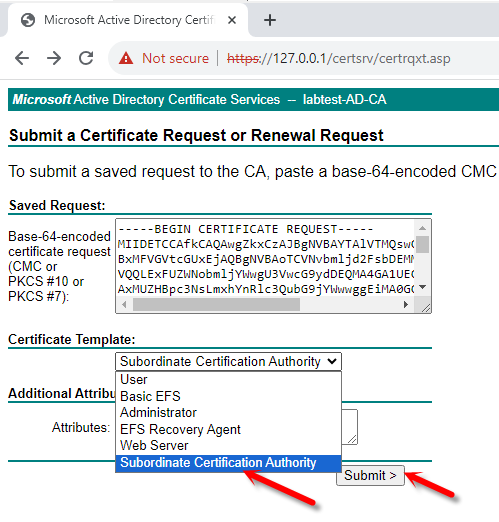
Request a certificate that has re-signing capability and here we are using the "Subordinate Certification Authority" template as an example
- Paste Certificate Enrollment Request text (from your WordPad file) into the Saved Request box.
- In the Certificate Template drop-down menu, select the Subordinate Certification Authority template.
- A Subordinate CA template has certificate re-signing capability.
- Do Not use the Web Server template (This template cannot do re-signing).
- Click Submit.
Download from the Microsoft CA Server and root CA certificate save to a local file
- Select the option Download certificate chain.
- Save the certificate (the file default name is certnew.p7b, rename if needed).
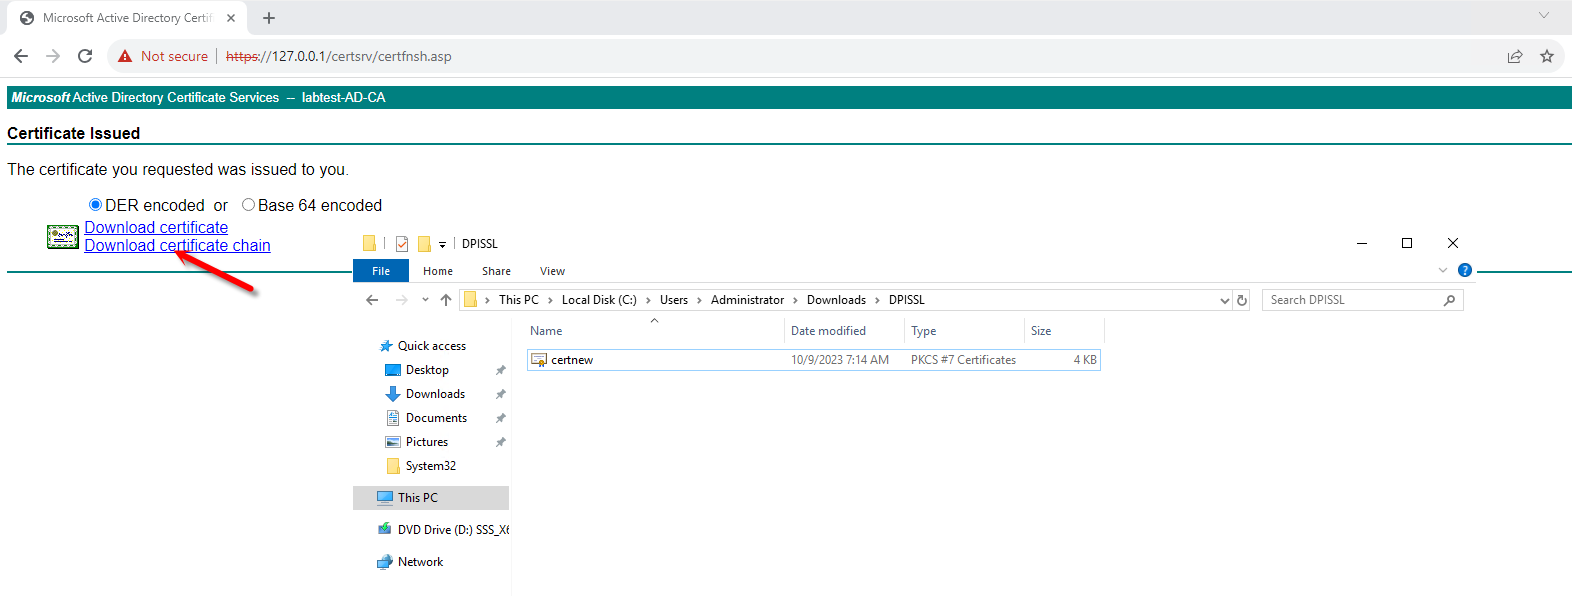
3. Download and save the CA root certificate.

Complete the certificate enrollment on SonicWall by uploading the newly issued certificate
- Navigate to Device | Settings | Certificates and select your certificate pending request Upload button.
- Browse to the new certificate file.
- Select file.
- Upload file.
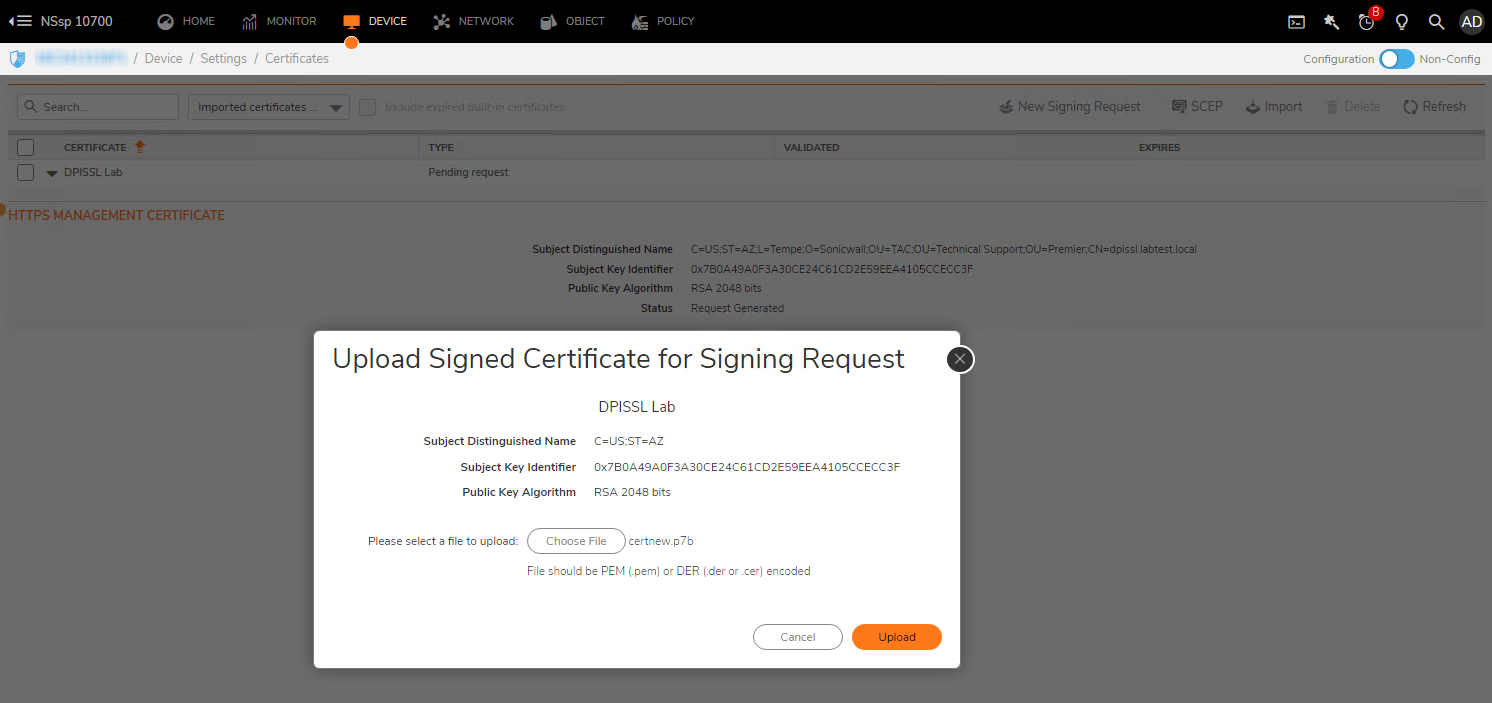
Import the DPI-SSL CA root certificate to SonicWall
- Navigate to Device | Settings | Certificates and select Import.
- Browse to CA certificate file.
- Select file.
- Upload file.
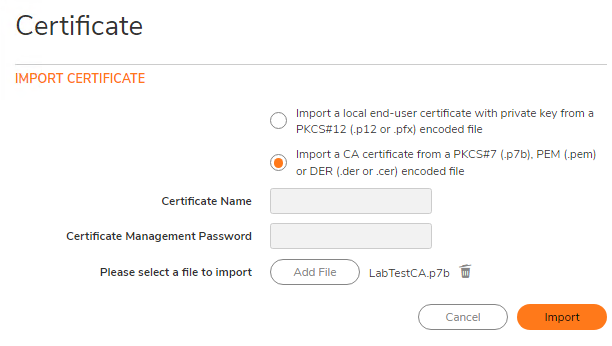
5. Check if the certificate is Validated by the firewall

View the imported certificate under 'Policy | DPI-SSL | Client SSL'
- The newly installed CA certificate is available for DPI-SSL services.

Related Articles
- Error:"Invalid API Argument" when modifying the access rules
- Cysurance Partner FAQ
- Configure probe monitoring for WAN Failover and Loadbalancing - SonicWall UTM


 YES
YES NO
NO