-
Products
-
SonicPlatform
SonicPlatform is the cybersecurity platform purpose-built for MSPs, making managing complex security environments among multiple tenants easy and streamlined.
Discover More
-
-
Solutions
-
Federal
Protect Federal Agencies and Networks with scalable, purpose-built cybersecurity solutions
Learn MoreFederalProtect Federal Agencies and Networks with scalable, purpose-built cybersecurity solutions
Learn More - Industries
- Use Cases
-
-
Partners
-
Partner Portal
Access to deal registration, MDF, sales and marketing tools, training and more
Learn MorePartner PortalAccess to deal registration, MDF, sales and marketing tools, training and more
Learn More - SonicWall Partners
- Partner Resources
-
-
Support
-
Support Portal
Find answers to your questions by searching across our knowledge base, community, technical documentation and video tutorials
Learn MoreSupport PortalFind answers to your questions by searching across our knowledge base, community, technical documentation and video tutorials
Learn More - Support
- Resources
- Capture Labs
-
- Company
- Contact Us
Exporting Configuration in JSON, XML from a SonicWall Firewall


Description
It is often desirable to retrieve the configuration of a firewall from the command line interface (CLI), either in the form of a Tech Support Report (TSR) or selectively (e.g., Access Rules or NAT policies). This article provides a brief description on how to generate configurations selectively in the CLI and store it in a file. The CLI is accessible either via the Terminal (Serial) or using the SSH management (Fig. 1).
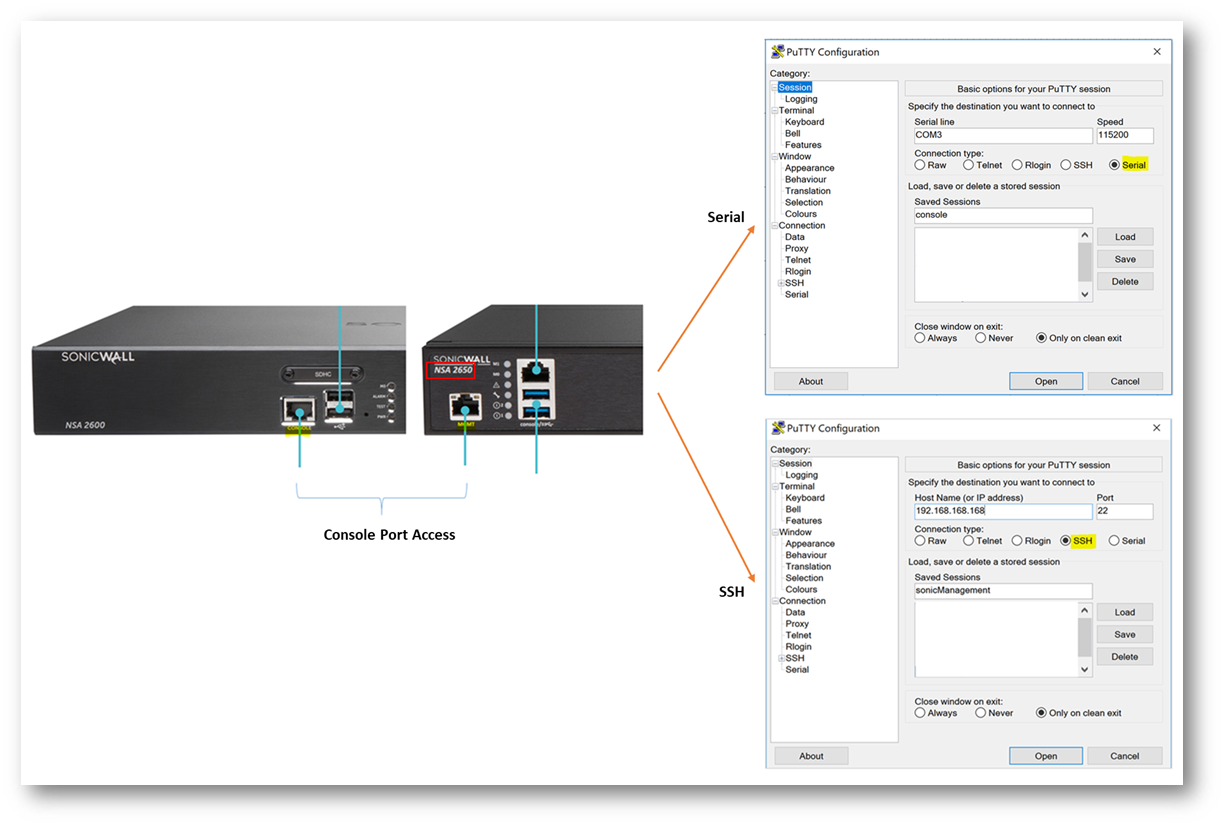
Fig. 1. Accessing CLI from the Terminal (a,b) using the Console/MGMT Port or by SSH (c). Please note that in the newer models such as NSa 2650, a Console Port is labeled as a management port (MGMT).
Terminal Access:
Terminal Access from a computer is achieved by connecting it to the firewall's Console port (Fig. 2) with a serial cable. These are RJ45 (connected to the Firewall) to DB9 (connected to the computer) cables that facilitate serial communication between two devices. Please note that a serial port is often missing on the newer generation of computers. Therefore one may use a Serial to USB adapter.
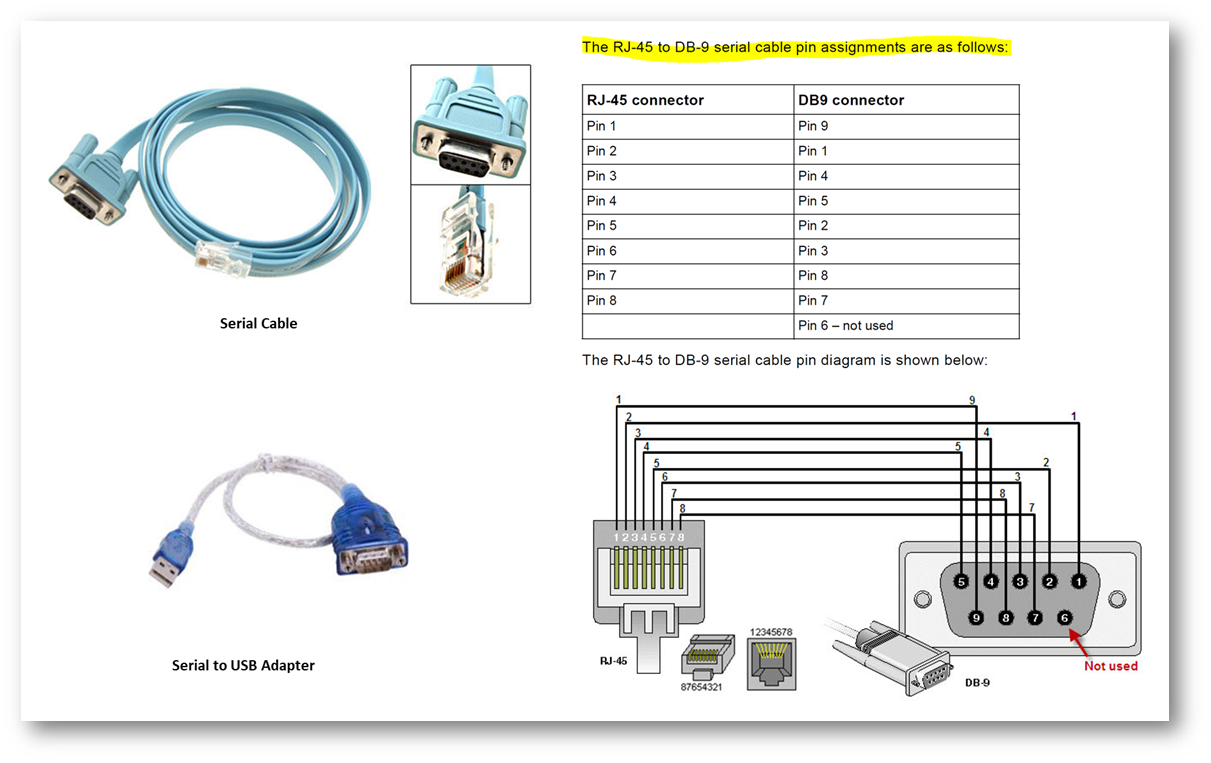
Fig. 2. A Serial Cable used for Terminal Access via the console port. Also shown are the pin configurations and a Serial to USB Adapter.
When one uses a USB adapter, the host computer assigns it a COM port, which can be found, for example, in the Device Manager (CMD: devmgmt.msc) of Windows (Fig. 3).
 Fig. 3. Device Manager in Windows. The USB adapter has been assigned COM3.
SSH Access:
One can access the firewall's CLI by SSH. This requires enabling SSH management on an interface (Network | Interfaces), typically LAN or Management (Fig. 4). SSH access uses an RJ45 cable connection.
 Fig. 4. Setting up SSH access on an interface (Network | Interfaces : e.g., X0).
Using a Software Client:
A common practice to access the CLI is by using a client like Putty. Unix and Linux have SSH built into them. It is important to note that the SonicWall firewalls do not allow one to save files locally, although one may set up an FTP server to upload diagnostic files. A more convenient way to save the outputs from a CLI access is via the LOG file in putty (Fig. 5).
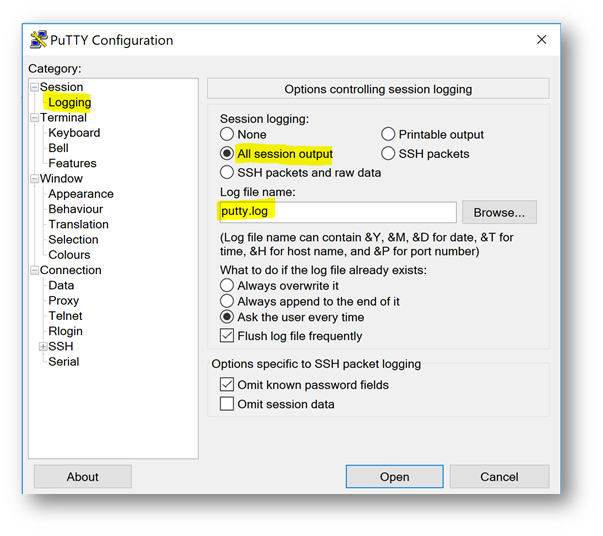
Fig. 5. Setting the putty.log allows one to save all the data from a session.
Based on the type of access- Serial or SSH, the Putty session is configured appropriately (Fig. 6).
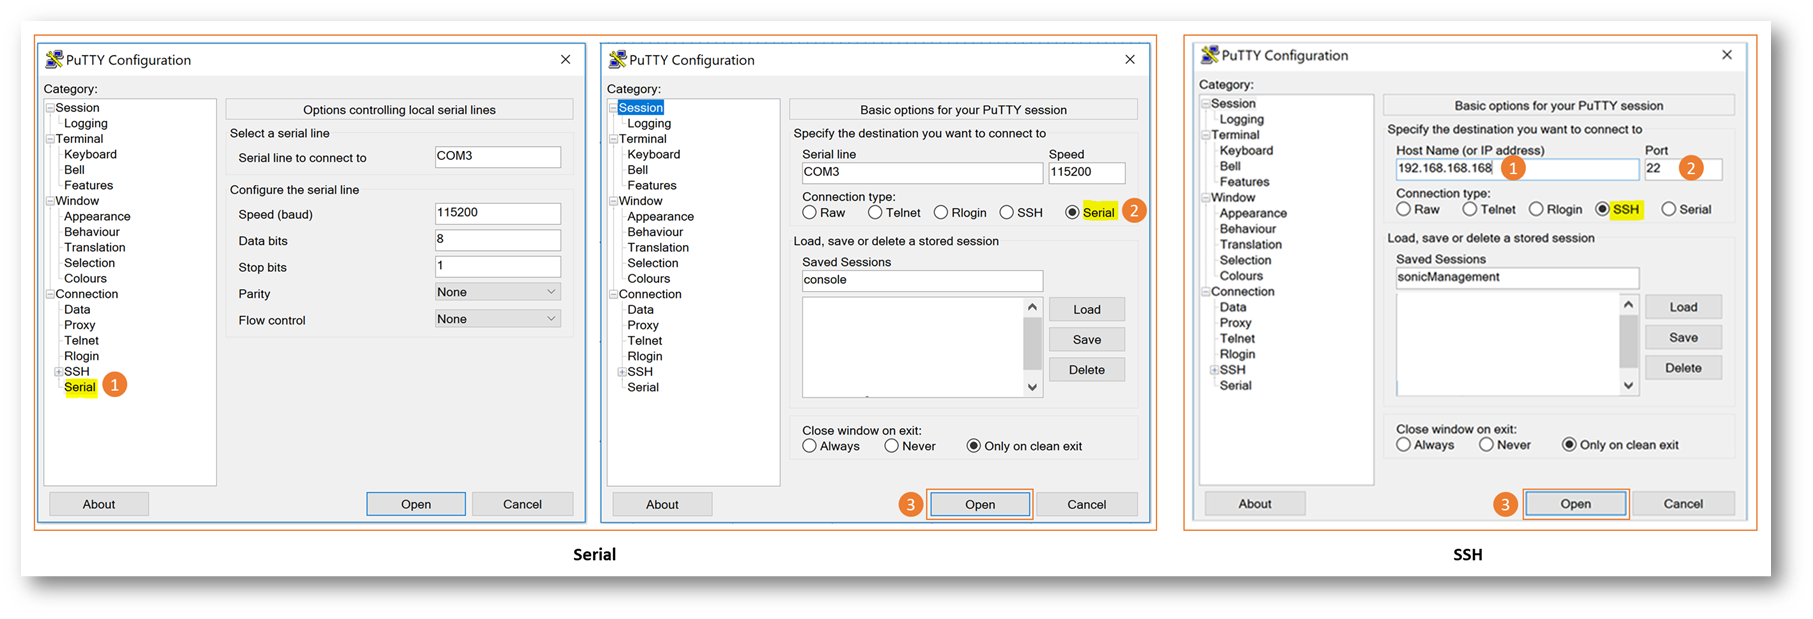
Fig. 6. Serial Access from Putty. Notice the Serial settings (left), which have to be configured before initiating the session.
Resolution
Setting the format of CLI output:
The format of the output from a command can either be set in the command as in Sonic OS 5x (Gen 5, Fig. 7) or globally as in SonicOS 6x (Gen 6, Fig. 8). Please note that in SonicOS > 6.2.0 the only supported modes are plain-text (default) and JSON.
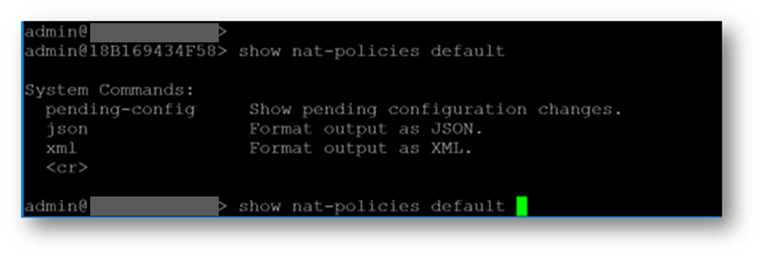
 Fig. 7. Setting up the format of output in Gen 5, e.g., show nat-policies default xml
A global configuration for output format and the output in Gen 6 is shown in Fig. 8.
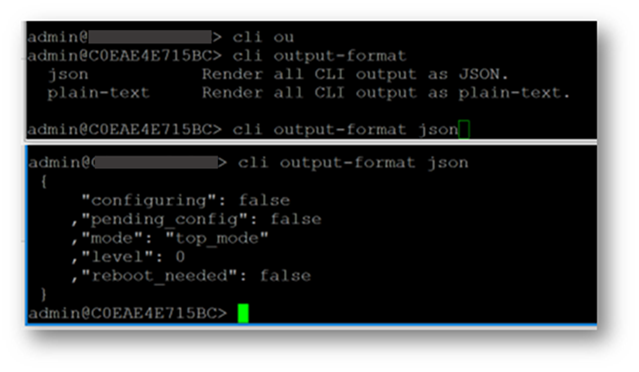

Fig. 8. Setting up JSON as the output format in Gen 6.
As mentioned earlier, the newer versions of Gen 6 do not support xml. One may consider a converter should such format is required (Fig. 9).

Fig. 9. JSON to XML conversion options.
Reviewing the CLI outputs:
As the Putty Session logs all the outputs, the command outputs can be retrieved on a text editor- Note Pad or Note Pad++
Related Articles
- Error:"Invalid API Argument" when modifying the access rules
- Cysurance Partner FAQ
- Configure probe monitoring for WAN Failover and Loadbalancing - SonicWall UTM
Categories
- Firewalls > TZ Series > Command Line Interface - CLI
- Firewalls > SonicWall NSA Series > Command Line Interface - CLI


 YES
YES NO
NO