


-
Products
-
SonicPlatform
SonicPlatform is the cybersecurity platform purpose-built for MSPs, making managing complex security environments among multiple tenants easy and streamlined.
Discover More
-
-
Solutions
-
Federal
Protect Federal Agencies and Networks with scalable, purpose-built cybersecurity solutions
Learn MoreFederalProtect Federal Agencies and Networks with scalable, purpose-built cybersecurity solutions
Learn More - Industries
- Use Cases
-
-
Partners
-
Partner Portal
Access to deal registration, MDF, sales and marketing tools, training and more
Learn MorePartner PortalAccess to deal registration, MDF, sales and marketing tools, training and more
Learn More - SonicWall Partners
- Partner Resources
-
-
Support
-
Support Portal
Find answers to your questions by searching across our knowledge base, community, technical documentation and video tutorials
Learn MoreSupport PortalFind answers to your questions by searching across our knowledge base, community, technical documentation and video tutorials
Learn More - Support
- Resources
- Capture Labs
-
- Company
- Contact Us
Configuring SNMPv3 in SonicOS (5.9/6.1 & above)
 03/26/2020
  66 People found this article helpful
 510,162 Views

Description
Simple Network Management Protocol Version 3 (SNMPv3) is an interoperable Standards- based protocol for network management. SNMPv3 provides secure access to device by a combination of authenticating and encrypting packets over the network.
The security features provided in SNMPv3 are
- Message integrity Ensuring that a packet has not been tampered with in-transit.
- Authentication Determining the message is from a valid source.
- Encryption Scrambling the contents of a packet prevent it from being seen by an unauthorized source.
Before SNMPv3, all data was transmitted in the clear and subject to monitoring and alteration by unauthorized users. Version 3 supports various encryption methods. We recommend users never use DES 56-bit encryption as this is very easy to decrypt. AES 128-bit is the preferred method.
Feature Functions
- Support USM (User-based Security Model, RFC3414) for SNMPv3 .
- Support View-Based Access Control Model (VACM, RFC3415) for SNMPv3.
- Support Administrative Framework (RFC3411) for SNMPv3 .
Feature Limitations
- Does not support notification destinations.
- Does not support proxy relationships.
- Does not support remotely configurable via SNMP operations.
Resolution
Enable SNMP and configure SNMP parameters
Please login to the SonicWall management GUI as admin.
- Navigate to MANAGE | Appliance |SNMP.
- Check the box Enable SNMP.
- Click in the Configure button and supply the parameters for SNMP or keep the default for general configuration.
- Click OK .
- Click ACCEPT .
 NOTE: For the SNMP functionality, the Community name should be the same in the SonicWall and the SNMP monitoring software.
Creating SNMP User, Group & Access
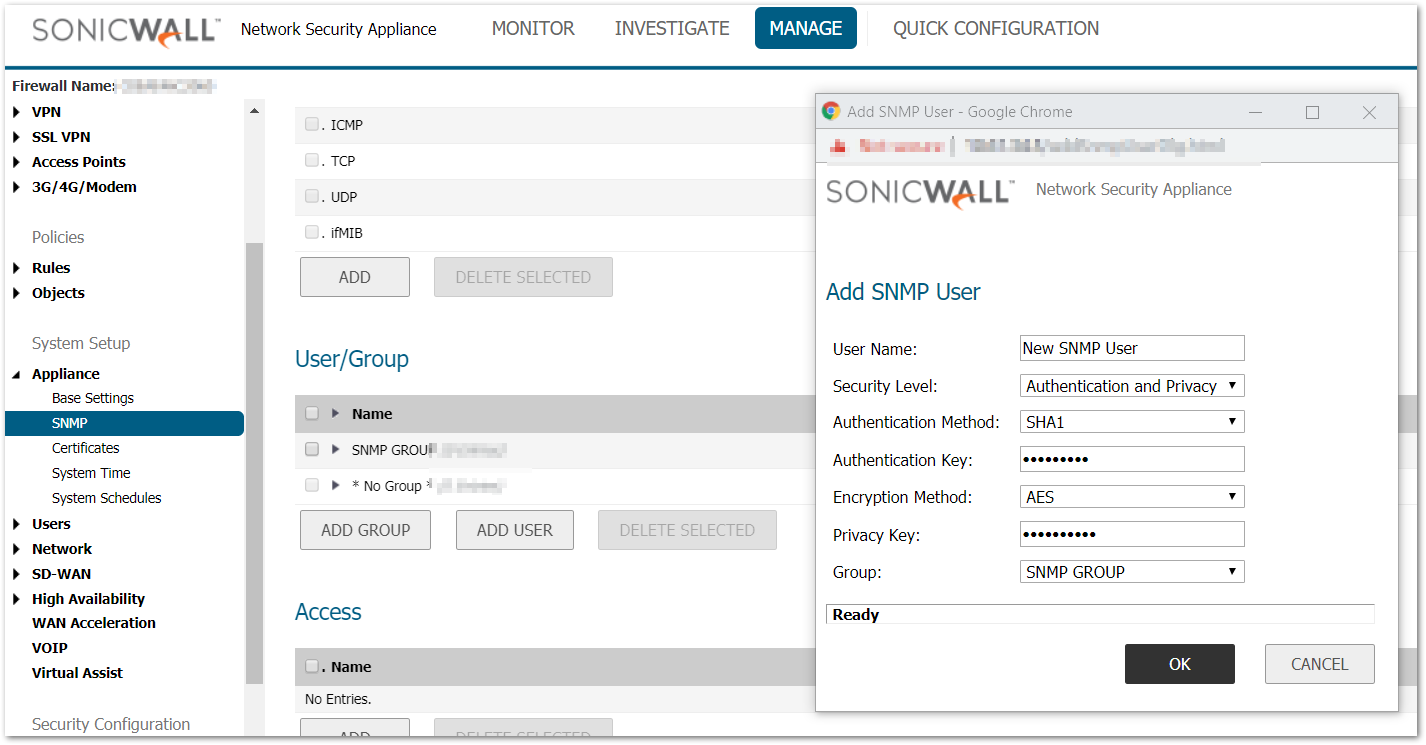
Adding User with Group
- Navigate toMANAGE | Appliance |SNMP, Click Add User button under Users/Group.
- User Name: NEW SNMP User(Type any friendly name which you would like to use for SNMP).
- Security Level: Authentication and Privacy (Select the level which you would like to use).
- Authentication Method: SHA1(Select the method which you would like to use).
- Authentication Key: user12345( type the key which you would like to use But it should be more than 8 characters).
- Encryption Method: AES(Select the method which you would like to use).
- Privacy Key: password123 (type any key which you would like to use).
- Group: SNMP Group (Select the group which you would like to add this user).
- Click OK.
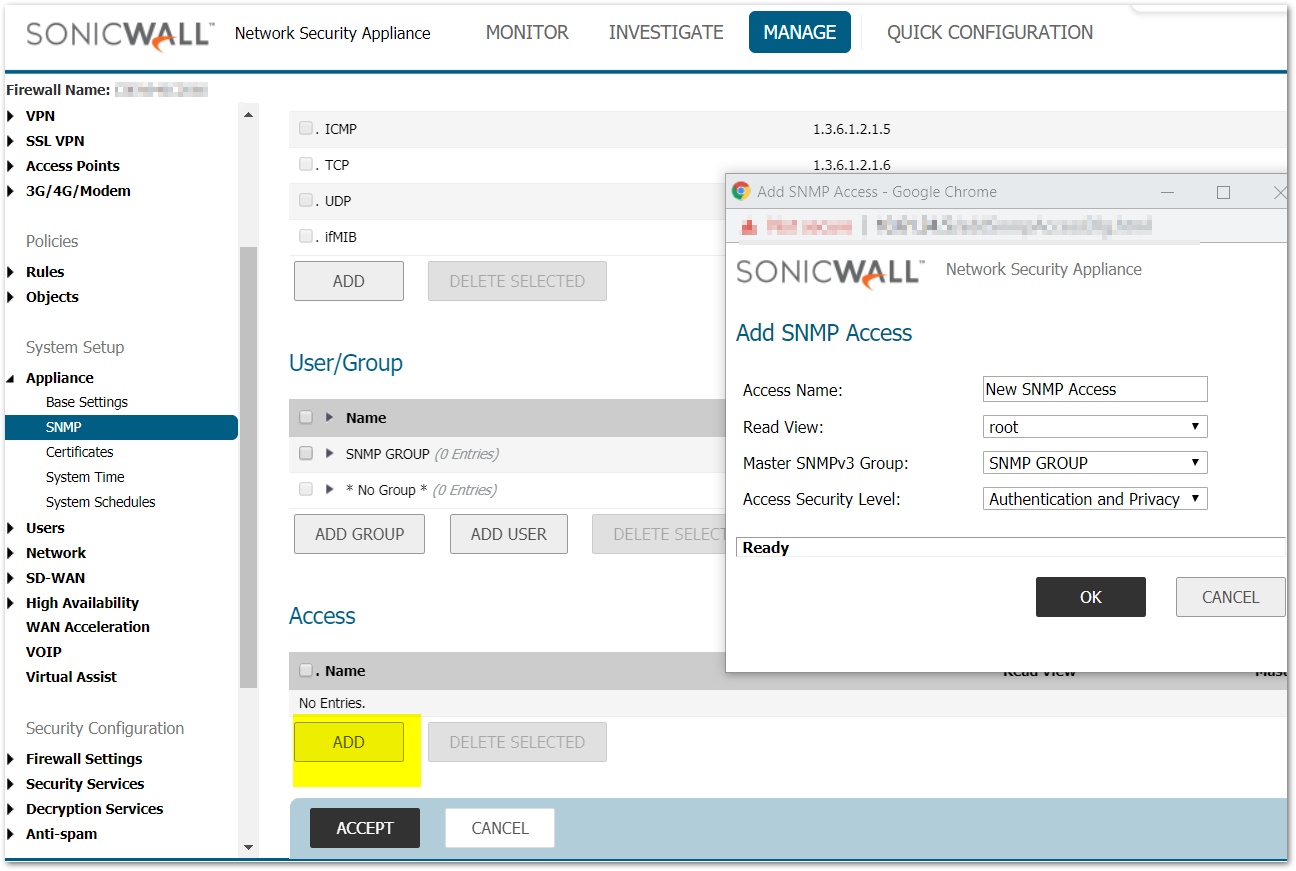
Creating Access for SNMP
- Navigate to MANAGE | Appliance |SNMP Click Add button under Access.
- Access Name: New SNMP Access (Type any name which you would like to use).
- Read View: root .
- Master SNMPv3 Group: SNMP Group (Select any group which you would like to use).
- Access Security Level: Authentication and Privacy (Select the level of security for SNMP).
- Click OK .
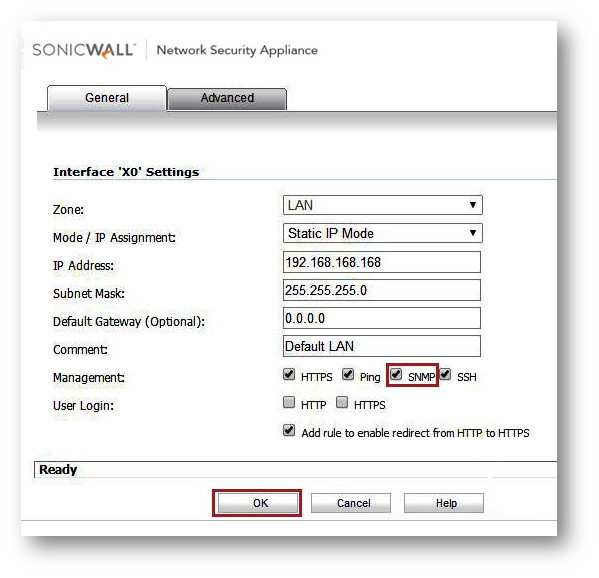
Enable SNMP on the SonicWall interface
Navigate to MANAGE| Network | Interfaces and click on the configure button in front of the LAN & WAN interface.
LAN Interface (X0)
- In the Management' section of Edit X0 interface window, check the SNMP' box.
- Click OK .
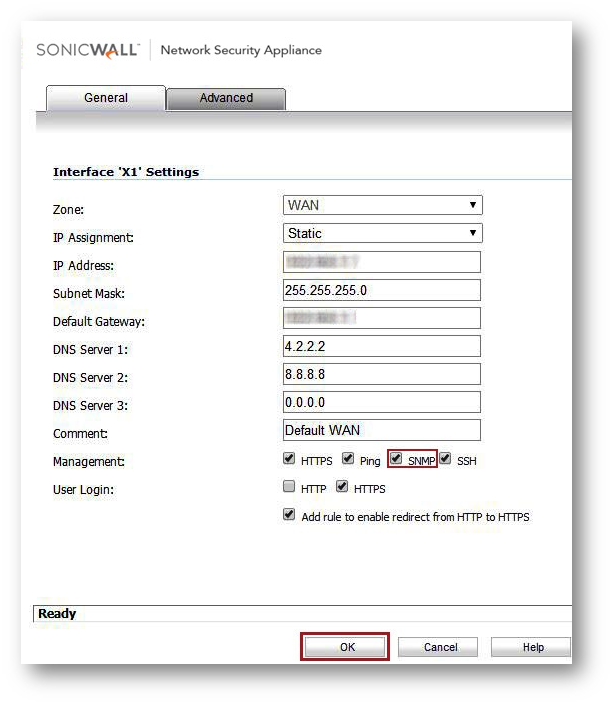
WAN Interface (X1)
- In the Management section of Edit X1 interface window, check the SNMP box.
- Click OK'.
Configuring SNMP & adding SonicWall unit in PRTG Monitoring software
- Open the SNMP software and register the SonicWall. (You can download and install a free edition of PRTG from http://www.paessler.com/prtg/download).
- Screenshots for PRTG (V14.2.9.1689) are attached below, just enter the SonicWall appliance's LAN IP address, along with the community string and it will start gathering data from the SonicWall.
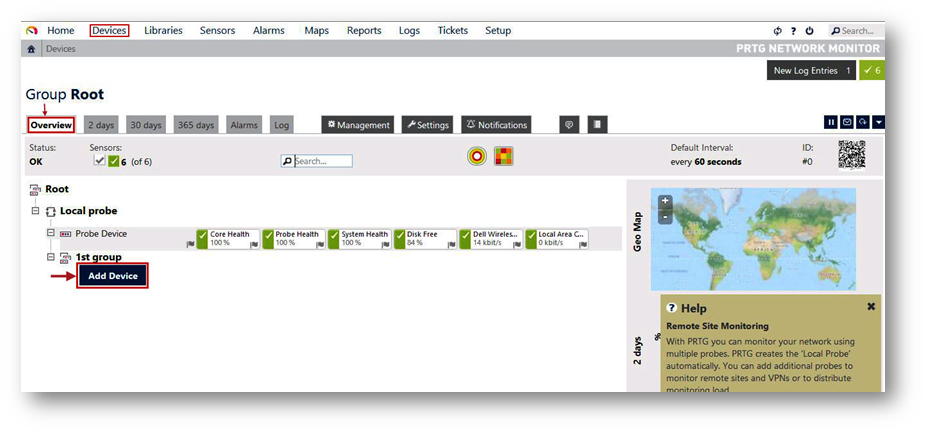
- Select Device tab in the PRTG software. Under Overview Click Add Device button to add your SonicWall device.
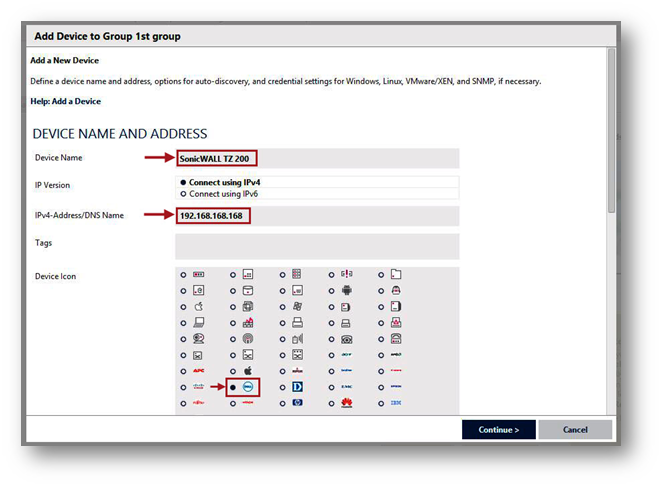
- In the device name enter SonicWall TZ 200 You should use the same name which you used in SNMP configuration of SonicWall.
- In IPV4- Address/DNS Name 192.168.168.168 (IP address of the SonicWall interface to which server is connected).
- Device Icon: Select Icon.
- Click Continue for next step.
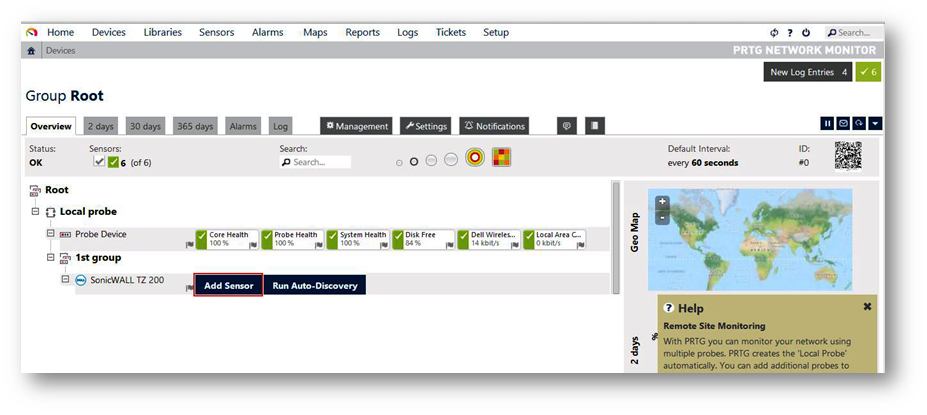
- You will find the new device which we added. Click Add Sensor button to select the sensor type.
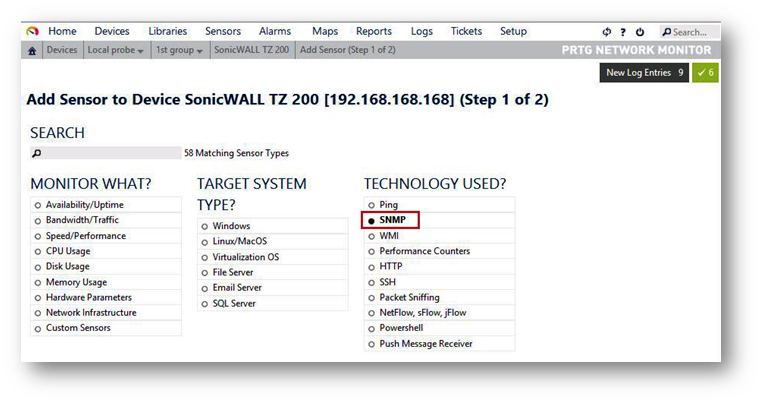
- Select SNMP under Technology Used.
- Select SNMP Traffic under Matching Sensor Type.

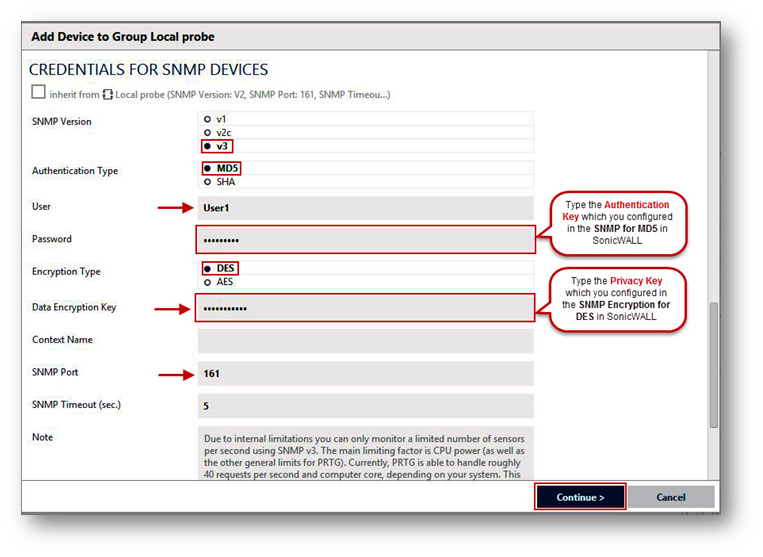
Under Credentials For SNMP Devices
Disable Inherit option and configure SNMP as below
- SNMP Version: V3.
- Authentication Type: MD5 (Select the Authentication method which you configured in SonicWall).
- User: User1 (Type the user which you created in SonicWall).
- Password: user12345 (Type Authentication Key which you configured in SonicWall).
- Encryption Type: DES (Select the Encryption method which you configured in SonicWall).
- Data Encryption Key: password123 (Type the Privacy Key which you configured in SonicWall).
- SNMP Port: 161.
- SNMP Timeout: 5.
- Click Continue button to save the configuration.
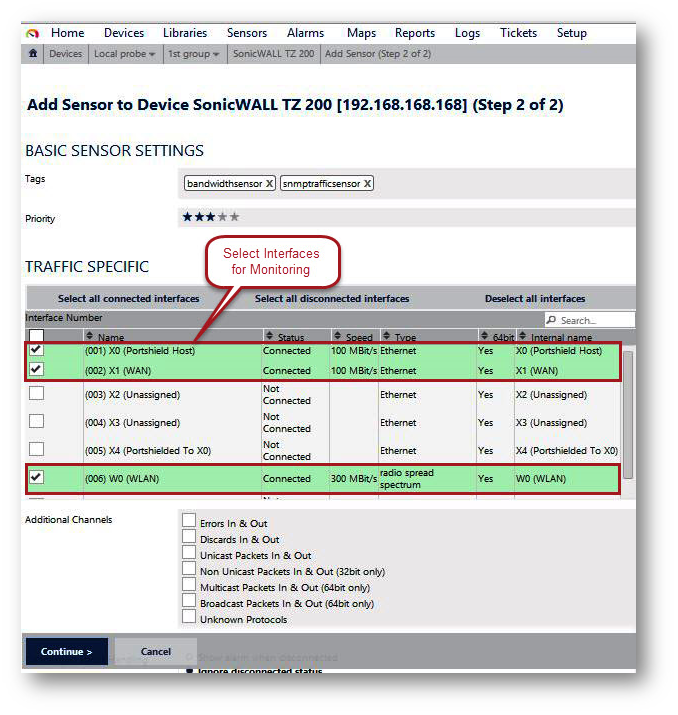
- Select the interface for which you would like to monitor traffic. In this scenario select X0, X1 & W0 interface and click Continue button.
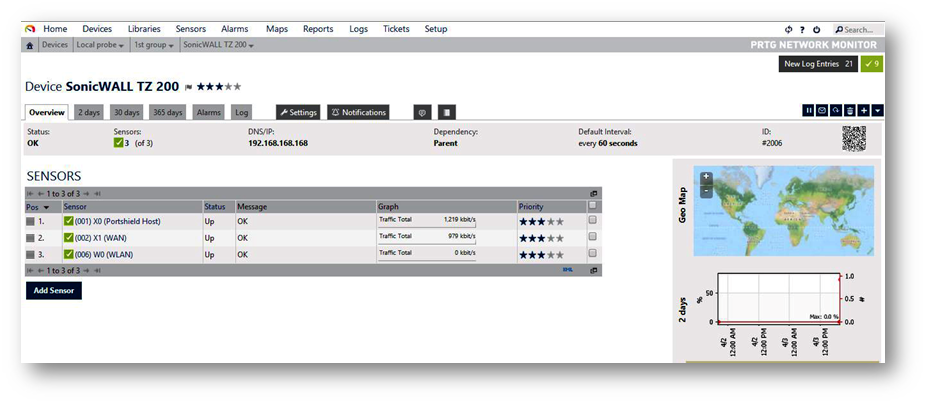
- Now you can see the sensor information for all the interface with the traffic rate.
How to Test
- In order to test the SNMP traffic. Select any one interface to see its traffic rate with graph. Click on X0 interface to see the information as below.
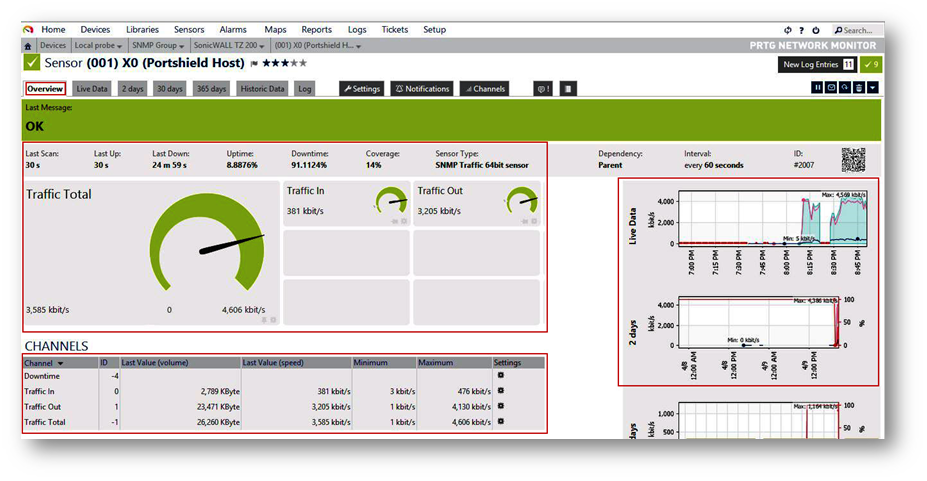
- The Live data can be shown in the graph format as below for the X0 interface.

Related Articles
- Error:"Invalid API Argument" when modifying the access rules
- Cysurance Partner FAQ
- Configure probe monitoring for WAN Failover and Loadbalancing - SonicWall UTM
Categories
- Firewalls > NSa Series > Networking
- Firewalls > TZ Series > Networking
- Firewalls > NSv Series > Networking
 YES
YES NO
NO