-
Products
-
SonicPlatform
SonicPlatform is the cybersecurity platform purpose-built for MSPs, making managing complex security environments among multiple tenants easy and streamlined.
Discover More
-
-
Solutions
-
Federal
Protect Federal Agencies and Networks with scalable, purpose-built cybersecurity solutions
Learn MoreFederalProtect Federal Agencies and Networks with scalable, purpose-built cybersecurity solutions
Learn More - Industries
- Use Cases
-
-
Partners
-
Partner Portal
Access to deal registration, MDF, sales and marketing tools, training and more
Learn MorePartner PortalAccess to deal registration, MDF, sales and marketing tools, training and more
Learn More - SonicWall Partners
- Partner Resources
-
-
Support
-
Support Portal
Find answers to your questions by searching across our knowledge base, community, technical documentation and video tutorials
Learn MoreSupport PortalFind answers to your questions by searching across our knowledge base, community, technical documentation and video tutorials
Learn More - Support
- Resources
- Capture Labs
-
- Company
- Contact Us
Configuring Multicast DNS for Apple (Bonjour) on SonicWall with iOS AirPrint Support


Description
Configuring Multicast DNS for Apple (Bonjour) on SonicWall with iOS AirPrint Support
Resolution
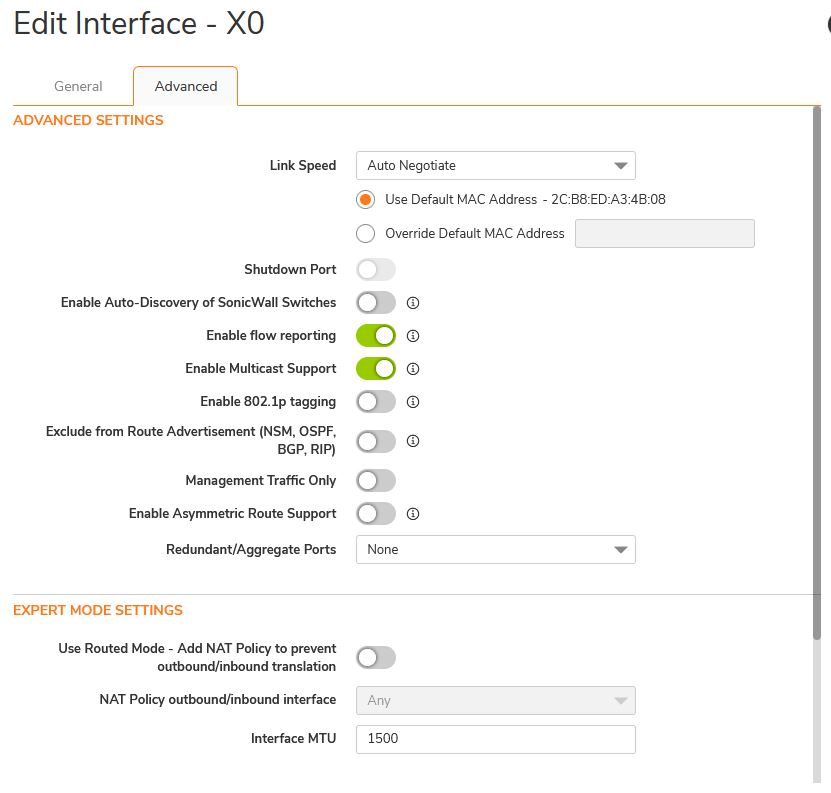
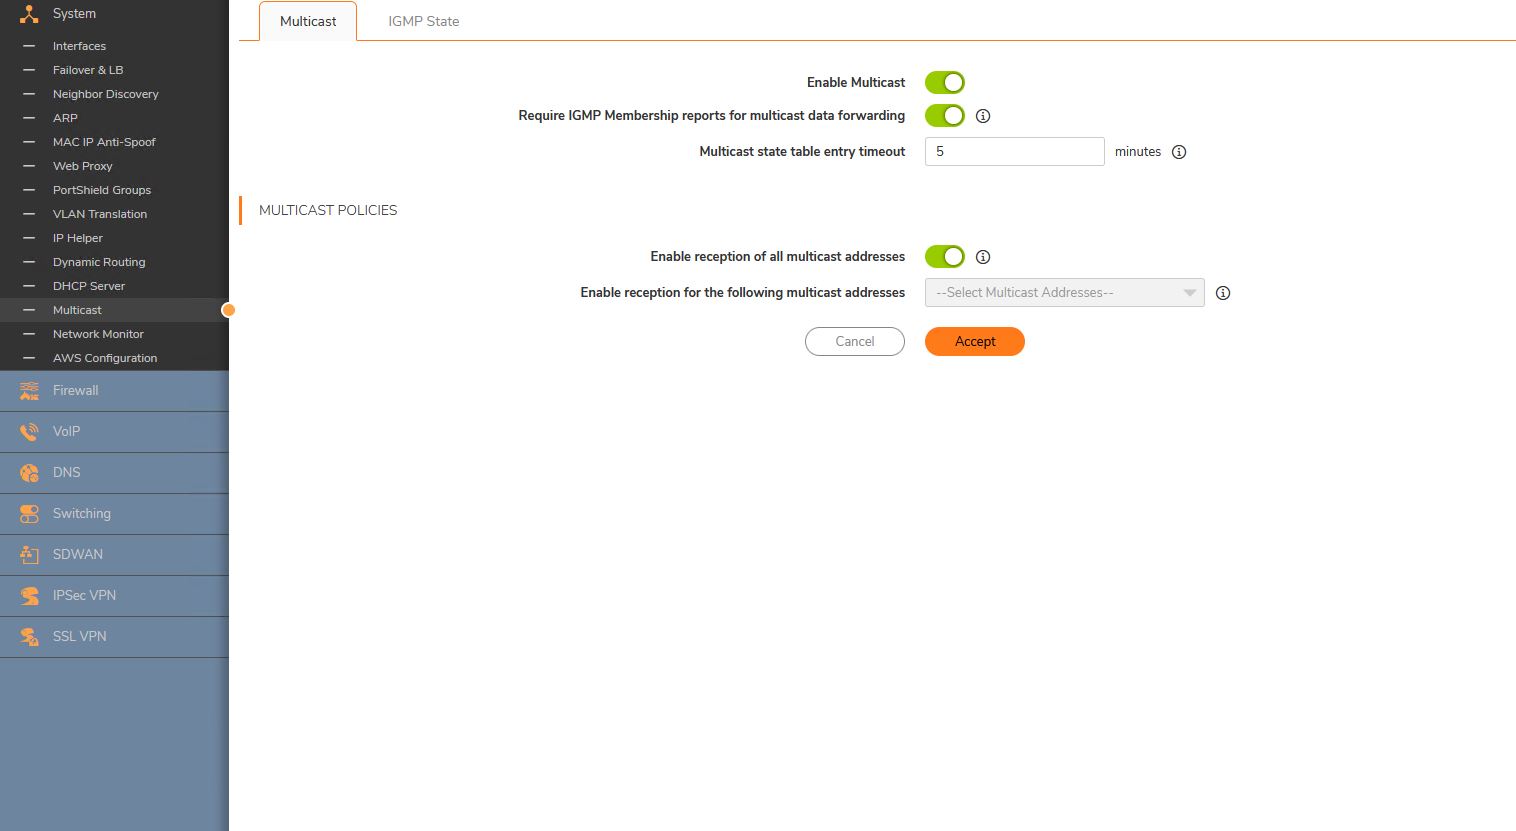
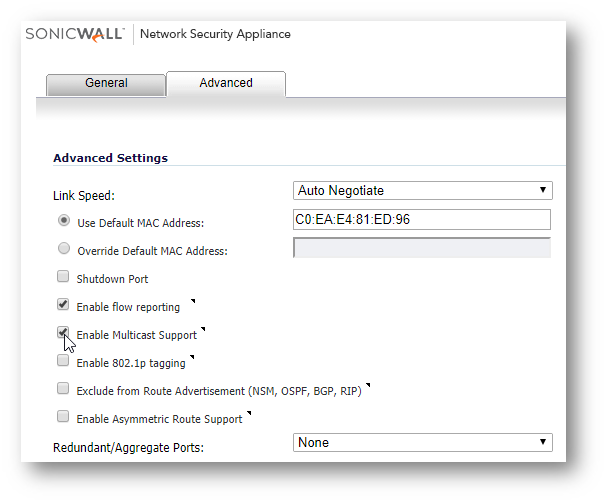
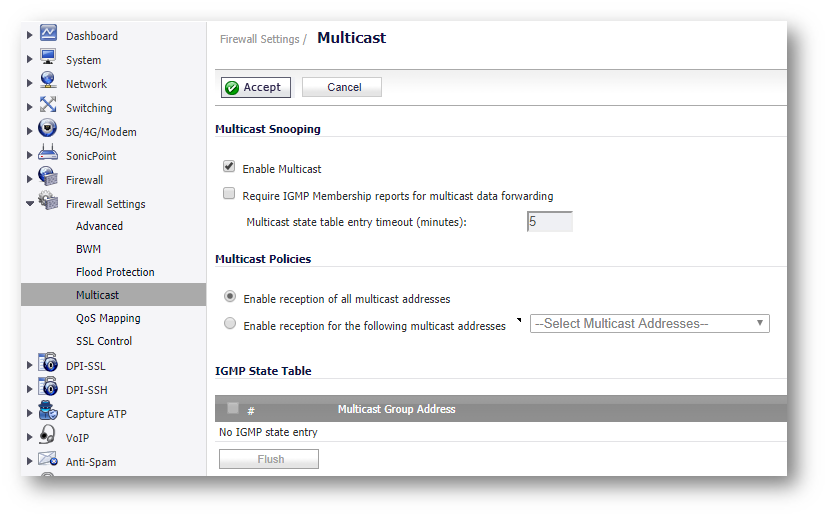
This release includes significant user interface changes and many new features that are different from the SonicOS 6.5 and earlier firmware. The below resolution is for customers using SonicOS 7.X firmware. Step 1: Configure each interface to support Multicast. Step 2: Configure the Global Multicast settings. Step 3: Change the default Deny WLAN to Multicast rule from Deny to Allow. This release includes significant user interface changes and many new features that are different from the SonicOS 6.2 and earlier firmware. The below resolution is for customers using SonicOS 6.5 firmware. Step 1: Configure each interface to support Multicast. The end result looks like this: As noted above, access rules are needed for traffic to flow between WLAN and LAN, so as long as the appropriate allow rules are in place, the iOS device should now be able to discover the printer and should be able to print successfully. Resolution for SonicOS 7.X


Resolution for SonicOS 6.5


See notes section for more information.
Notes:
To add AirPrint support, NAT Policies must be created to translate traffic to/from the Printer so it appears to be on the same subnet as the iOS devices. Apple's documentation states that the printer and the iOS device must be on the same network, and bridging the WLAN to the LAN is not supported on Gen 4. NAT Policies are a great workaround to these limitations.
Related Articles
- Error:"Invalid API Argument" when modifying the access rules
- Cysurance Partner FAQ
- Configure probe monitoring for WAN Failover and Loadbalancing - SonicWall UTM
Categories
- Firewalls > TZ Series
- Firewalls > SonicWall SuperMassive E10000 Series
- Firewalls > SonicWall SuperMassive 9000 Series
- Firewalls > SonicWall NSA Series


 YES
YES NO
NO