-
Products
-
SonicPlatform
SonicPlatform is the cybersecurity platform purpose-built for MSPs, making managing complex security environments among multiple tenants easy and streamlined.
Discover More
-
-
Solutions
-
Federal
Protect Federal Agencies and Networks with scalable, purpose-built cybersecurity solutions
Learn MoreFederalProtect Federal Agencies and Networks with scalable, purpose-built cybersecurity solutions
Learn More - Industries
- Use Cases
-
-
Partners
-
Partner Portal
Access to deal registration, MDF, sales and marketing tools, training and more
Learn MorePartner PortalAccess to deal registration, MDF, sales and marketing tools, training and more
Learn More - SonicWall Partners
- Partner Resources
-
-
Support
-
Support Portal
Find answers to your questions by searching across our knowledge base, community, technical documentation and video tutorials
Learn MoreSupport PortalFind answers to your questions by searching across our knowledge base, community, technical documentation and video tutorials
Learn More - Support
- Resources
- Capture Labs
-
- Company
- Contact Us
Client VPN hanging at acquiring IP using SonicWall DHCP; Drop code "Bad output source IP"


Description
Global VPN Client passes through Phase 1 and Phase 2 but getting stuck at Acquiring IP with DROPPED, Drop Code: 160(Bad output source IP)
This article is valid for both scenarios: using SonicWall DHCP server and an internal DHCP server.
Resolution
Resolution for SonicOS 7.X
This release includes significant user interface changes and many new features that are different from the SonicOS 6.5 and earlier firmware. The below resolution is for customers using SonicOS 7.X firmware.
Configure the DHCP Relay
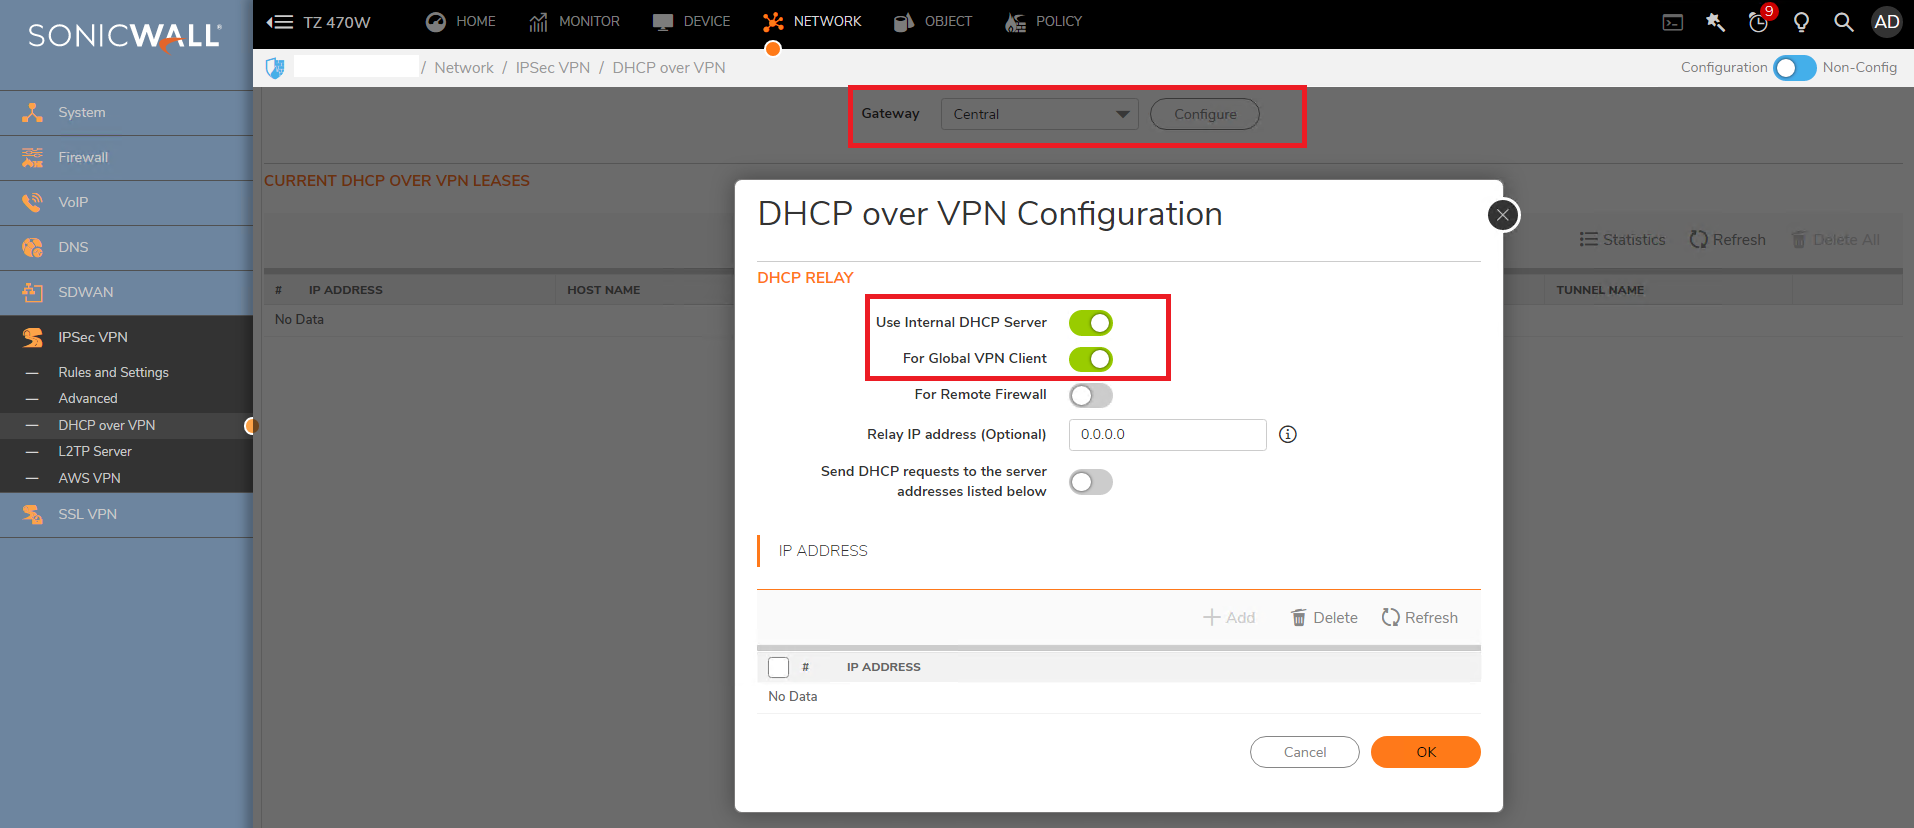
- Login to the SonicWall Management Interface; Navigate to Network | IPSec VPN| DHCP over VPN
- Make sure that Central Gateway is selected and click configure.
- Select Use Internal DHCP Server if SonicWall is the DHCP server. Check the For Global VPN client chekbox to use the DHCP server for Global VPN Clients.
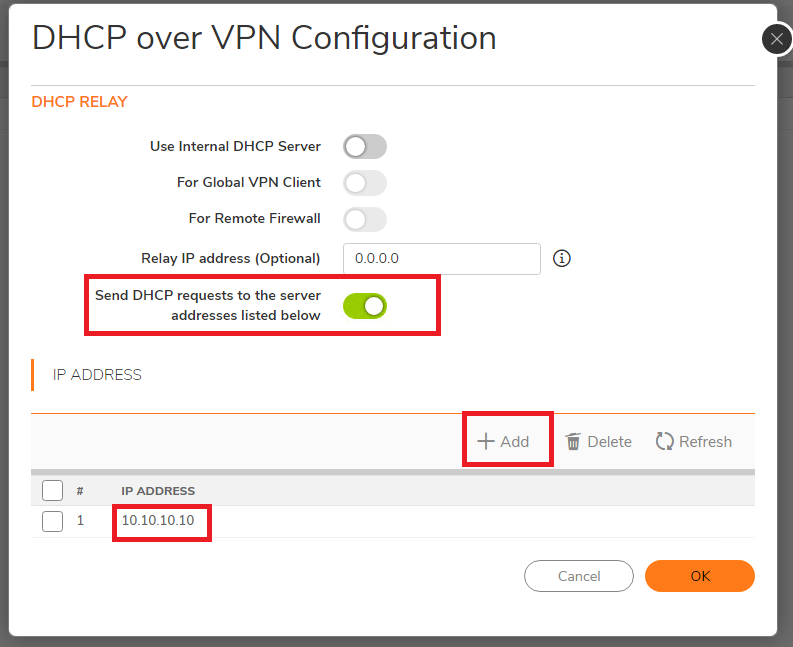
- If you want to send the DHCP requests to specific servers, select Send DHCP requests to the server address listed below. Click Add. Type the IP addressses of the DHCP servers in the IP address field. Click ok. The SonicWall security appliance now directs DHCP requests to the specified servers.
Configure User Accounts following these steps
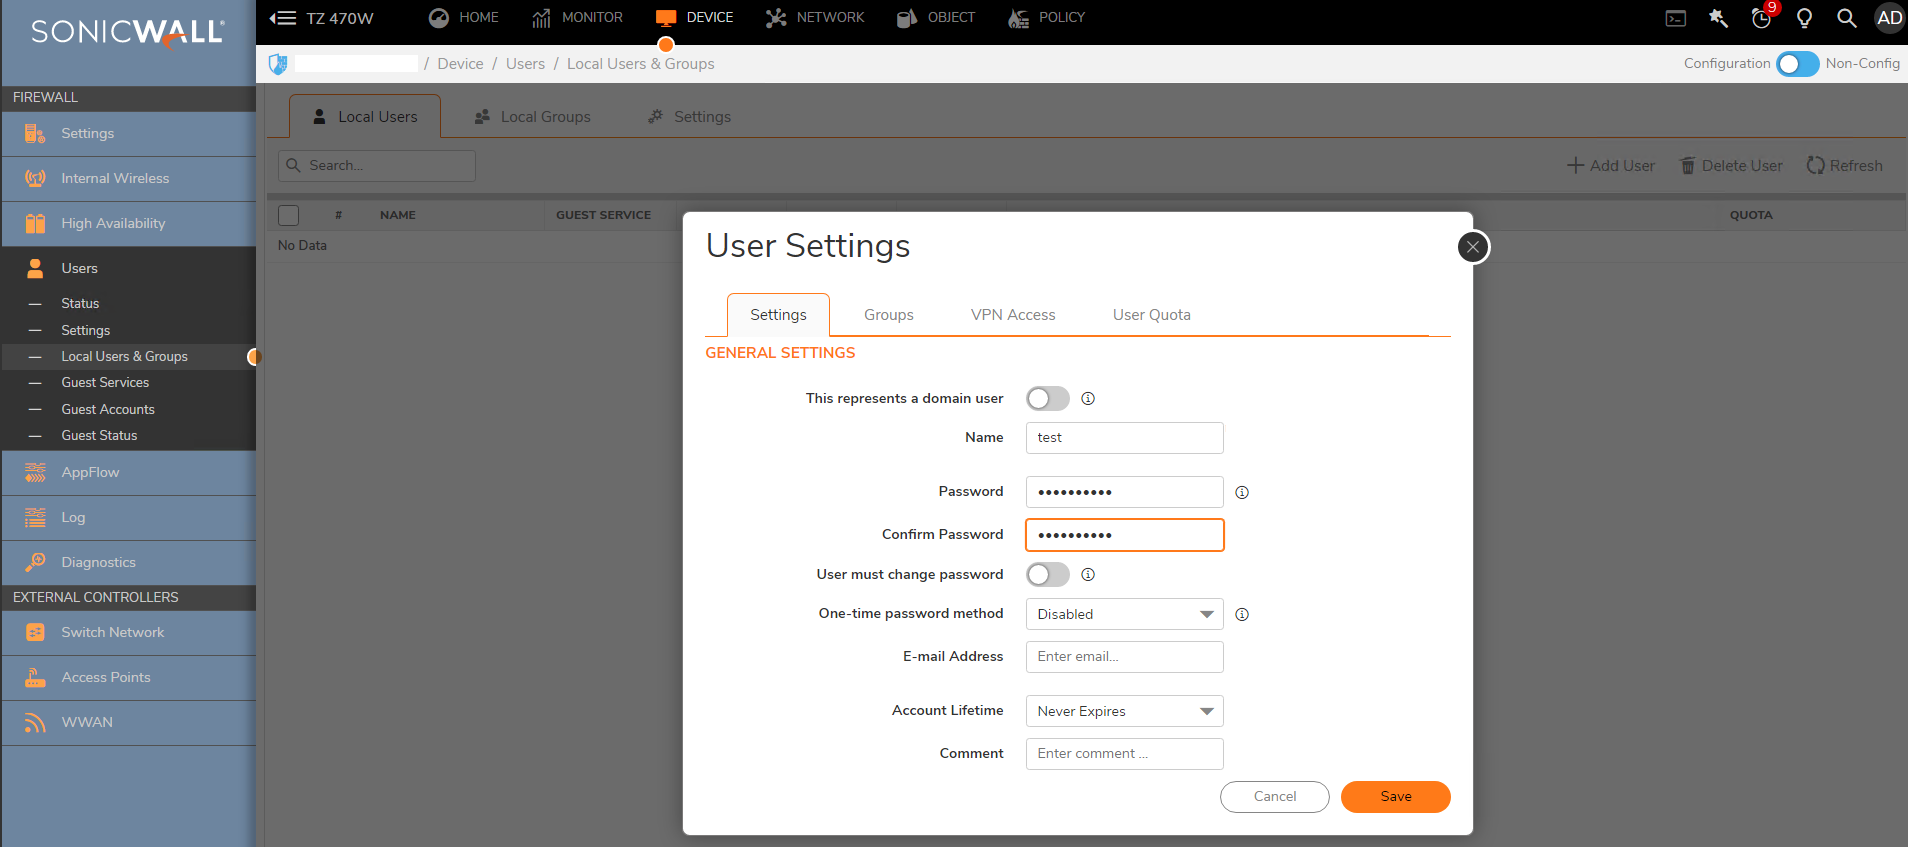
- Navigate to Device | Users | Local Users and Groups
- Click Add.
- Set up the desired name and password under the Settings tab.
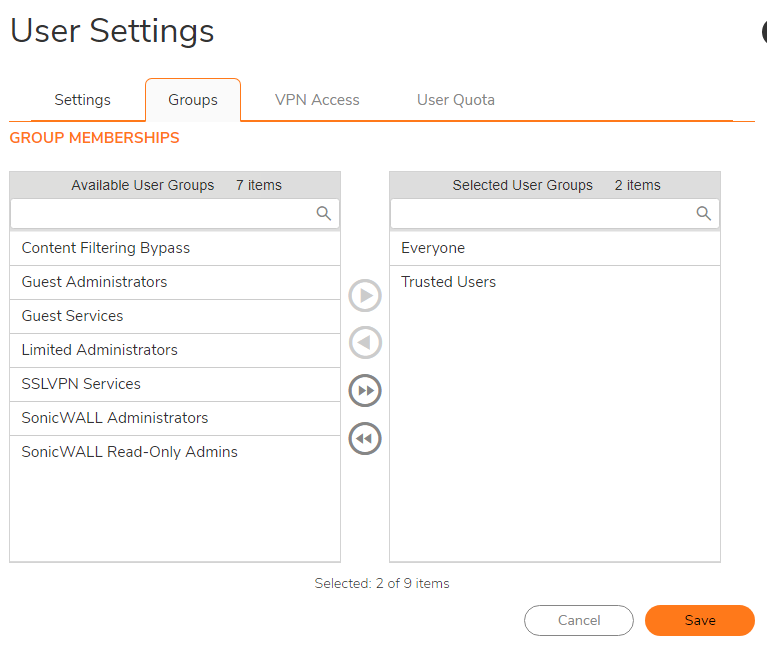
- Go to the Groups tab and set the user as a member of Trusted Users.
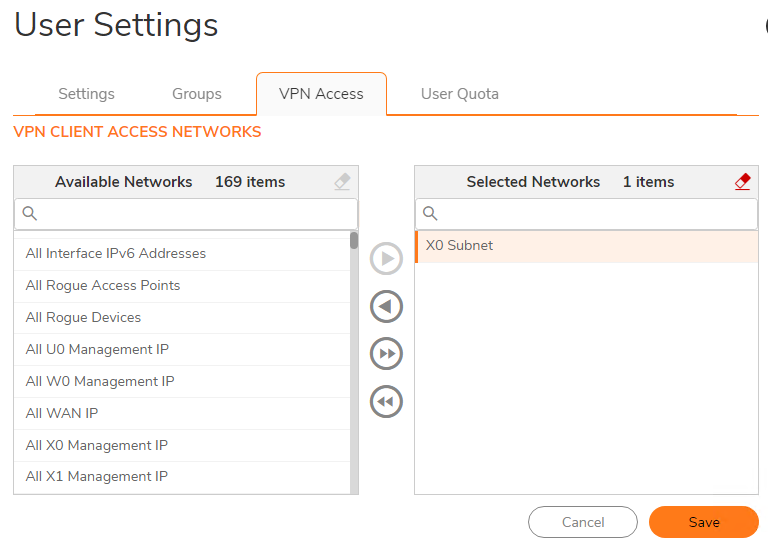
- Go to the VPN access tab and select the subnet the user needs to access.
 EXAMPLE: If you want the GVC users to access VPN networks, add them to the Access list section and Click OK.
6. Ensure that X0 is configured, you can use an unused random IP.
You can Ran a packet capture, to help you better understand the problem because you will have a DROPPED, Drop Code: 160 (Bad output source IP)
Ran the packet capture as follow:
Ether Type: IP
IP Type: UDP
Don't add any IP
Destination port: 67,68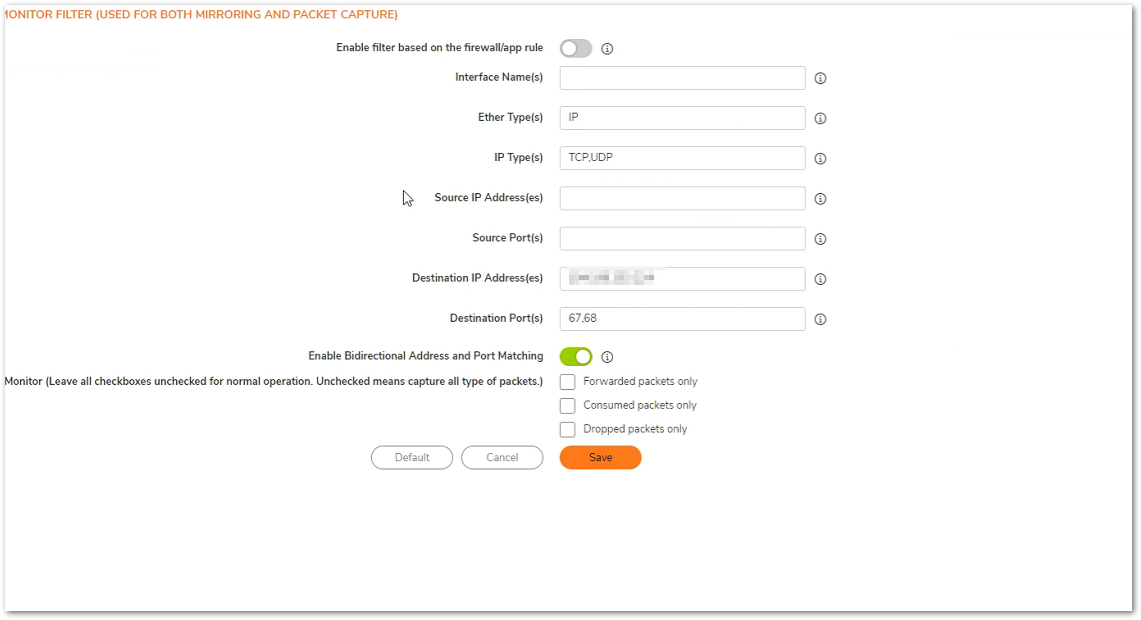
Try connecting to GVC and go back to packet monitor to see the resultYou should have a DROPPED, Drop Code: 160 (Bad output source IP)
In order to resolve this problem you need to configure X0, you can use an unused random IP even if you are not planning to use to manage the firewall.

Resolution for SonicOS 6.5
This release includes significant user interface changes and many new features that are different from the SonicOS 6.2 and earlier firmware. The below resolution is for customers using SonicOS 6.5 firmware.
Configure the DHCP Relay
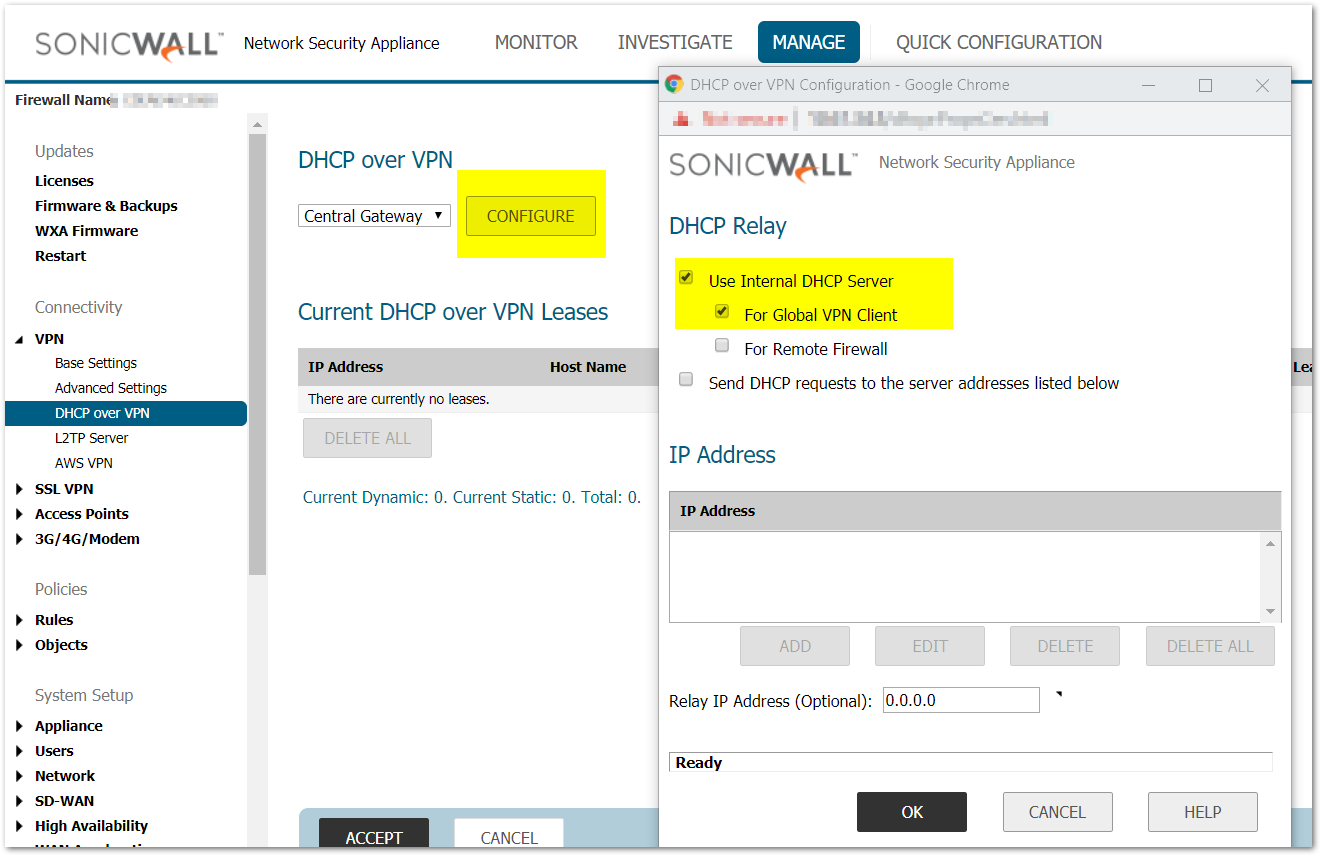
- Login to the SonicWall Management Interface; navigate to MANAGE | VPN | DHCP over VPN.
- Make sure that Central Gateway is selected and click Configure.
- Select Use Internal DHCP Server if the SonicWall is the DHCP server. Check the For Global VPN Client checkbox to use the DHCP Server for Global VPN Clients.
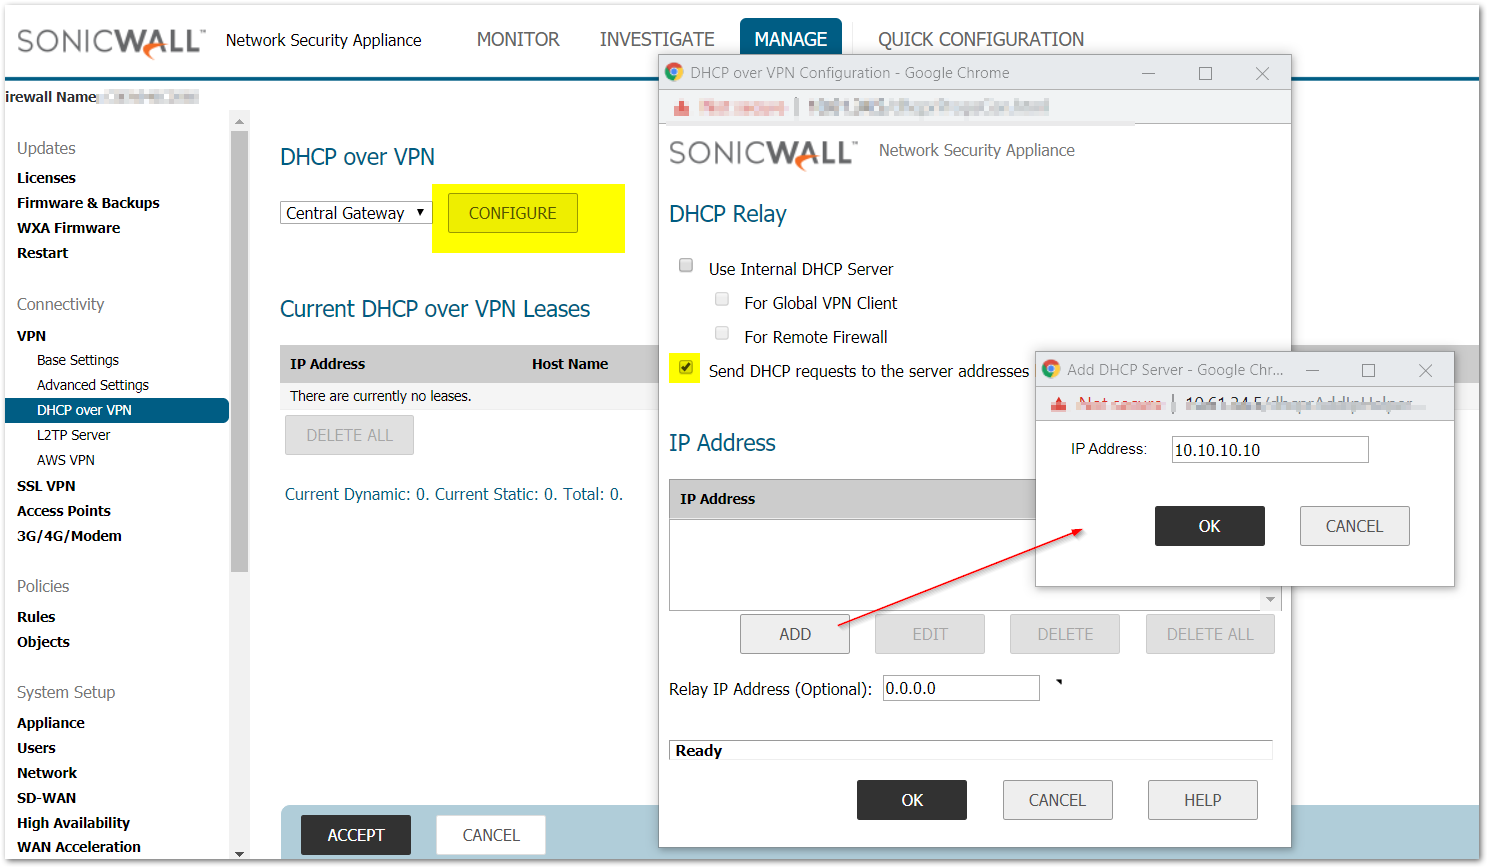
- If you want to send DHCP requests to specific servers, select Send DHCP requests to the server addresses listed below. Click Add. Type the IP addresses of DHCP servers in the IP Address field, Click OK. The SonicWall security appliance now directs DHCP requests to the specified servers.
Configure User Accounts following these steps
- Navigate to MANAGE|Users | Local Users & Groups.
- Click Add.
- Set up the desired name and password under the Settings tab.
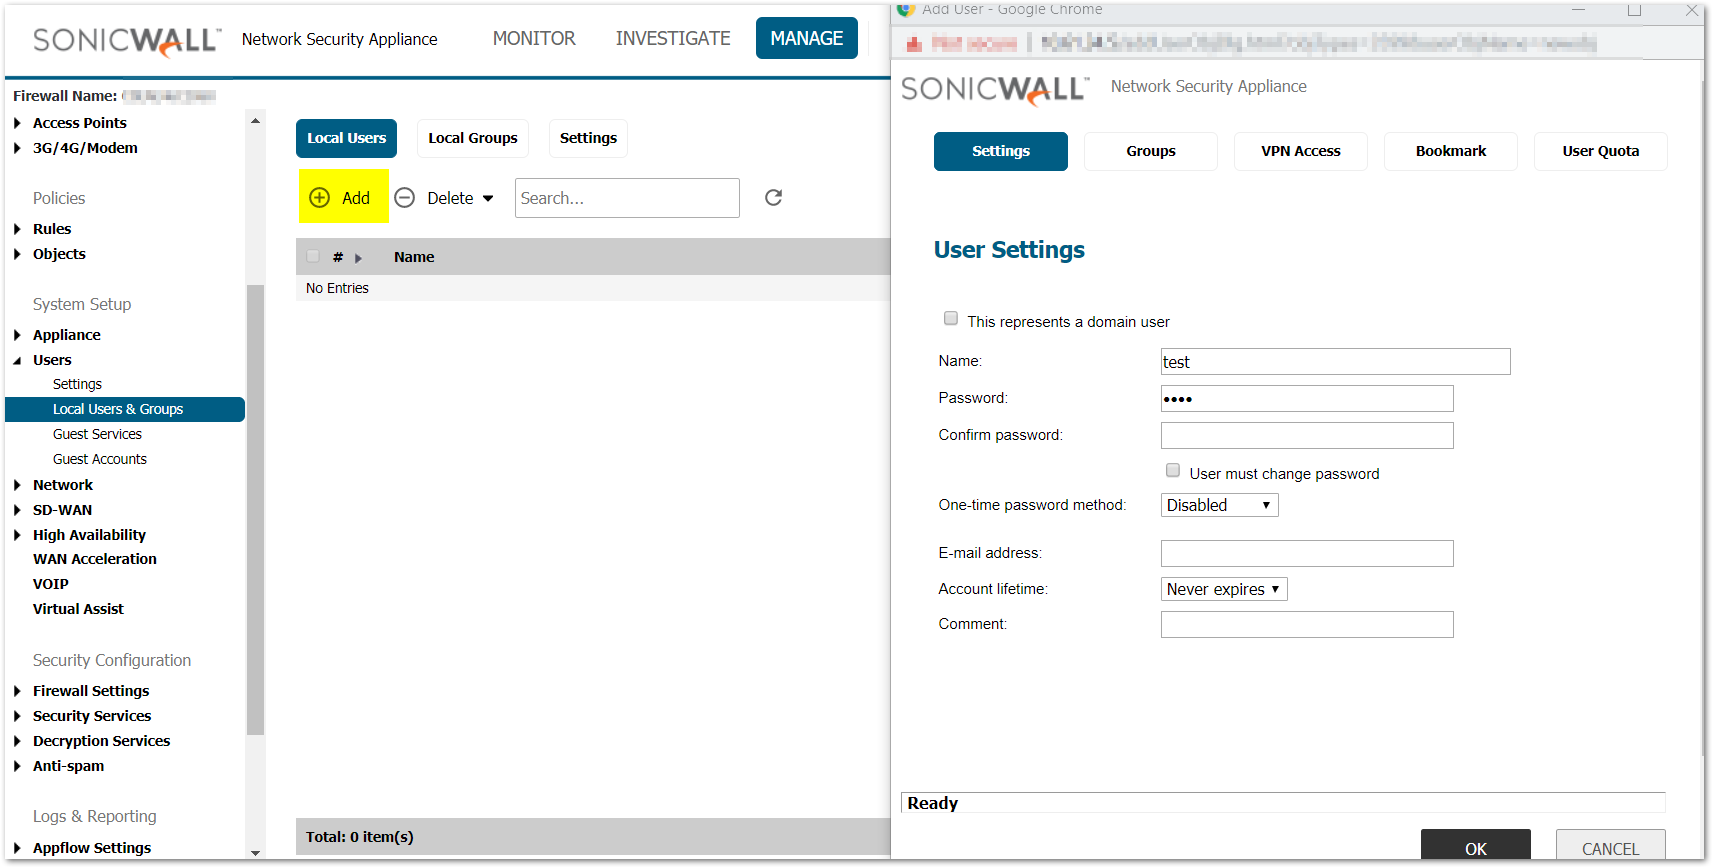
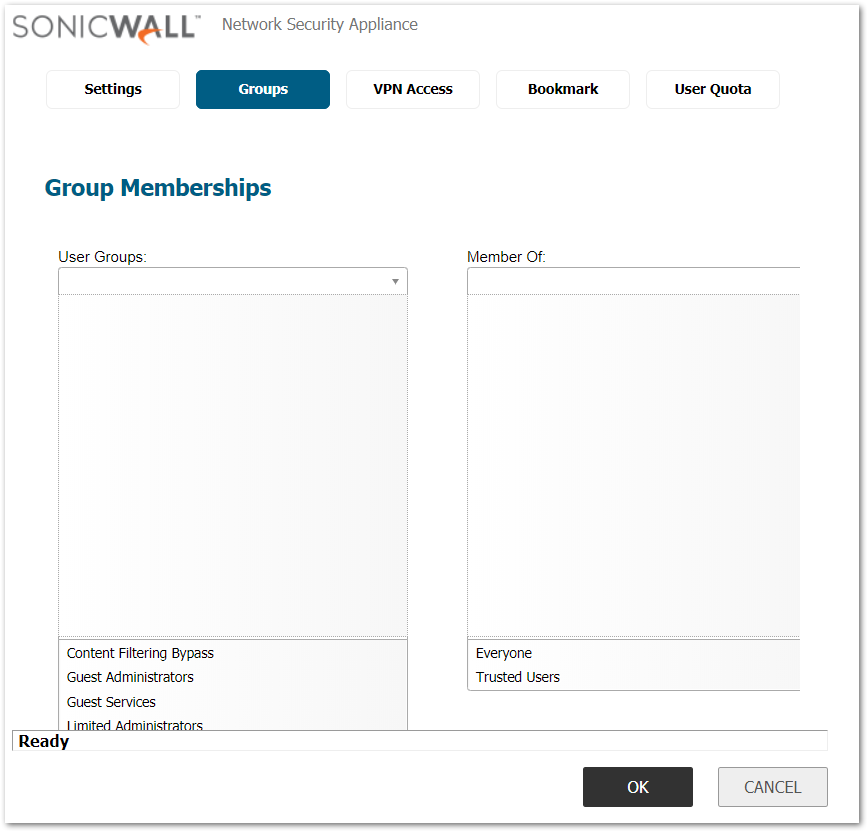
- Go to the Groups tab and set the user as a member of Trusted Users.
- Go to the VPN Access tab and select the subnet the user needs to access.
 EXAMPLE: If you want the GVC users to access VPN networks, add them to the Access List section.
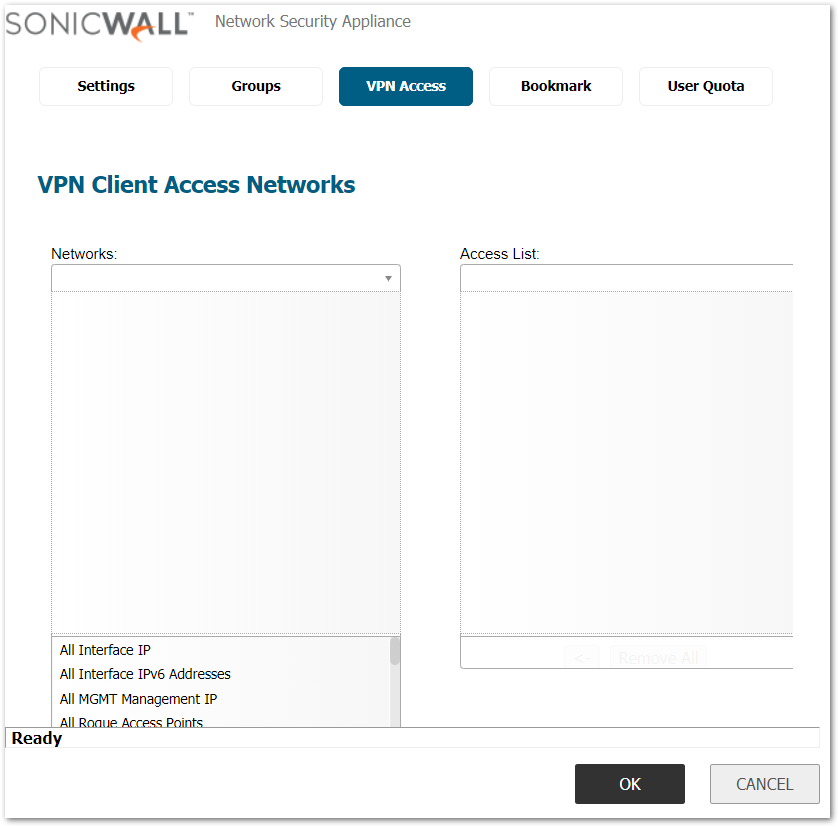
- Click OK.
How to test:
- Install the latest GVC software on the remote user’s computer.
- Launch the Global VPN Client software.
- Click on File | New Connection and Click Next.
- Select Remote Access and click Next.
- Under IP address enter the WAN IP address of the SonicWall, click Next and then Finish.
- Right click on the new connection that is created and click Enable.
- Enter the Pre-Shared Secret for the connection.
- Enter the Username and Password for the connection.
- After entering the Username and Password the adapter will try to acquire an IP address and change to Connected status.
- To check the IP address for the SonicWall Virtual Adapter go to the command prompt on the computer and type the command ipconfig.
Related Articles
- Error:"Invalid API Argument" when modifying the access rules
- Cysurance Partner FAQ
- Configure probe monitoring for WAN Failover and Loadbalancing - SonicWall UTM
Categories
- Firewalls > SonicWall SuperMassive E10000 Series > DHCP Server
- Firewalls > SonicWall SuperMassive 9000 Series > DHCP Server
- Firewalls > TZ Series > DHCP Server
- Firewalls > NSa Series > DHCP Server
- Firewalls > NSv Series > DHCP Server


 YES
YES NO
NO