-
Products
-
SonicPlatform
SonicPlatform is the cybersecurity platform purpose-built for MSPs, making managing complex security environments among multiple tenants easy and streamlined.
Discover More
-
-
Solutions
-
Federal
Protect Federal Agencies and Networks with scalable, purpose-built cybersecurity solutions
Learn MoreFederalProtect Federal Agencies and Networks with scalable, purpose-built cybersecurity solutions
Learn More - Industries
- Use Cases
-
-
Partners
-
Partner Portal
Access to deal registration, MDF, sales and marketing tools, training and more
Learn MorePartner PortalAccess to deal registration, MDF, sales and marketing tools, training and more
Learn More - SonicWall Partners
- Partner Resources
-
-
Support
-
Support Portal
Find answers to your questions by searching across our knowledge base, community, technical documentation and video tutorials
Learn MoreSupport PortalFind answers to your questions by searching across our knowledge base, community, technical documentation and video tutorials
Learn More - Support
- Resources
- Capture Labs
-
- Company
- Contact Us
Cleaning the Capture Client & Client Protection Service Folder from End Device


Description
This article talks about deleting Capture Client & Client Protection Service Folder from End Device. At times it happens that your machine is not shown as part of https://captureclient.sonicwall.com plus Capture Client is not visible under Control Panel after Capture Client is Installed. When you are in such situation and you try to delete the "Client Protection Service" Folder C:\Program Files\SonicWall or "Capture Client" under C:\Program Files(x86)\SonicWall you get a Permission Denied Error. When you are hit with such scenario use the below steps to delete CPS & CC folder in Windows 7 & Windows 10 Machine.
Resolution
The issue was resolved after the ownership of the following folders were changed to add full user permissions ("Everyone"), and then deleted:
1. C:\Program Files\Sonicwall\ Client Protection Service\
2. C:\Program Files (x86)\SonicWall\ Capture Client\
Changing Permission of Folder CC & CPS for Windows 7 (Below Demo is for CPS folder the same applies to CC Folder as well).
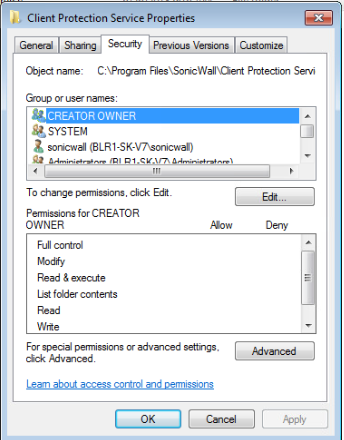
A) Right click the folder and choose "Properties" and the select the "Security Tab" and then click on Advanced Button:-
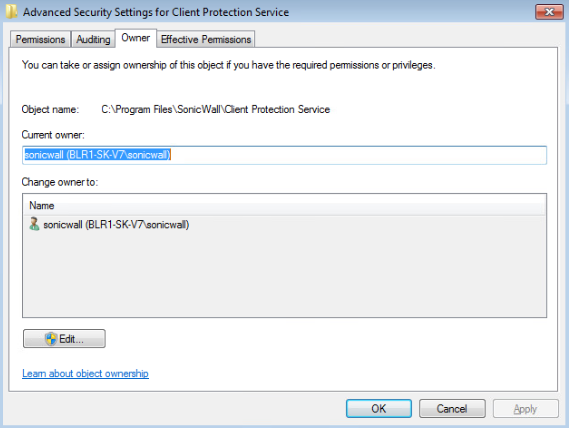
B) Once you are in Advanced Security Settings . Click on the "Owner" Tab and then Click on "Edit" Button:-
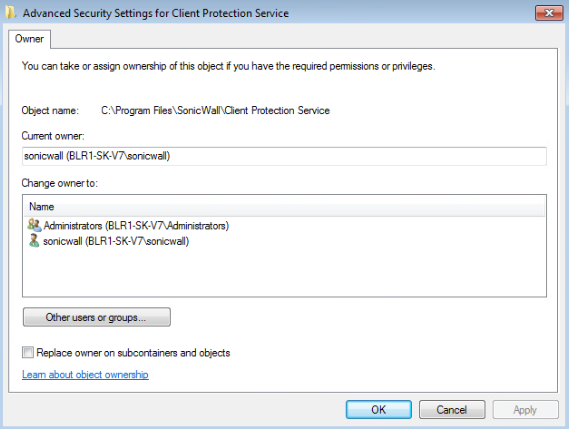
C) When you are on Advanced Security Settings . Click on "Others Users or Groups"
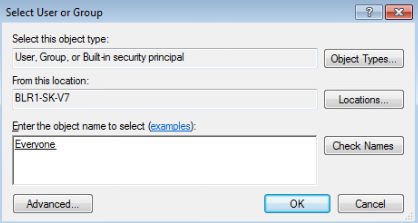
D) Add Object Name "Everyone" as below and then Click "OK".
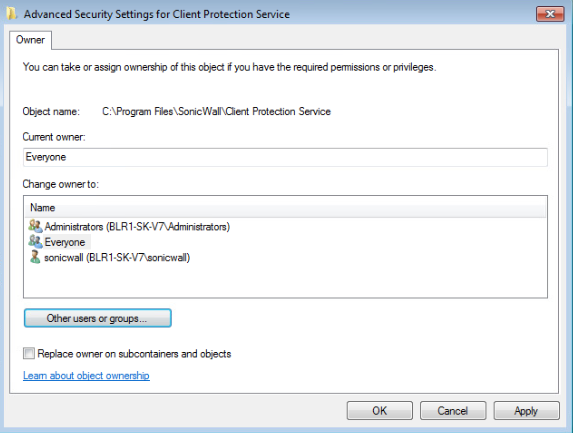
E) Once you are in on Advanced Security Settings . Click "Everyone" and then Check the box "Replace Owners on Subcontainers and Objects". Click on "Apply".
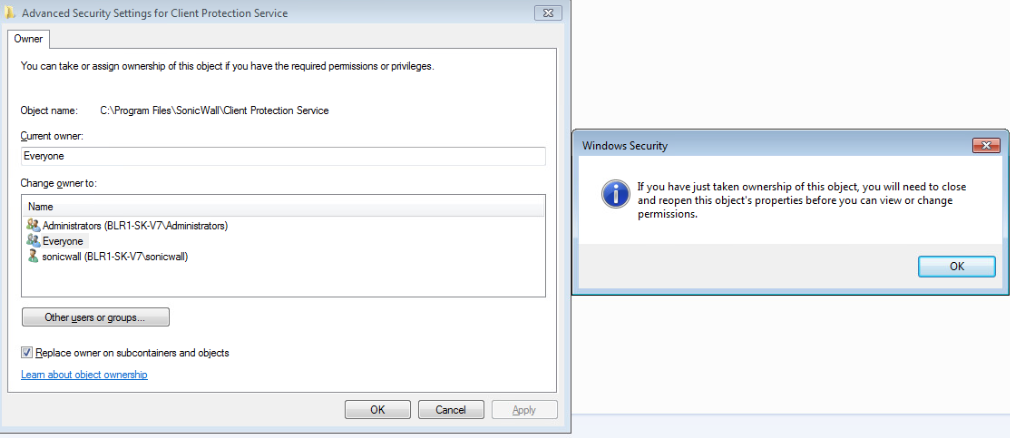
F) You will get a Pop-up for "Windows Security". Click "OK". After that Click "OK" multiple times till you reach "Client Protection Service Properties" Page.
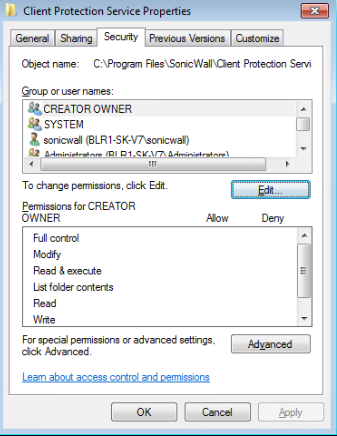
G) The below page shows that you are back to "Client Protection Service Properties". Click "EDIT" below "Group or User Names:"
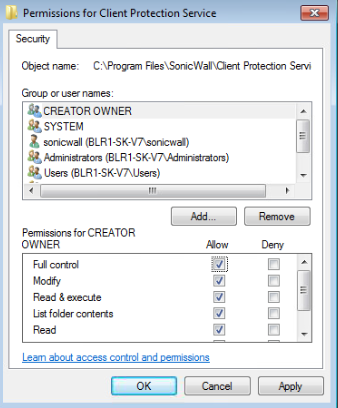
H) Give "Full Control " to all the "Group & User Names" one by one by first selecting the individual "Group or User Names" and then clicking all the "Check Box" below "Allow" and then click Apply. Once you give "Full Control" to all the "Group and User Names". Click "OK" to return to "Client Protection Service Properties" Page.
I) Finally click "OK" when you back to "Client Protection Service Properties" Page.
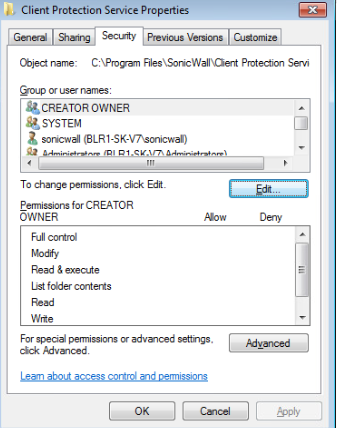
J) Select the CPS folder do right click and choose "Delete" to get rid of the folder.
Changing Permission of Folder CC & CPC for Windows 10 (Below Demo is for CPS folder the same applies to CC Folder as well).
A) Right click the folder and choose "Properties" and the select the "Security Tab" and then click on Advanced Button:-
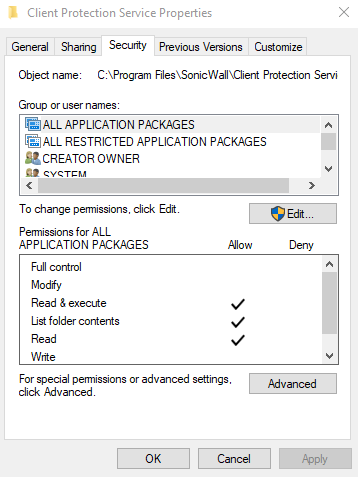
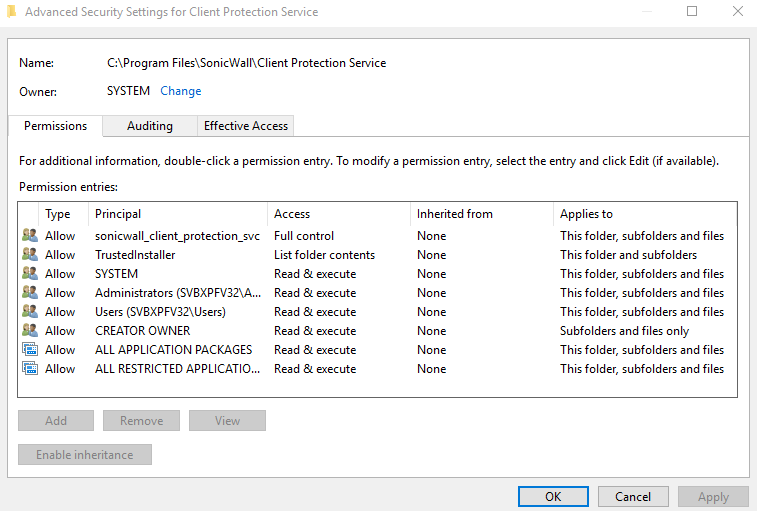
B) Once you are in Advanced Security Settings . Click on the Change:-
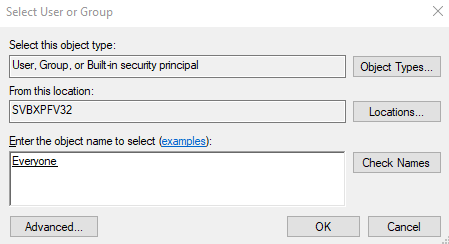
C) Add Object Name "Everyone" as below and then Click "OK".
D) Once you are in on Advanced Security Settings . Then Check the box "Replace Owners on Subcontainers and Objects" & "Replace All Child Object Permission Entries with Inheritable Permission Entries from this Object". Click on "Apply".
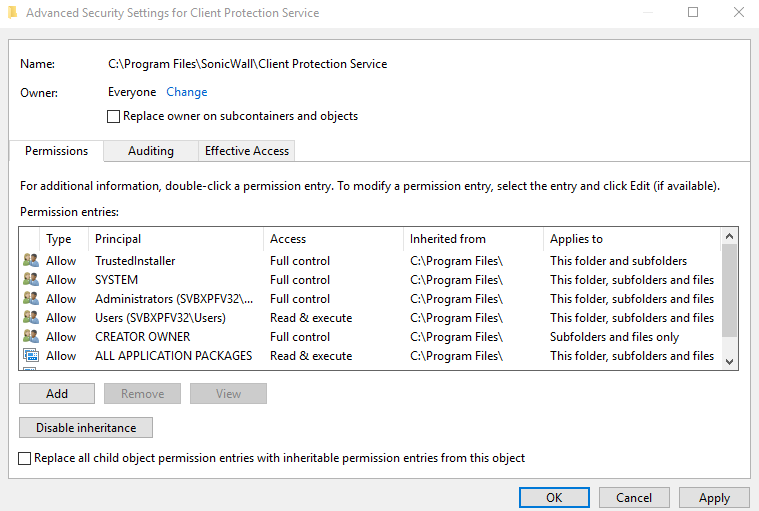
E) You will get a Pop-up for "Windows Security". Click "Yes". After that Click "OK" few times till you reach "Client Protection Service Properties" Page.
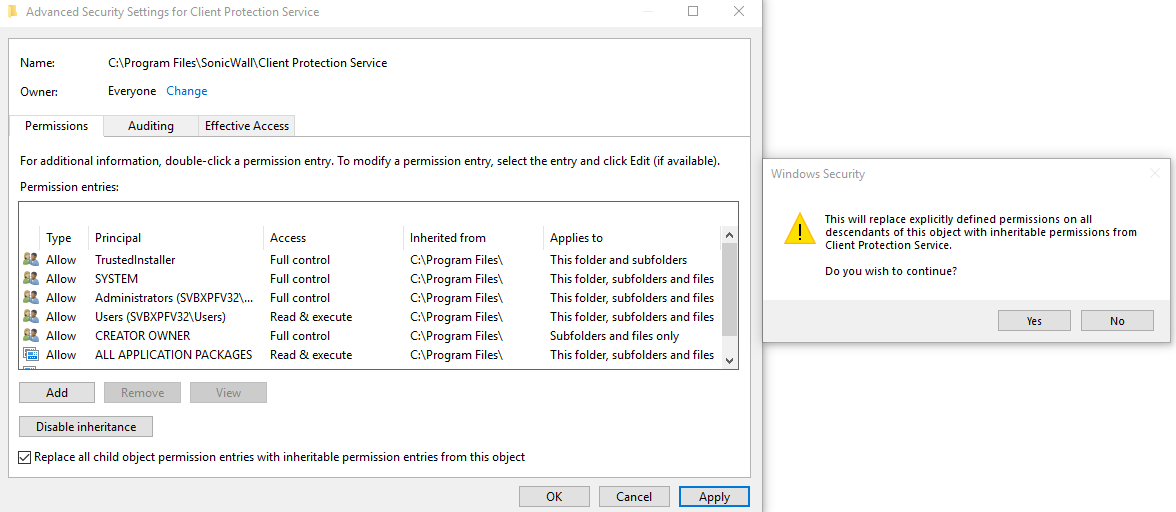
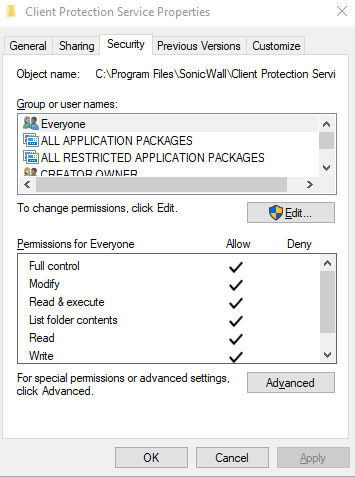
F) The below page shows that you are back to "Client Protection Service Properties". Click "EDIT" below "Group or User Names":
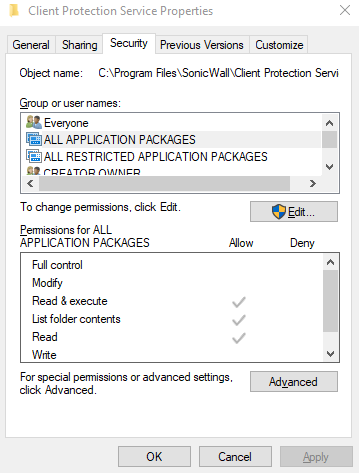
G) Give "Full Control " to all the "Group & User Names" one by one by first selecting the individual "Group or User Names" and then clicking all the "Check Box" below "Allow" and then click Apply. Once you give "Full Control" to all the "Group and User Names". Click "OK" to return to "Client Protection Service Properties" Page.
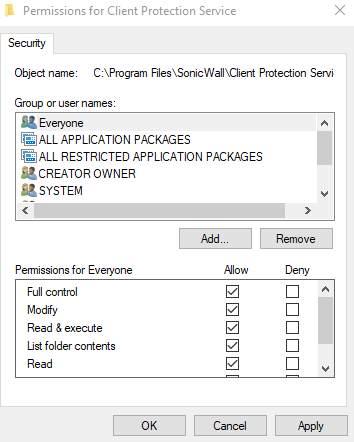
H) Finally click "OK" when you back to "Client Protection Service Properties" Page.
I) Select the CPS folder do right click and choose "Delete" to get rid of the folder.
Related Articles
- SentinelOne agent command line tool
- Capture Client Agent Return Codes - Phase 1
- Configure Email and Notification(Alerts) in Capture Client for Tenants


 YES
YES NO
NO