Adding a subnet to an existing Site to Site VPN Tunnel (SonicOS Enhanced)(KB Article and
Description
Resolution
To watch a video tutorial on this topic, click here
Feature/Application:
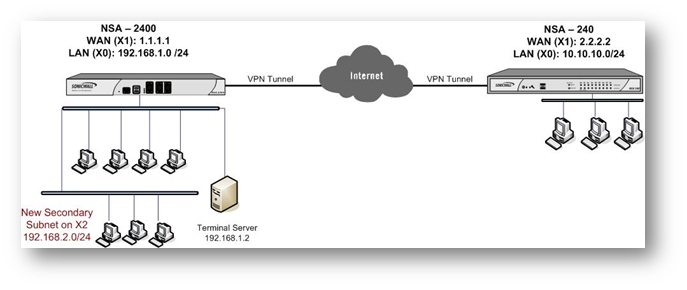
In this scenario we have an active VPN tunnel between a NSA 2400 (Site A) at the central site and a NSA 240 (Site B) at the remote site with the following configuration:
Site A : NSA 2400: X1: WAN - 1.1.1.1
X0: LAN - 192.168.1.0/24
Site B: NSA 240: X1: WAN - 2.2.2.2
X0: LAN - 10.10.10.0/24
The Tunnel is up and both sites are able to access the other site's LAN segment.
Site A has expanded their network to include a DMZ segment to their local network: X2: DMZ - 192.168.2.0/24. In order to add the new subnets to the site to site VPN tunnel follow these directions:

Procedure:
Central Site Configuration (Site A)
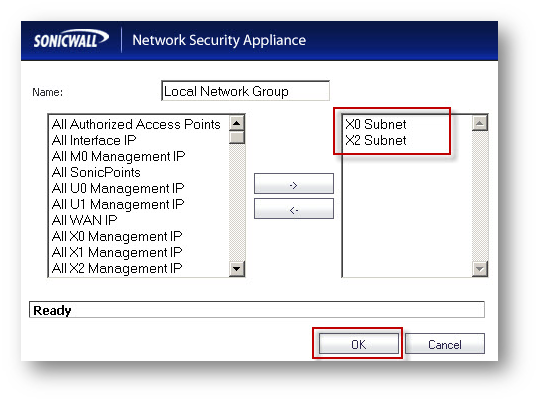
Step 1. Create a group called Central Site Network and add the default Address Objects X0 Subnets and X2 Subnets to it.
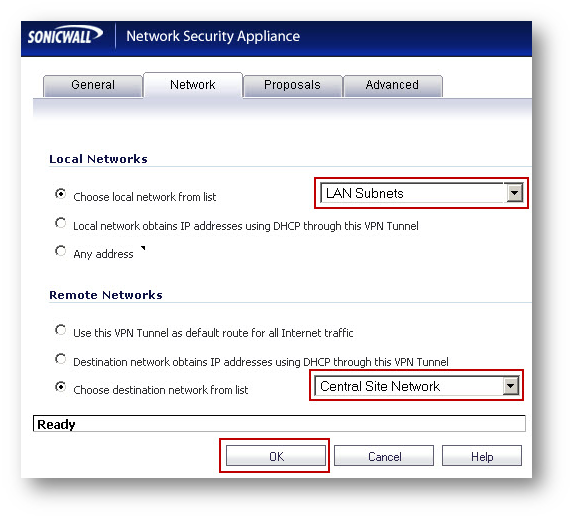
Step 2. Edit the VPN Policy and select the group Central Site Network from the "Choose local network from list" drop-down list under Local Networks in the Network tab.
Step 3. Click on OK to save the settings.
Remote Site Configuration (Site B)
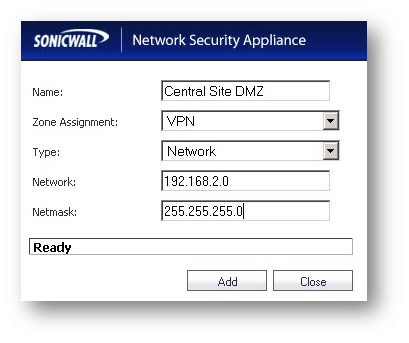
Step 1. Create an Address Object called Central Site DMZ with the following settings:
Name: Central Site DMZ
Zone: VPN
Type: Network
Network: 192.168.2.0
Net Mask: 255.255.255.0

Step 2. Create a group called Central Site Network and add Address Objects Central Site LAN and Central Site DMZ to it. Here it is assumed that an address object Central Site LAN was created when configuring the Site to Site VPN.
Step 3. Edit the VPN Policy and select the group Central Site Network from the "Choose destination network from list" drop-down list under Desination Networks in the Network tab.
Step 4. Click on OK to save the settings.
How to Test:
Ping from a workstation on the Remote Site to a workstation in the X2 subnet on the Central Site, for eg. 192.168.2.2. Refresh the VPN > Settings page on both side and you should see a green icon on both LAN and DMZ segments.
